Keeping your garden tools sharp isn’t just about making your work easier—it’s about plant health too. Dull tools crush plant stems instead of making clean cuts, leaving them vulnerable to disease. Sharp tools also reduce the strain on your muscles and joints while gardening. Ready to give your trusty garden helpers the edge they deserve? Here are 17 proven methods to keep them in top-notch condition.
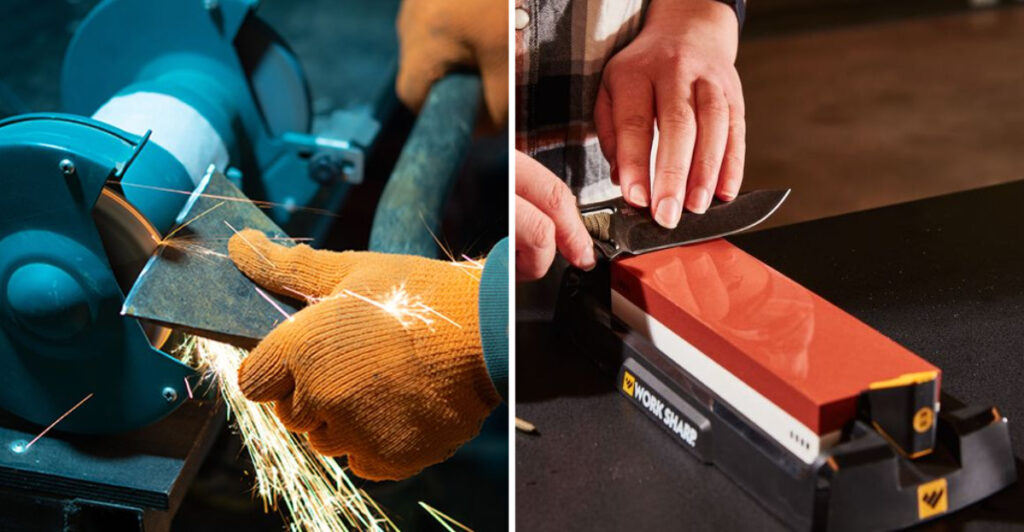
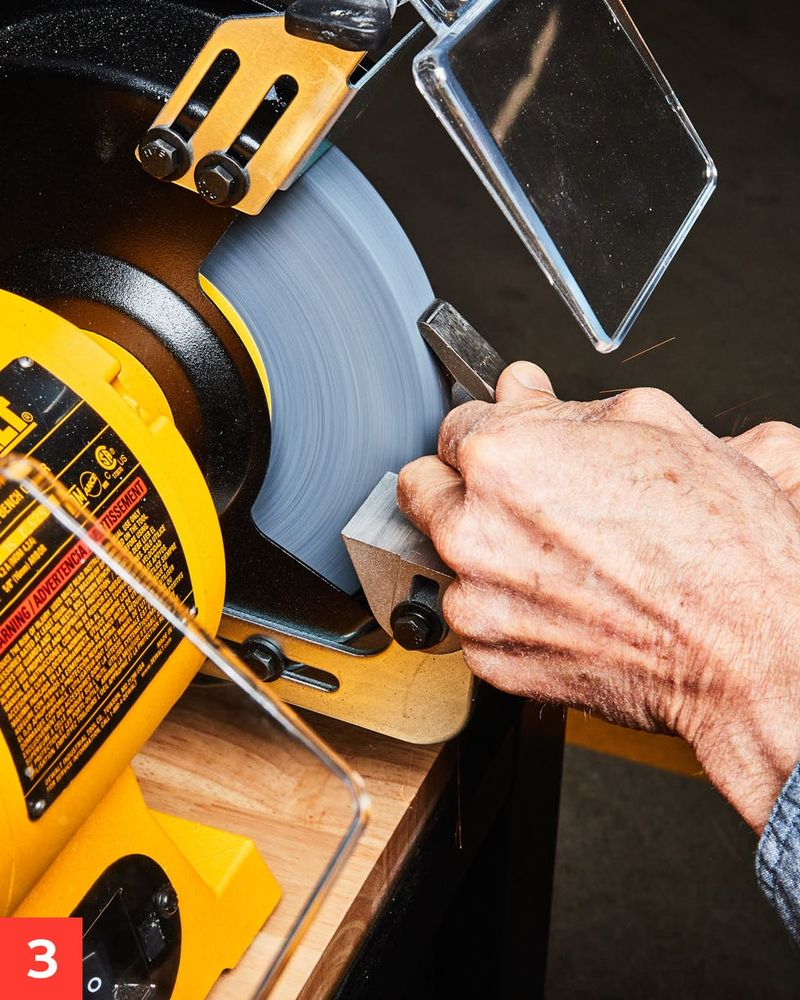
1. Use a Bench Grinder for Quick Results

Professional gardeners swear by bench grinders for fast, effective sharpening. The spinning stone wheel removes metal quickly, restoring edges on pruners, shears, and hoes in minutes.
Position your tool at a 20-degree angle against the wheel and move it smoothly across the surface. Always wear safety glasses to protect your eyes from flying metal particles.
A bench grinder isn’t just efficient—it gives you the most consistent edge possible when used correctly.
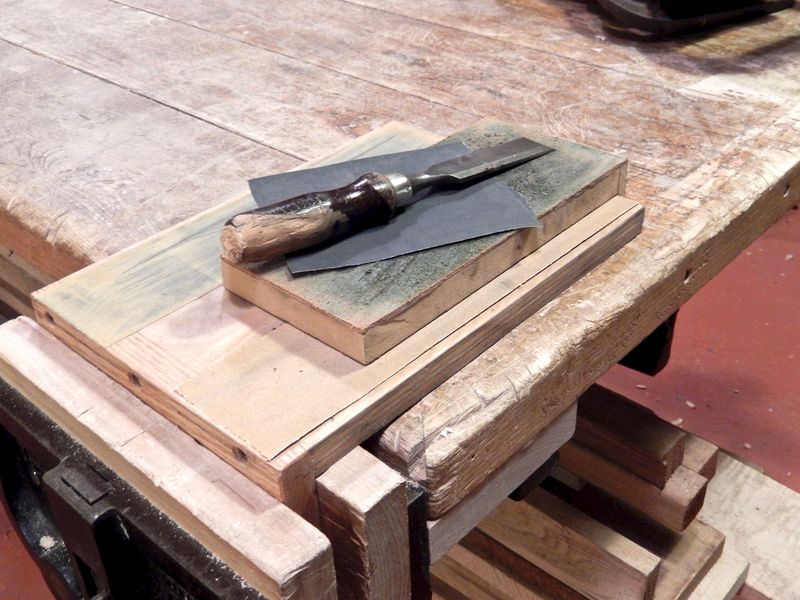
2. Sharpen with a Whetstone for Precision
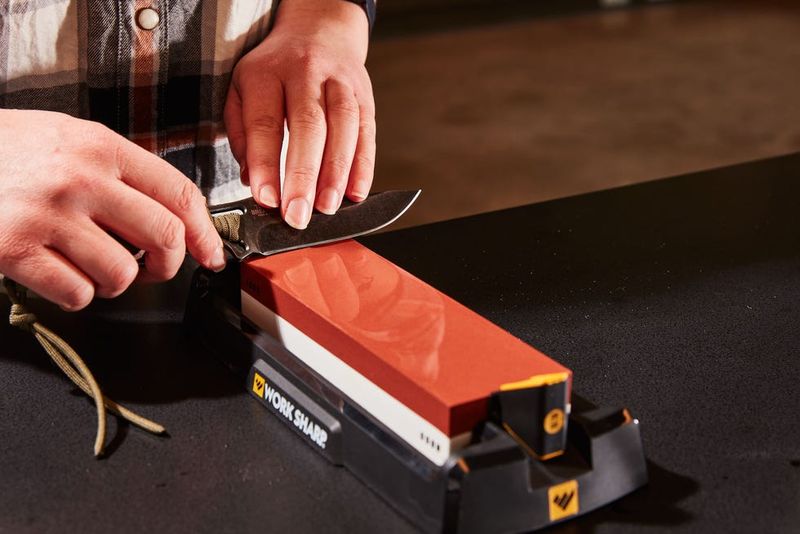
Whetstones offer incredible precision for your favorite pruners and knives. Soak your stone in water for 10 minutes before use to prepare the surface.
Hold your tool at a consistent angle (usually 20-25 degrees) and make smooth, sweeping motions across the stone. Flip the tool regularly to ensure even sharpening on both sides.
The gentle abrasion of a whetstone removes minimal metal while creating an exceptionally keen edge that slices through stems with minimal pressure.
3. Try a Diamond File for Hard-to-Reach Spots
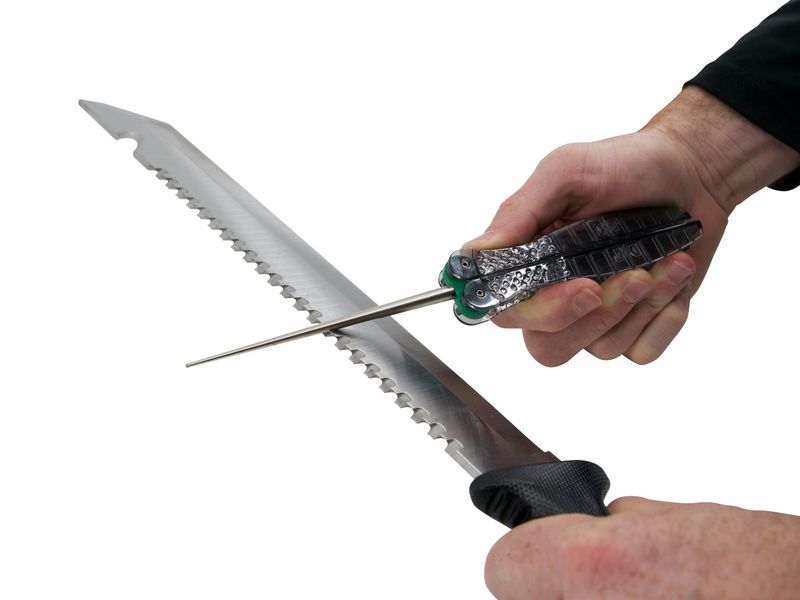
Diamond files shine when dealing with serrated blades and tight spots that larger tools can’t reach. The diamond coating cuts through metal faster than traditional files while maintaining precise control.
Work in one direction only—pushing away from you—to prevent damaging the file. Focus on maintaining the original angle of the blade.
These files come in various grits, from coarse for heavily damaged tools to extra-fine for finishing touches that leave your blades gleaming and razor-sharp.
4. Opt for a Rotary Tool with Grinding Attachment

Rotary tools like Dremels transform into perfect garden tool sharpeners with the right attachment. The high-speed spinning action makes quick work of dull edges on smaller tools.
Use light pressure and keep the tool moving to prevent overheating. The grinding stone attachment works best for initial sharpening, while polishing attachments provide the finishing touch.
Battery-powered models offer the freedom to sharpen anywhere in your garden without hunting for an outlet.
5. Employ a Sharpening Rod for Regular Maintenance
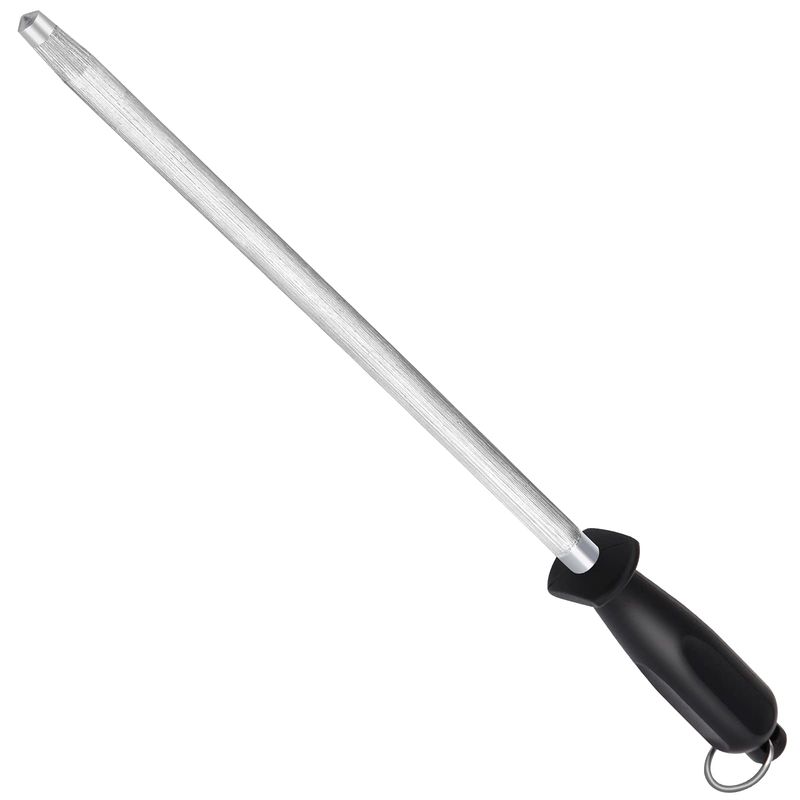
Sharpening rods (sometimes called honing steels) excel at quick touch-ups between more thorough sharpenings. They’re perfect for maintaining pruners and garden knives that see daily use.
Hold the rod vertically with its tip resting on a solid surface. Draw the blade across the rod at a 20-degree angle, pulling from base to tip.
Regular honing realigns the microscopic edge of your tools without removing metal, extending the time between more intensive sharpening sessions.
6. Sharpen Shovels with an Angle Grinder
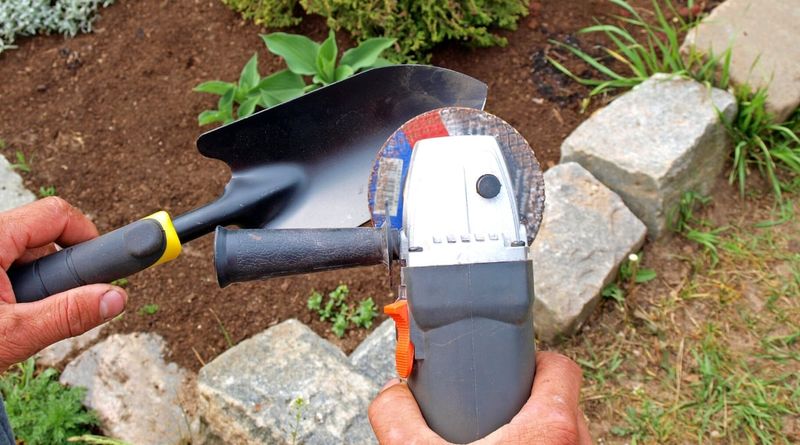
Larger tools like shovels and spades benefit tremendously from an angle grinder’s power. Secure your shovel in a vise with the edge facing up before starting.
Hold the grinder at approximately a 45-degree angle to the shovel’s edge. Move steadily along the entire cutting surface, maintaining even pressure.
A sharp shovel slices through soil like butter, reducing the effort needed for digging and creating cleaner edges for garden beds and trenches.
7. Use a Multi-Tool Sharpener for Convenience
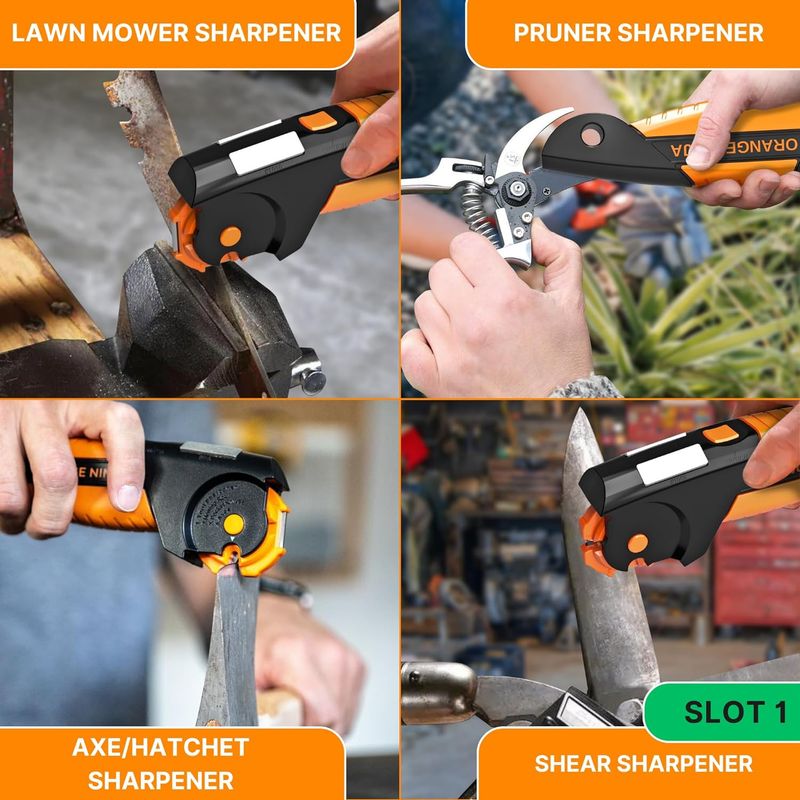
Multi-tool sharpeners combine several sharpening surfaces in one compact device. Most include V-notches, flat stones, and rod components to handle various garden tools.
The preset angles in these tools eliminate guesswork, making them perfect for beginners. Simply draw your tool through the appropriate slot or across the correct surface.
Their portable size means you can keep one in your garden shed and another in your tool belt for immediate touch-ups when you notice a tool becoming dull.
8. Create a DIY Sandpaper Station
Transform ordinary sandpaper into an effective sharpening station by securing various grits to wooden blocks. Start with coarse 80-grit for reshaping damaged edges, then progress through medium and fine grits.
Wet the sandpaper slightly to reduce dust and improve cutting action. Maintain a consistent angle while drawing the tool across the sandpaper in smooth, even strokes.
This method costs almost nothing but delivers professional results when you take your time and work through all the grits systematically.
9. Apply Electric Knife Sharpeners to Garden Tools
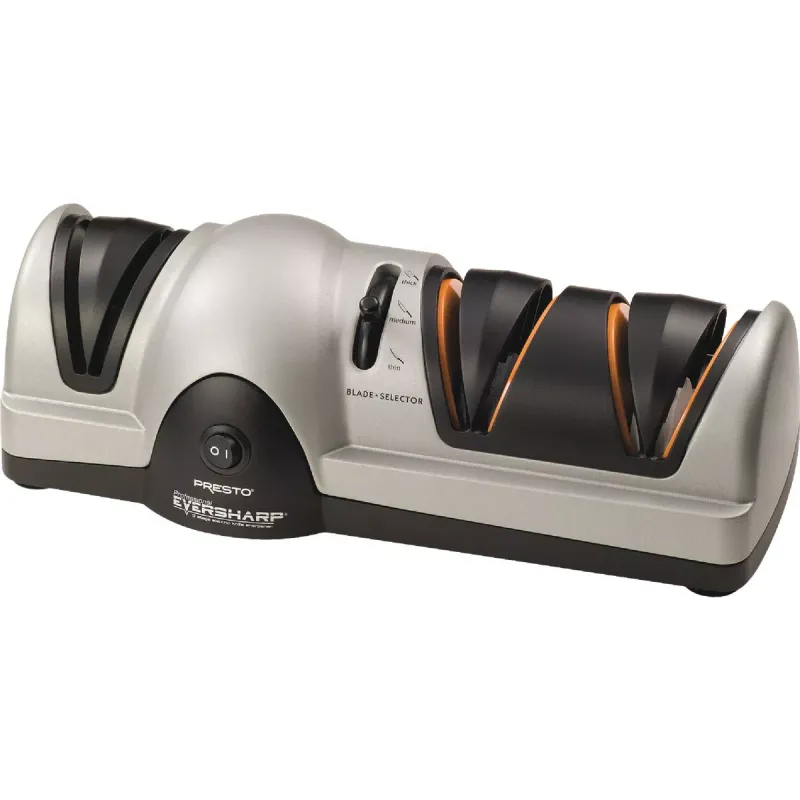
Kitchen knife sharpeners can double as garden tool sharpeners for thin-bladed items like pruners and garden knives. Their motorized grinding wheels create consistent edges with minimal effort.
Test on an old tool first, as some garden tools may be too thick for the slots. Pull the blade through slowly, allowing the machine to do the work without forcing it.
The convenience factor can’t be beaten—a quick 30-second session restores sharpness to tools that have become noticeably dull during use.
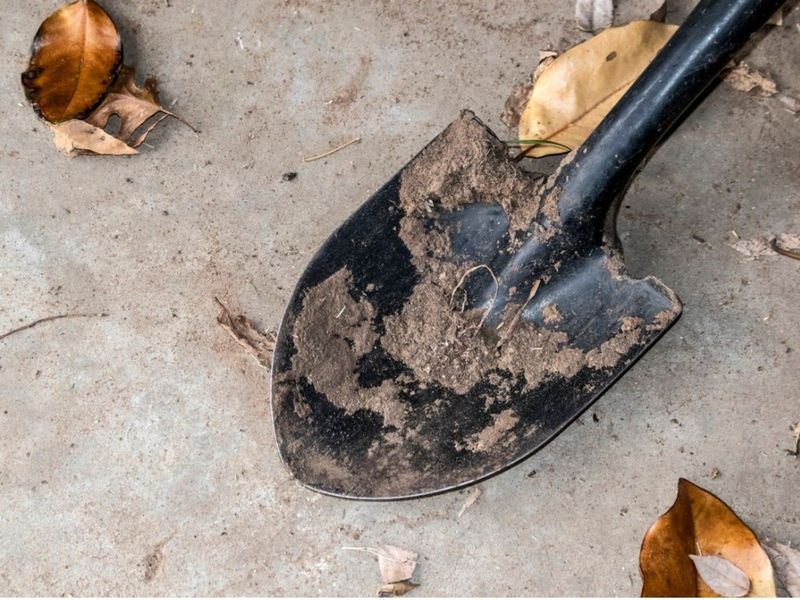
10. Utilize a Mill File for Lawn Mower Blades

A 10-inch mill file makes quick work of dull lawn mower blades. Remove the blade from your mower first (disconnecting the spark plug for safety) and secure it in a vise.
File in one direction only, following the original angle of the cutting edge. Count your strokes to ensure you remove the same amount of metal from both sides.
Sharp mower blades cut grass cleanly rather than tearing it, resulting in a healthier lawn that’s more resistant to disease and drought stress.
11. Try the Car Window Method in a Pinch
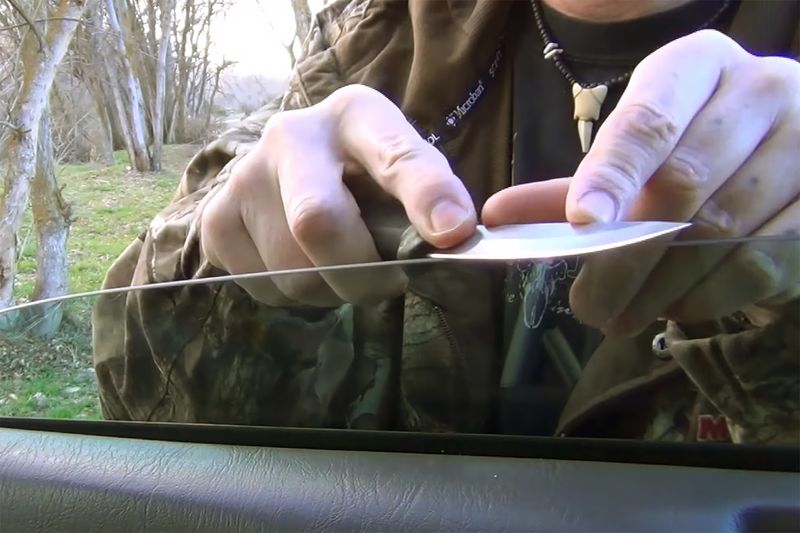
Believe it or not, the unglazed ceramic edge at the bottom of a car window can sharpen small garden tools in emergencies. Roll your car window down about halfway to expose this rough edge.
Carefully draw your pruner blade or knife across this edge at the proper angle, using light pressure. Make 10-15 passes to restore a serviceable edge.
While not ideal for regular use, this trick can save the day when you’re gardening away from home and discover a dull tool.
12. Invest in a Water-Cooled Sharpening System
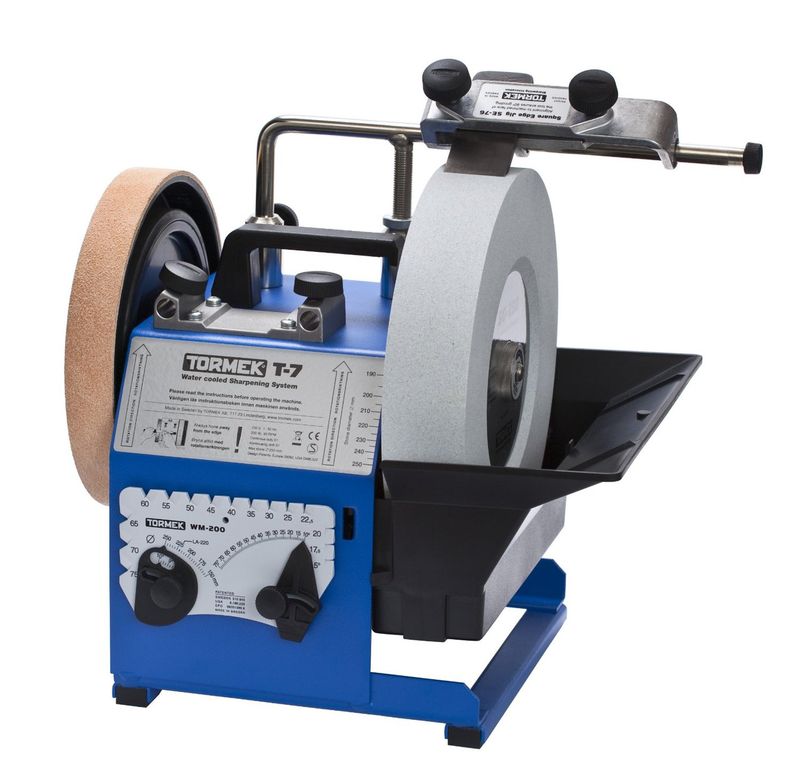
Water-cooled sharpeners use slowly rotating stones bathed in water to prevent overheating. This method is particularly gentle on high-quality tool steel that could lose its temper with excessive heat.
The continuous water flow also removes metal particles that would otherwise clog the stone. Most systems include guides that maintain perfect angles throughout the sharpening process.
Though more expensive than other options, these systems create the finest edges possible and extend tool life by minimizing metal removal during sharpening.
13. Use Ceramic Rods for Delicate Tools

Ceramic sharpening rods provide the perfect balance of effectiveness and gentleness for your finest garden tools. Unlike metal files, ceramics remove minimal material while still restoring razor sharpness.
Hold the rod in your non-dominant hand and draw the tool across it at a consistent angle. The white ceramic surface shows metal residue, helping you track your progress.
These rods excel at maintaining expensive pruners and grafting knives that benefit from frequent light touch-ups rather than occasional aggressive reshaping.
14. Apply a Leather Strop for the Final Edge
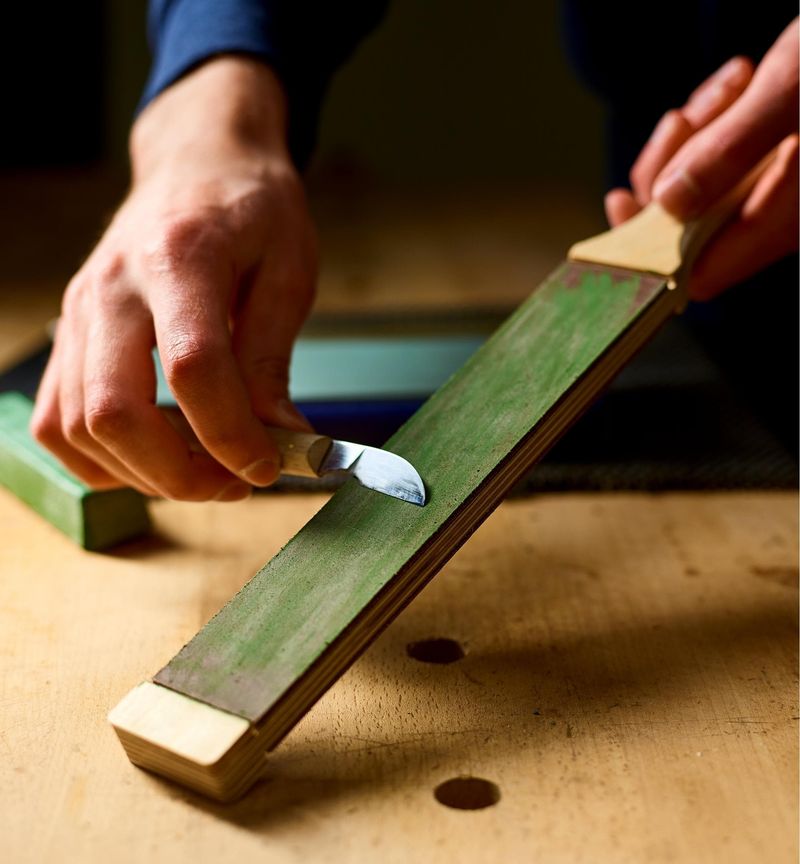
Leather strops take sharpening to the next level by polishing microscopic burrs left by other sharpening methods. Apply a small amount of honing compound to the leather surface before use.
Draw the tool backward across the strop (spine leading, edge trailing) to prevent cutting the leather. Ten strokes per side usually creates a mirror finish that slices through plant material effortlessly.
Barbers have used this technique for centuries to achieve the ultimate edge on straight razors—your garden tools deserve the same treatment!
15. Clean Tools Before Sharpening
Clean tools sharpen more effectively and prevent premature wear on your sharpening equipment. Scrub away dirt, sap, and rust using warm soapy water and a stiff brush.
For stubborn rust, soak tools in white vinegar for a few hours before scrubbing with steel wool. Dry thoroughly to prevent new rust from forming.
This preparation step might seem tedious, but it dramatically improves sharpening results while extending the life of both your tools and sharpening equipment.
16. Protect Yourself with Proper Safety Gear
Sharpening creates metal fragments that pose serious hazards to unprotected eyes and hands. Always wear safety glasses that wrap around your face to block particles from all angles.
Cut-resistant gloves protect your fingers from both the sharpening medium and the increasingly sharp tool edges. Consider a dust mask when using methods that generate fine metal dust.
Working in good lighting further reduces accident risk by helping you maintain proper angles and spot potential problems before they cause injuries.
17. Apply Rust-Preventive Oil After Sharpening

Freshly sharpened edges are particularly vulnerable to rust because the protective coating has been removed. Apply a thin layer of food-safe mineral oil or specialized tool oil immediately after sharpening.
Use a cloth to distribute the oil evenly across all metal surfaces, not just the cutting edge. The oil creates a moisture barrier that prevents oxygen from reaching the metal.
This simple two-minute step preserves your hard work and keeps tools ready for immediate use without the frustration of finding them rusty next season.