October brings cooler weather and gentle rains, making it the perfect month to give your perennials a fresh start. Dividing and transplanting these hardy plants now helps them develop strong roots before winter settles in, leading to healthier growth and more spectacular blooms next spring. Whether you’re rejuvenating overcrowded clumps or sharing plants with friends, fall division is a gardening task that pays off beautifully.
1. Choose the Right Perennials to Divide
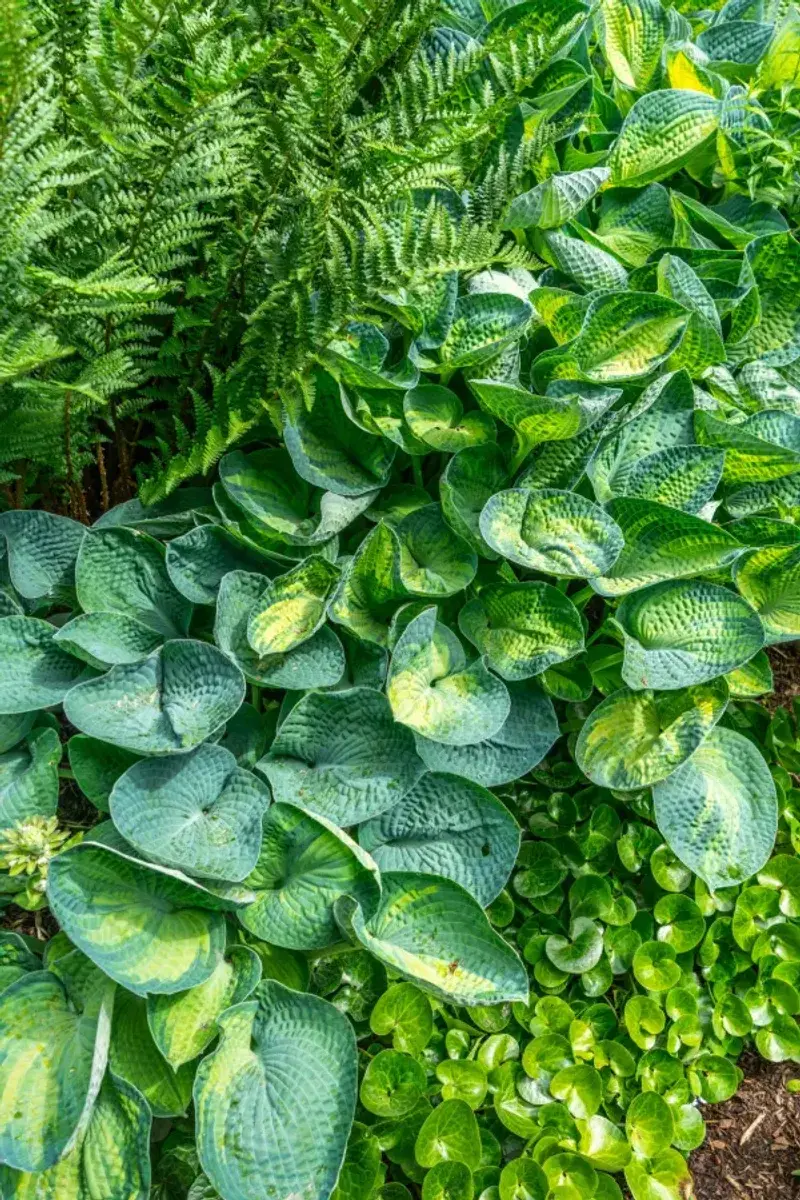
Not every perennial thrives when divided in autumn, so knowing which ones to tackle is crucial. Spring and summer bloomers like hostas, daylilies, astilbe, and black-eyed Susans are excellent candidates because they’ve finished flowering and can focus energy on root development.
Peonies and irises also respond well to fall division, though their deep root systems require extra care. Plan to divide these plants every three to five years to prevent overcrowding and maintain vigorous blooms.
Avoid dividing fall bloomers like asters and mums in October, as they’re actively flowering and won’t have time to establish before frost arrives.
2. Time Your Division Correctly
Timing can make or break your transplanting success. Aim to complete your division work at least four to six weeks before your area’s first expected hard frost, giving roots enough time to settle in comfortably.
Check your local frost dates and work backwards from there. Early to mid-October works wonderfully in most regions, though gardeners in warmer zones might wait until late October or early November.
Pick a cool, overcast day for the task, ideally after a good rainfall when the soil is moist but not waterlogged. Hot, sunny conditions stress plants unnecessarily and make recovery harder.
3. Prepare Plants Before Division
Proper preparation reduces transplant shock significantly. Water your perennials deeply one or two days before you plan to divide them, ensuring the root ball is thoroughly moistened throughout.
This hydration helps roots stay pliable during division and gives plants a moisture reserve to draw from during recovery. Cut back the foliage to about six inches tall, which makes handling easier and reduces water loss through leaves.
Gather your tools beforehand: a sharp spade, garden fork, pruning shears, and a hose. Having everything ready streamlines the process and minimizes the time plants spend out of the ground.
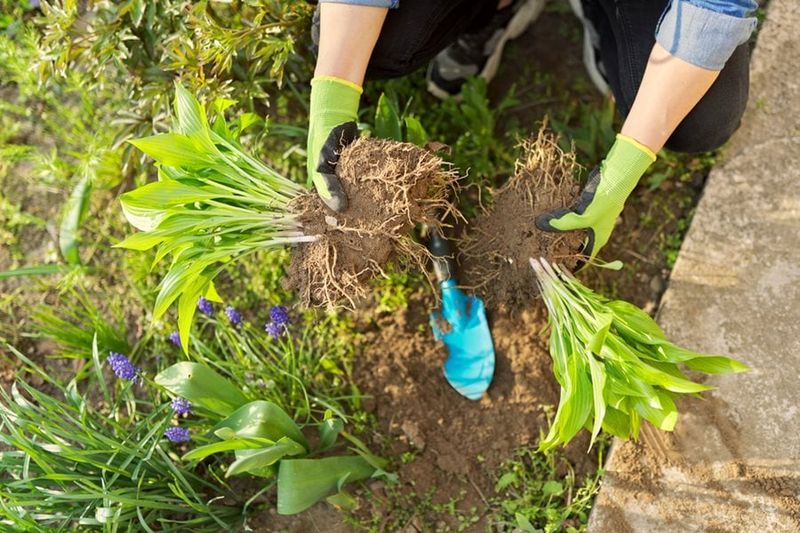
4. Dig Up the Plant Carefully
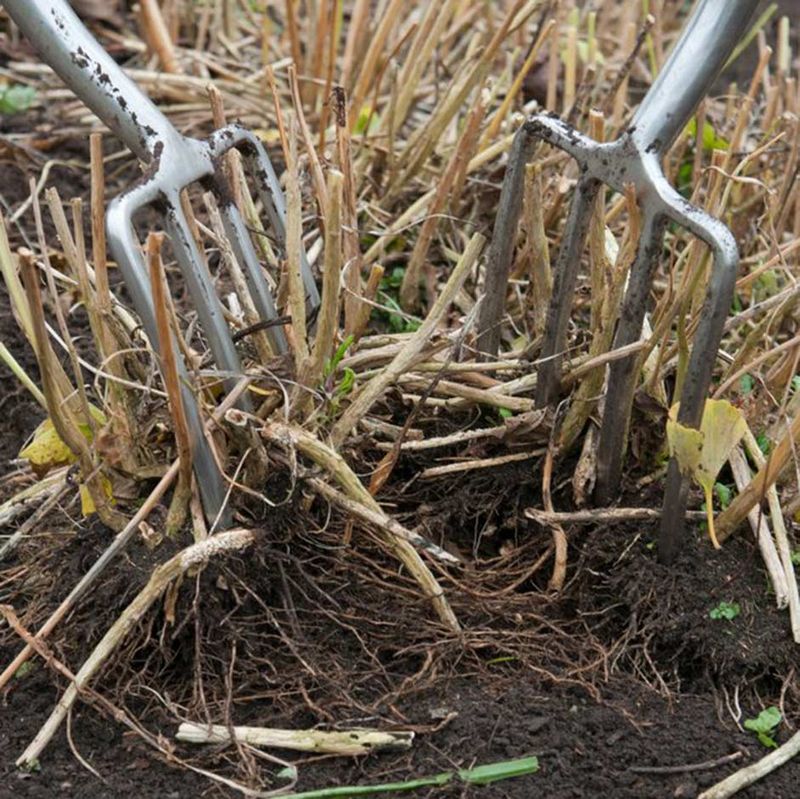
Gentle excavation protects valuable roots from damage. Insert your spade or garden fork about four to six inches away from the plant’s base, working in a circle around the entire clump.
Push the tool deep enough to get beneath the root system, then lever the plant upward carefully. Shake off loose soil so you can see the root structure clearly and identify natural division points.
For stubborn or large clumps, you might need to work from multiple angles or use two garden forks back-to-back as levers. Take your time—rushing increases the risk of tearing important roots unnecessarily.
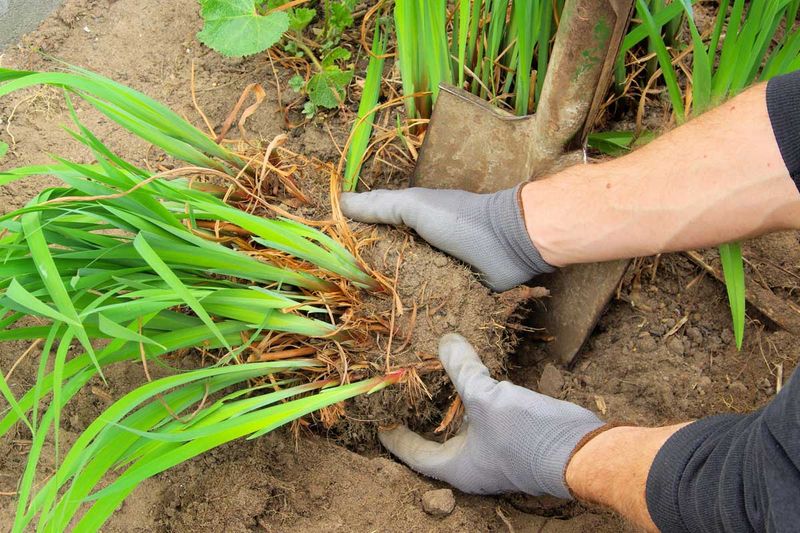
5. Divide the Clump into Sections
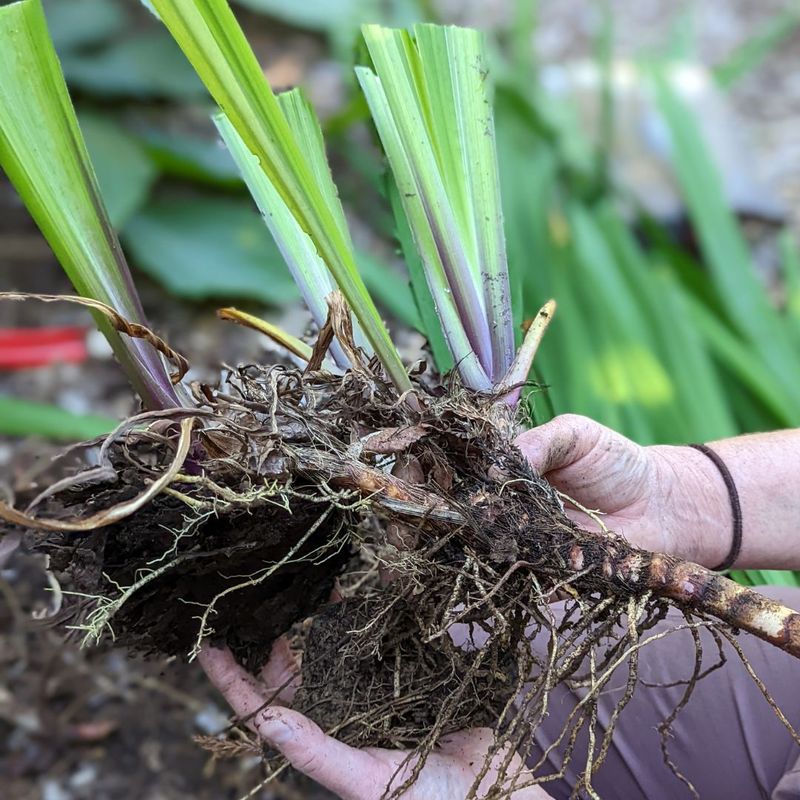
Breaking apart the clump requires both finesse and confidence. Look for natural separations where the plant naturally wants to split, usually where you see distinct crowns or growth points with their own root systems.
Some perennials pull apart easily by hand, while others need a sharp knife, pruning saw, or even a clean spade to slice through tough roots. Each division should have at least three to five healthy shoots and a good portion of roots attached.
Discard any dead, diseased, or woody center portions, keeping only the vigorous outer sections that will grow most energetically in their new locations.
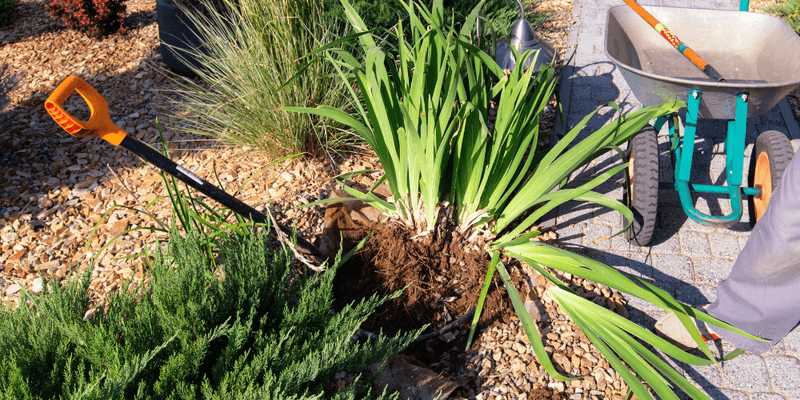
6. Replant Divisions at Proper Depth
Planting depth matters more than many gardeners realize. Position each division at the same depth it was growing originally, with the crown—where roots meet stems—sitting right at soil level.
Planting too deep can cause crown rot, while planting too shallow exposes roots to freezing temperatures and drying winds. Dig holes slightly larger than the root mass, spreading roots outward naturally rather than cramping them.
Backfill with the original soil mixed with a bit of compost if desired, firming gently around roots to eliminate air pockets. Space divisions according to each plant’s mature size to prevent future overcrowding.
7. Water Thoroughly After Transplanting
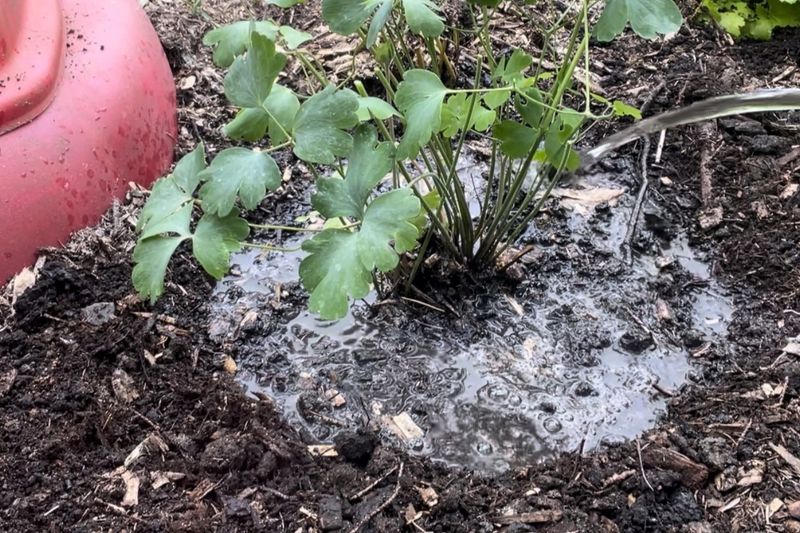
Immediate watering is absolutely essential for transplant success. Drench each division thoroughly right after planting, saturating the root zone completely to settle soil and eliminate air pockets that dry out roots.
Water slowly and deeply rather than quickly spraying the surface. The goal is to ensure moisture reaches every part of the root system, encouraging roots to grow outward into surrounding soil.
Continue watering regularly throughout fall, especially if rainfall is scarce. Keep soil consistently moist but not soggy until the ground freezes, giving divisions the best possible start before winter dormancy begins.
8. Mulch and Protect Through Winter
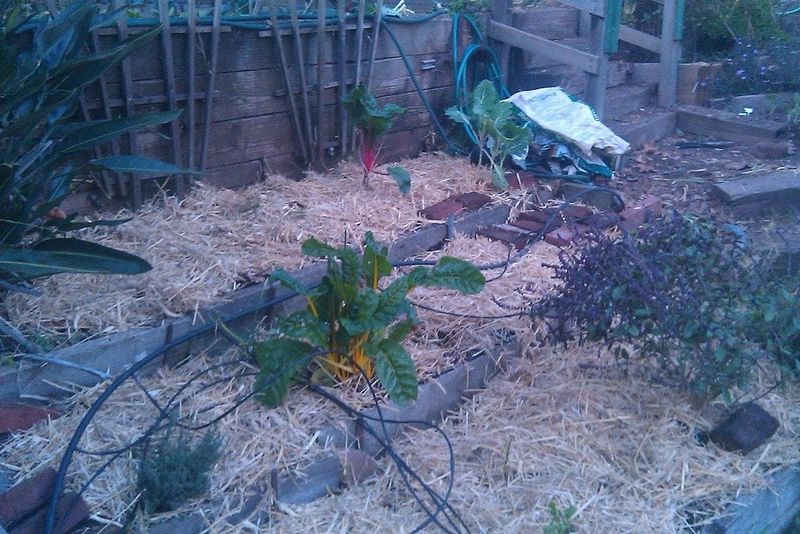
Winter protection gives tender new roots a fighting chance. Apply a two to three-inch layer of organic mulch like shredded leaves, straw, or wood chips around each division after the ground begins to freeze.
This insulation moderates soil temperature fluctuations that can heave plants out of the ground during freeze-thaw cycles. Keep mulch a few inches away from plant crowns to prevent rot and discourage rodents from nesting.
Come spring, pull back excess mulch as new growth emerges, allowing soil to warm naturally. Your divisions will reward your efforts with vigorous growth and abundant blooms throughout the growing season.