
Gladiolus put on one of the most dramatic flower shows a North Carolina garden can offer, but keeping those corms alive through winter takes a little planning. The secret is not digging on a fixed calendar date but reading the plant and watching the local forecast.
Lift too early and you shortchange next summer’s flowers; wait too long and a hard freeze can ruin the corms you worked all season to grow. This guide walks through every step, from knowing when to dig to choosing the strongest corms for replanting.
The plant—not the calendar—sets lifting time
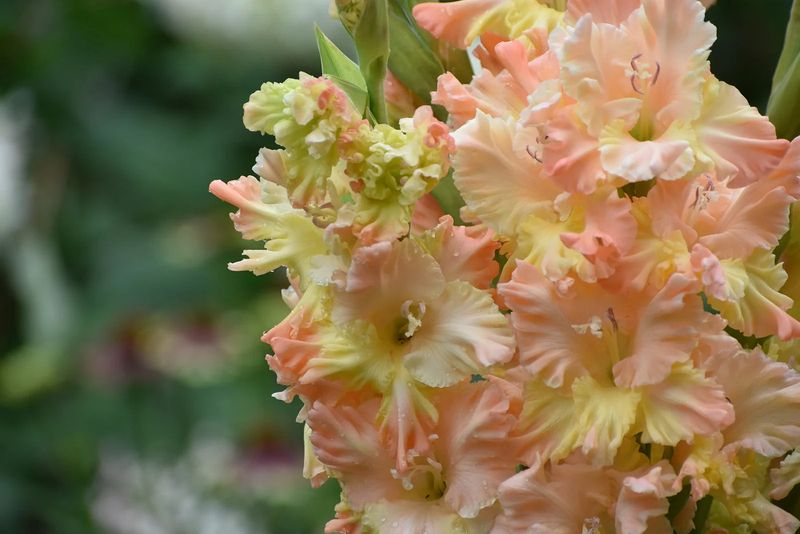
Yellowing foliage is the signal most North Carolina gladiolus growers should be waiting for, not a date on the wall calendar. When leaves begin to turn yellow and die back on their own, the plant is telling you that energy transfer into the replacement corm is winding down.
That is the moment to reach for the garden fork, unless your local freeze forecast is pushing you to act sooner.
A single statewide lifting date simply does not work across North Carolina’s varied geography. NC State’s Freeze Date Explorer shows that average first fall freezes arrive in late October in the mountains but often hold off past December 1 near the Outer Banks.
A mountain gardener in Watauga County and a Coastal Plain gardener near New Bern can be operating on schedules six or more weeks apart. Telling everyone to dig in October is accurate for some and premature for others.
Variety also plays a role that gets overlooked. NC State Extension’s Plant Toolbox notes that some hardier gladiolus types may survive winter with a protective layer of mulch, while large-flowered hybrid gladiolus should not be counted on to overwinter reliably across the state.
If you are growing one of the popular large-flowered hybrids, lifting and storing is the safer path in most of North Carolina.
The practical routine is straightforward: check the foliage condition first, then cross-reference with your local freeze forecast. If leaves are still green and no damaging freeze is in the near-term forecast, leave the plants alone and let them finish their work.
University of Missouri Extension’s gladiolus guide reinforces that waiting for natural foliage decline gives the replacement corm the best chance to develop fully before it is pulled from the ground.
Green leaves are still building next summer’s flowers
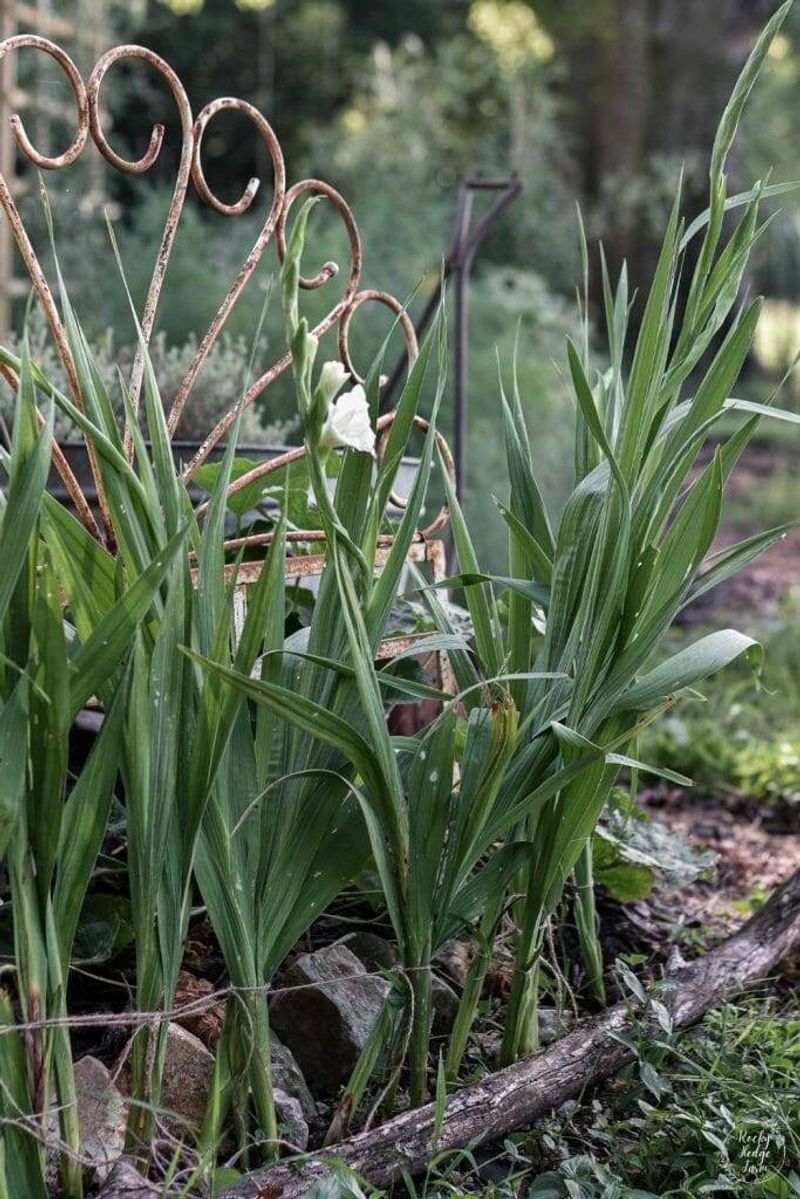
After the last bloom on a gladiolus spike fades, many gardeners feel the urge to cut the whole plant down and tidy up the bed. Resisting that urge is one of the most useful things you can do for next summer’s display.
The flower spike may be finished, but the leaves are still capturing sunlight and moving carbohydrates down into the corm forming just below ground.
Missouri Extension’s summer flowering bulbs guide explains that larger corms generally produce larger plants and more impressive flower spikes. Cutting green leaves early shortens the window the plant has to build that corm to its full potential size.
The replacement corm grows above the old mother corm, and it needs every week of active foliage it can get before the season closes.
Cornell Cooperative Extension’s gladiolus care guidance draws a clear line between “after flowering” and “after foliage dies back” – these are not the same moment. Waiting for the leaves to yellow on their own, or to be killed by frost, is the safest practical rule.
If a hard freeze is approaching before the foliage has matured naturally, that is the one situation where earlier action is justified.
Promising a guaranteed bigger show next summer would overstate what lifting and storing can do. Corm size is one important factor among several.
Cultivar genetics, disease pressure, sun exposure, soil drainage, consistent moisture during the growing season, and planting depth all shape the flower performance you see the following July. Protecting a healthy, well-developed corm through winter gives those other factors a strong foundation to work with, but it cannot carry the whole load on its own.
Lift before a hard freeze reaches the bed
Timing the actual dig comes down to a simple rule: act before the ground freezes hard, not after. A light frost that blackens the foliage overnight is not an emergency for the corms sitting a few inches underground, but it is a useful signal that heavier freezes are likely coming soon.
Use that window to get the corms out rather than waiting to see how cold it gets.
Start by pushing a garden fork or spade into the soil several inches away from the base of the plant. Working too close risks slicing right through a corm, and a cut surface invites rot during storage.
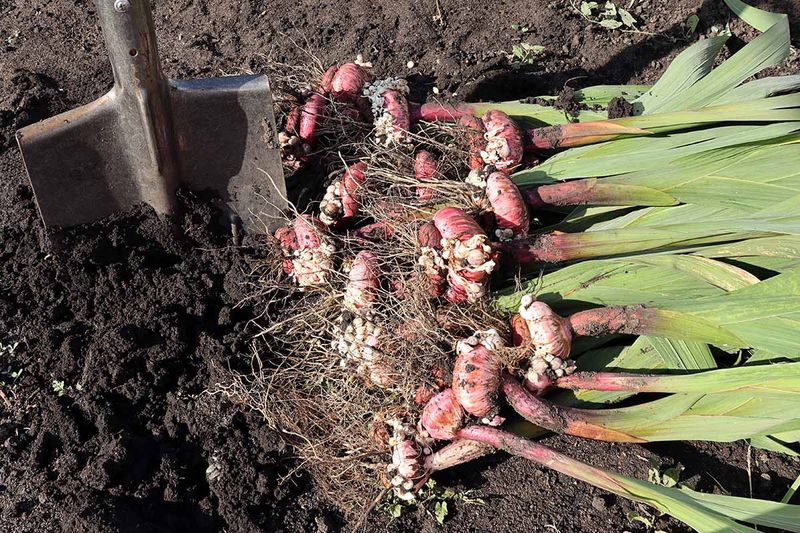
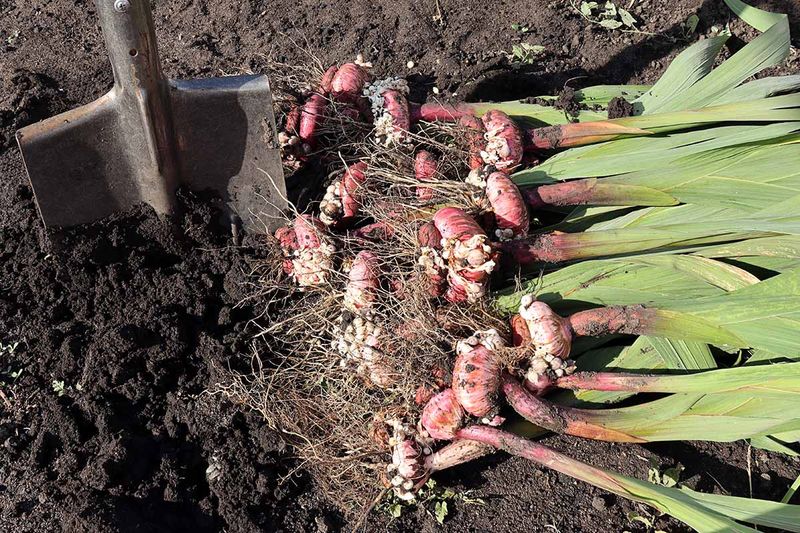
Push the fork down at an angle, lever the clump upward, and lift the whole mass of soil and corms together rather than pulling on the foliage. Iowa State University Extension’s overwintering guide recommends shaking or brushing away loose soil after lifting, then trimming the foliage back to roughly 1 to 2 inches above the corm.
Do not leave lifted corms sitting in the bed or in a pile on wet ground. Once the clump is up, move it somewhere dry and out of direct sun the same day.
Purdue Extension’s winter storage publication notes that gladiolus should be dug before the ground freezes, and that prolonged exposure to cold, wet soil after the tops die back increases the risk of corm rot and disease.
A light frost kills the tops but does not destroy every corm in the ground. The real danger is prolonged freezing that penetrates the soil deeply or repeated freeze-thaw cycles that keep the corms wet and cold for weeks.
Watch the NC State freeze forecast tool for your county, and treat a stretch of nights forecast below 28 to 30 degrees as the hard deadline for getting corms out of the ground.
Sort the corms before they enter storage
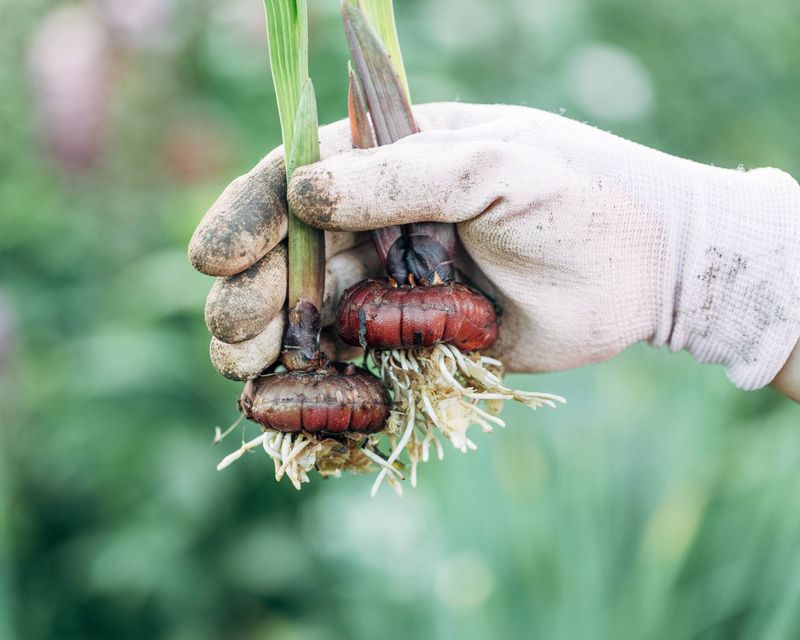
Once corms are out of the ground, sorting them before storage saves time and protects the healthy ones from being contaminated by bad neighbors sitting in the same box all winter. The standard to apply is simple: firm means keep, soft means discard.
A healthy gladiolus corm feels solid and dense when you squeeze it gently. Any corm that gives, feels mushy, shows dark sunken rot spots, or has obvious mechanical damage from the digging tool should be removed from the group immediately.
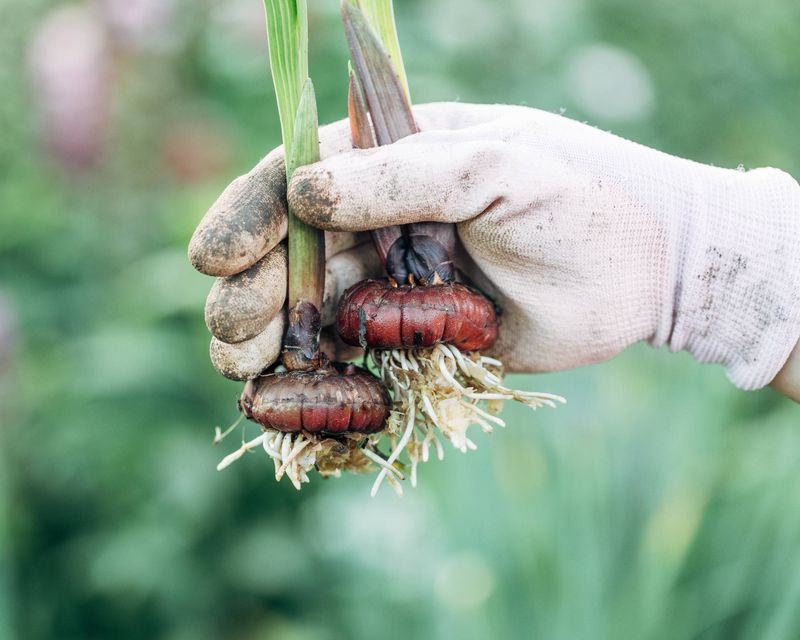
Missouri Extension explains the anatomy that trips up many first-time growers: the new replacement corm forms above the old mother corm, which shrivels over the growing season. After curing, the old mother corm usually separates from the new one without much effort and can be composted.
The new corm sitting on top is what you want to carry into next summer.
Around the base of the new corm you will often find a cluster of small cormels, which look like tiny rough seeds. These are worth saving if your goal is to build up stock of a particular variety over several years, but they should not be counted on to flower the following summer.
UC IPM’s gladiolus production guide notes that small cormels typically need two to three growing seasons or more before reaching a size that supports reliable blooming. Grow them in a separate nursery row rather than mixing them into your main display planting.
For the main display next summer, focus on the largest firm corms you harvested. Size is not the only thing that determines flower performance, but bigger, fully developed corms carry more stored energy into the next growing season and give you a stronger starting position.
Set aside any corm smaller than about the diameter of a quarter for the cormel nursery row, and let the largest ones take the prime spots in the garden next spring.
Cure the corms in a dry, ventilated place
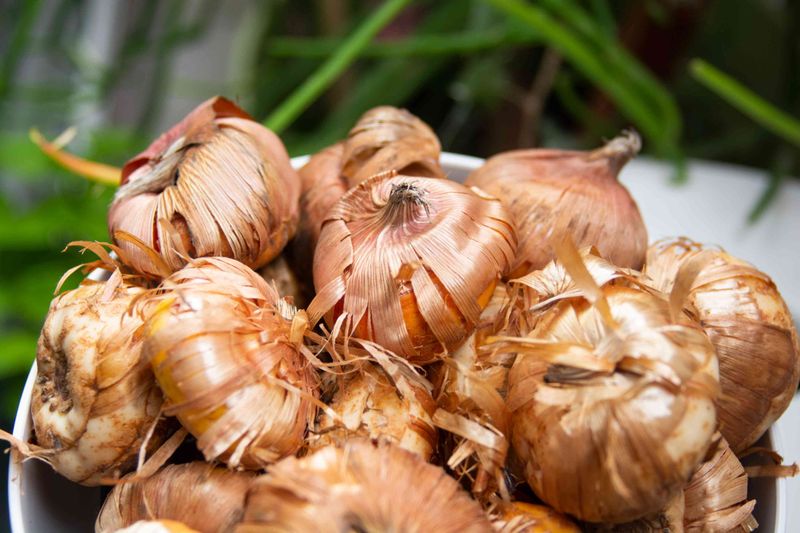
Curing is the step between digging and storage, and skipping it is one of the most common reasons corms rot over winter. Fresh-dug corms still carry surface moisture and need time to dry down before being packed away.
Arrange them in a single layer on a screen, slatted tray, or piece of wire mesh so air can circulate around each one, and set them somewhere dry, shaded, and well-ventilated.
Purdue Extension recommends curing gladiolus for two to three weeks in a warm, dry location, suggesting a target around 80 to 85 degrees Fahrenheit. Other extension sources give a broader 60 to 70 degree range as acceptable for home settings.
Either way, the goal is a consistently warm and dry environment, not a precise laboratory temperature. A shaded garage, covered porch, or spare room with good airflow works well for most home gardeners.
Direct sun is a problem during curing. Leaving freshly dug corms in full sun can overheat the outer tissue and dry the surface unevenly, which does not help the interior dry down properly.
Damp conditions are equally problematic – corms stacked in a humid corner or touching wet surfaces during this stage are already on the path to rot before storage begins.
UC IPM’s commercial gladiolus production guidance describes curing near 95 degrees Fahrenheit with controlled humidity and forced airflow. That specification is designed for large-scale commercial operations with environmental controls, not for a home garage or shed.
University of Wisconsin Extension’s tender bulb storage guide confirms that the home standard is simply a dry, airy spot at a comfortable room temperature for a couple of weeks. Match the method to your actual setting rather than chasing a commercial target you cannot replicate at home.
Store corms cool, dry, and able to breathe
After curing is complete, the corms need a home that stays cool, dry, and well-ventilated from now until spring planting. Iowa State Extension’s overwintering guidance points to a target storage temperature range of roughly 35 to 45 degrees Fahrenheit, while other extension sources suggest 40 to 50 degrees as a workable home range.
The exact number matters less than the principle: cool enough to keep the corms dormant, but never cold enough to freeze them.
Container choice is more important than many gardeners realize. Mesh bags, nylon stockings, shallow wooden trays, cardboard boxes with ventilation holes, or paper bags all allow moisture to escape and air to move around the corms.
UC IPM’s gladiolus guide and multiple other extension sources consistently caution against sealed plastic bags and airtight containers. Trapped humidity inside a sealed container creates exactly the warm, moist pocket where mold and rot thrive.
Purdue Extension also emphasizes keeping stored corms frost-free throughout the winter. A garage that drops to 20 degrees during a January cold snap is not a safe storage location unless the corms are insulated or moved indoors.
Basements, interior utility rooms, and climate-moderated crawl spaces often hold steadier temperatures than unheated outbuildings in North Carolina’s mountain counties.
Plan to check on stored corms at least once a month during winter. Pull out any corm that has gone soft, developed visible mold, or shows signs of spreading rot.
One rotting corm left in the bag can spread decay to neighbors sitting close by. Good air circulation and regular inspection are the two practices that reduce winter storage losses more than anything else.
Corms that come out of storage firm and dry in spring are the ones that give you a real shot at a strong display next summer.
Treat thrips and disease as specific problems
Sanitation during the lifting and curing process does more to protect stored corms than any chemical treatment. Handling corms carefully, keeping your work surface clean, curing in dry and ventilated conditions, and removing obviously diseased or damaged corms at the sorting stage are the core practices.
Chemical treatment is a specific response to a specific problem, not a routine step every gardener should follow.
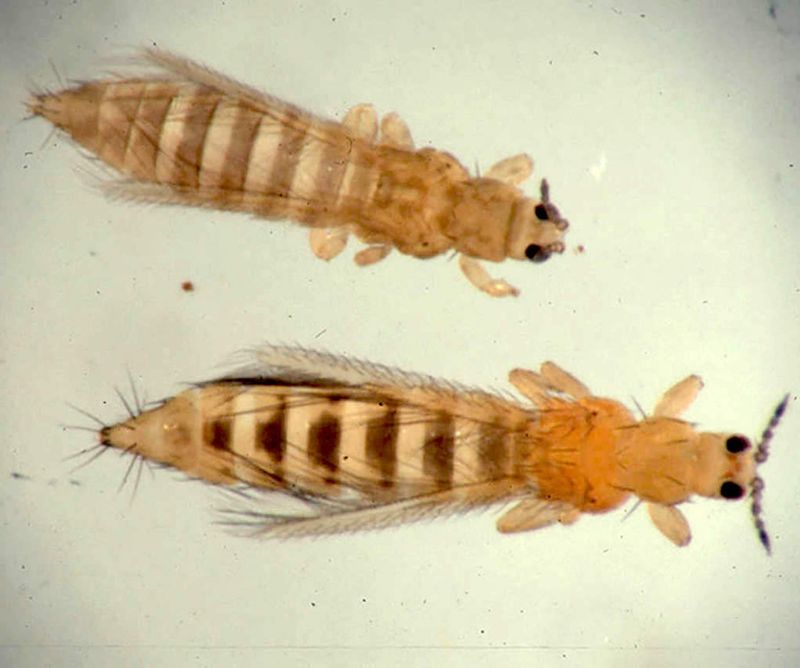
NC State Extension’s gladiolus thrips guide describes the damage pattern to look for: silver-streaked or flecked foliage during the growing season, and corm surfaces that show rough, corky, or dark-spotted areas at harvest. Thrips are tiny insects that feed on plant tissue and can hide in corm scales through winter, re-infesting next year’s planting.
If you saw clear thrips damage during the growing season, cleaning the corms more carefully and considering a labeled treatment is reasonable.
Some extension sources recommend a bleach-and-water soak specifically when thrips are a documented concern. NC State’s Plant Toolbox entry for gladiolus notes that fungicide or insecticide treatment may be appropriate when problems occurred during the growing season.
This should be framed as a targeted response, not a universal step. Many extension sources advise keeping corms dry rather than washing them routinely, because excess moisture during curing creates its own problems.
UC IPM’s gladiolus pest management guide provides detailed information on thrips life cycles and control options. Any pesticide or fungicide you consider must carry a current label for that specific use, and you must follow that label exactly.
The EPA’s pesticide label system explains how to verify that a product is legally registered for your intended use. When in doubt, prioritize discarding badly affected corms over trying to rescue them with chemical treatment.
Save the best corms for next summer’s display
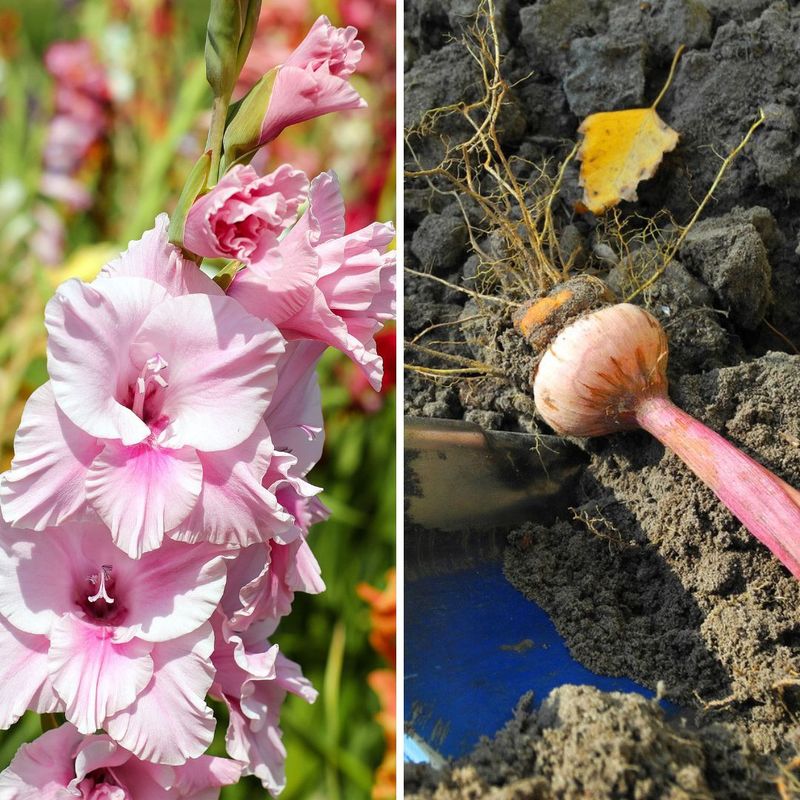
All the careful digging, curing, and storing leads to one practical decision in spring: which corms go back in the ground for the main display, and which ones go into a separate nursery area for slower development. Reserve the largest, firmest corms you harvested for the primary beds.
Missouri Extension classifies larger corms as the most dependable flowering sizes, while small cormels may need multiple growing seasons before they bloom reliably. Mixing small cormels into your main planting usually produces patchy results.
Growing conditions in the garden still shape the outcome after storage ends. Mississippi State Extension recommends full sun, well-drained soil, and approximately 1 inch of water per week for strong spike development.
Gladiolus planted in heavy clay with poor drainage or in a spot that gets only partial afternoon sun will underperform regardless of how well the corms were stored. Good soil preparation and consistent moisture during the growing season carry as much weight as corm quality when it comes to the flower display you actually see.
Stagger your planting dates in spring to extend the bloom season rather than having every spike open in the same two-week window. Plant a batch every two weeks from after the last frost through early summer, and you will have flowers across a much longer stretch of the season.
The corrected takeaway from this whole process is straightforward: do not dig because the calendar or an article says “now.” Watch the foliage until it yellows, keep an eye on the local freeze forecast, and lift before the ground freezes hard. Cure the corms properly, store them cool and dry, inspect them through winter, and bring only the healthiest material back to the garden in spring.
Every step in that chain matters, but the chain starts with reading the plant rather than the date.