Have you ever wondered what it would be like to season your dishes with cloves you’ve grown yourself? Growing a clove plant at home is more than just a hobby—it’s an invitation to transform your everyday cooking into something extraordinary. This guide will walk you through every step, from choosing the right seeds to mastering the art of indoor clove cultivation.
Clove plants may thrive in tropical climates, but with a little patience and the right care, you can grow them in the comfort of your home. Imagine the satisfaction of nurturing a plant that not only adds elegance to your space but also enriches your meals with fresh, aromatic spices. The process is simpler than you think, and the rewards are well worth the effort.
As you dive into this guide, you’ll uncover the secrets to growing one of the world’s most beloved spices, enhancing your cooking and your home with the fruits of your labor.

Understanding Cloves
Cloves have a rich history and unique characteristics that are integral to their multiple benefits and uses. These aromatic flower buds are not just a flavorful spice but a versatile addition to both culinary and medicinal practices.
Origins and Characteristics
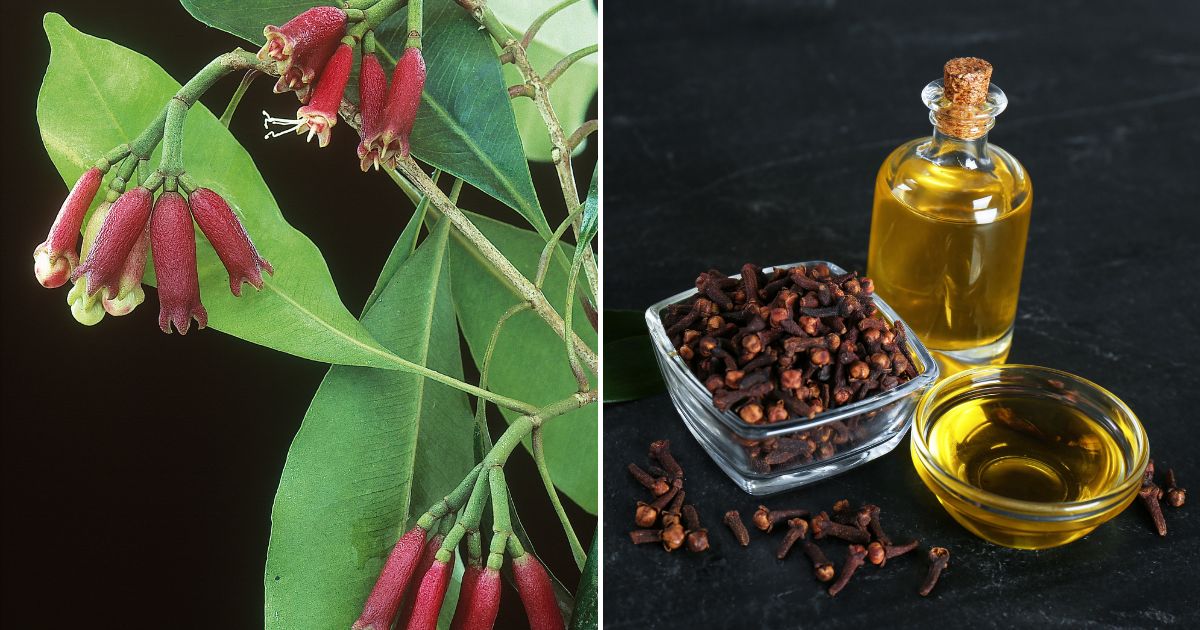
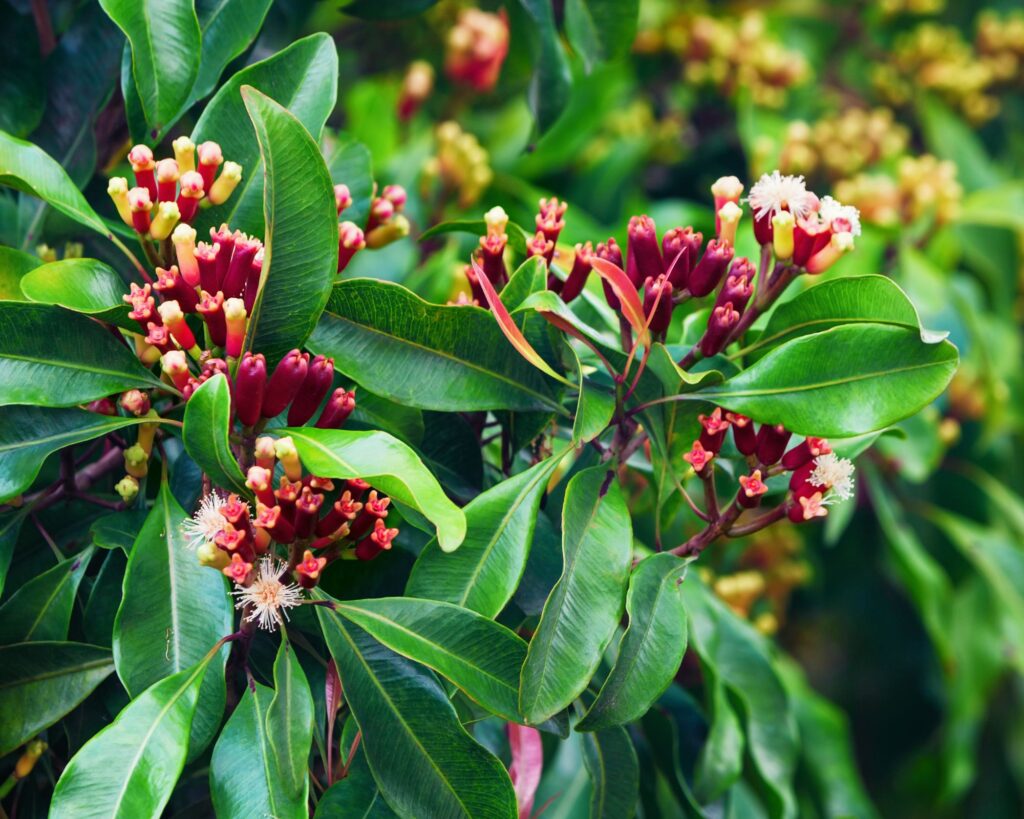
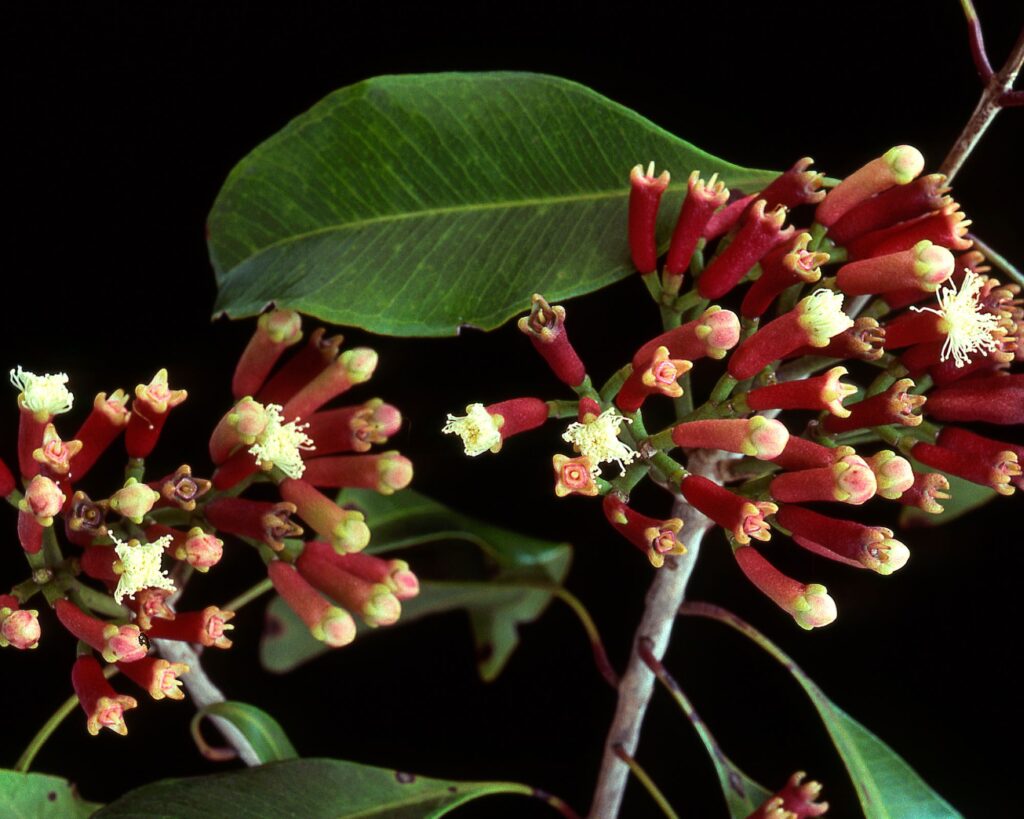
Cloves are native to the Maluku Islands in Indonesia. These evergreen trees can grow up to 8-12 meters tall. Their flower buds are harvested just before they open, then dried until they turn their familiar dark brown color. Each bud is shaped like a small, thin nail, adding a distinct appearance to this spice.
The Latin name for cloves is Syzygium aromaticum. This plant thrives in tropical climates with well-drained soil and humid conditions. The powerful aroma of cloves comes from the compound eugenol, which constitutes 80-90% of the essential oil content.
Benefits and Uses
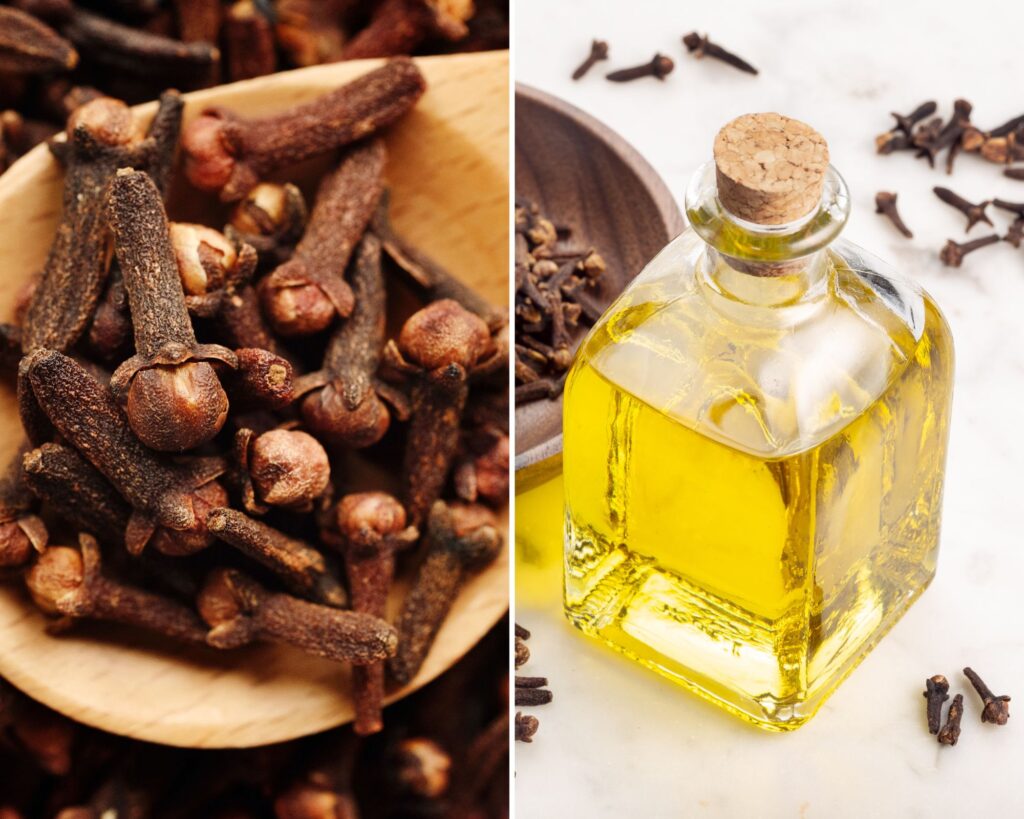
Cloves are renowned for their aromatic and health properties. In cooking, cloves add a warm, spicy flavor to dishes like stews, meats, and baked goods. They are often ground into a powder or used whole in spice blends like garam masala. Clove oil is also beneficial in aromatherapy and natural remedies.
Medicinal uses include relief from toothache and digestive issues. The antimicrobial and anti-inflammatory properties of cloves make them popular in oral health products and over-the-counter remedies. Whether infused in teas or used in essential oils, cloves provide a natural boost to your wellness routine.
Cultivation Requirements
To grow a healthy clove plant, you need to focus on the right climate, soil, fertilization, watering, and sunlight needs. These factors play a crucial role in ensuring the plant thrives and produces high-quality cloves.
Climatic Conditions
Clove plants thrive in tropical climates where temperatures range between 70-85°F (21-29°C). They require high humidity levels and do not tolerate frost. Ensure the plant is protected from strong winds as they can damage the delicate flowers and leaves. Planting cloves at elevations of 300-900 meters above sea level can provide optimal growing conditions.
Soil and Fertilization
Well-draining, loamy soil rich in organic matter is ideal for clove plants. Maintain a pH level between 5.5 and 7.0. Adding compost or aged manure enhances soil fertility. Fertilize with a balanced, slow-release fertilizer rich in nitrogen, phosphorus, and potassium every three months to encourage healthy growth.

Watering and Sunlight Needs
Clove plants need consistent moisture but avoid waterlogging. Water the plants regularly, especially during dry spells. Partial shade is beneficial during the initial growth stages, but mature plants prefer full sunlight. Ensure your clove plant gets at least 6 hours of sunlight daily for optimal growth.
Propagation Techniques
Growing cloves from seeds requires attention to detail starting with selecting viable seeds and preparing them properly. This section also covers planting methods and guidelines for nurturing seedlings to ensure strong, healthy plants.
Seed Selection and Treatment
Choose fresh clove seeds for the best results. Fresh seeds are often found inside ripe clove fruits, known as “mother cloves,” which should be plump and free from disease.
Once you have your clove seeds, soak them in lukewarm water for 24 hours to soften the outer coating. This helps speed up the germination process. It’s essential to use clean, filtered water to avoid introducing any pathogens.
After soaking, you may treat the seeds with a mild fungicide to prevent mold growth during germination. This step is optional but recommended for areas with high humidity.
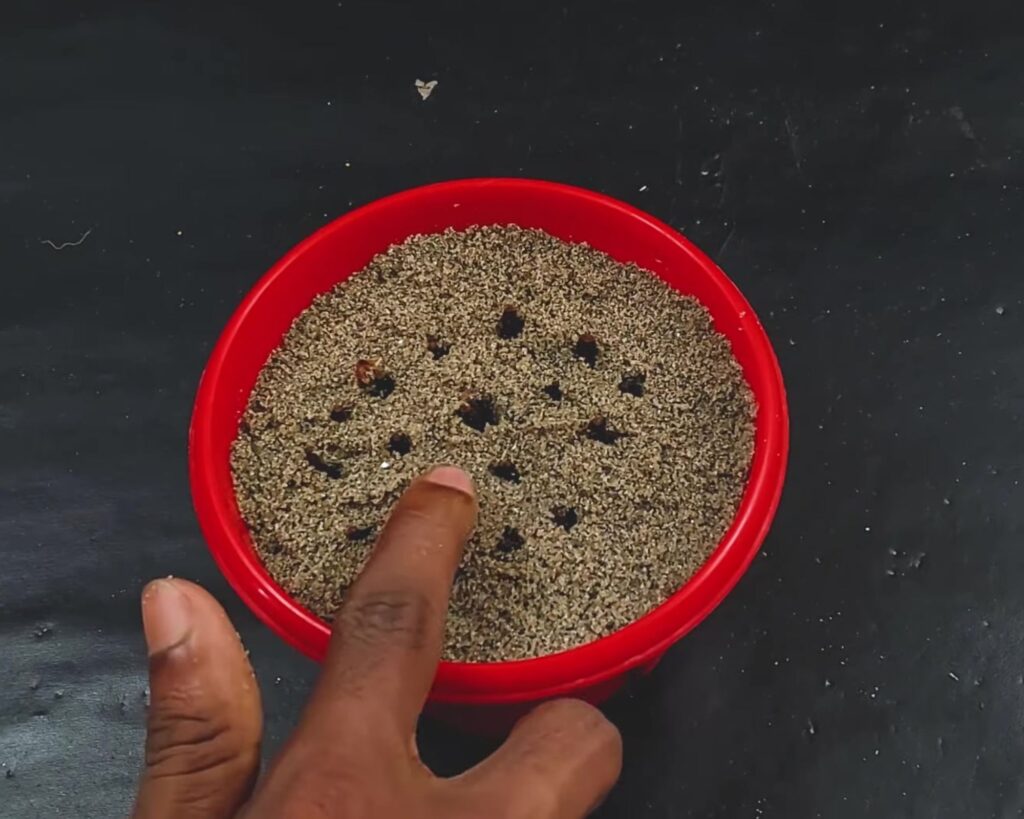
Seed Planting
Prepare a seedling tray or small pots with a light, well-draining potting mix. Ideal mixes include equal parts of sand, compost, and garden soil.
Plant the seeds about 1 inch deep in the soil with the pointed end facing downward. Ensure adequate spacing of about 2 inches between each seed to give them room to grow without crowding.
Water the planted seeds gently but thoroughly to moisten the soil. Place the tray or pots in a warm, shaded location with indirect sunlight and maintain a temperature between 70-85°F (21-29°C).
Germination and Seedling Care
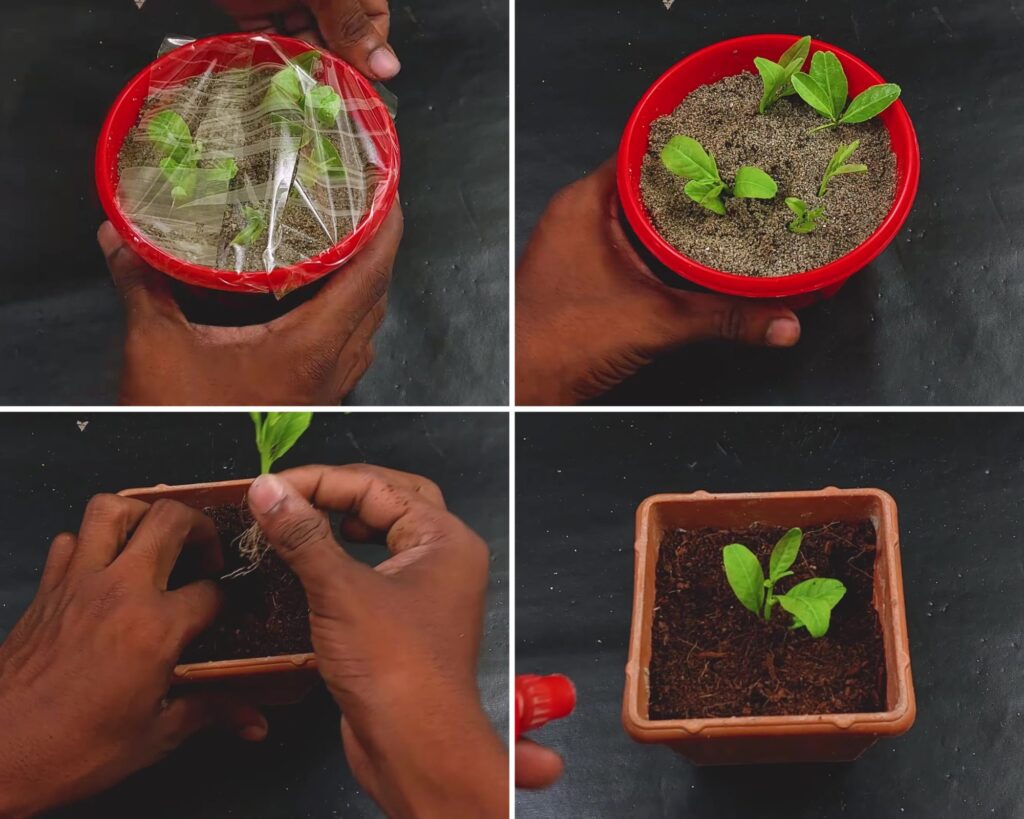
Germination typically takes 1-6 months, so patience is key. Keep the soil consistently moist but not waterlogged. You may cover the seedling tray with plastic wrap to retain humidity, but ensure proper ventilation to avoid mold growth.
Once the seedlings emerge, remove any coverings and gradually introduce them to more light. Ensure they receive bright, indirect sunlight for about 6 hours daily.
When seedlings develop two sets of true leaves, they can be transplanted into individual pots or directly into the garden. Use a rich, well-draining soil mix and provide partial shade until the plants are well-established.
Monitor for pests and diseases regularly. Young clove plants are especially susceptible to fungal infections, so avoid overhead watering and ensure good air circulation around the plants.
Plant Care and Maintenance
Ensuring your clove plant thrives involves regular pruning, training, and keeping an eye out for pests and diseases. Each of these aspects plays a critical role in the overall health and productivity of your clove plant.
Pruning and Training
Regular pruning helps shape the clove plant and encourages healthy growth. Trim any dead or diseased branches using sterilized pruning shears. Remove any suckers that sprout at the base to maintain a strong main stem.
Training involves guiding the plant’s growth in a specific direction. Support structures like stakes can help direct growth and prevent the plant from bending. Regularly check and adjust these supports to accommodate the plant’s growth.
Pest and Disease Management
Clove plants are susceptible to pests like aphids and spider mites. Inspect your plant regularly and if you spot any pests, treat them with insecticidal soap or neem oil. Early detection can prevent a full-blown infestation.
Diseases such as leaf blight and root rot can affect clove plants. Provide proper drainage and avoid over-watering to prevent root rot. For leaf blight, remove any affected leaves and treat with a fungicide if necessary. Maintaining good air circulation around the plant can also help keep diseases at bay.
Harvesting and Curing
Knowing when and how to harvest and cure clove plants is crucial for ensuring the best quality spices. Timing the harvest and following proper curing methods guarantees the best flavor and longevity for the cloves.
Harvest Timing
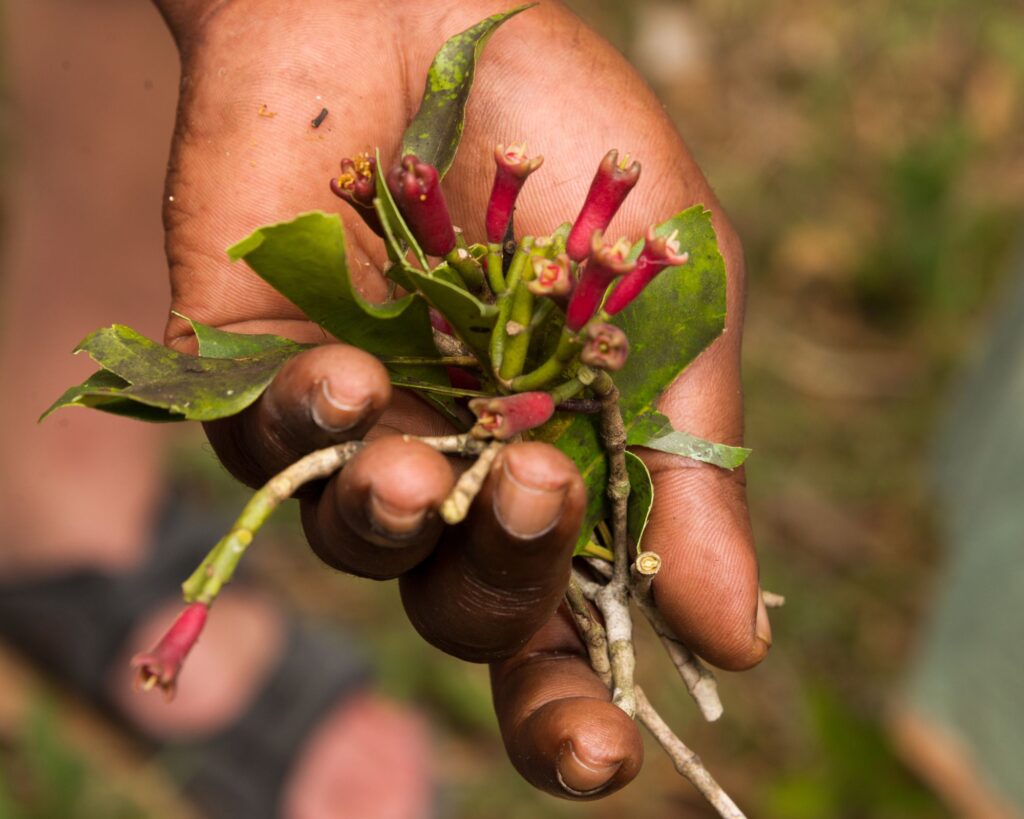
Clove buds must be harvested at the right stage for the best quality. Typically, you should pick the buds when they turn from green to a slight pinkish hue. Using the right tools, such as sharp garden shears, prevents damage to the plant and the buds.
The ideal time of day to harvest is early morning. This helps preserve the essential oils in the buds. Be gentle when handling the buds to avoid bruising, which can affect the flavor.
Curing Process
After harvesting, curing the cloves properly is essential. First, spread the buds in a single layer on a drying tray or a clean mat. Place them in a well-ventilated area away from direct sunlight. This helps preserve their color and flavor.
Turn the buds regularly to ensure even drying. Curing typically takes about 4-5 days, but this can vary depending on the climate. Once dried, the cloves should be stored in an airtight container in a cool, dark place to keep their potency.
Growing your own clove plant at home is an opportunity to connect with nature, enhance your culinary experiences, and bring a touch of the exotic into your living space. The knowledge and care you invest will be returned in the form of fragrant, homegrown cloves that elevate your cooking and bring a sense of accomplishment.
As you nurture your clove plant, you’ll discover the satisfaction of cultivating one of the world’s most treasured spices. The process may require patience, but the result is well worth the effort.
Enjoy the journey from seed to spice and savor the unique flavor of success.