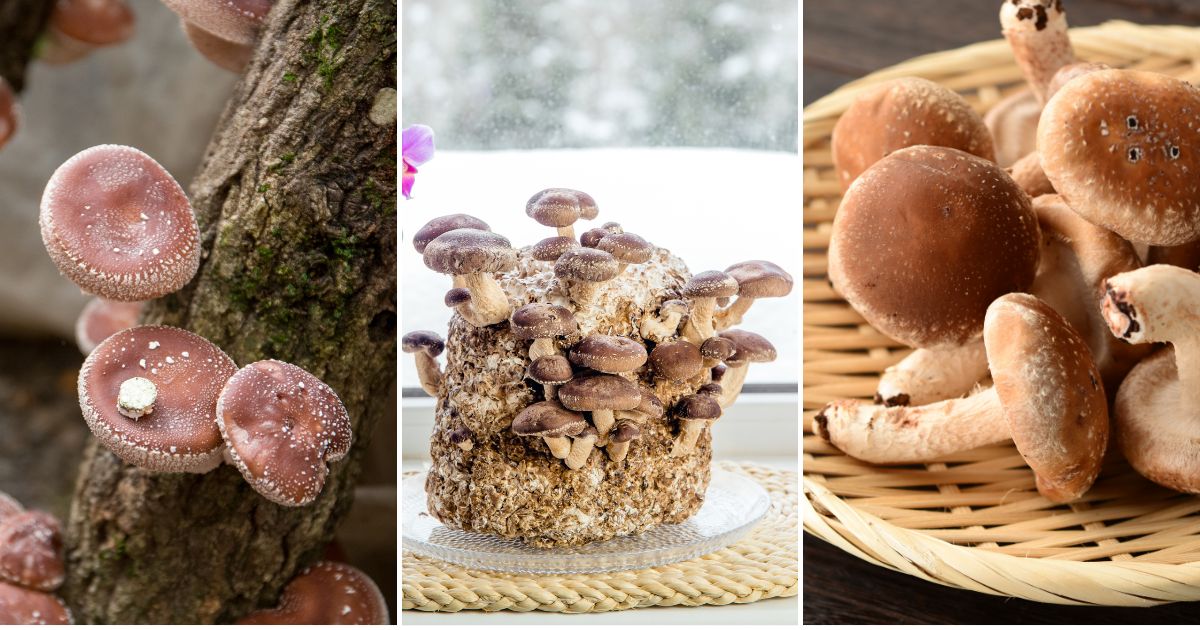
Have you ever wished you could add a fresh, gourmet touch to your meals without relying on store-bought ingredients? Growing shiitake mushrooms at home might be the perfect answer.
These mushrooms, cherished for their rich umami flavor, are a culinary game-changer, especially in Asian-inspired dishes. Imagine harvesting your own nutrient-packed, earthy shiitakes right from your garden or kitchen – it’s easier than you might think!
With a little know-how and the right setup, you can turn your space into a mini mushroom farm. This guide will walk you through every step, showing you just how simple and rewarding cultivating shiitake mushrooms at home can be.

Get ready to elevate your cooking with your very own harvest of delicious shiitakes!
Why Grow Shiitake Mushrooms?
Shiitake mushrooms aren’t just flavorful; they’re packed with health benefits. They contain essential vitamins, minerals, and compounds like polysaccharides that support the immune system.
Growing them at home means you can have a fresh supply without worrying about pesticides or other contaminants often found in commercially grown mushrooms.
Getting Started: What You Need to Grow Shiitake Mushrooms
Before you start, gather the necessary supplies and select the method you want to use. Shiitake mushrooms can be grown using various methods, but the most popular ones involve using hardwood logs or pre-made mushroom-growing kits.
Here’s what you need:
1. Hardwood Logs (Preferred Method)
- Hardwood logs: Shiitake mushrooms prefer hardwood logs like oak, alder, maple, or beech. Choose logs that are 4-6 inches in diameter and about 3-4 feet long. The wood should be freshly cut, preferably within a few weeks of harvest.
- Shiitake spawn: This is the mycelium that will colonize the logs and produce mushrooms. You can buy shiitake spawn in different forms, such as plug spawn (wooden dowels inoculated with mycelium) or sawdust spawn.
- Drill: Needed to create holes in the logs for inserting the spawn.
- Wax: Melted cheese wax or beeswax will seal the spawn in place and protect it from contamination.
2. Mushroom Kits (Beginner-Friendly)
- Mushroom growing kits often contain pre-inoculated substrate (usually sawdust or straw) and a bag to create the right environment for mushroom growth. They are an excellent option for beginners or those who want to grow mushrooms indoors.
Method 1: Growing Shiitake Mushrooms on Logs
Growing shiitake mushrooms on hardwood logs is the traditional and most rewarding method, although it requires patience since it can take several months to a year for the mushrooms to start producing.
Here’s a step-by-step guide:
Step 1: Choosing and Preparing the Logs
1. Log Selection: Choose hardwood logs that are free of rot, disease, and insect infestations. The best time to harvest logs for mushroom growing is in the late winter to early spring when the sap is running.
2. Cutting the Logs: Ensure the logs are around 4-6 inches in diameter and 3-4 feet long. Freshly cut logs retain the moisture needed for shiitake mushrooms to thrive.
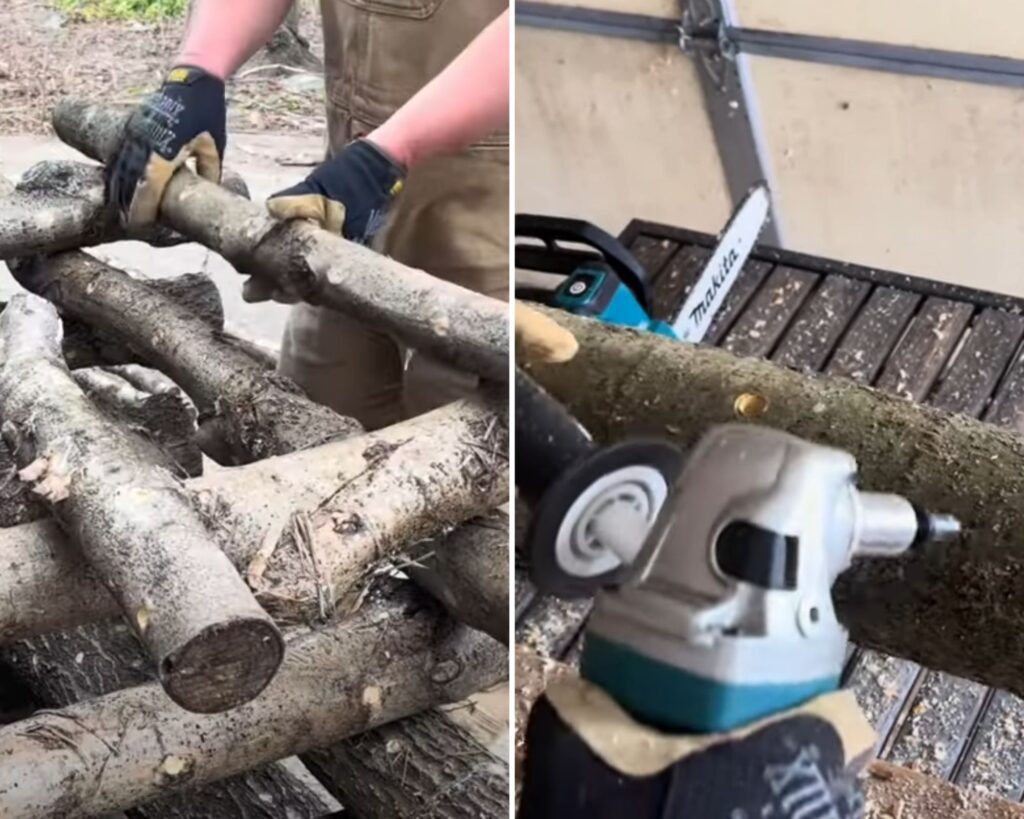
3. Seasoning the Logs: Allow the logs to season for 1-2 weeks after cutting. This will help the bark to dry and harden, reducing the chance of contamination and creating a better environment for the shiitake spawn.
Step 2: Inoculating the Logs
1. Drill Holes: Using a power drill with a 5/16-inch drill bit, create holes about 1 inch deep in the log. Space the holes 6 inches apart along the length of the log, and make rows spaced about 2 inches apart around the circumference.
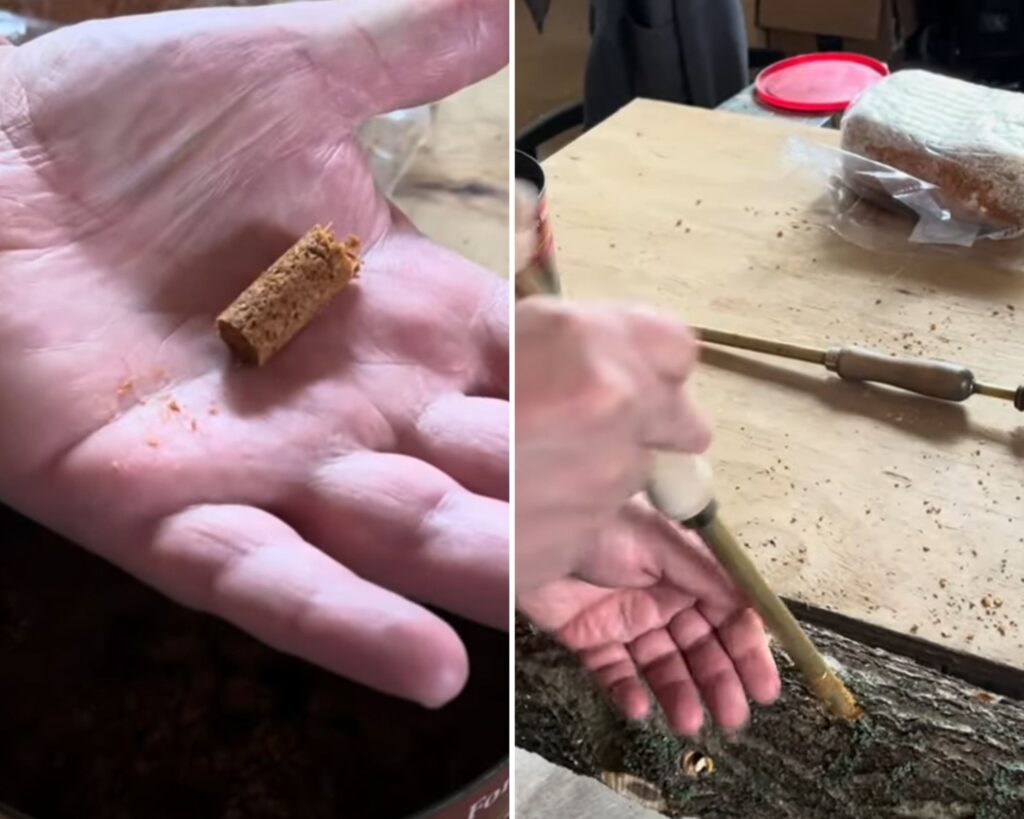
2. Insert the Spawn: Place the shiitake plug spawn into the holes. If you’re using sawdust spawn, fill the holes with it using a spawn inoculation tool.
3. Seal the Holes: Melt the wax and carefully pour it over each hole to seal in the spawn. This helps to prevent contamination and retain moisture.
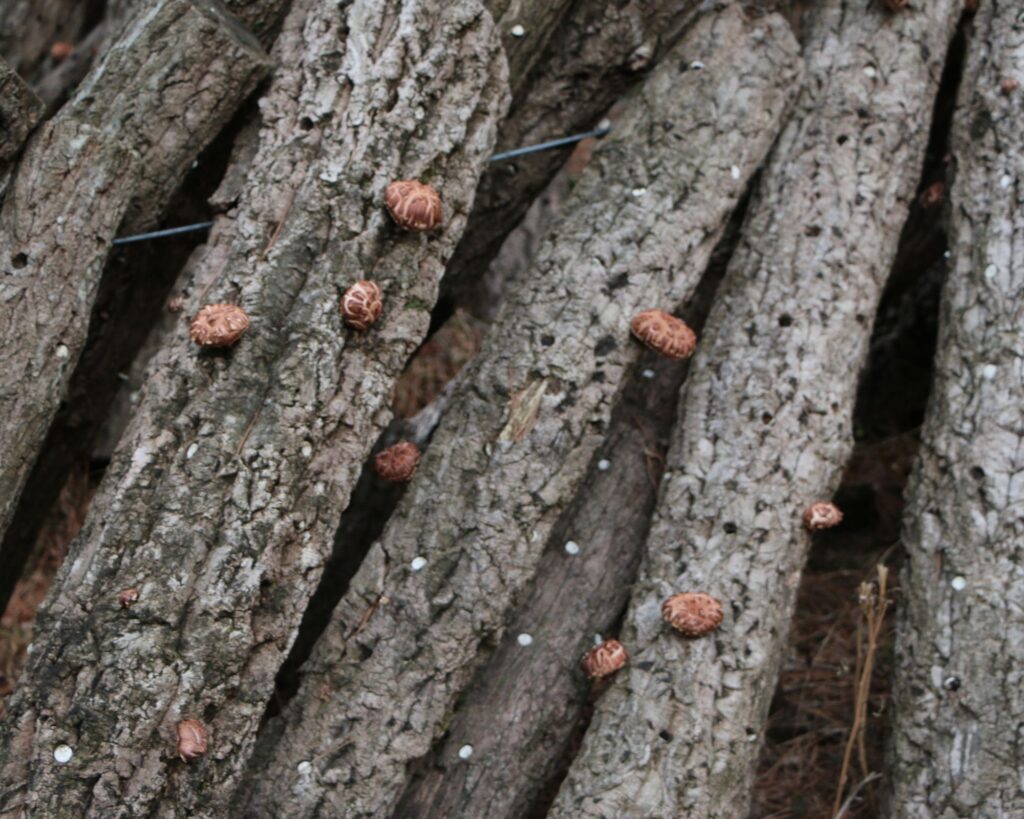
Step 3: Incubating the Logs
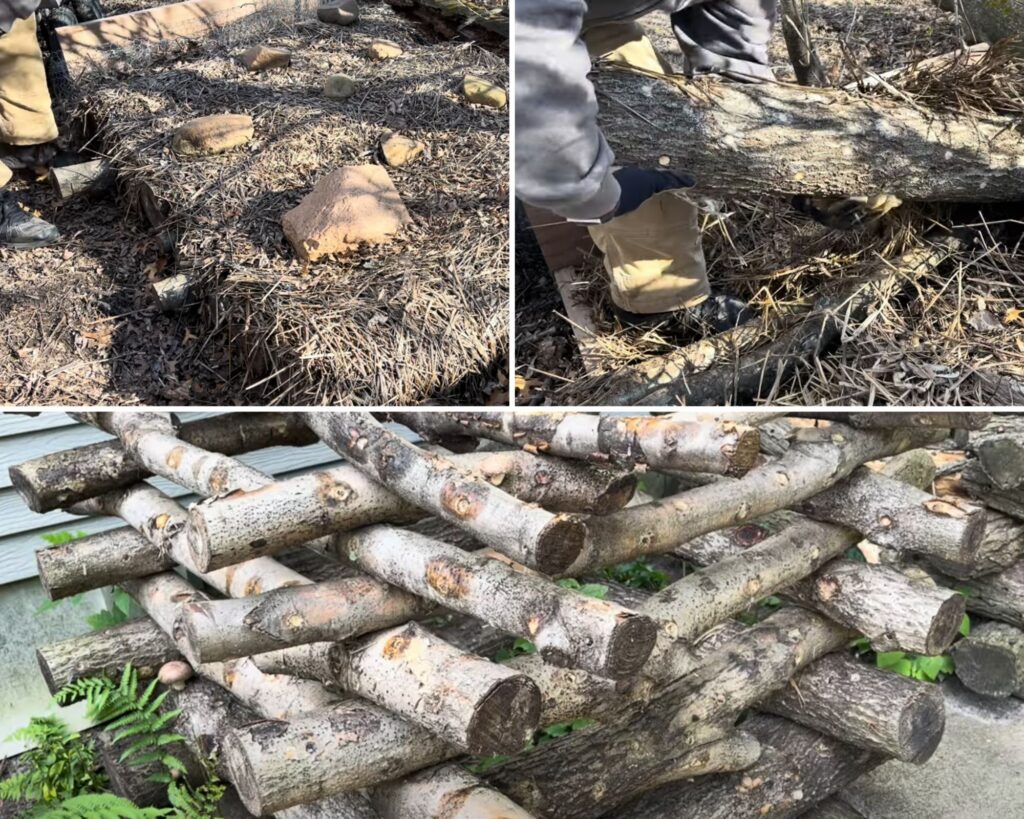
1. Stacking the Logs: Arrange the inoculated logs in a shaded area outdoors. The logs can be stacked in different ways, such as in a crisscross pile or leaned against a support. The key is to allow air circulation while keeping the logs off the ground.
2. Watering: During the warm months, water the logs every 1-2 weeks if natural rainfall isn’t sufficient. The logs should stay moist but not waterlogged. In winter, natural precipitation will usually be enough.
3. Wait for Colonization: The mycelium will take several months to a year to fully colonize the log, depending on the conditions. You’ll know colonization is complete when you see a white, fuzzy growth on the log ends.
Step 4: Forcing Fruiting
1. Soaking: To encourage fruiting, soak the logs in cold water for 24 hours after they’ve been colonized. This simulates the natural seasonal conditions that trigger mushroom growth.
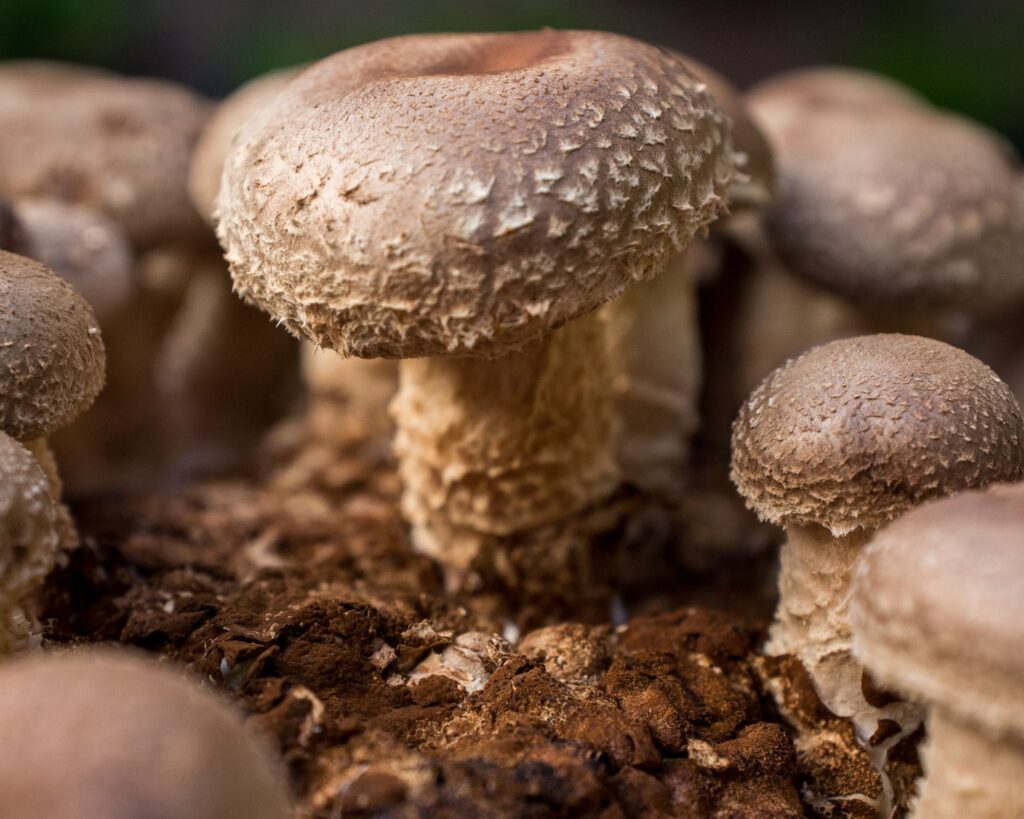
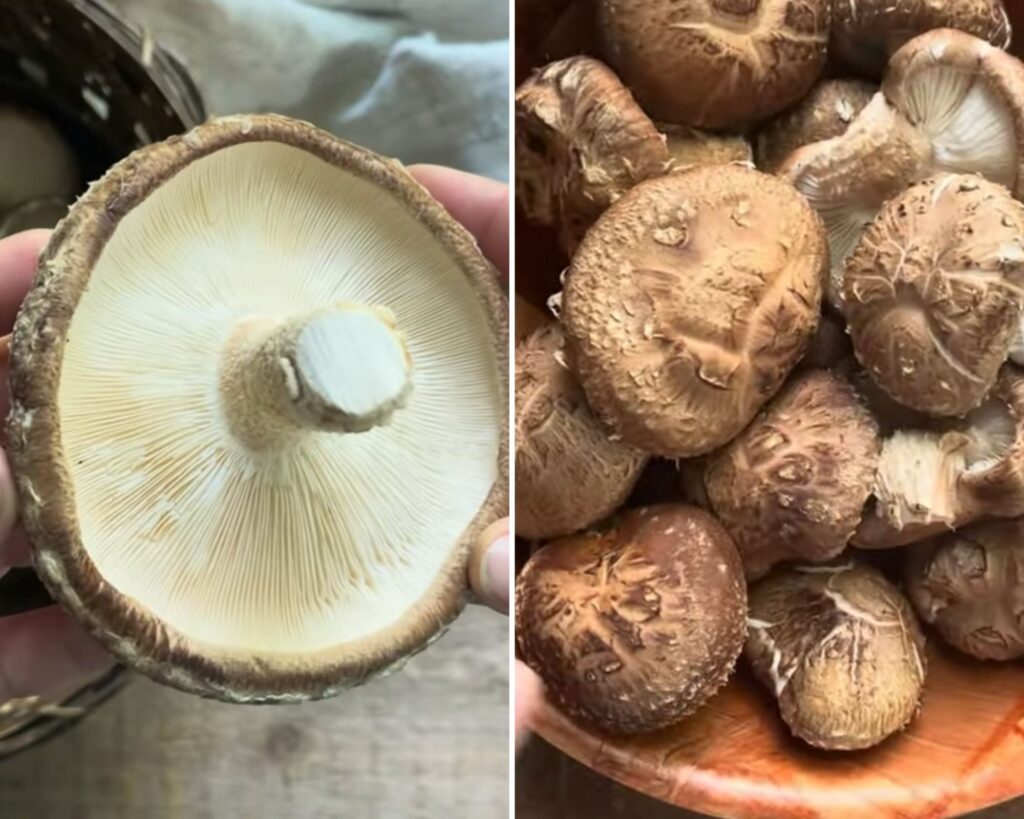
2. Harvesting: After soaking, place the logs in an upright position in a shaded, humid area. In about 7-10 days, you should start seeing shiitake mushrooms emerging. Harvest them by twisting them off the log when the caps have fully opened and the edges start to curl.
Method 2: Growing Shiitake Mushrooms Indoors Using a Kit
If you prefer a simpler method, growing shiitake mushrooms indoors with a pre-made kit is a convenient option. Mushroom kits come with everything you need to start growing and are perfect for beginners.
Step 1: Unboxing and Setting Up
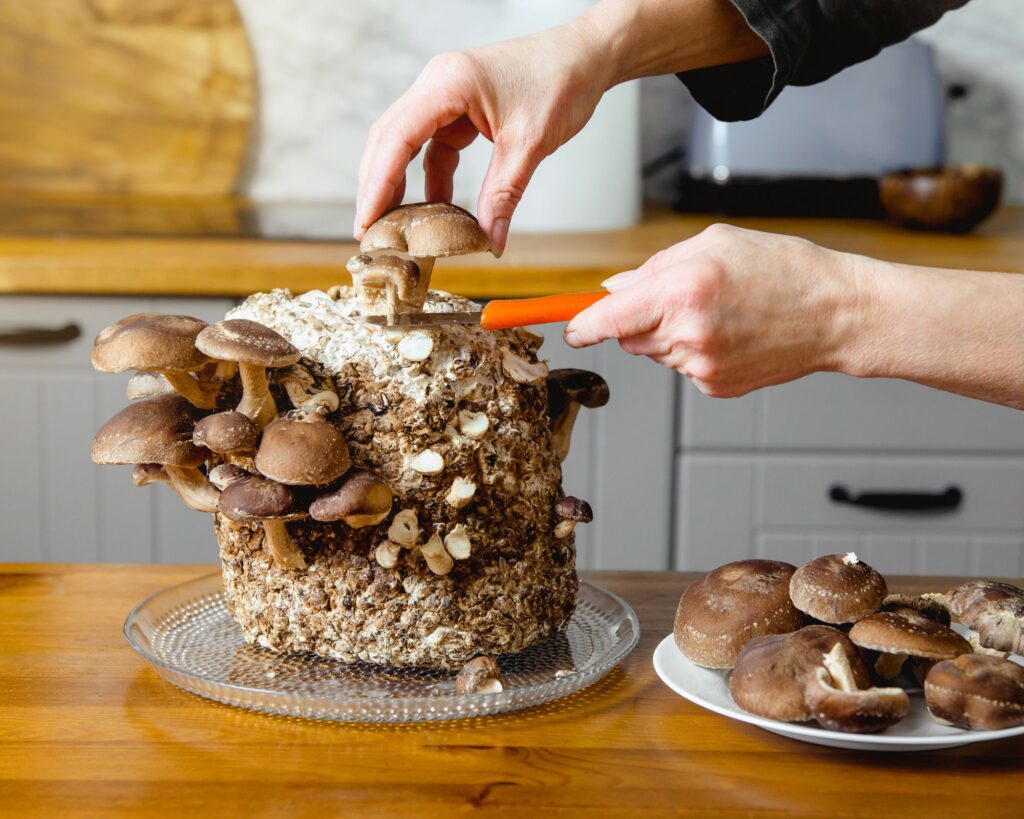
1. Open the Kit: Remove the growing block from the kit packaging. Most kits include an inoculated block of sawdust that’s ready to fruit.
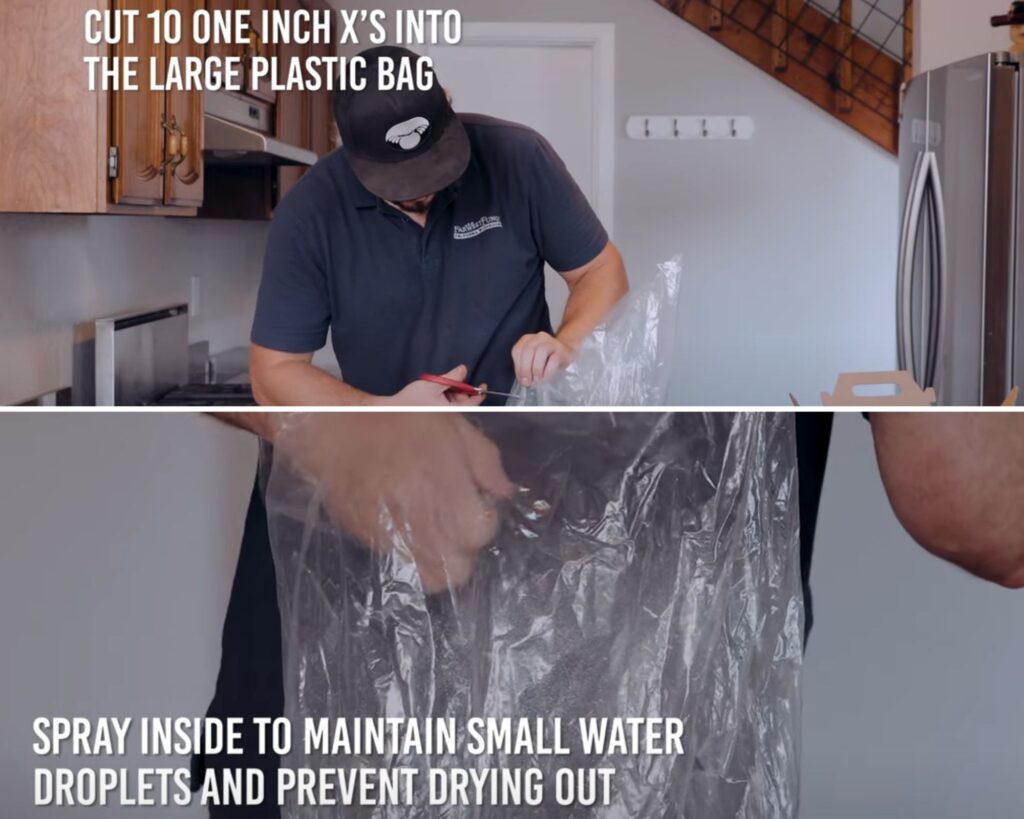
2. Prepare the Block: Place the block in a humid environment, such as a humid room or a grow tent. You can also create a mini greenhouse by placing a plastic bag with small holes over the block.
Step 2: Maintaining the Right Conditions
1. Moisture: Keep the block moist by misting it with water daily. Avoid over-saturating, as this can lead to mold growth.
2. Temperature: Shiitake mushrooms grow best in temperatures between 55-75°F. Keep the kit in a location where you can maintain a consistent temperature.
Step 3: Harvesting
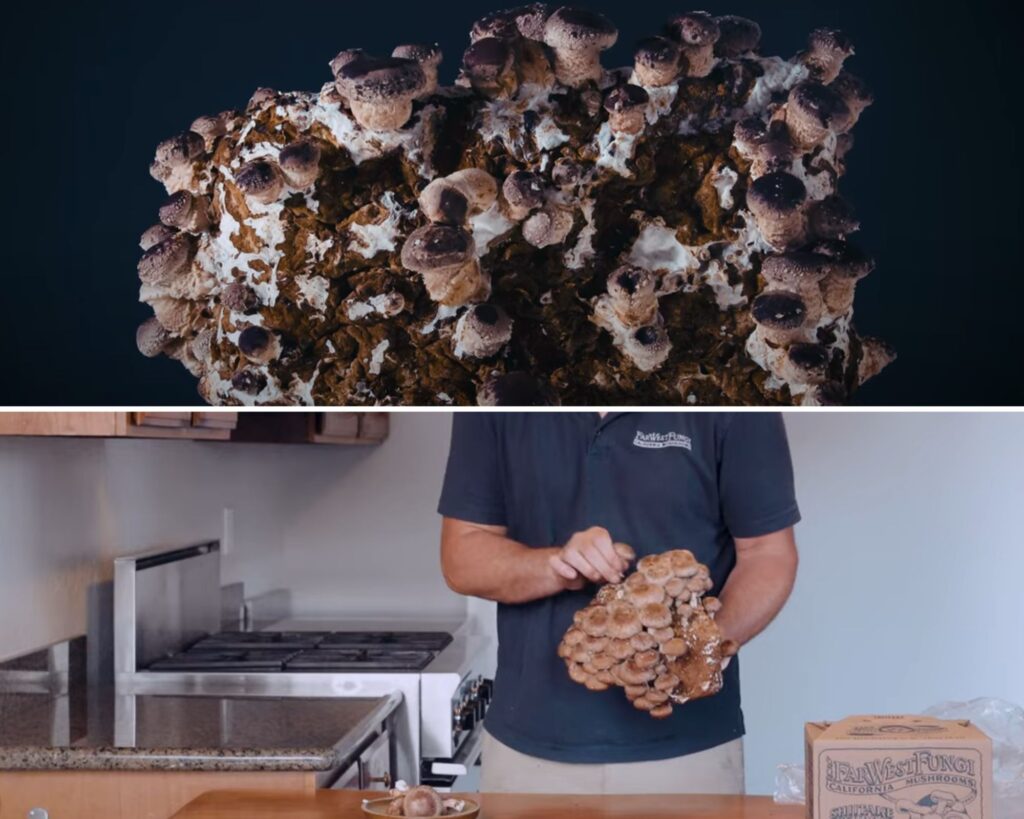
1. Watch for Growth: Within a few weeks, you’ll notice small mushroom pins (baby mushrooms) starting to form. Continue misting and maintain humidity during this period.
2. Harvesting: Once the mushrooms have fully developed caps that begin to curl, harvest them by gently twisting or cutting them from the base.
Step 4: Repeat
Second Flush: Most kits can produce multiple flushes of mushrooms. After the first harvest, allow the block to rest for a few weeks before soaking it in water to trigger the next flush.
Tips for Successful Shiitake Mushroom Cultivation
- Choose the Right Location: Whether using logs or kits, keep your mushroom-growing setup in a shaded, humid area. Direct sunlight can dry out the logs or substrate, negatively affecting mushroom growth.
- Water Regularly: Logs should be watered periodically to maintain moisture. Kits need misting daily to ensure a humid environment.
- Be Patient: Growing shiitake mushrooms, especially on logs, takes time. Don’t rush the process and allow the mycelium to fully colonize before forcing fruiting.
Growing shiitake mushrooms at home is an enriching experience that provides you with fresh, flavorful mushrooms for your kitchen.
Whether you choose the traditional log method or opt for the convenience of a mushroom kit, you’ll soon be enjoying the unique taste and health benefits of homegrown shiitake mushrooms.
With proper care, patience, and the right conditions, you can cultivate a thriving shiitake mushroom crop year after year.