Mint is one of the most useful herbs you can grow at home—it adds freshness to your drinks, desserts, and dishes. But constantly buying new bundles from the store can get expensive, especially if you use mint often. The good news? You can grow mint easily at home in a glass of water. This simple hydroponic method requires no soil, minimal space, and lets you watch roots form right before your eyes. Here’s exactly how to do it.
1. Why Growing Mint at Home Makes Sense
When you grow mint at home, you get an endless supply of fresh, pesticide-free leaves anytime you need them. It’s not only healthier but also eco-friendly, since you harvest only what you need, reducing waste. Mint grows fast—up to 4 inches a month—making it perfect for beginners who want quick results. Plus, your kitchen or windowsill will smell amazing year-round.
2. Benefits of Growing Mint in Water
Hydroponic mint growing—using only water instead of soil—has major advantages. It’s clean, compact, and pest-free. You can easily monitor root growth through the glass and maintain perfect water conditions for faster development. It’s also ideal for apartments or homes with limited space since it doesn’t require garden soil or outdoor sunlight.
3. Choosing the Best Mint Variety
Different mint types offer different flavors. Peppermint (Mentha × piperita) has a strong, cooling taste, perfect for teas and desserts. Spearmint (Mentha spicata) is milder and sweeter, ideal for cocktails and savory dishes. Both varieties thrive indoors, so pick one based on your flavor preference—or grow both for versatility.
4. What You’ll Need
You only need a few basic items: fresh mint cuttings (from your garden or store-bought bunch), a clear glass jar or vase, clean room-temperature water, and scissors or pruning shears. If you plan to move your mint to soil later, have a small pot and potting mix ready.
5. Preparing the Glass Container
Pick a clear glass container tall enough to hold the stems without submerging the leaves. Mason jars and small vases work perfectly. Clean the glass thoroughly to remove residue or bacteria, then fill it with non-chlorinated, room-temperature water, leaving about an inch of space from the top. If you only have tap water, let it sit out for 24 hours to allow the chlorine to evaporate.
6. Taking and Prepping Cuttings
Choose healthy mint stems about 4–6 inches long with several leaves. Cut just below a node—the point where leaves meet the stem—using clean scissors. Remove leaves from the lower half of each stem to prevent rotting underwater and to encourage root growth from those nodes. Fresh, unwilted stems root best.
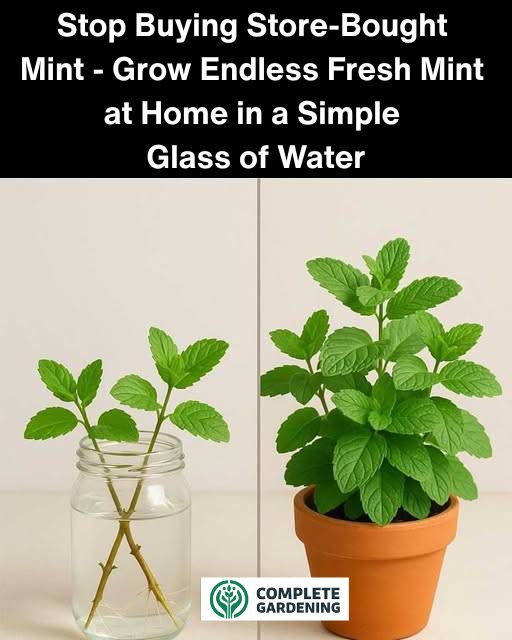
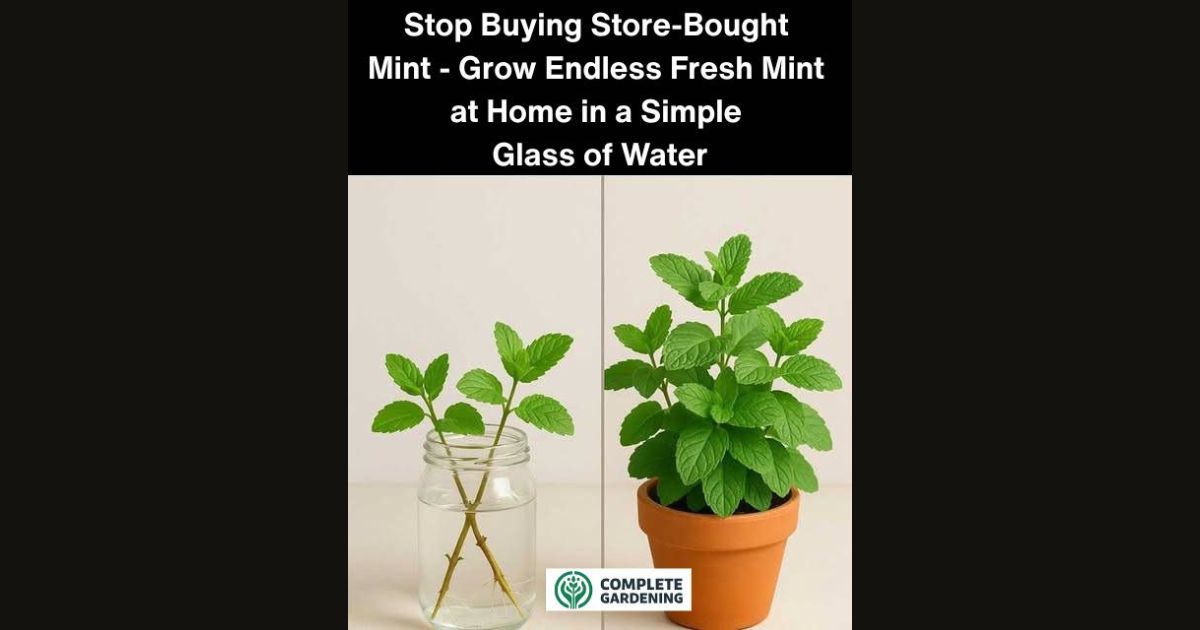
7. Rooting Mint in Water
Place the cuttings in the glass so that the bare nodes are underwater while keeping the top leaves dry. Set the glass near a bright window with indirect sunlight, such as a north- or east-facing window. Within 7–14 days, you’ll notice white roots forming. Avoid direct sun—it can overheat the water and damage the cuttings.
8. Perfect Light and Temperature Conditions
Mint thrives in bright, indirect light and moderate temperatures between 65–75°F (18–24°C). If your home doesn’t get enough natural light, use an LED grow light for 6–8 hours daily. Avoid placing your jar near drafts, heaters, or air conditioners to prevent temperature stress.
9. Keep Water Fresh and Clean
Monitor the water level so that the nodes remain submerged. Change the water every 5–7 days to prevent stagnation and algae buildup. Always use clean, room-temperature water, and rinse the glass before refilling. If the water turns cloudy or smells bad, replace it immediately to protect the developing roots.
10. Troubleshooting Growth Issues
If the leaves yellow, your mint might need more light or a small boost of nutrients. Add a few drops of diluted liquid fertilizer or hydroponic nutrient mix to the water once roots appear. If mold or algae develops, move the jar to a cooler, shadier spot and clean it thoroughly before refilling.
11. Transitioning to Soil (Optional)
Once the roots reach about 2 inches, you can plant your mint in soil. Fill a pot with well-draining mix, make a small hole, and gently place the rooted cutting inside. Water thoroughly and keep the pot in indirect light for a few days. Gradually introduce it to direct sunlight so it adjusts smoothly. Mint will continue to spread and thrive, whether indoors or outside.
Conclusion: Fresh Mint Anytime You Need It
Growing mint in a glass of water is one of the simplest and most rewarding indoor gardening projects. With just a few cuttings and basic care, you’ll have a thriving mint plant that provides fresh leaves year-round. No more store-bought herbs—just homegrown freshness at your fingertips.