Vanilla is one of the world’s most coveted spices, loved for its sweet, aromatic flavor and versatility in everything from desserts to perfumes.
What many don’t realize is that the journey from vanilla bean to extract involves a meticulous cultivation process that begins with the growing of vanilla orchids.
In this guide, I’ll walk you through everything you need to know to grow your own vanilla beans—whether you’re cultivating them in your backyard or in a carefully controlled indoor environment.
Let’s explore the art of growing this beautiful orchid and bringing out the full flavor of vanilla beans.
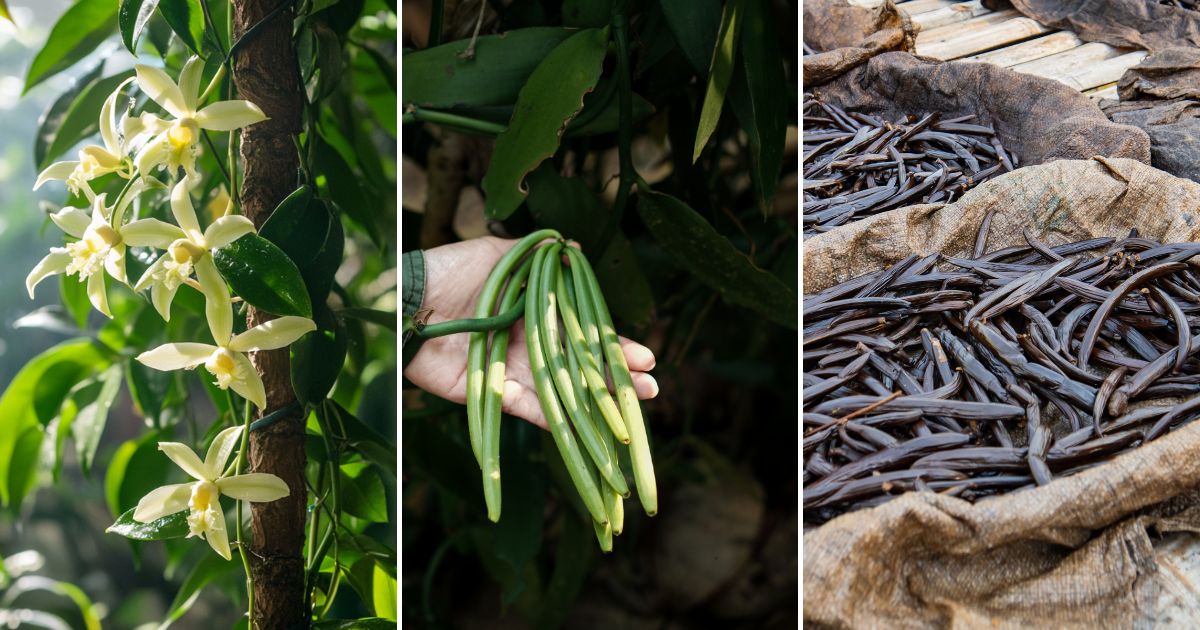
A Quick Introduction to Vanilla Orchids
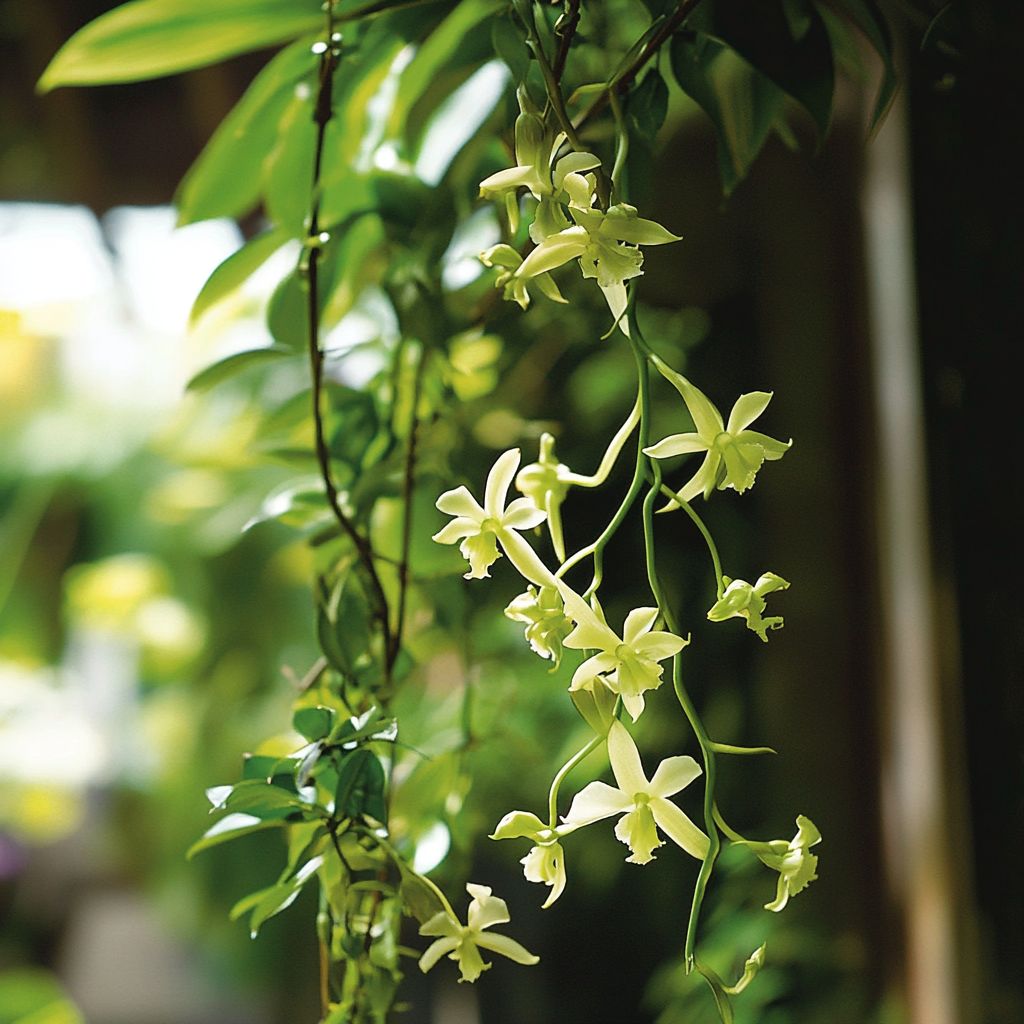
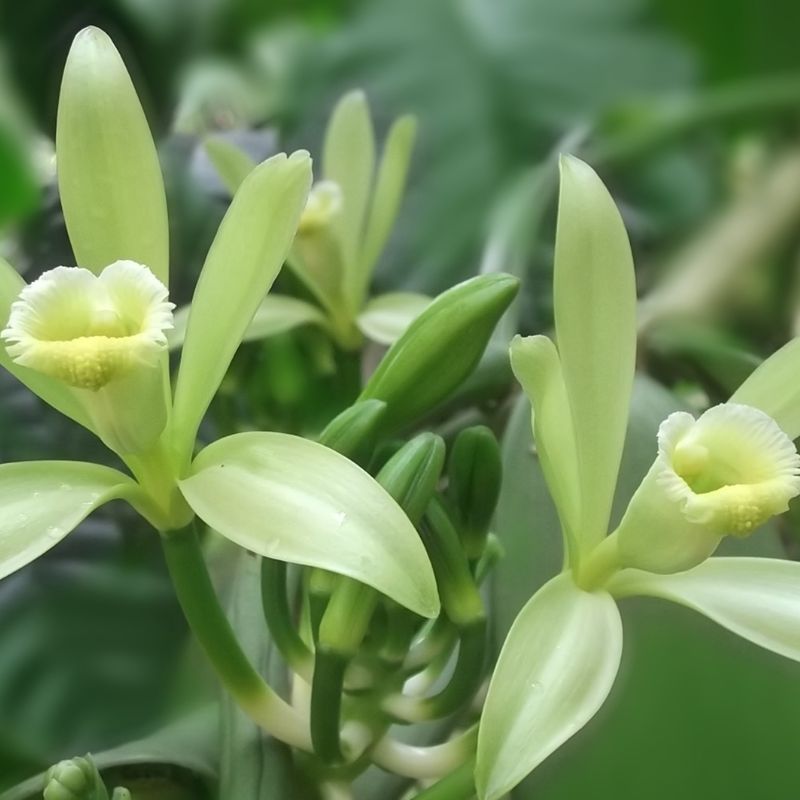
Vanilla beans come from the vanilla orchid, scientifically known as Vanilla planifolia. This tropical vine thrives in warm, humid environments, with the majority of the world’s vanilla production happening in Madagascar, Indonesia, and Mexico.
The plant can reach impressive lengths of up to 30 feet, with long, fleshy green stems that twine around supporting structures.
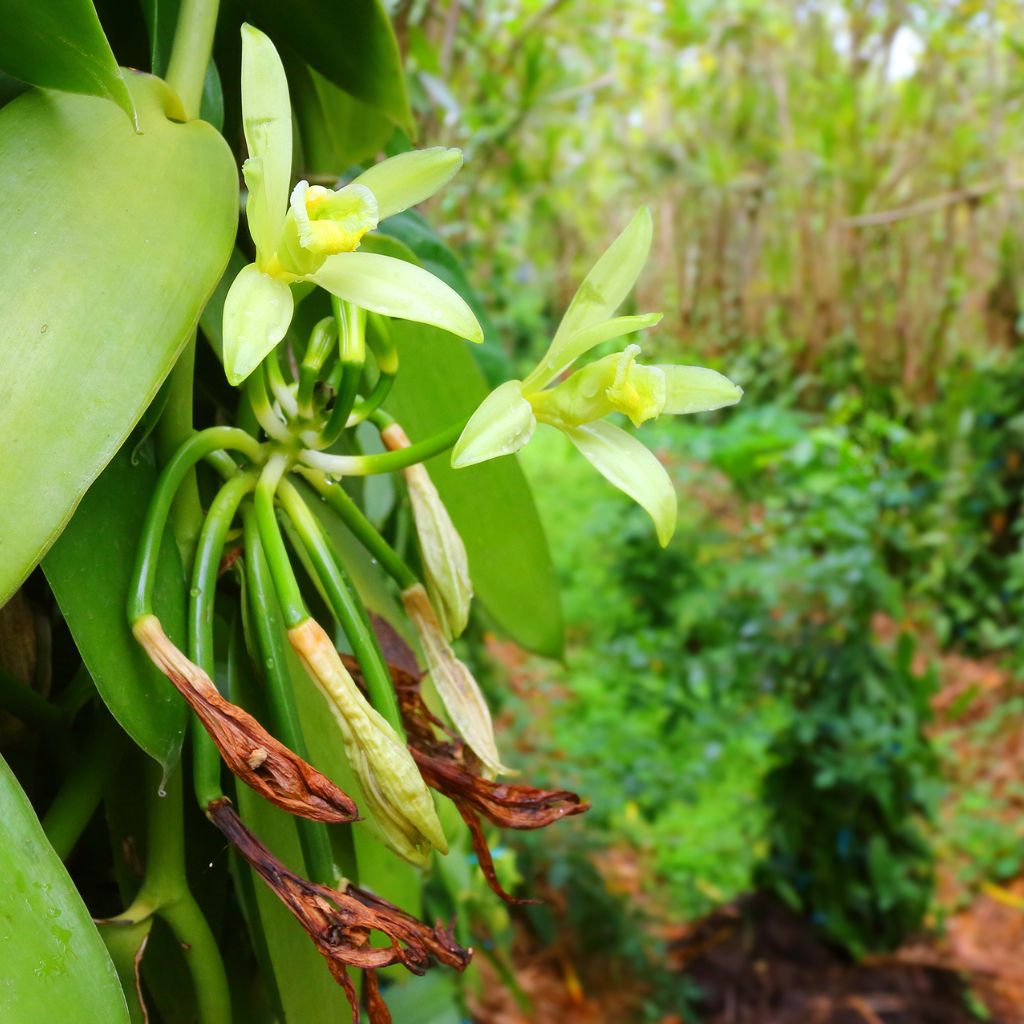
The vanilla orchid is unique among plants because it requires hand pollination to produce beans.
In their natural habitat, vanilla orchids are pollinated by specific species of bees, but outside of those regions, growers must pollinate the flowers manually to produce vanilla pods.
Vanilla cultivation can be a labor of love, but with patience, care, and attention to detail, you can grow your own vanilla beans at home. Here’s how!
Selecting the Right Conditions for Growing Vanilla
Before you start, it’s important to understand that vanilla orchids are delicate plants that require very specific growing conditions. Mimicking their natural habitat as closely as possible is key to success.
Temperature and Humidity
Vanilla orchids thrive in warm, tropical climates. Ideally, the daytime temperature should be between 75 and 85 degrees Fahrenheit, while nighttime temperatures should not drop below 60 degrees.
Humidity is also essential—aim for 70 to 80 percent humidity throughout the growing process. If you’re growing your vanilla orchid indoors, investing in a humidifier can help maintain these levels.
Light Requirements

While vanilla orchids need plenty of bright, indirect light to grow, direct sunlight can scorch the delicate leaves.
Place your plant in an area that receives filtered sunlight or use a grow light if you’re growing indoors. A shaded greenhouse or a location near a window that gets morning sunlight and afternoon shade is perfect.
Soil and Potting Medium
Vanilla orchids prefer a loose, well-draining potting mix that allows their roots to breathe. A combination of orchid bark, sphagnum moss, and coconut husk is an excellent mix for growing vanilla. You can also add perlite for better drainage.
If you’re growing the orchid in a pot, make sure it has plenty of drainage holes to prevent water from sitting at the roots. Vanilla roots are sensitive to rot, so a well-drained medium is essential.
Space and Support
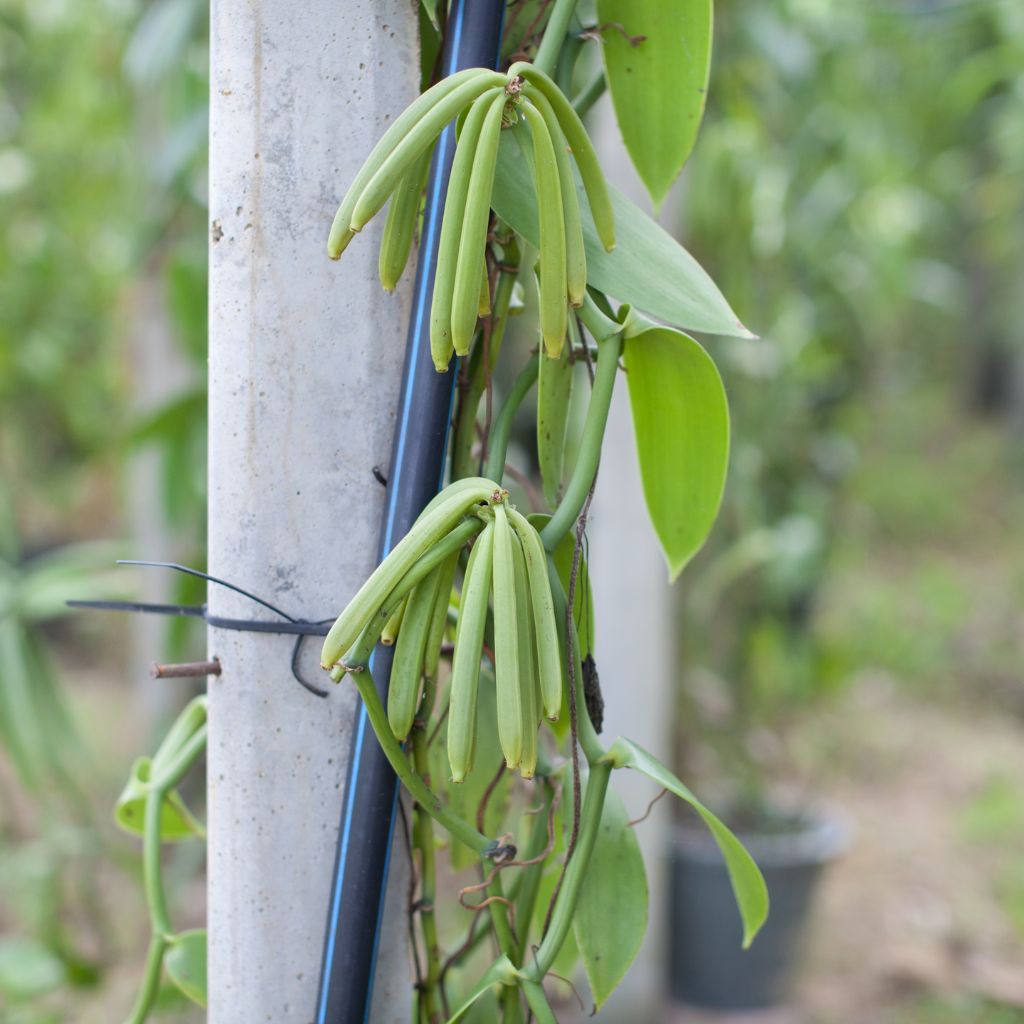
Vanilla is a climbing vine, so it needs a structure to support its growth. You can use a trellis, a stake, or another nearby plant as a support system.
Keep in mind that vanilla vines can grow quite long, so ensure the support structure is tall enough to accommodate its length as it matures.
Planting Your Vanilla Orchid
Vanilla orchids can be propagated from cuttings, which is the easiest way to start growing at home. Here’s a simple step-by-step guide to getting your vanilla orchid cutting planted and ready for growth.
1. Obtain a Cutting: You’ll need a vanilla orchid cutting that’s about 12-18 inches long. Make sure the cutting has a few healthy, aerial roots and at least three to four leaves.
2. Prepare the Potting Medium: Fill a pot with your chosen orchid potting mix. It should be loose enough to drain well while retaining enough moisture for the orchid’s roots.
3. Plant the Cutting: Insert the bottom end of the cutting into the potting medium, burying it about 2-3 inches deep. Make sure the aerial roots are in contact with the support structure and the potting mix.
4. Water and Humidify: Water the cutting thoroughly but don’t saturate the potting medium. Keep the environment humid and mist the leaves regularly to provide extra moisture.
5. Provide Support: As your vanilla orchid grows, it will need to climb. Tie the vine to your support structure, but be careful not to tie it too tightly, as this can damage the plant.
Now, all that’s left to do is nurture your orchid as it grows and develops!
Caring for Your Vanilla Orchid
Vanilla orchids require consistent care to grow healthily and eventually produce beans. Below are the key elements of vanilla orchid care.
Watering
Vanilla orchids prefer evenly moist but not waterlogged soil. During the growing season, water your orchid once or twice a week, ensuring the potting medium dries out slightly between waterings.
It’s best to water early in the day to allow excess moisture to evaporate, which helps prevent root rot. During cooler months or the plant’s dormant period, reduce watering to about once a week.
Don’t forget to mist the leaves regularly, as vanilla orchids absorb moisture through their leaves, too.
Fertilizing
To encourage strong growth and blooming, feed your vanilla orchid with a balanced fertilizer every two to four weeks during the growing season (spring and summer).
You can use an orchid-specific fertilizer or a diluted general-purpose liquid fertilizer. In the fall and winter months, when growth slows, you can reduce or stop feeding the plant altogether.
Pruning

Pruning your vanilla orchid can help manage its growth and encourage blooming. Trim away any dead or yellowing leaves to keep the plant looking healthy.
You can also prune back long vines that have become unruly, but avoid cutting too much, as this can slow down growth.
Pollination
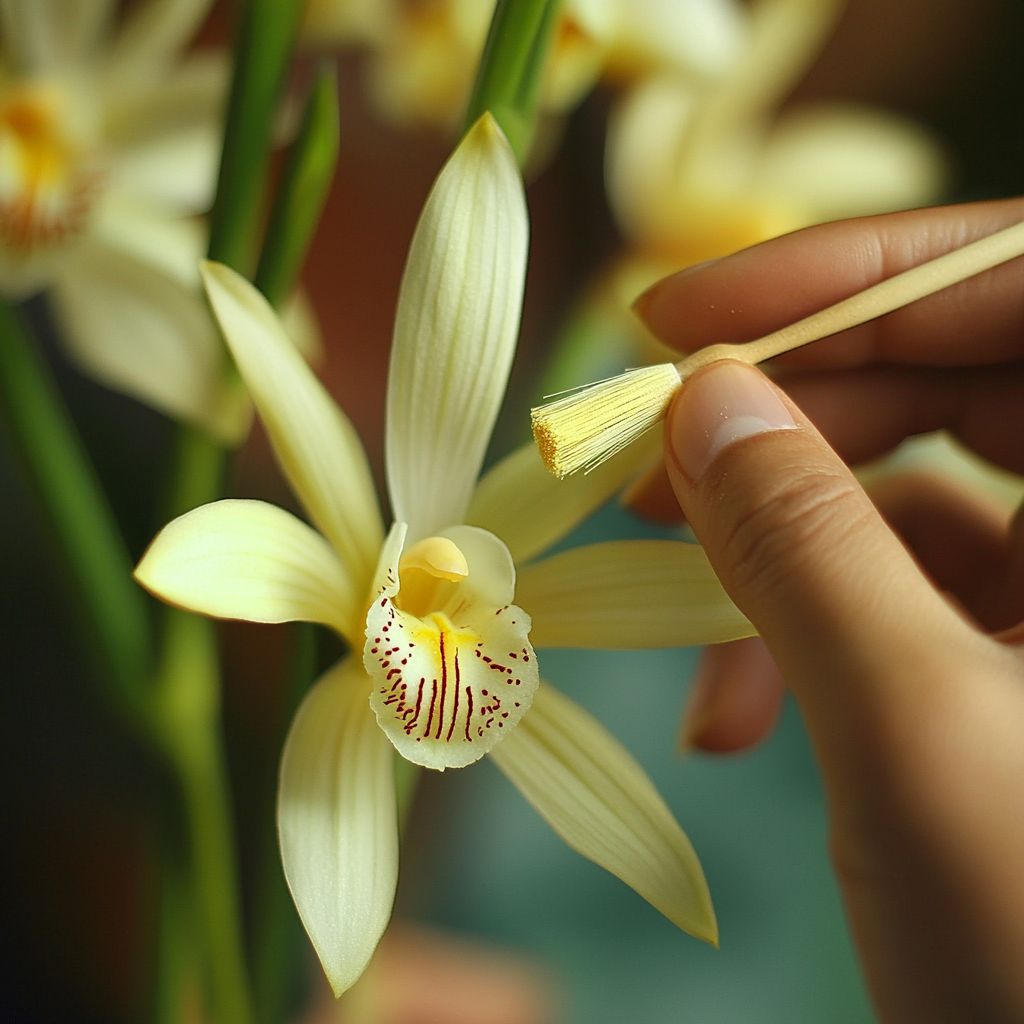
Pollination is a crucial part of vanilla production. The vanilla orchid only blooms for one day, and in order to produce beans, it must be pollinated during this short window of time.
In regions outside of the vanilla orchid’s native range, natural pollinators are scarce, so hand pollination is necessary.
To hand-pollinate your orchid, you’ll need a small, soft brush or a toothpick. Gently transfer the pollen from the flower’s anther to its stigma.
This process requires a steady hand and patience but is well worth the effort when your plant begins producing vanilla pods.
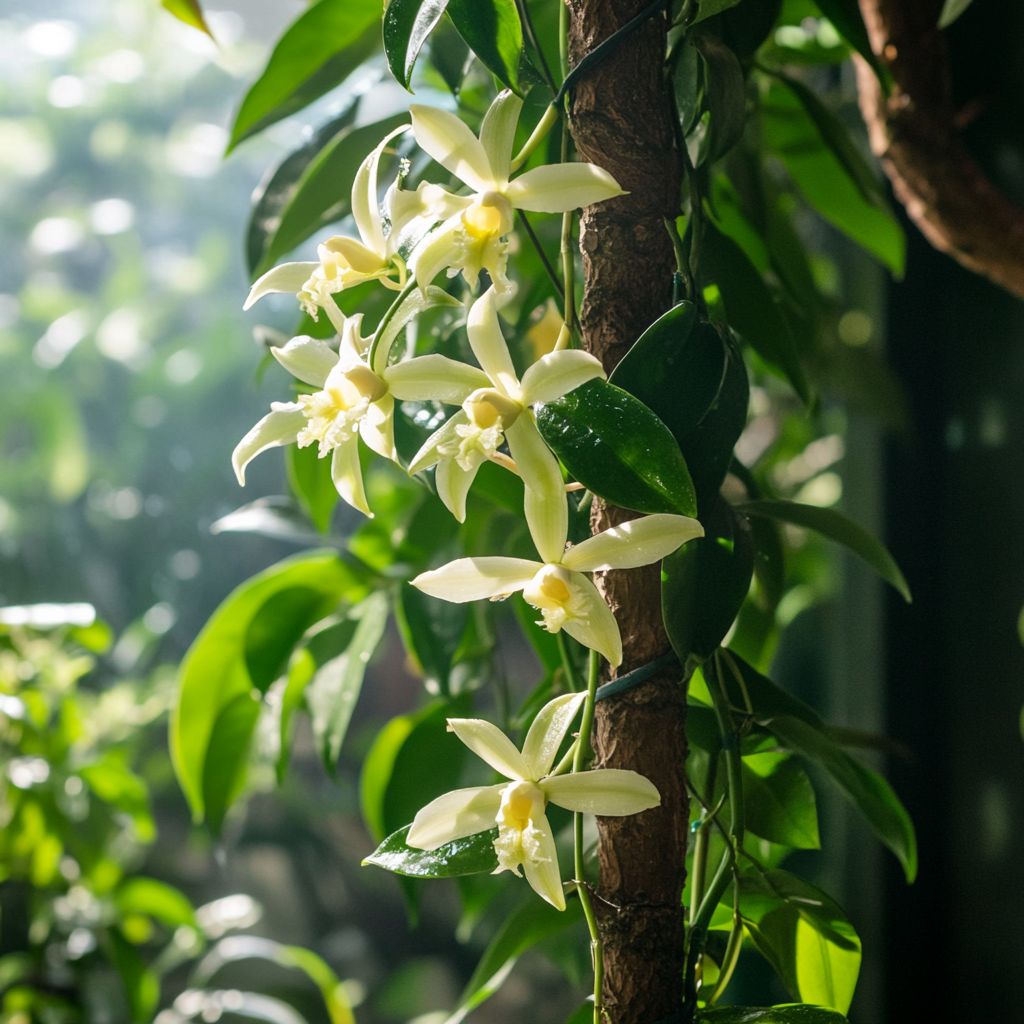
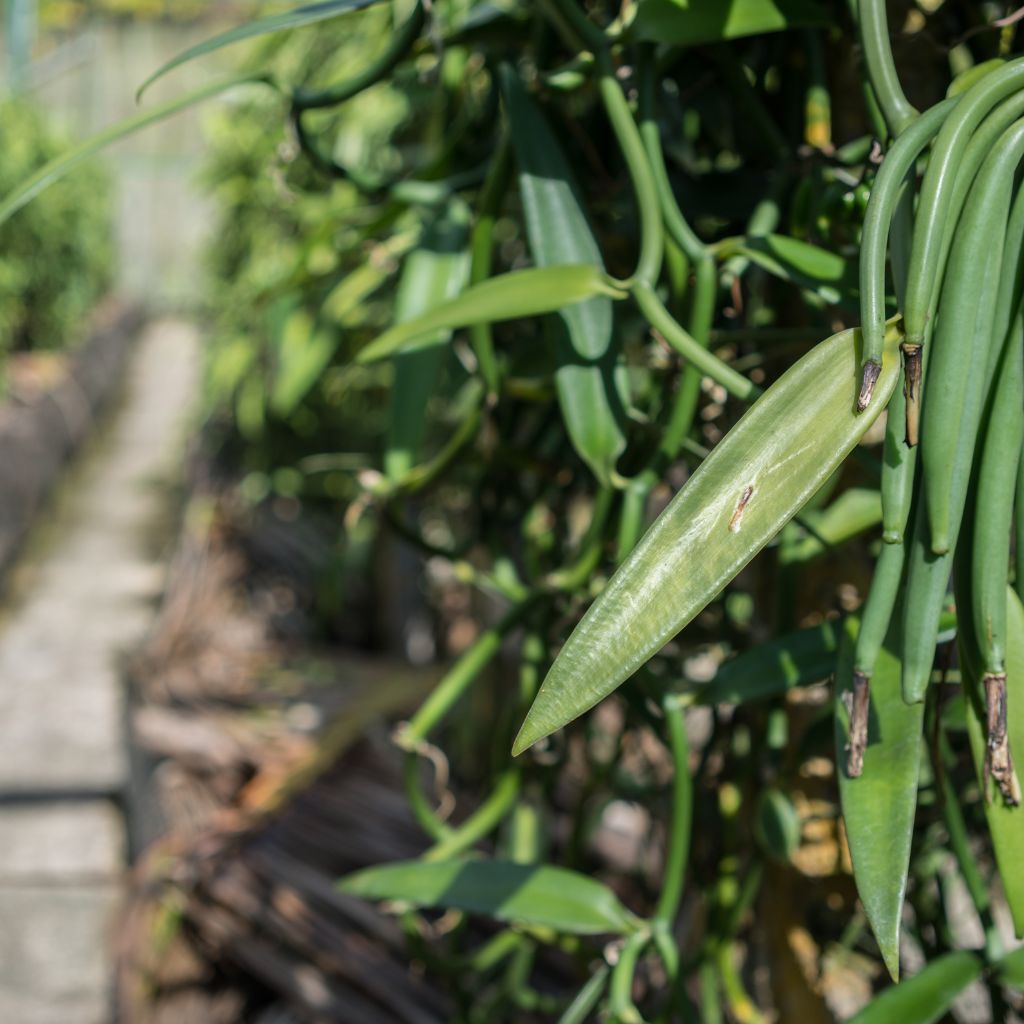
Harvesting and Curing Vanilla Beans
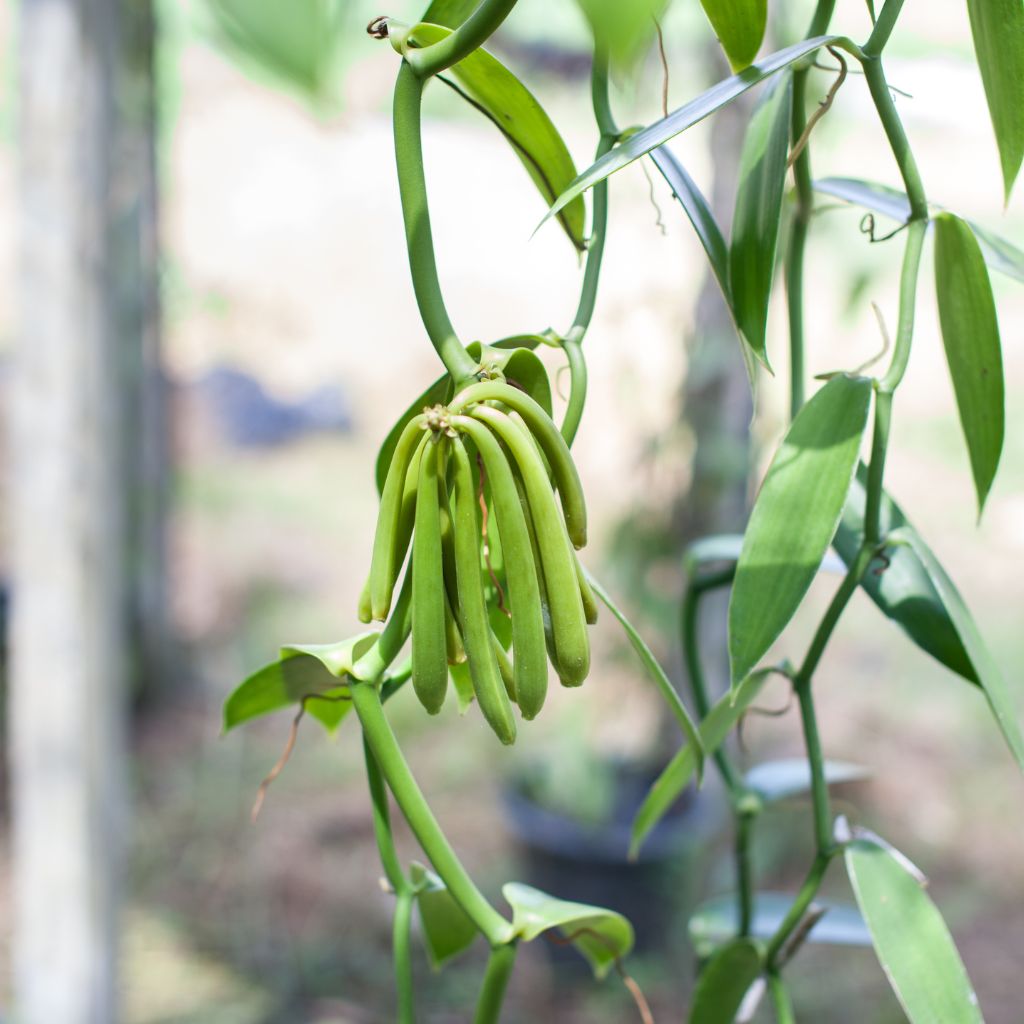
Growing vanilla beans takes time and patience, as the beans take about nine months to fully develop after pollination.
Once the beans are ready, they will turn a yellowish-green color and start to split at the tip. This is your sign that it’s time to harvest!
Harvesting
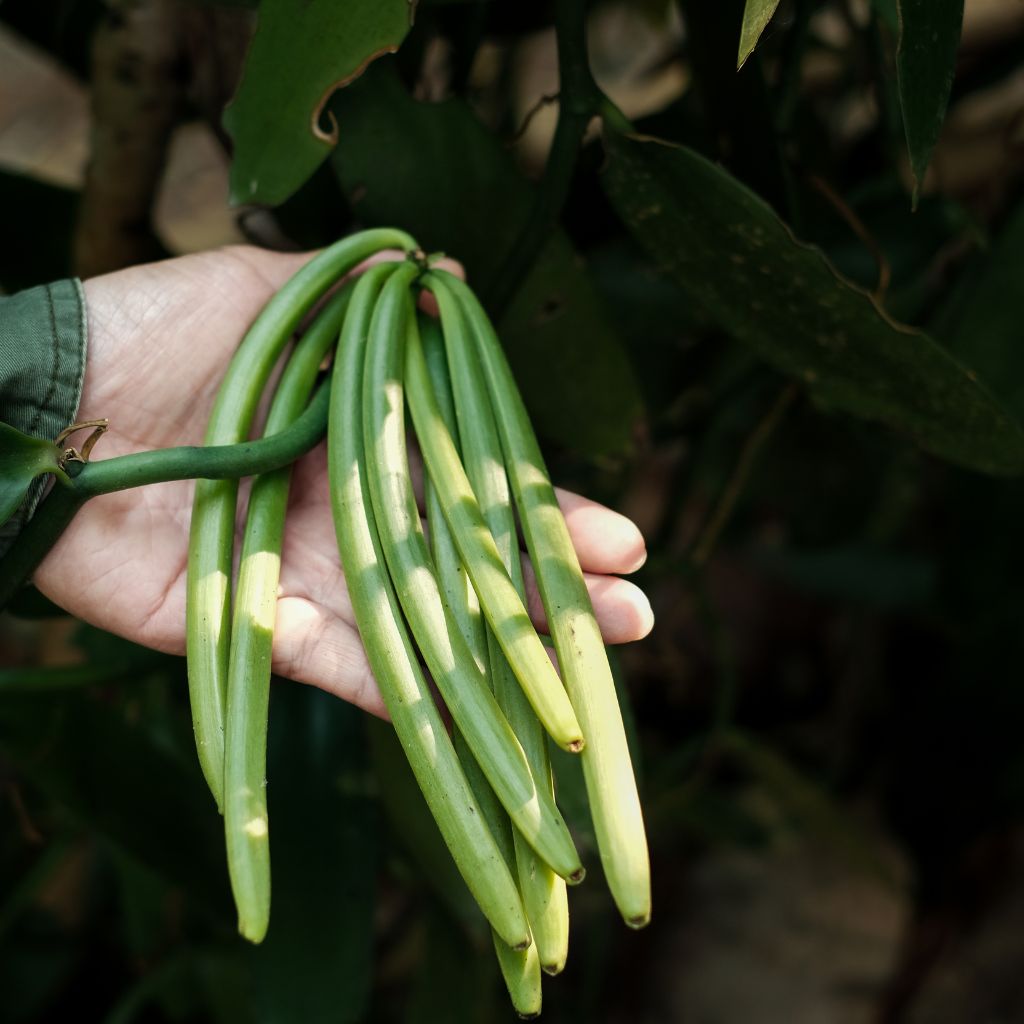
Cut the beans from the vine using sterilized scissors or pruning shears. Be careful not to damage the plant or any developing beans. Vanilla beans are not yet aromatic when they’re harvested; the flavor comes from the curing process.
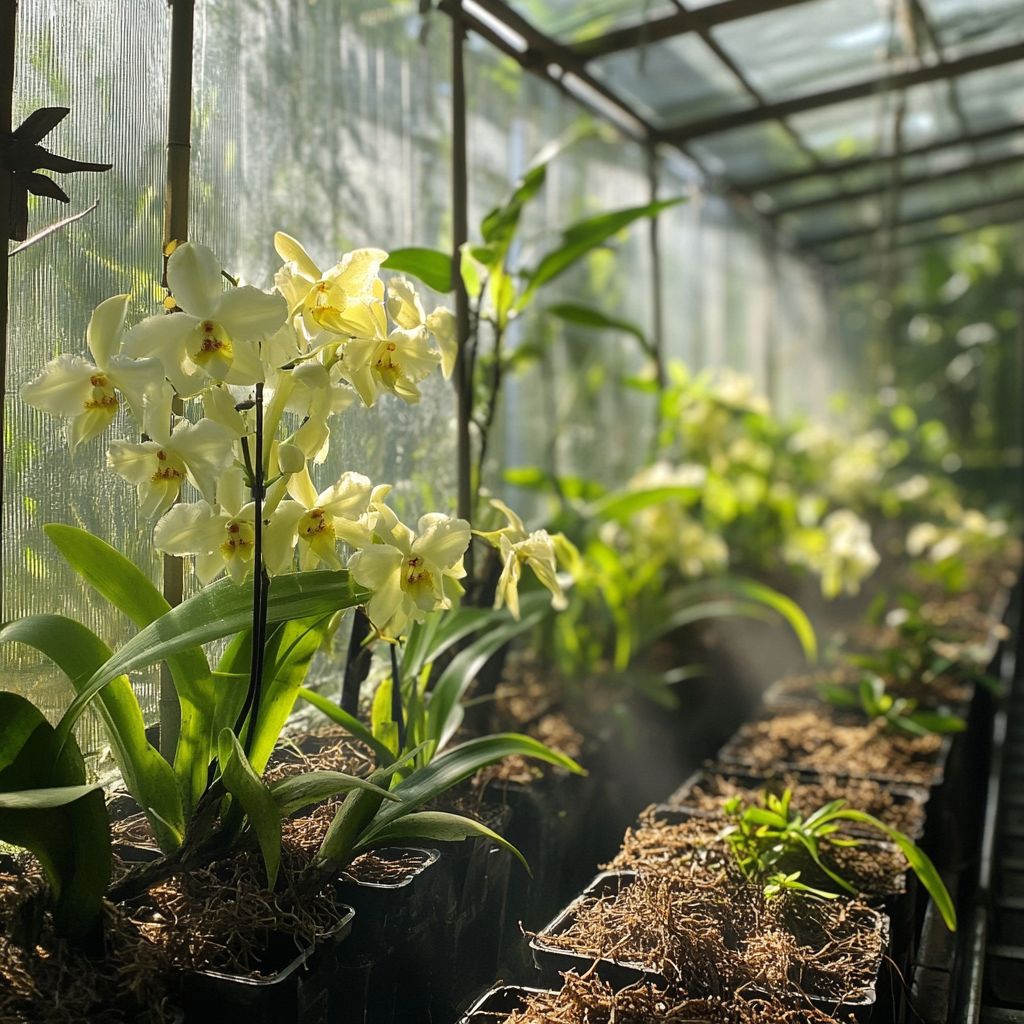
Curing Vanilla Beans
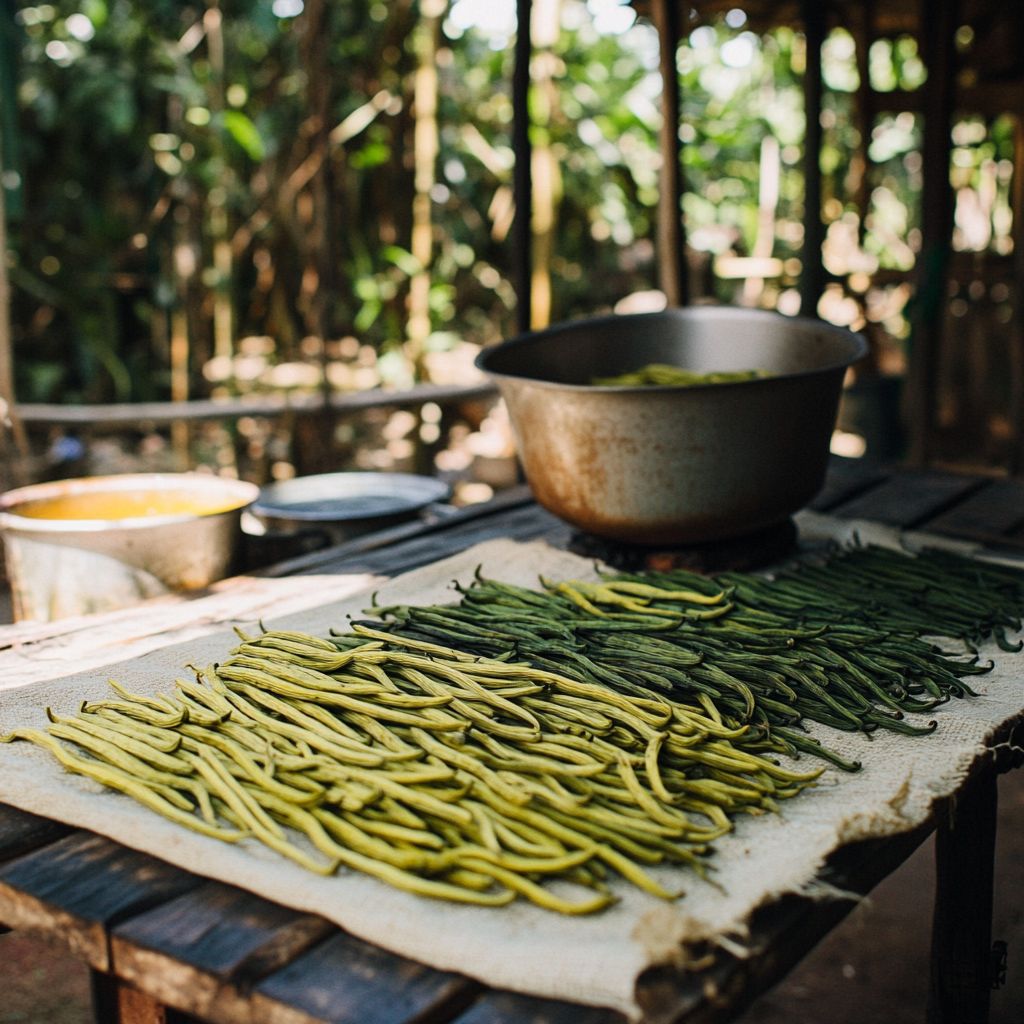
Curing vanilla beans is an art in itself. This process brings out the bean’s rich, complex flavor and ensures a long shelf life. Here’s a basic method for curing vanilla beans at home:
1. Blanching: Boil a pot of water and submerge your freshly harvested beans in the water for about 2-3 minutes. This helps stop enzyme activity and kickstarts the curing process.
2. Sweating: Remove the beans from the water and wrap them in a towel or cloth. Place the beans in a warm, humid place (around 110°F) for about 24 hours. This encourages fermentation, which is essential for developing flavor.
3. Drying: After sweating, lay the beans out in a sunny spot to dry. Rotate them every day to ensure even drying. This can take several weeks, and the beans should become pliable and dark in color.
4. Storing: Once the beans are fully cured, store them in airtight containers, away from light and heat. Properly cured vanilla beans can last for years and will develop even richer flavors over time.
Troubleshooting Common Vanilla Orchid Problems

Like any plant, vanilla orchids can encounter issues during their growth. Here are a few common problems and how to solve them:
Yellowing Leaves: This could be a sign of overwatering or too much direct sunlight. Check your watering schedule and move the plant to a shadier spot if needed.
Root Rot: If the soil stays too wet, the roots can begin to rot. Make sure your potting mix drains well and reduce watering if necessary.
No Flowers: Vanilla orchids won’t flower until they’re mature, which can take several years. Ensure the plant has proper light, humidity, and nutrients to encourage blooming when the time is right.
Growing vanilla orchids and producing your own vanilla beans is a long and rewarding process.
With the right conditions, careful attention, and a bit of patience, you can enjoy fresh, home-grown vanilla in your kitchen.
Use your homemade vanilla beans in baking, infusions, or homemade vanilla extract, and savor the rich flavor that comes from a plant you nurtured from start to finish.
Vanilla cultivation is truly an art, and with a little bit of practice, you’ll be well on your way to becoming a master vanilla grower!