Transform your space with a DIY moss wall, an innovative and eco-friendly way to incorporate nature into your home. This indoor living art installation not only purifies the air but also adds a vibrant touch of greenery to your interiors. With the right materials and creativity, you can create a stunning and unique piece of art that reflects your personal style and enhances your environment.
1. Selecting the Right Moss
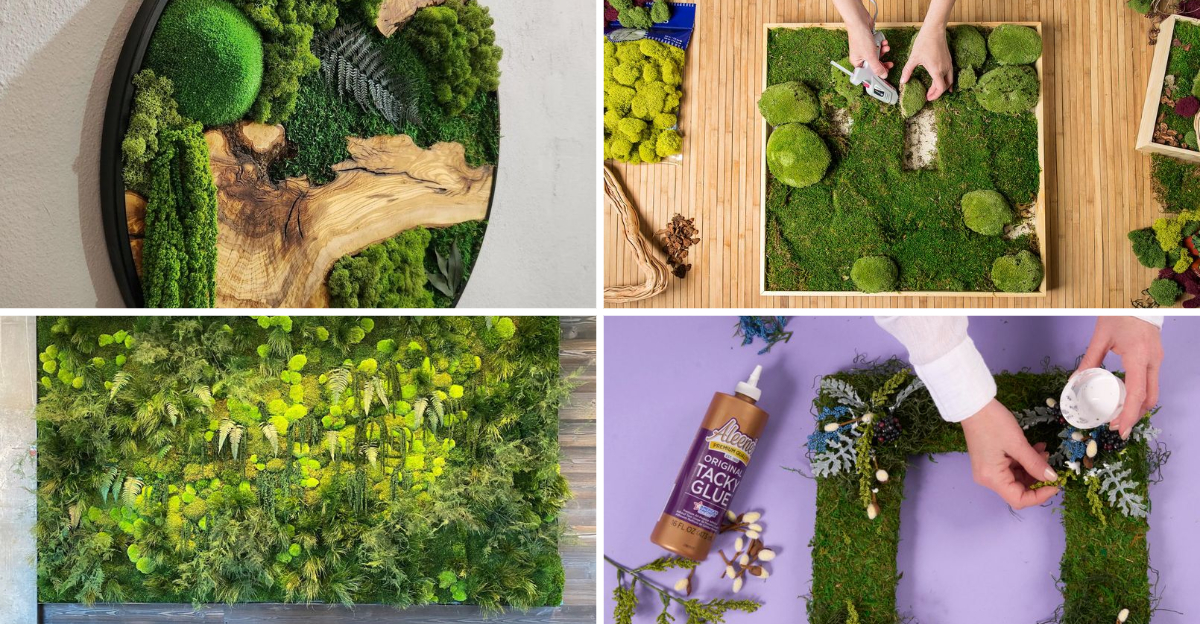
Choosing the right moss is essential for your living art piece. Consider the texture, color, and growth habits of different moss varieties. Sheet moss, for instance, offers a lush, carpet-like appearance. Reindeer moss adds texture with its branching structure.
Mood moss, on the other hand, provides a unique, bushy look. Each type has its own charm and can be used to create different effects on your wall. Ensure the moss you select is preserved, so it requires minimal maintenance, making it perfect for indoor use.
Did you know preserved moss maintains its fresh look without the need for watering?
2. Preparing Your Wall
Before you start your project, the wall needs to be properly prepared. First, select a suitable location that receives indirect light. Use a measuring tape and level to outline the area where your moss wall will go.
Mark the boundaries lightly with a pencil to guide your installation process. The surface should be clean and dry for optimal adherence. A smooth wall ensures the moss and any backing materials stick well.
Consider adding a backing board if your wall texture is uneven. This preparation step sets the stage for a successful installation.
3. Creating the Frame
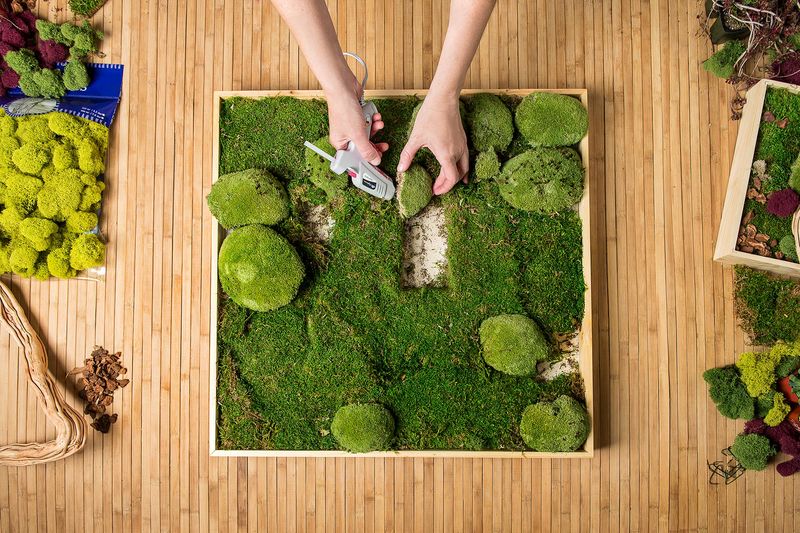
Building a sturdy frame is crucial for supporting your moss wall. Begin by measuring and cutting wood to fit the dimensions of your outlined area. Assemble the pieces with nails or screws to form a solid rectangle or square.
This frame will support the moss and any additional design features you may wish to include. Reinforce the corners for extra stability. You might also consider using reclaimed wood for an eco-friendly touch.
Adding a backing, like chicken wire or mesh, helps secure the moss in place. Now, your frame is ready to hold a masterpiece.
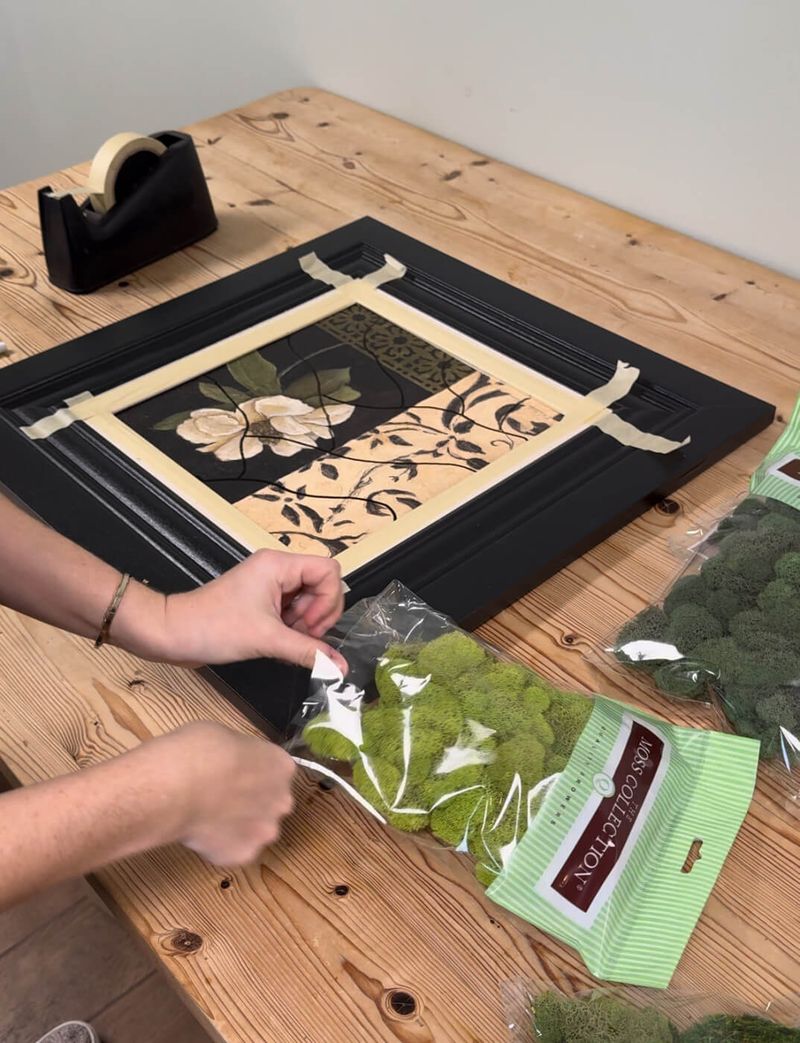
4. Applying Adhesive
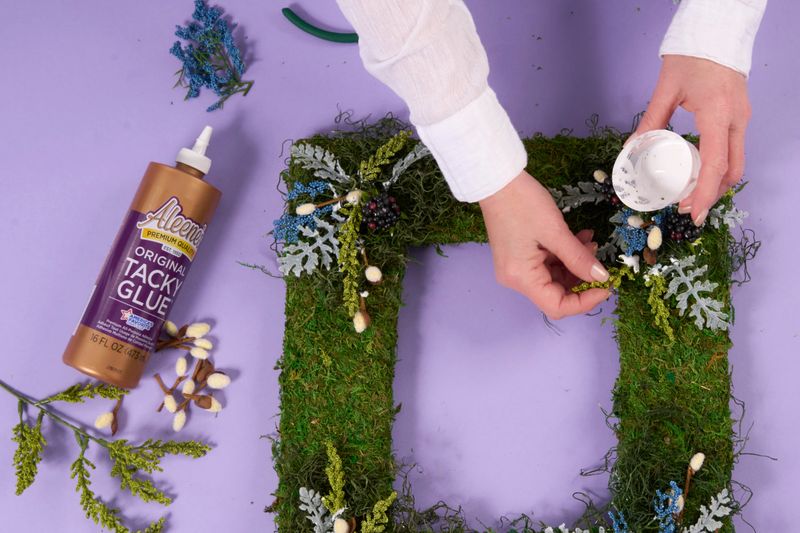
Secure your moss with the right adhesive. Choose a non-toxic glue that’s safe for indoor use and won’t harm the moss. Apply it evenly across the backing of your frame.
Ensure the glue covers all areas where the moss will be attached, providing a secure bond. This step is crucial for keeping your moss wall intact over time.
Use gloves to protect your hands and work in a well-ventilated area to avoid inhaling fumes. With careful application, your moss will stay firmly in place, creating a seamless and enduring art piece.
5. Arranging the Moss
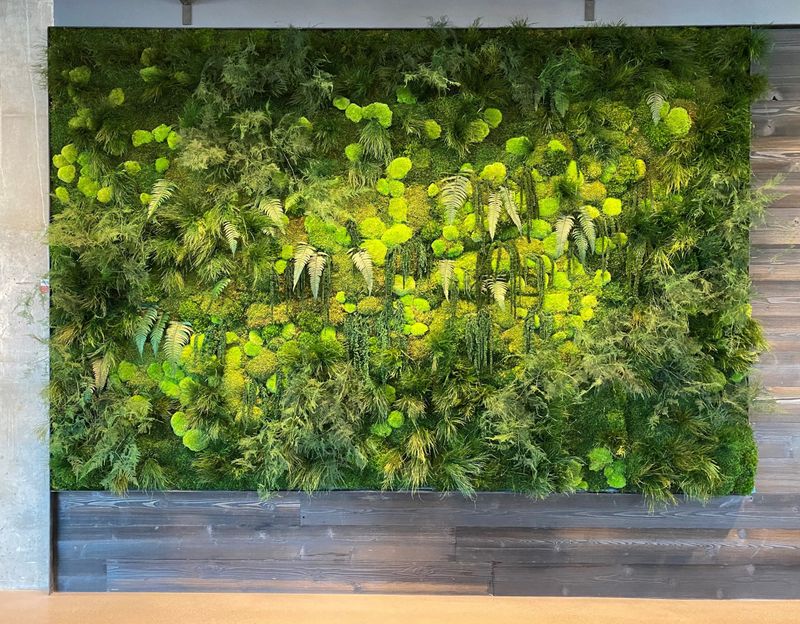
Arranging the moss creatively is where your artistic flair shines. Start by laying out larger pieces, like sheet moss, to form the base layer. Next, incorporate different moss types for texture and depth.
Balance is key; consider the color contrast and how the different mosses interact. Reindeer moss can add height and interest, while mood moss can fill gaps with its voluminous nature.
Step back occasionally to view your work from a distance, ensuring a cohesive and appealing design. Your creativity will bring your moss wall to life, making it uniquely yours.
6. Integrating Additional Elements

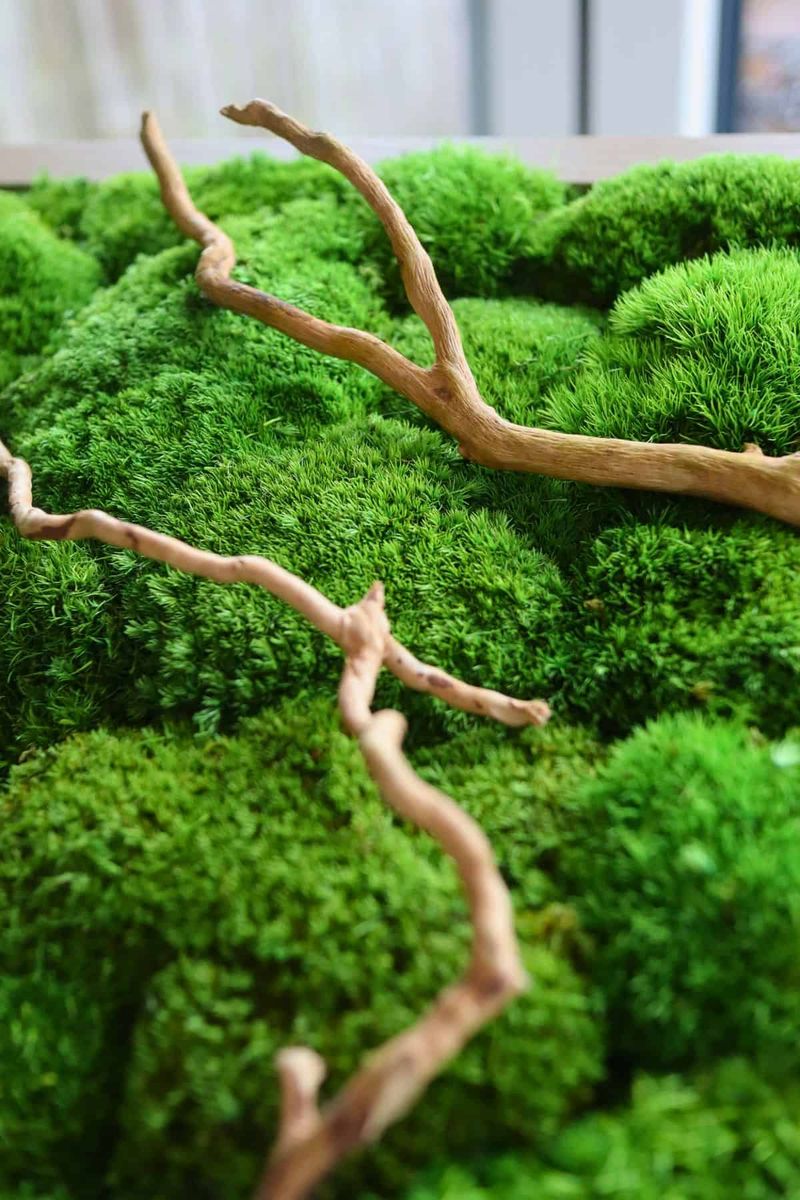
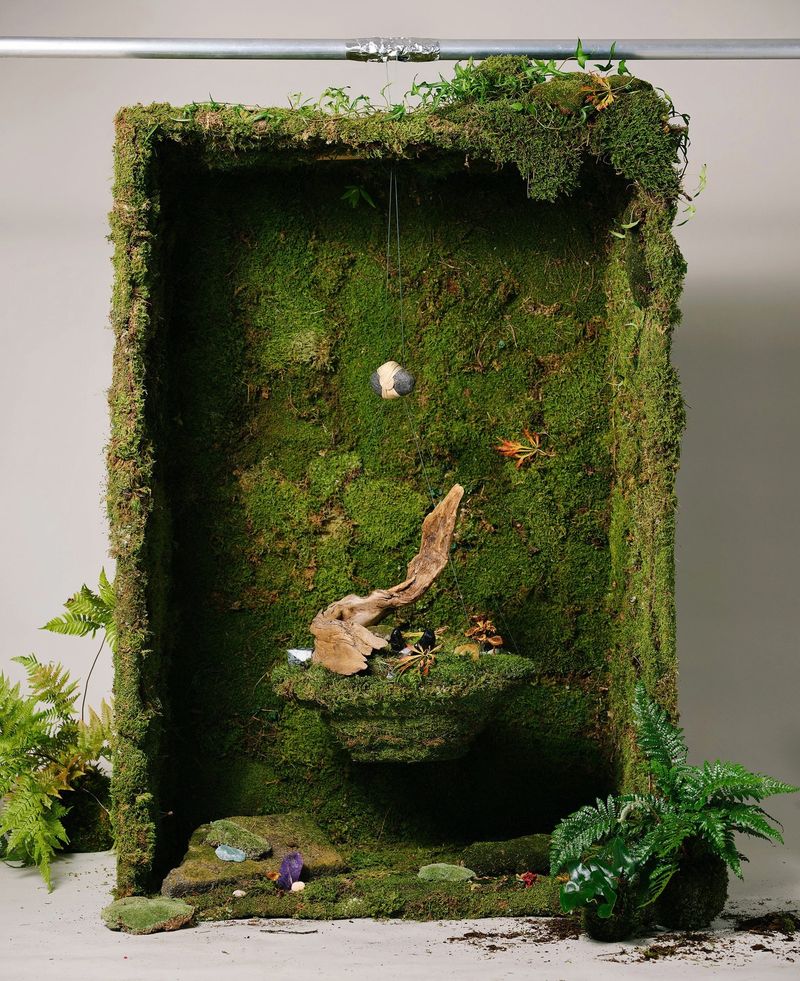
Elevate your moss wall by integrating additional elements. Consider adding natural items such as small stones, branches, or driftwood. These can enhance the organic feel and provide focal points within the moss.
Arrange these elements thoughtfully to complement the moss without overshadowing it. Natural accents add variety and interest, making your wall more than just a flat surface.
Experiment with placement and combinations to find what resonates with your personal style. This step allows for customization, ensuring your moss wall is a true reflection of your artistic vision.
7. Maintaining Your Moss Wall
Keeping your moss wall looking its best is simple with minimal maintenance. Since preserved moss doesn’t grow, it requires no watering. However, occasional cleaning helps maintain its vibrant appearance.
Use a soft brush or cloth to remove dust gently, being cautious not to damage the moss. Avoid direct sunlight, which can cause fading. If necessary, mist occasionally to add humidity.
This low-maintenance art form is perfect for busy lifestyles, offering a green touch without the hassle. Enjoy the beauty of nature effortlessly with a well-cared-for moss wall.
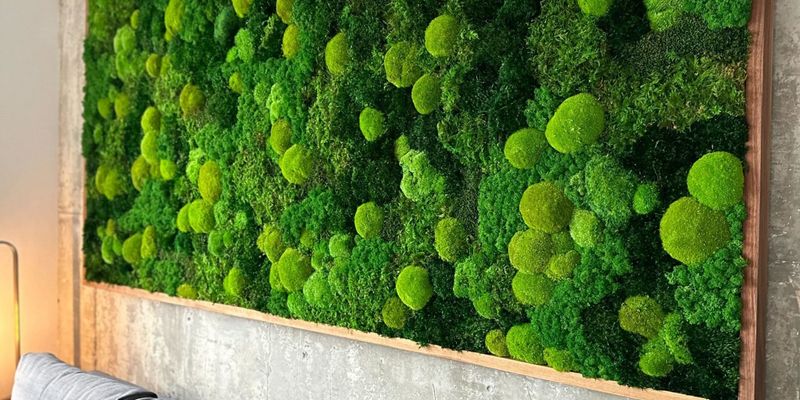
8. Choosing Color Varieties
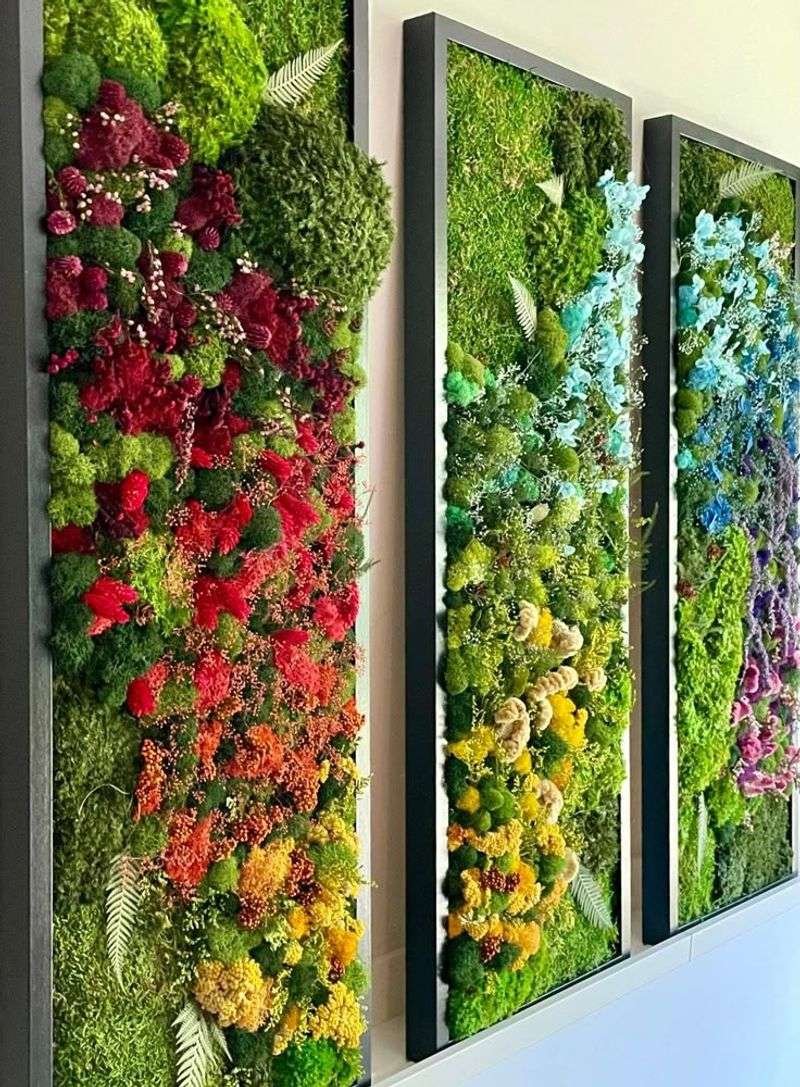
Enhance your moss wall by choosing a mix of color varieties. Different species offer shades from vibrant greens to silvery grays. Adding color diversity creates visual interest and depth.
Consider incorporating reindeer moss for its unique tones. This variation not only adds color but also texture, offering a distinct contrast to smoother moss types.
Experiment with color patterns. Group similar shades together for a gradient effect or scatter contrasting colors for a dynamic look. Your wall becomes a canvas, painting nature’s palette indoors.
9. Incorporating Natural Accents

Integrate natural accents to elevate your moss wall. Adding stones or twigs provides texture and an organic feel. This enhances the wall’s appeal beyond just the moss.
Small plants like ferns can be included for added greenery. Their presence offers movement and life, further enriching the wall’s visual dynamics.
These elements not only complement the moss but also reflect personal style. Whether rustic or modern, accents can be adapted to fit any aesthetic, making the wall uniquely yours.
10. Lighting Considerations

Lighting plays a crucial role in your moss wall’s appearance. Different lights can enhance the colors of the moss, making them pop or fade.
Consider using soft, ambient lighting for a soothing glow. This type of lighting highlights textures without creating harsh shadows.
For a dramatic effect, use spotlighting to focus on specific sections. This approach draws attention to intricate details and can transform the wall into an art piece after dark. Adjusting light intensity can change the wall’s mood entirely.
11. Fragrance Addition
Imagine a moss wall that not only pleases the eyes but also the senses with a gentle fragrance. Incorporate aromatic herbs like lavender or mint.
These scents are not only relaxing but also add an unexpected dimension to your wall. The aromas waft gently, providing a refreshing atmosphere.
Choose herbs that thrive in similar conditions to moss. This compatibility ensures longevity and minimal maintenance. The result is a multi-sensory experience that captivates all who encounter it.
12. Seasonal Themes

Keep your moss wall engaging by aligning it with seasonal themes. Use decorations that reflect the time of year.
For autumn, add fallen leaves and small gourds. In spring, incorporate budding flowers or pastel ribbons. These changes keep the wall dynamic and fresh.
Seasonal decorations can be easily swapped, allowing for quick updates. This flexibility makes the moss wall an ever-evolving element of your decor. It becomes a living representation of the changing world outside.
13. Textural Diversity

Introduce textural diversity to your moss wall with different moss types. Combining spiky, fluffy, and smooth textures can create a tactile wonder.
These contrasts not only add interest visually but also encourage interaction. Visitors may find themselves reaching out to touch the various surfaces.
Textural variety ensures that your wall isn’t just visually appealing but also engaging on a physical level. It becomes a sensory piece that invites exploration and adds depth to your indoor space.
14. Vertical Garden Integration

Take your moss wall to the next level by integrating it with a vertical garden. This combination allows for a diverse range of plants.
Include small flowering plants and succulents to add color and texture. The differing plant heights create a layered effect that’s visually striking.
This integration transforms the moss wall into a comprehensive living installation. It supports biodiversity and creates an oasis within your home. The blend of moss and varied flora brings a piece of the outdoors inside.
15. DIY Moss Wall Kits
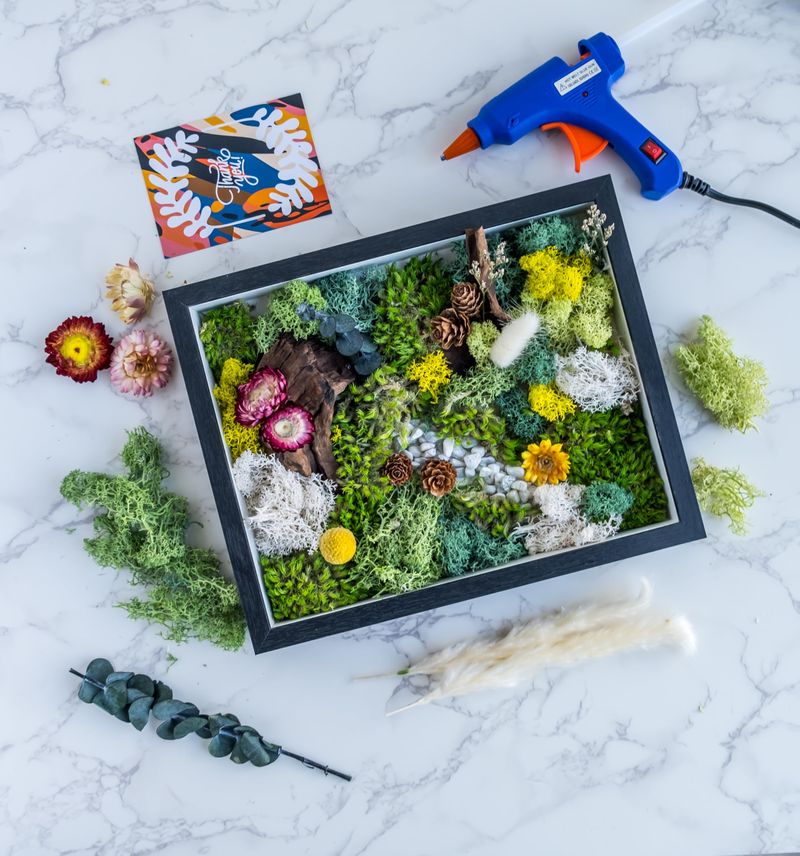
Starting a moss wall project can be simplified with a DIY kit. These kits provide everything you need, from moss and frames to tools and instructions.
They are ideal for those new to crafting or short on time. With step-by-step guidance, creating a moss wall becomes accessible to everyone.
The convenience of a kit removes the guesswork, allowing for a focused and enjoyable crafting experience. It’s a perfect way to explore creativity without the stress of sourcing individual components.