
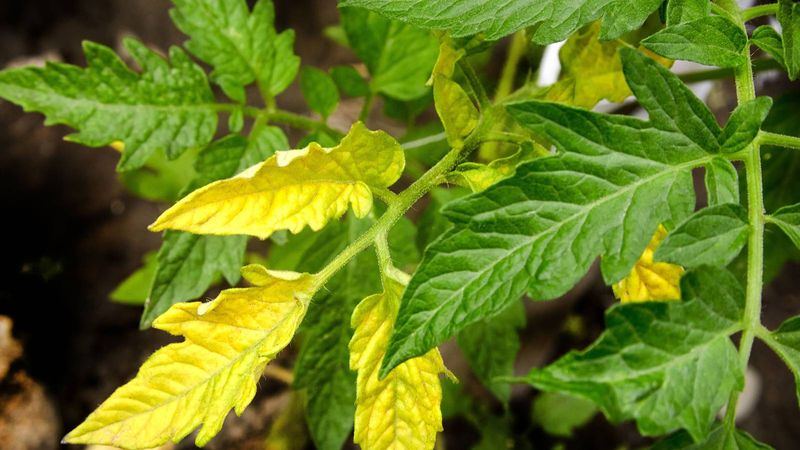
Watching your tomato plant’s lower leaves turn yellow during a heat wave is enough to make any gardener nervous. The good news is that yellowing older leaves often tell you something useful about what’s happening below the soil surface, not just on the plant itself. Understanding what the pattern means, and what it doesn’t prove, can save you from watering too much, fertilizing blindly, or reaching for a fungicide that won’t help. A careful look at the root zone, the leaf patterns, and the rest of the plant will point you toward the right fix.
Bottom-up yellowing tells you where to investigate first
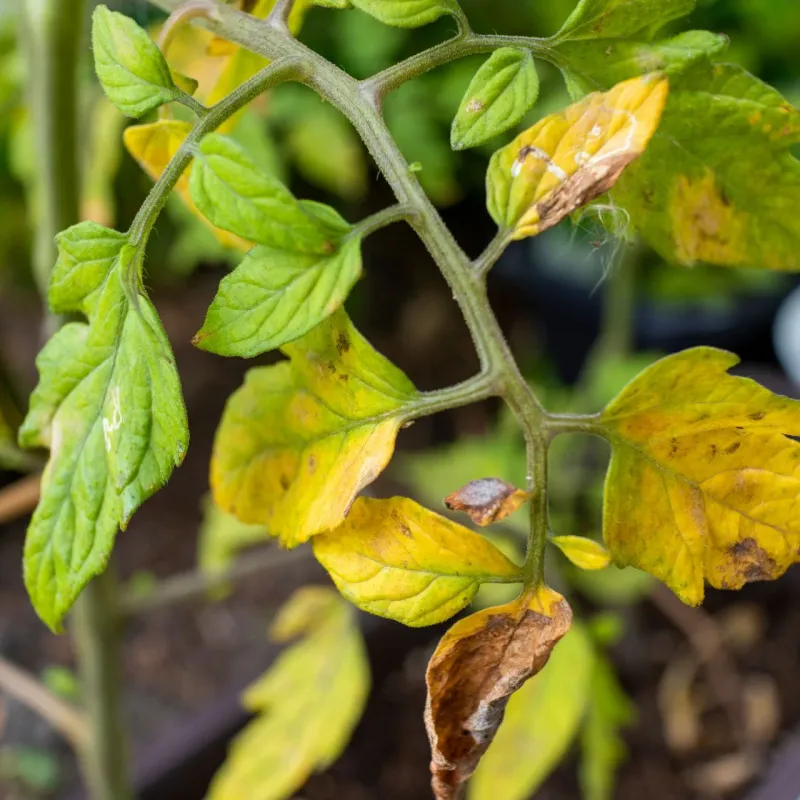
Older leaves on the lower portion of a tomato plant are often the first to show stress because nitrogen is a mobile nutrient. When the plant runs short, it pulls nitrogen from its oldest foliage and sends it upward to support new growth, so those bottom leaves fade and yellow before anything else changes. That biology makes the lower leaves a useful early-warning signal, but it doesn’t tell you what caused the shortage in the first place.
Symptom location is a starting point for investigation, not a diagnosis. University of Minnesota Extension guidance on fertilizing plants notes that nitrogen deficiency typically shows as a general pale yellowing beginning on older leaves, while UC Agriculture and Natural Resources points out that the same bottom-up pattern can appear with natural aging and shading when the upper canopy is otherwise healthy. Foliar diseases, vascular wilts, herbicide injury, and overwatering can all produce a similar picture.
Before drawing any conclusion, ask a few grounding questions. Is the yellowing broad and uniform across older leaves, or is it spotted, ringed, or interveinal? Does the whole plant look pale and stunted, or is new growth at the top still vigorous and dark green? Is the plant wilting, showing stem lesions, or continuing to flower and set fruit normally?
Penn State Extension recommends comparing the full symptom picture before acting, because the root zone deserves an early look without being assumed guilty.
Heat increases demand but does not diagnose the cause
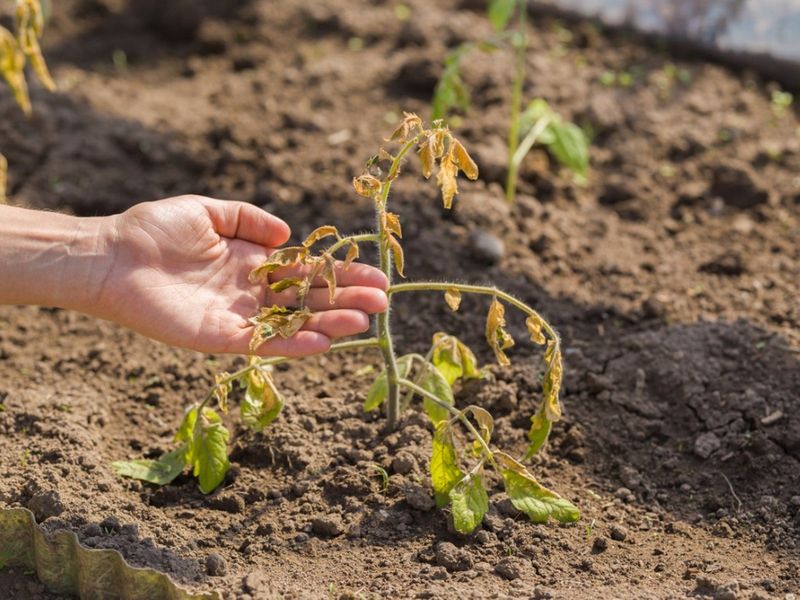
Hot weather raises the rate at which tomato plants lose water through their leaves, and that increased demand can expose a root system that was already marginal. Poor drainage, compacted soil, uneven watering, or a thin layer of roots from shallow irrigation can all become more obvious when temperatures climb. The heat amplifies an existing problem rather than creating a new one from scratch.
That distinction matters because heat produces its own recognizable symptoms that are different from uniform lower-leaf yellowing. Penn State Extension’s overview of heat stress in tomatoes describes inward leaf curl, flower drop, scorching at leaf margins, and reduced or misshapen fruit as the more typical heat responses. University of Minnesota Extension adds that plants can wilt even when soil moisture is adequate if roots are damaged and can’t keep up with water loss. If you see a wilted plant on a 95-degree afternoon, that alone doesn’t tell you whether the soil is bone-dry or waterlogged.
Checking the root zone before you respond is the key step. UGA Fulton County Extension on drainage problems explains that persistently wet soil can reduce root function just as severely as drought, so adding more water to a plant that’s already sitting in poor drainage can make things worse. Identify what the soil is actually doing before you reach for the hose or the fertilizer bag.
Check moisture and drainage several inches down
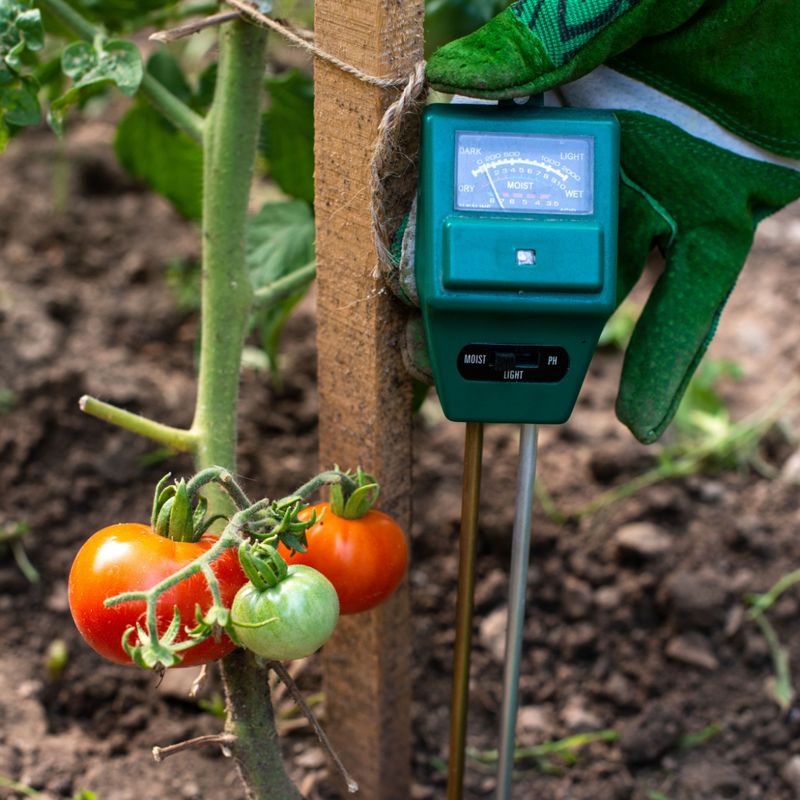
The surface of garden soil can look and feel dry within hours of watering, even when there’s still adequate moisture several inches down where the roots actually live. Judging soil moisture by the top crust leads to overwatering just as often as it leads to underwatering. Push your finger, a wooden dowel, or a soil probe at least three to four inches into the ground near the plant’s drip line before deciding whether to water.
University of Minnesota Extension’s tomato-growing guide recommends thoroughly soaking the root zone rather than watering shallowly and often, because shallow irrigation keeps roots near the surface where they’re more vulnerable to heat and drought. A general baseline of about one inch of water per week is frequently cited, but the UGA Commercial Tomato Production Handbook and UGA’s disease management guide for home vegetable gardens both emphasize that sandy soil, containers, wind, plant size, and recent rainfall all change the actual need. There is no single schedule that fits every situation.
Both extremes cause trouble. Soil that stays constantly wet reduces oxygen in the root zone, which impairs root function and opens the door to crown and root rots. Soil that swings between very dry and very wet stresses the plant and can contribute to nutrient-uptake problems. UGA Fulton County Extension on watering tomatoes recommends slow, deep watering at the soil line using drip irrigation, a soaker hose, or careful hand watering, and suggests watering in the morning when possible to reduce foliar wetness.
Avoid routinely splashing water on the leaves, because wet foliage encourages the foliar diseases that can also cause lower-leaf yellowing.
Root damage can block uptake even when water is present
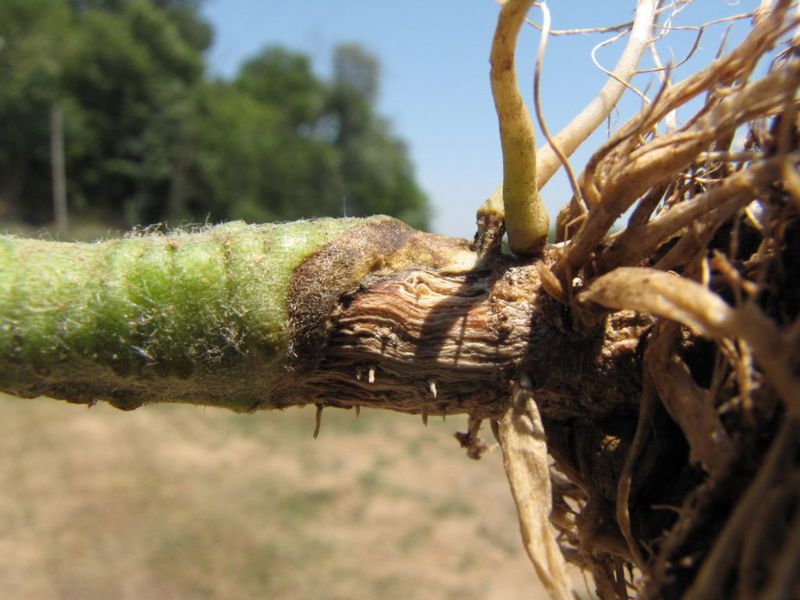
Roots can fail for reasons that have nothing to do with dry soil. Waterlogged conditions cut off oxygen to the root zone, compacted soil restricts root growth, physical injury from hoeing or transplanting can sever feeder roots, and soilborne pathogens can attack roots directly. In every one of those cases, a plant may wilt or show nutrient stress even when the soil around it is moist, because the damaged root system simply can’t move water and minerals upward fast enough.
Fusarium crown and root rot is one concrete pattern worth knowing. University of Minnesota Extension’s page on Fusarium crown and root rot describes a cluster of symptoms that includes lower-leaf yellowing, premature leaf drop, wilting that doesn’t recover overnight, brown stem lesions near the soil line, and visibly rotted or discolored roots. That combination is different from simple drought stress or a nitrogen shortfall, and adding fertilizer or water won’t reverse it.
UGA Extension’s drainage guidance and UGA Carroll County Extension’s tomato problem guide both point to poor drainage as a key contributor to root disease. Before compensating with more water or fertilizer, check whether the planting site drains freely after heavy rain, gently examine the stem base for lesions or soft tissue, and look at the roots if you can access them. Root problems need evidence, not assumption, before you choose a response.
Use leaf patterns to separate nutrients from disease
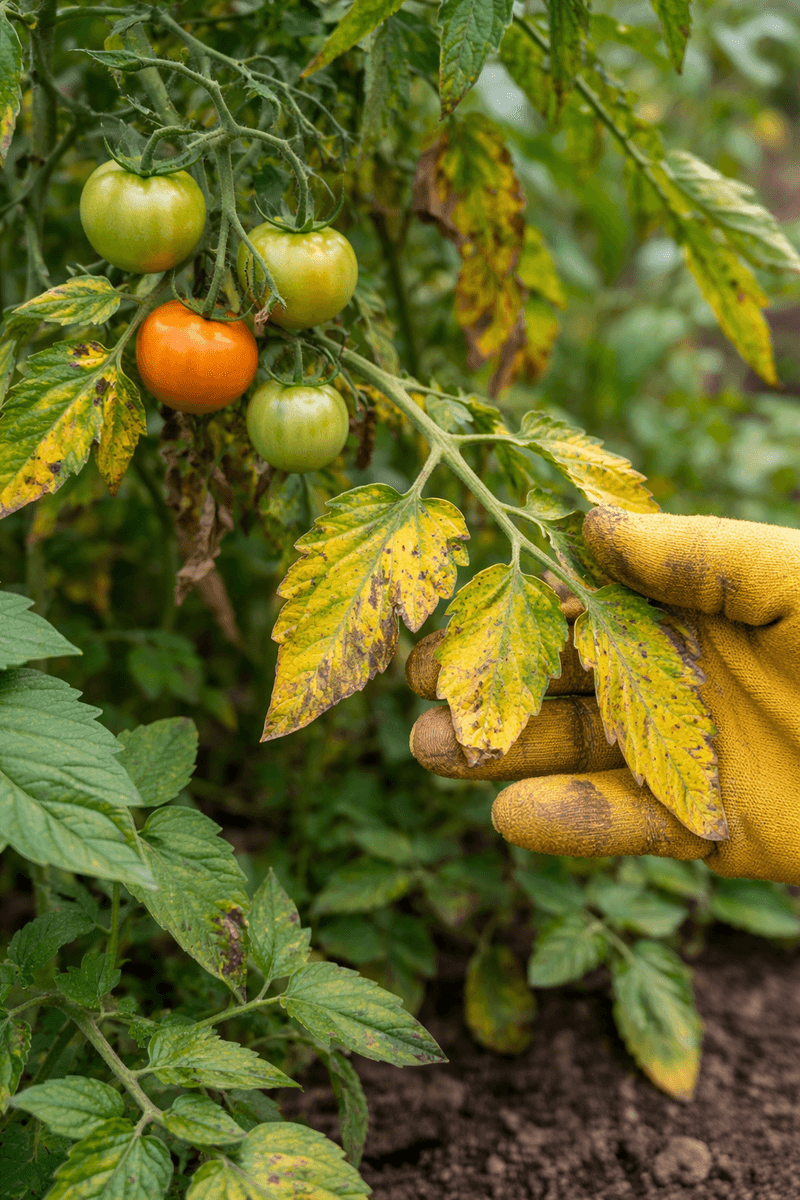
The shape and distribution of yellowing matter almost as much as which leaves are affected. Broad, even fading across an entire older leaf, without spots, rings, or dark borders, fits the picture of a nutrient issue more than a fungal one. When the whole plant looks generally light green, growth has slowed, and there are no distinctive lesions anywhere, nitrogen deficiency becomes a reasonable working hypothesis. University of Minnesota Extension’s fertilizing guide describes this pattern as a general pale yellowing that starts on older leaves and may move upward as the plant continues pulling nitrogen from aging tissue.
Foliar diseases produce a different picture. Penn State Extension’s tomato disease guide describes early blight lesions as brown spots with concentric rings, sometimes surrounded by a yellow halo, while University of Delaware Cooperative Extension’s leaf-spot fact sheet explains that Septoria leaf spot produces small, water-soaked spots that develop pale or tan centers with tiny dark specks inside. Both diseases commonly start on lower leaves, cause surrounding yellowing, and lead to defoliation if unchecked, but they require different responses than a nutrient deficiency does.
Other nutrient patterns can look similar enough to cause confusion. Iron deficiency more often shows up as yellowing between the veins of young, upper leaves rather than older ones. Magnesium deficiency can produce an interveinal or speckled pattern on older leaves that may be mistaken for uniform yellowing at a glance. Ask Extension’s tomato yellowing Q&A cautions that nutrient symptoms overlap considerably, so visual diagnosis is provisional at best.
Confirm a suspected deficiency with a soil test before adding amendments.
Let the upper canopy and fruit refine the diagnosis
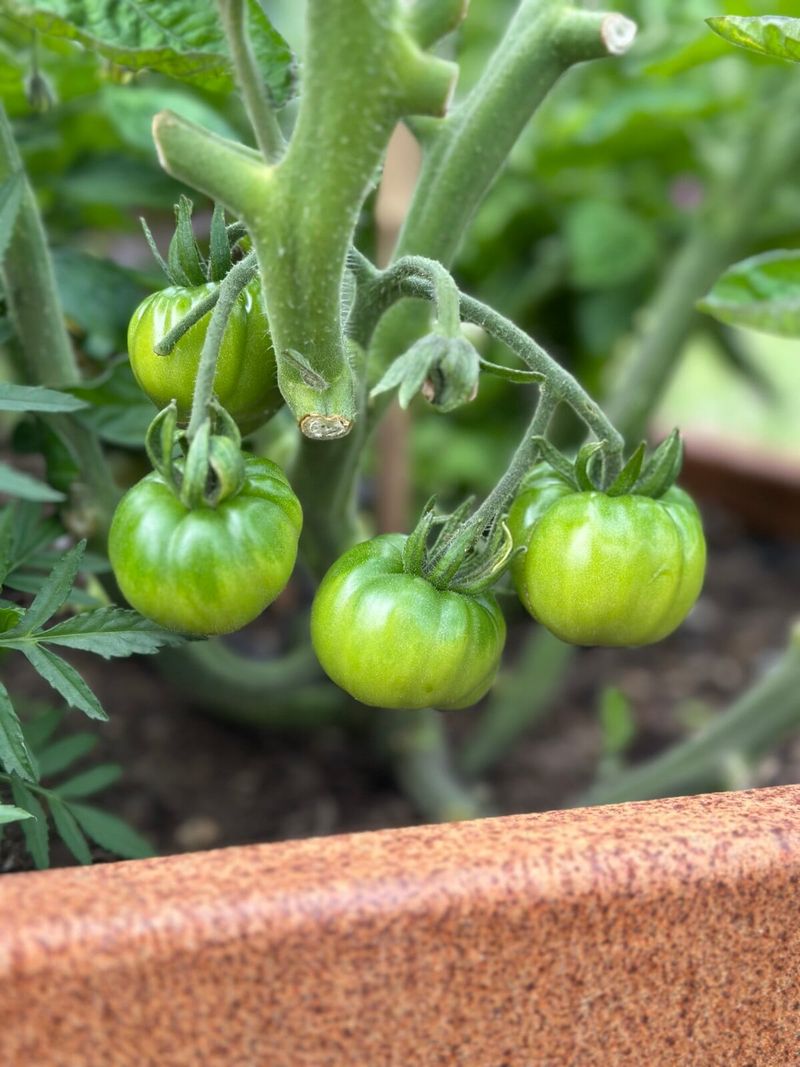
A few yellowing leaves near the ground mean something very different when the rest of the plant is thriving than when the whole plant looks pale and stressed. Checking the upper canopy gives you a second data point that either confirms or complicates what the lower leaves are suggesting. Vigorous new growth at the top, dark green color throughout the upper two-thirds of the plant, and normal fruit development are all signs that the plant’s core functions are intact.
UC Agriculture and Natural Resources notes that lower leaves can naturally decline as the plant grows taller and its own canopy shades the oldest foliage. If the upper plant is healthy, fruiting normally, and free of spots or persistent wilt, a few shaded lower leaves declining is a normal part of the plant’s life cycle rather than a crisis. University of Minnesota Extension’s tomato disorder page similarly describes physiological leaf roll, where leaves curl inward during heat and recover in cooler parts of the day, as a response that may not reduce yield at all.
Blossom-end rot sometimes appears alongside yellow leaves during hot weather, but the two problems don’t share a single cause. Penn State Extension’s blossom-end rot guide explains that the condition reflects inadequate calcium delivery to developing fruit, often connected to uneven moisture, root injury, excessive soil salts, or other stresses rather than a simple calcium shortage in the soil. Damaged fruit does not identify why the leaves are yellow, and treating one symptom won’t necessarily fix the other.
Make the smallest evidence-based correction
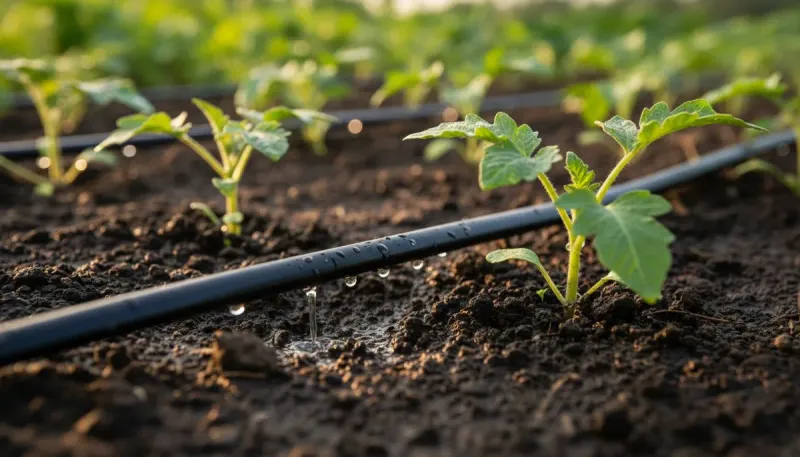
Once you’ve looked at the root zone, the leaf pattern, and the whole plant, start with the least invasive correction the evidence actually supports. If moisture is uneven, adjust your watering approach before anything else. UGA Fulton County Extension’s watering guidance recommends applying water slowly at the soil line using drip irrigation or a soaker hose rather than overhead sprinklers, because keeping foliage dry reduces the risk of foliar disease. Water in the morning when you can, and let the depth of soil moisture guide your timing rather than a fixed daily schedule.
Mulch is a practical companion to good watering. UGA Camden County Extension recommends a mulch layer of roughly 2 to 3 inches to reduce evaporation, moderate soil temperature, and limit soil splash that can spread foliar pathogens. Keep the mulch pulled back an inch or two from the stem so it doesn’t hold moisture against the crown. If drainage is poor, address that structurally rather than trying to compensate with less watering.
Fertilizer deserves caution. Oregon State University Extension and Penn State Extension’s seedling-to-fruit guide both recommend testing soil before making substantial fertilizer applications, because excess nitrogen can push leafy growth at the expense of flowers and fruit. University of Minnesota Extension’s container-plant guidance adds that nutrient imbalances can result from over-application just as easily as from deficiency. Reserve a complete vegetable fertilizer for situations where deficiency is confirmed or strongly suspected, and follow label directions.
Skip Epsom salt and eggshells as general remedies: University of Minnesota Extension’s review of popular soil additives finds no reliable evidence that either one corrects yellowing or prevents blossom-end rot without a confirmed deficiency. Fungicide belongs only where disease lesions have been identified, not as a precaution against yellowing with no visible pathogen signature.
Prune selectively and reassess the plant
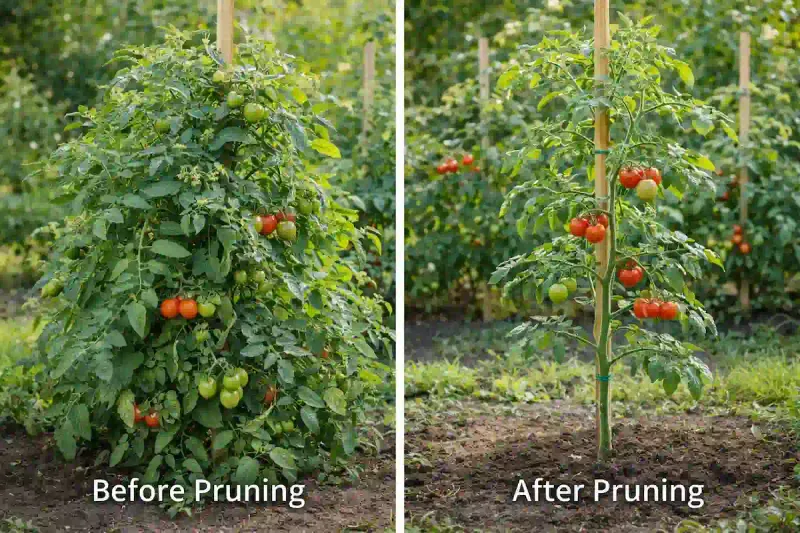
Removing yellow leaves feels productive, but stripping every discolored leaf off a struggling plant can do more harm than good. Leaves, even aging ones, still contribute to photosynthesis. Removing too many at once reduces the plant’s ability to feed itself and can expose fruit to sunscald. Penn State Extension advises limiting pruning to leaves that are clearly diseased, dead, or so deeply shaded they serve no function, and recommends removing no more than 20% of the plant’s total leaf mass at one time.
When you do remove diseased foliage, dispose of it in the trash rather than the compost pile. Most home compost piles don’t get hot enough to reliably kill fungal spores, so composting infected leaves can spread the problem next season. Disinfect your pruning tools between plants using a diluted bleach solution or isopropyl alcohol to avoid carrying pathogens from one plant to another.
After correcting moisture or drainage, give the plant a week or two before reassessing. Healthy upper growth with only a few shaded lower leaves declining points toward normal aging. Uniform pallor spreading upward with slow growth sends you back to soil and nutrient checks. Spots, stem lesions near the soil line, wilting that doesn’t recover overnight, or continued decline without improvement calls for a closer look at root health or a disease identification rather than an automatic fungicide application.
University of Minnesota Extension’s Fusarium guide is a useful reference if stem or root symptoms are part of the picture. Bottom-up yellowing marks where to start looking, not which answer to assume.