
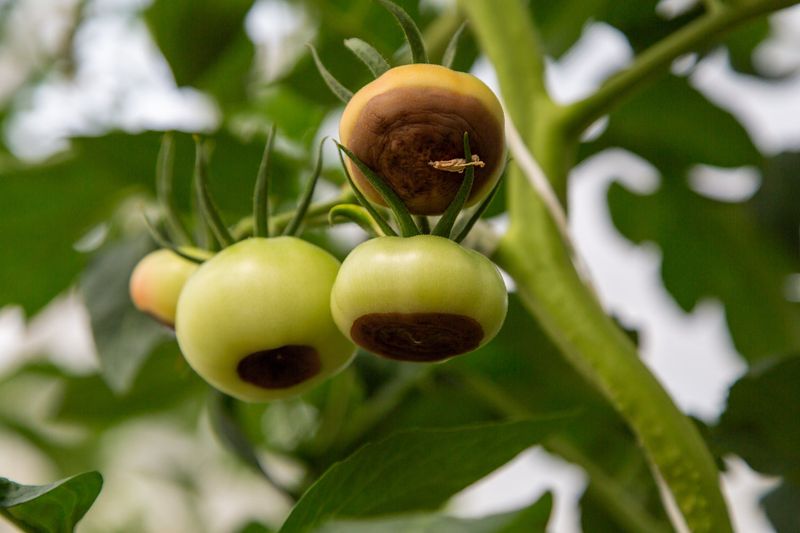
You walk out to check your tomato plants, and everything looks great above ground – full green leaves, sturdy stems, plenty of developing fruit. Then you flip a tomato over and find a dark, sunken patch spreading across the bottom. That damage is called blossom-end rot, and it is one of the most common and frustrating surprises in the summer vegetable garden. Understanding what is really happening inside the plant – and where to look first for answers – can save the rest of your harvest.
The fruit shows the symptom, not necessarily the source
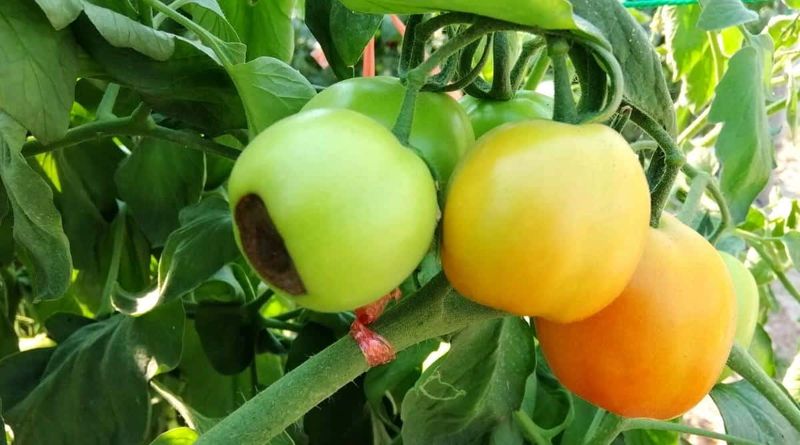
Blossom-end rot announces itself on the fruit in a very specific way. The damage begins as a tan, water-soaked, flattened patch on the blossom end – the bottom of the tomato, opposite the stem attachment point. Over time that patch darkens to brown or black, turns leathery, and sinks inward, sometimes covering a quarter or more of the fruit.
One reason this disorder catches gardeners off guard is that the rest of the plant can look completely normal. University of Minnesota Extension guidance on tomato disorders confirms that blossom-end rot affects developing fruit rather than functioning as a whole-plant infection, which explains why healthy green foliage and rotten fruit can coexist on the same vine. The leaves are doing their job; the problem is happening inside the rapidly growing fruit, where calcium is not arriving reliably.
Color alone does not lock in the diagnosis, though. Several other fruit problems can produce dark or sunken spots, so the location of the damage matters. A lesion squarely on the blossom end, without pink spores, without the pale papery look of sunscald, and without the corky scarring of catfacing, points strongly toward blossom-end rot. The affected fruit will not heal itself – once tissue breaks down, it stays damaged and can invite secondary fungal or bacterial decay.
That makes accurate identification the essential first step before deciding what to change in the garden.
Calcium reaches fruit through a working root-and-water system
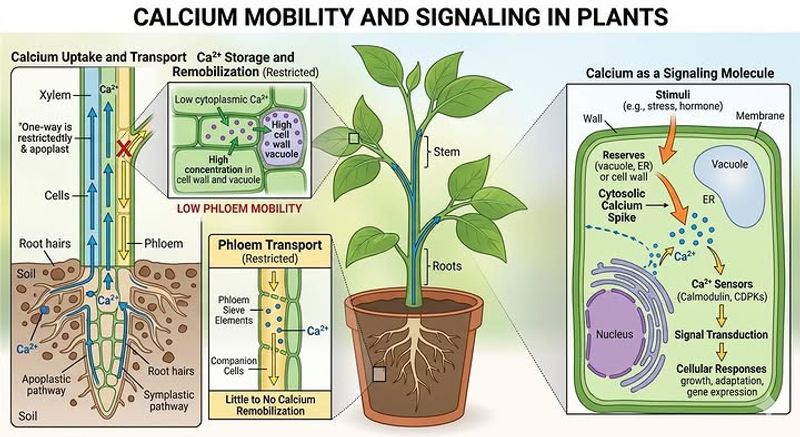
Calcium does not simply sit in the soil waiting for tomatoes to absorb it passively. Actively growing root tips take it up, and water carries it upward through the xylem – the plant’s internal plumbing – to reach developing fruit. When that delivery system is interrupted anywhere along the route, the fruit at the end of the line suffers first.
Several root-zone conditions can break the chain even when the soil contains plenty of calcium. Drought slows water movement and reduces uptake. Soil that swings repeatedly between bone-dry and saturated stresses roots and disrupts the steady flow that calcium transport requires. Waterlogged soil suffocates roots outright.
Excess salts in the soil draw water away from roots through osmosis, reducing uptake. Excessive vegetative growth – often triggered by heavy nitrogen fertilization – can redirect resources toward shoots rather than fruit, starving developing tomatoes of reliable calcium delivery.
Scientists continue to debate the exact sequence of events. A peer-reviewed reappraisal published in Scientia Horticulturae argues that low calcium in fruit tissue may be partly a consequence of stress-related cell damage rather than always its initiating cause. University of Georgia Extension research on blossom-end rot similarly notes that no single critical soil-moisture threshold has been established for prevention. The practical takeaway from that uncertainty is the same either way: reduce plant stress, improve water movement, and protect roots – because those steps address the most common disruptions to calcium delivery regardless of which comes first.
Inspect the root zone before buying an amendment
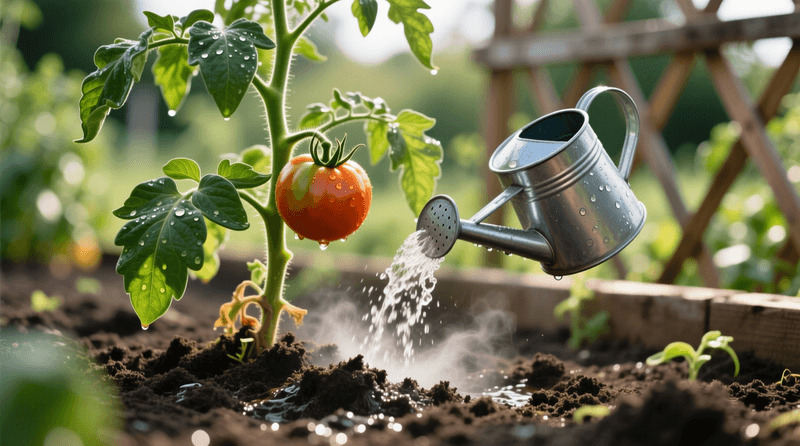
Before reaching for a bag of lime or a bottle of calcium spray, spend five minutes checking the actual conditions around your plant’s roots. Push a finger or a small trowel two inches below the soil surface. Bone-dry soil at that depth tells you the roots have been working under drought stress. Soggy, compacted soil that holds water long after rain points to a drainage problem that no amendment will fix on its own.
Also think back over the past few weeks. Has the soil been swinging between very dry and very wet? That kind of fluctuation is one of the most common triggers for blossom-end rot because it repeatedly disrupts the steady water flow that carries calcium to fruit. UMN Extension recommends checking for drought, alternating dry and saturated soil, poor drainage, compacted soil, and recent root disturbance as the first diagnostic steps – not a soil calcium test.
Root damage from transplanting or from hoeing too close to the stem is another overlooked factor. Injured roots simply cannot absorb water and nutrients as efficiently as healthy ones, and the effect shows up in the fruit before it ever appears in the leaves. Penn State Extension advises checking soil moisture about two inches below the surface before irrigating, which also gives you a chance to notice compaction or poor structure. Excess fertilizer salts can also interfere with calcium movement, so if you have been feeding heavily, that belongs on your inspection checklist too.
Match the remedy to the condition you actually find.
Steady moisture is the first management step
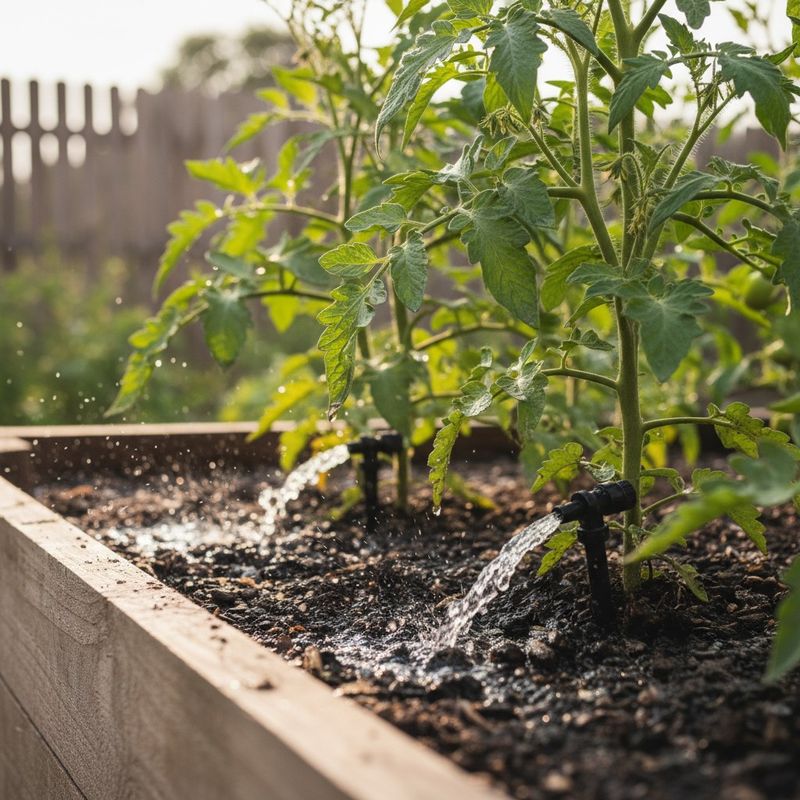
Once you have identified a moisture problem in the root zone, the correction is not to water more – it is to water more consistently. The goal is soil that stays evenly moist without sitting wet. Permanently saturated soil suffocates roots just as surely as drought does, and the swings between the two extremes are often worse than either condition held steady.
Penn State Extension gives a general reference of about 1 to 1.5 inches of water per week, including rainfall, as a starting point for in-ground tomatoes – but that number shifts with heat, soil texture, container size, and how much mulch you are using. Checking the soil two inches down before you water is more reliable than following a fixed schedule. Hot, sandy soil in a container may need attention every day during a heat wave; a clay-heavy raised bed after a rainy week may need nothing.
Drip irrigation or soaker hoses deliver water slowly and directly to the root zone, which tends to maintain steadier moisture than overhead sprinklers and also keeps foliage dry to reduce leaf disease risk. If you do water by hand, direct the flow at the base of the plant, preferably in the morning. UNH Extension guidance on managing blossom-end rot emphasizes that consistent moisture, rather than any specific daily schedule, is the management target. Finish by spreading 2 to 3 inches of seed-free straw or bark mulch over the root zone to slow evaporation and buffer temperature swings – just keep it pulled back an inch or two from the stem itself to avoid rot at the base.
More calcium is not automatically the answer
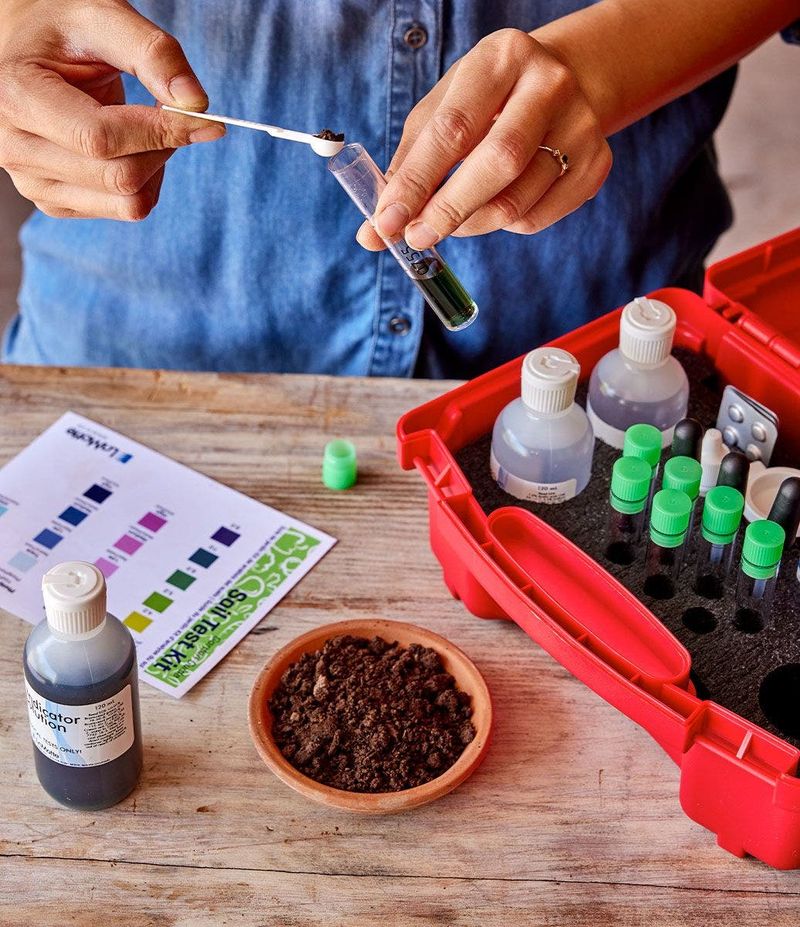
Plenty of gardeners see blossom-end rot and immediately reach for a calcium supplement, and that instinct makes sense on the surface. The disorder is linked to insufficient calcium in developing fruit, so adding calcium seems logical. The problem is that fruit-level calcium shortage does not automatically mean the soil is calcium-deficient. Many garden soils already contain more than enough calcium; the real bottleneck is delivery, not supply.
Adding lime, gypsum, or fertilizer without testing first can create new problems. Lime raises soil pH as well as supplying calcium, and applying it to soil that does not need a pH adjustment can lock out other nutrients. Gypsum supplies calcium without changing pH, which makes it a better choice when the soil is already at a good pH but a test shows genuinely low calcium – but it is still not a fix for a moisture or root problem. UMN Extension’s review of common soil-health home remedies explains that eggshells decompose too slowly to help during an active episode, and that Epsom salts supply magnesium rather than calcium – meaning they can actually worsen the problem by interfering with calcium uptake if used in excess.
Foliar calcium sprays are widely sold for blossom-end rot, but the evidence for their effectiveness is inconsistent. UGA Extension notes that calcium moves primarily through xylem water flow and that the fruit surface becomes less permeable as it develops, limiting how much a foliar spray can actually deliver. Existing affected fruit will not recover from a spray. Heavy nitrogen fertilization is another common overcorrection – if your plants are very dark green and producing lots of leafy growth, pulling back on nitrogen may help redirect the plant’s resources toward fruit rather than shoots.
Check the weather, crop load, and variety too
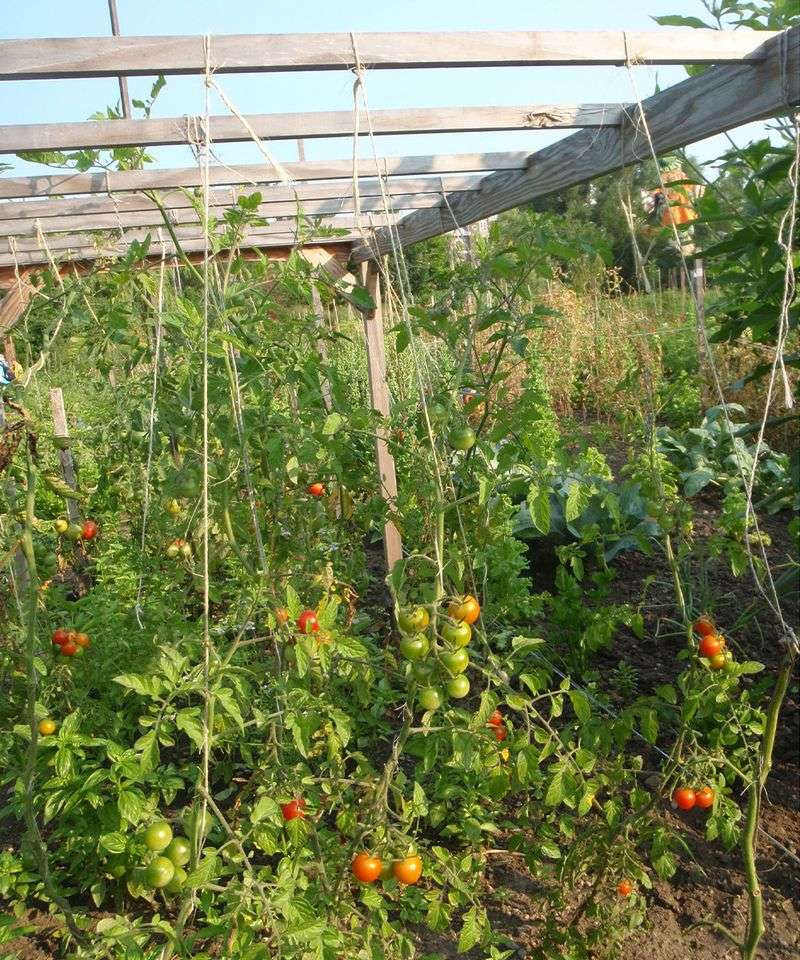
Root-zone moisture deserves the first look, but it is not the only factor worth examining. Several stresses that have nothing to do with your soil or irrigation habits can contribute to blossom-end rot, and understanding them helps explain why the problem sometimes appears even when you think you have been watering well.
High heat and intense sunlight accelerate water loss from leaves and fruit simultaneously, and when demand outpaces supply even briefly, calcium delivery to developing fruit can fall short. A heavy fruit load places competing demands on the plant’s resources. Rapid fruit expansion during warm weather can outpace the rate at which calcium arrives through normal water transport. Salinity – whether from over-fertilization, road salt, or naturally salty soil – can interfere with water uptake at the root level.
UNH Extension identifies heat, salinity, and rapid growth as contributing factors alongside moisture management.
The first fruit set on a plant tends to suffer most, and UMN Extension notes that later fruit on the same plant may develop normally once growing conditions stabilize. Larger slicer, plum, and pear-shaped varieties generally face more risk than cherry tomatoes or some round-fruited types, because their bigger fruit requires more sustained calcium delivery over a longer development period. Choosing a less susceptible variety can reduce your risk, but no cultivar is immune under severe enough stress. Think of variety selection as one layer of a broader strategy rather than a standalone solution.
Not every dark spot is blossom-end rot
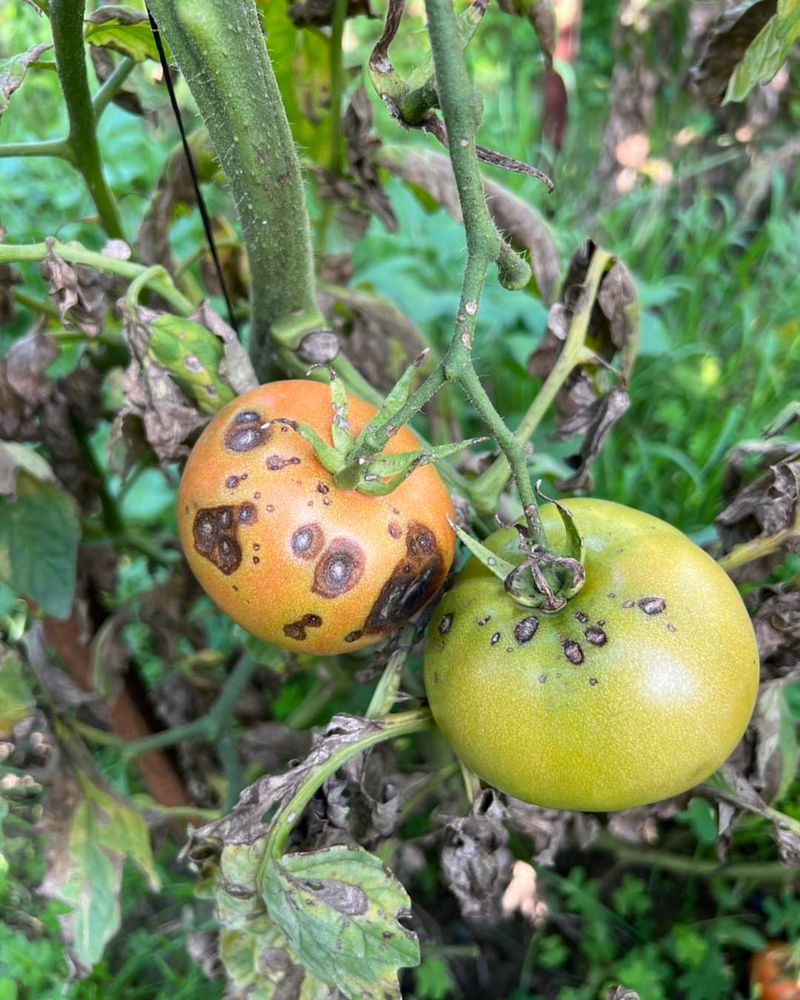
A dark spot on a tomato is not always blossom-end rot, and treating the wrong problem wastes time while the real one continues. Location, texture, ripeness, and what else is happening on the plant are the clues that separate blossom-end rot from several look-alike disorders.
Early blight and Alternaria fruit rot often begin near the stem end or on fruit that has been damaged, and they typically come with leaf symptoms – the dark, target-ring lesions on older leaves that most gardeners recognize. Anthracnose produces small, sunken, circular spots that tend to appear on ripe or nearly ripe fruit; under humid conditions you may notice salmon-pink spore masses in the center of the spots. Sunscald creates a pale, papery, almost bleached patch on whichever side of the fruit faces the sun directly – usually after foliage is removed or damaged. Catfacing produces irregular corky scars, puckering, and deformity at the blossom end, but without the characteristic dark leathery rot.
The UMN Extension tomato fruit-spot diagnostic guide walks through these distinctions with descriptions and images.
Getting the diagnosis right matters for treatment. Blossom-end rot is a physiological disorder, not an infectious disease, so fungicides and insecticides are not the appropriate response for a confirmed case. UGA Extension classifies blossom-end rot as an abiotic condition, meaning it has no pathogen to target with a spray. If fungal or bacterial symptoms are also present on leaves or elsewhere on the fruit, those deserve separate diagnosis and may warrant different management.
Use later fruit to judge whether conditions improved
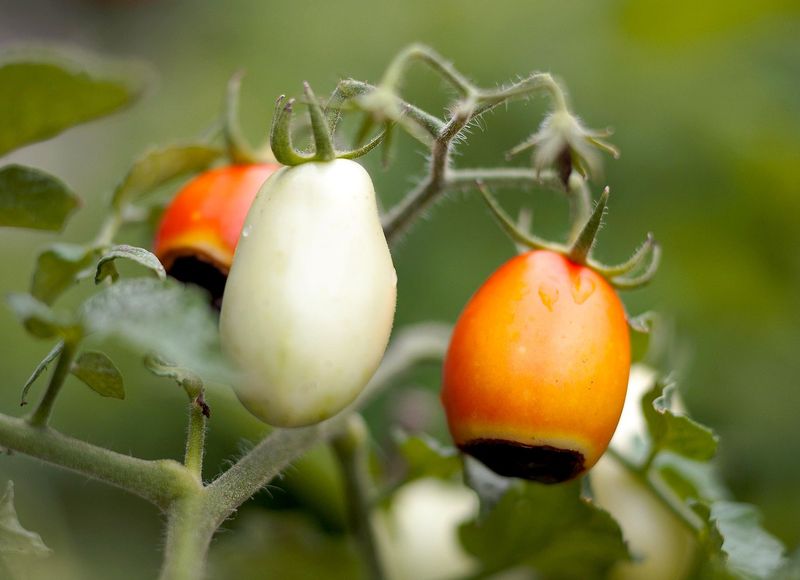
Badly affected fruit will not heal, and leaving it on the plant does not help. Remove tomatoes with large, leathery, or sunken lesions so the plant can focus its resources on developing fruit that still has a chance. Damaged tissue invites secondary fungal and bacterial decay, which can spread to nearby fruit if the rotting tomato stays on the vine or falls to the ground beneath the plant.
Fruit with only a small, dry lesion that has not developed soft rot or mold sits in a grayer area. Some extension guidance allows cutting away the affected portion and using the rest, but fruit showing extensive soft rot, visible mold, or a foul smell should be discarded. UMN Extension recommends removal of badly affected fruit as the safest general approach rather than trying to salvage every tomato with any sign of the disorder.
Protect the roots going forward by avoiding cultivation within 1 foot of the stem – hoeing too close is a surprisingly common way to damage the feeder roots that matter most for water and calcium uptake. Where compaction or poor drainage is a confirmed problem, correcting it now will pay off both for the remainder of this season and for future plantings. UNH Extension advises reassessing later-season fruit as the clearest signal that conditions have actually improved. If the next flush of tomatoes comes in clean, the root zone was the right place to start.
If problems continue despite stable moisture and protected roots, revisit heat exposure, crop load, and variety susceptibility – because the underground is a very good first place to look, not necessarily the last word.