
Cracked tomatoes are one of the most frustrating sights in a late-summer garden, especially when you have been waiting weeks for a fall crop to ripen. The good news is that a steady watering routine, backed by a layer of organic mulch, can lower the risk of those splits showing up in the first place.
This is not a one-time fix you apply in August and forget about, but a habit you build and maintain through the whole fruit-development period. Knowing why cracks happen and how to keep soil moisture steady gives you a real edge heading into fall harvest.
Cracking Signals a Rapid Moisture Shift, Not a Single Watering Mistake
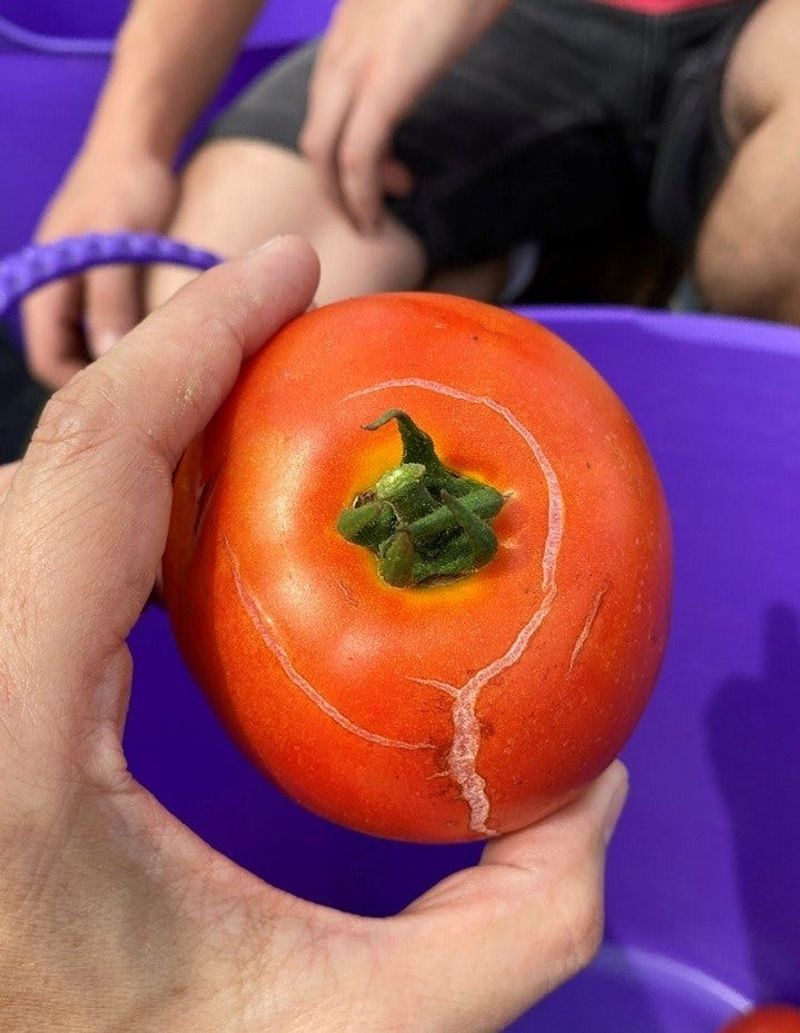
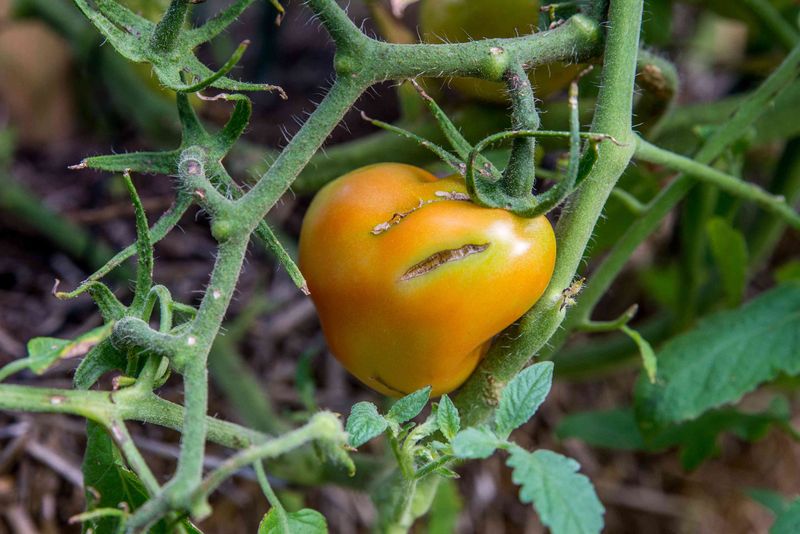
Radial cracks shoot outward from the stem end like spokes on a wheel, while concentric cracks form rings around the shoulders of the fruit. Both types show up when the tomato plant pulls in a sudden rush of water after the soil has been relatively dry, causing the interior flesh to expand faster than the skin can stretch.
The skin splits, and you are left with an opening that lets in fungal and bacterial decay organisms.
What makes this tricky is that the trigger is the swing in moisture availability, not simply the act of watering. Peer-reviewed research on fruit cracking in tomato points repeatedly to rapid changes in water supply during the fruit-expansion stage as the central cause, with cultivar genetics, heat, fruit maturity, and canopy condition all playing supporting roles.
Watering correctly reduces the size of those swings, but it cannot remove every variable that contributes to a split.
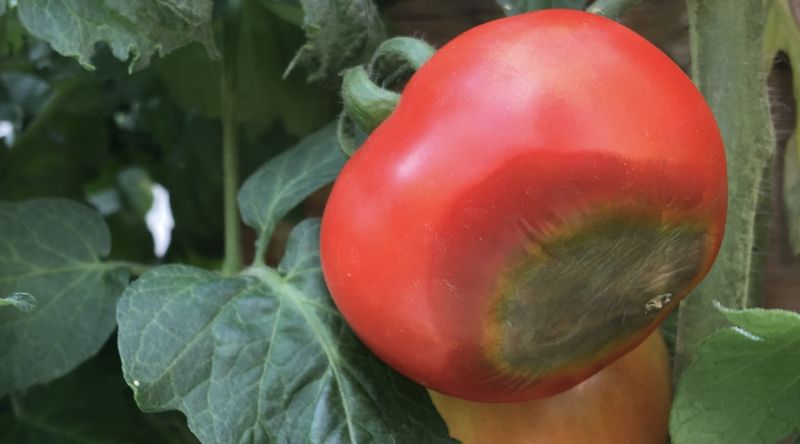
One disorder that sometimes gets confused with growth cracks is blossom-end rot. Penn State Extension’s guide to tomato diseases and disorders describes blossom-end rot as a dark, sunken, leathery lesion that appears at the blossom end of the fruit, not at the stem end or shoulders.
That distinction matters because the two problems have different causes and call for different responses. Growth cracks are primarily a moisture-fluctuation issue; blossom-end rot involves disrupted calcium movement, often following moisture stress.
Keeping root-zone moisture even through watering and mulch can meaningfully reduce cracking risk, according to NC State Extension’s home tomato guide. That said, no watering schedule eliminates cultivar susceptibility, a sudden downpour, or the rapid growth that hot weather can trigger.
The goal is risk reduction, not a guarantee of uncracked fruit.
Match the Routine to Your Region and Tomato Crop Stage
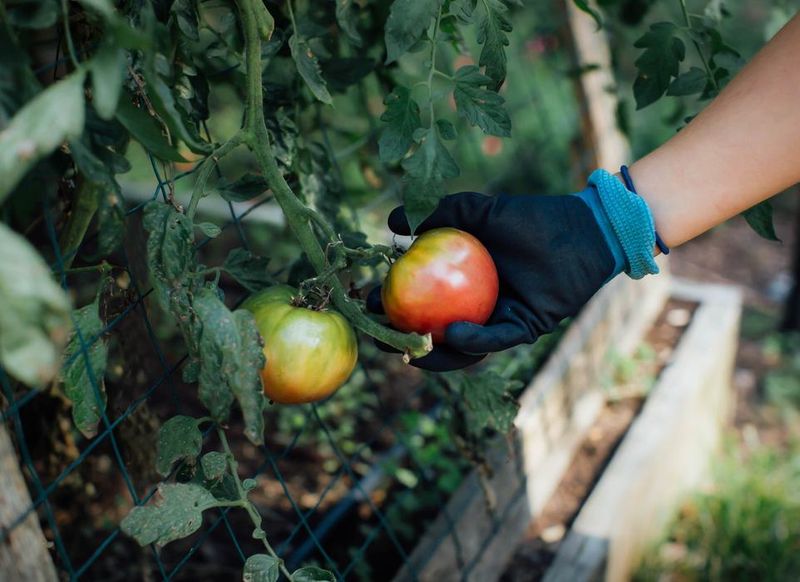
“Second-crop tomatoes” means something different depending on who you ask. For some gardeners it refers to newly transplanted fall starts set out in late July or August.
For others it means an existing plant that survived the summer and is now producing a later flush of flowers and fruit. A third possibility is succession planting, where a second round of transplants goes in after an early-season crop finishes.
The watering and mulching advice in this article applies to all three situations, but the heat exposure, planting dates, and harvest expectations differ enough that a one-size schedule does not fit everyone.
NC State’s Extension Gardener Handbook makes clear that fall planting dates shift across the state. Mountain gardeners typically transplant earlier in the summer to beat shorter frost windows, while Piedmont gardeners often target mid-to-late July through early August.
Coastal Plain gardeners may have a bit more flexibility into August because the first frost arrives later. August is therefore one possible period when a fall tomato might be establishing roots or beginning to set fruit, not a universal statewide deadline.
NC State’s Central North Carolina Planting Calendar illustrates how those windows are mapped for one part of the state. If you garden in the mountains or the Coastal Plain, check guidance specific to your region rather than assuming the central Piedmont schedule applies to you.
Heat adds another layer of complexity. UGA’s Commercial Tomato Production Handbook notes that consistently high nighttime temperatures can cause blossom drop, limiting fruit set even when soil moisture is well managed.
If your fall plants are blooming during a heat wave, you may see fewer fruits set regardless of how carefully you water, and that is worth knowing before you troubleshoot.
Water Deeply Enough to Keep the Root Zone Evenly Moist
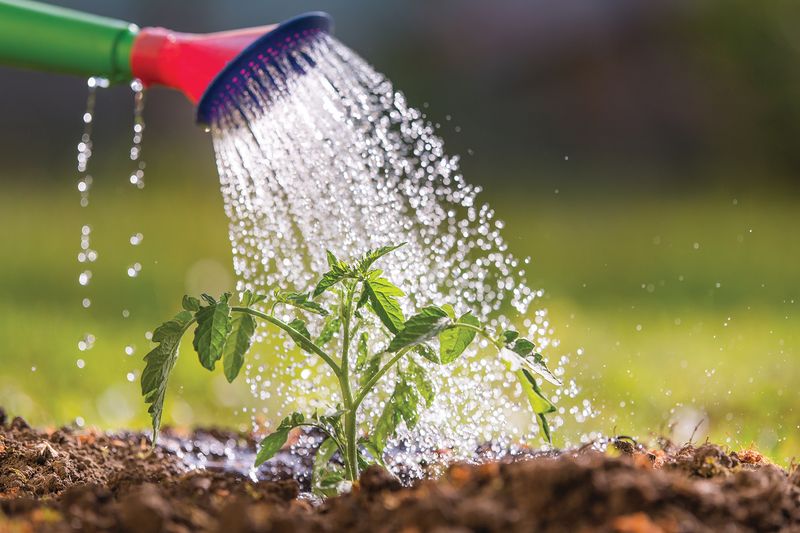
Shallow, frequent sprinkles keep the top inch of soil damp while leaving the main root zone dry. Tomato roots run deeper than that, and if the lower soil stays parched between waterings, the plant experiences a real moisture deficit even when the surface looks wet.
The goal is to wet the soil to roughly 6 to 8 inches deep at each watering session, which is where the bulk of the feeder roots are working.
NC State Extension recommends providing about 1 to 1.5 inches of water per week during fruiting, counting both rainfall and irrigation together. That figure is a practical starting point, not a rigid rule.
Sandy soils drain quickly and may need smaller, more frequent applications to keep moisture levels steady. Heavy clay soils hold water longer but can become waterlogged if you overdo it.
In either case, checking the soil before you water is more reliable than following a fixed calendar.
A simple check: push a finger or a narrow trowel blade about 2 inches into the soil near the drip line of the plant. If the soil feels dry at that depth, water thoroughly.
If it still feels moist, wait and check again the next day. The aim is evenly moist soil throughout the root zone, not saturated soil that sits wet for days.
University of Minnesota Extension’s irrigation guidance reinforces this principle: waterlogged conditions can harm roots and reduce a plant’s ability to take up water and nutrients, which is the opposite of what you want.
Container-grown tomatoes dry out faster than in-ground plants and may need checking daily during hot spells. Plants in full sun, large pots, or terracotta containers lose moisture especially quickly.
Smaller plants need less total water than large, heavily fruiting vines, so adjust volume as the season progresses.
The consistent thread across all these variables is the same: check the soil, water when needed, and stop before the root zone becomes saturated.
Use Organic Mulch to Slow Drying and Buffer Swings
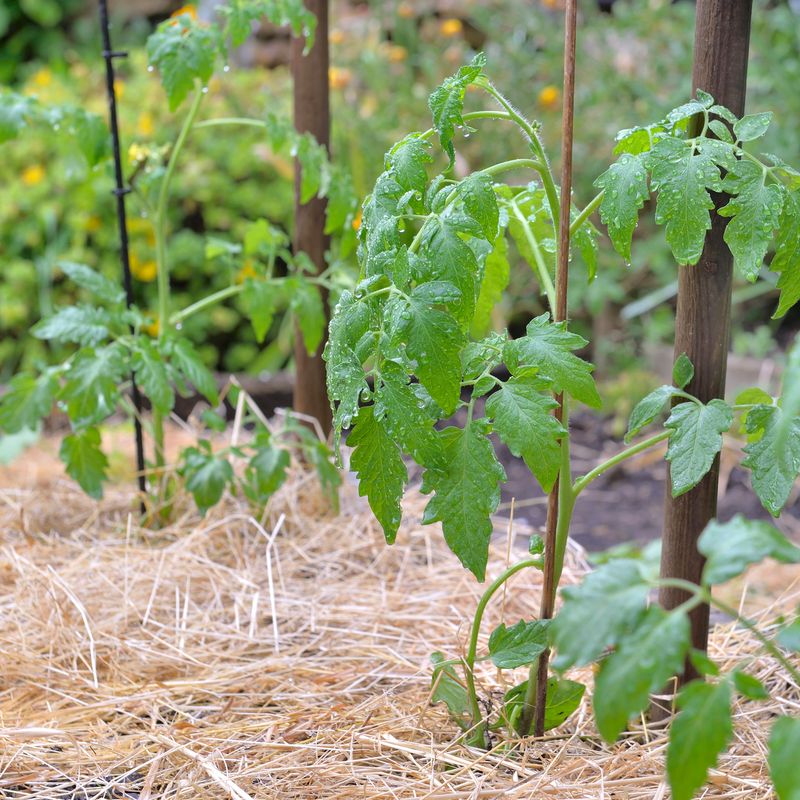
Bare soil loses moisture quickly in North Carolina’s summer heat, and every time the root zone dries out between waterings, you set the stage for the kind of dry-to-wet swing that encourages cracking. A layer of organic mulch acts as a buffer, slowing evaporation so the soil stays more evenly moist between irrigation sessions.
That steadier environment is exactly what you are trying to create.
Weed-free straw, pine straw, chopped leaves, and compost all work well. NC State Extension’s tomato guide supports mulching as a moisture-conservation practice, and a depth of about 2 to 4 inches gives you meaningful insulation without piling material so high that it stays persistently wet.
Finer materials like compost tend to compact and may need refreshing more often than coarser straw. Check the depth every few weeks and add more as the layer settles.
One detail that matters more than it might seem: keep the mulch away from the tomato stem. University of Minnesota Extension’s mulching guidance recommends leaving a clear gap around the base of each plant.
Mulch pressed against the stem can hold moisture against the bark long enough to encourage decay or disease, which is a problem you do not want to add on top of cracking concerns.
Before you spread mulch, assess the soil. If the ground is already dry, water thoroughly first so you are locking in moisture rather than sealing in a deficit.
Mulch applied to dry soil will slow wetting as well as drying, which delays the benefit.
Apply it after a good watering session or after a soaking rain, and the material will start working in your favor right away.
Prevent the Moisture Routine from Creating New Problems
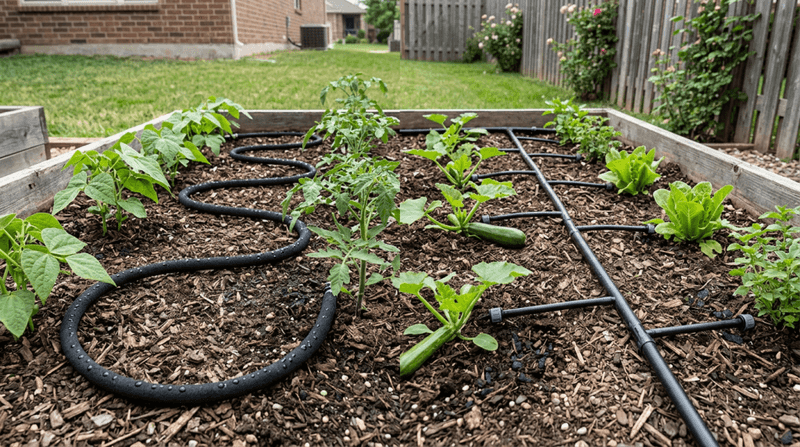
A well-intentioned watering and mulching routine can backfire if the execution is off. Poor drainage is the most common culprit.
Mulch reduces evaporation, but it cannot fix a bed that sits waterlogged after heavy rain. Roots sitting in saturated soil lose the ability to absorb water and oxygen efficiently, which stresses the plant in a different way and can contribute to the same moisture-uptake problems you were trying to prevent.
UGA’s tomato production handbook emphasizes that good drainage is a prerequisite for effective moisture management, not something mulch can substitute for.
How you deliver water also matters. University of Minnesota Extension’s tomato guide recommends applying water at the soil surface with a soaker hose or drip system rather than overhead.
Overhead sprinklers wet the foliage and fruit surface, and prolonged leaf wetness creates favorable conditions for fungal diseases like early blight and Septoria leaf spot. Soil splash from overhead watering can also move disease spores from the ground onto lower leaves.
Cracking is primarily a moisture-fluctuation problem, not a direct result of overhead watering, but reducing foliage wetness is still a sound practice that protects your plants from additional stress.
Canopy management is another area where well-meaning gardeners sometimes cause harm. Penn State Extension’s cracking guide notes that healthy foliage shields fruit from intense direct sunlight and moderates the temperature swings that can accelerate skin splitting.
Removing too many leaves at once, or losing foliage to disease, exposes fruit to conditions it was not hardened against.
Prune conservatively, focus on removing clearly diseased material, and try to maintain enough canopy to provide shade over the developing fruit cluster.
Account for Heat, Rain, Variety, and Fruit Exposure
Even a textbook moisture routine cannot fully account for what North Carolina weather does in late summer. Scattered afternoon thunderstorms are common, and one storm can drop an inch of rain on one side of a neighborhood while the garden two streets over gets almost nothing.
That kind of local variability means you cannot rely on a weather app or a regional summary to tell you whether your tomatoes received adequate water. Put a simple rain gauge in your garden and read it after every storm.
To give that point context without overstating it: a Central North Carolina climate summary, such as the National Weather Service August 2022 climate summary for central NC, illustrates how variable monthly totals can be from year to year, but it does not establish a statewide pattern. Your garden’s actual rainfall is the only number that matters for your irrigation decisions.
Variety genetics play a larger role than many gardeners expect. University of Minnesota Extension’s tomato fruit-crack diagnosis tool notes that large-fruited and heirloom types are generally more susceptible to cracking than smaller-fruited or crack-tolerant cultivars.
If cracking has been a recurring problem in your garden despite careful watering, variety selection is worth revisiting before next season.
Rapid fruit growth during hot spells, excessive nitrogen fertilization that pushes vegetative growth at the expense of steady fruit development, and direct sun exposure on fruit that has lost canopy cover all increase cracking risk beyond what moisture management can address. Penn State Extension recommends harvesting fruit at the breaker-to-pink stage when heavy rain is in the forecast after a dry stretch.
A tomato picked at that stage will continue ripening indoors and avoids the abrupt water surge that triggers splitting on the vine.
Think of early harvest as a backup measure, not a replacement for the steady moisture routine you are already maintaining.
Inspect Cracked Fruit and Continue the Routine
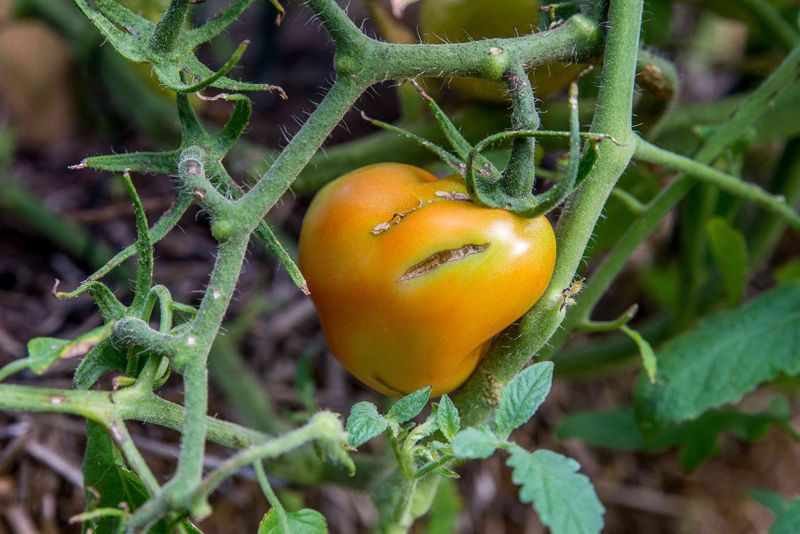
When you spot cracked fruit, start by checking the soil moisture right then. If the root zone is dry, water deeply before you do anything else.
Then walk through the bed and assess each cracked tomato individually rather than writing off the whole crop at once.
Superficial, dry cracks that have not opened deeply into the flesh may leave the tomato perfectly usable if you get to it promptly. University of Minnesota Extension’s guide to tomato disorders explains that cracks create entry points for decay organisms, so the window for using cracked fruit is shorter than for intact tomatoes.
Cut away any affected area, smell the fruit, and check the texture. Fruit that is soft, leaking juice, foul-smelling, or showing visible mold or rot should go in the compost, not on the table.
Safety becomes especially important when canning is involved. University of Minnesota Extension’s home canning guidance for tomatoes is clear that damaged or diseased fruit should not be used for home canning.
Decay organisms can alter the acidity of tomato tissue in ways that affect the safety of the finished product, so reserve your best, firmest, uncracked tomatoes for the canning jar and use cracked-but-sound fruit fresh.
After the inspection, replenish mulch if it has thinned, note whether rainfall has been sufficient, and keep monitoring soil moisture through the rest of the fruit-development period. The routine works because you repeat it, not because you do it once.
A garden that finishes the fall season with a few cracked tomatoes and a solid harvest of sound fruit is a garden where the moisture management did its job.