
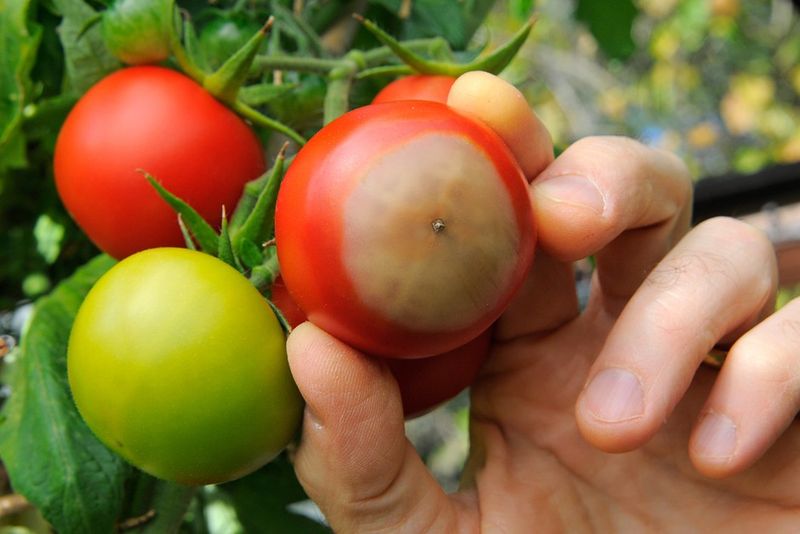
Finding a dark, sunken patch on the bottom of your tomatoes in August can feel like a gut punch after months of watering, weeding, and waiting. That leathery spot has a name – blossom-end rot – and it shows up most often when summer heat and uneven watering gang up on your plants at the same time.
The good news is that once you understand what is happening at the root zone, you have a clear, practical path forward. This article walks you through how to identify the problem, stabilize your watering, and give your next round of fruit the best possible chance.
The leathery spot points first to blossom-end rot
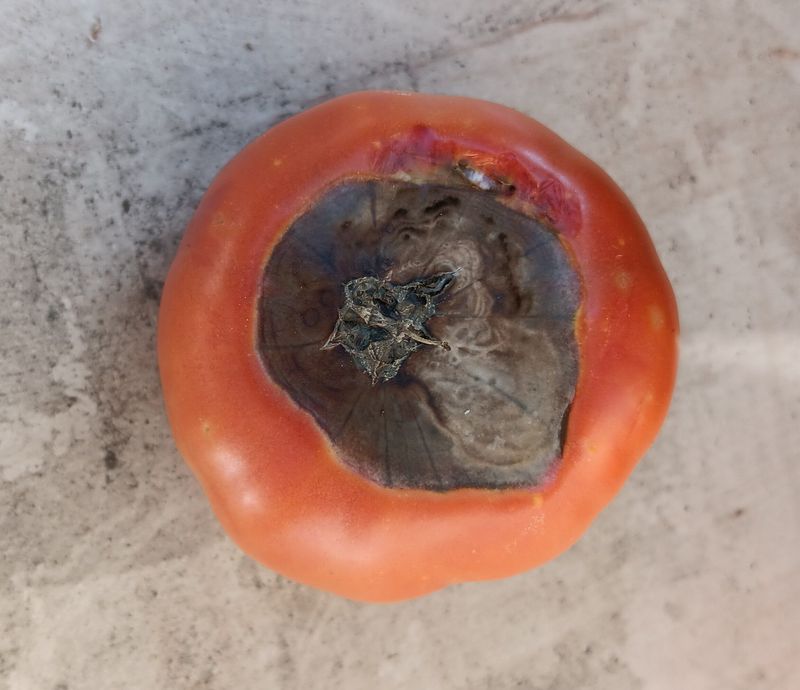
A small pale or water-soaked area appearing at the very bottom of a developing tomato – the end where the flower once attached – is the earliest visible sign most gardeners notice. Over the following days, that spot typically darkens and flattens into a tan, brown, or black lesion that feels dry and leathery when you press it.
Utah State University Extension describes the progression from a water-soaked area to a sunken, discolored patch that can expand to cover a significant portion of the blossom end.
This disorder is physiological rather than infectious in its initial form. No insect causes it, and a healthy plant nearby will not catch it the way it might catch a fungal disease.
University of Minnesota Extension classifies blossom-end rot as an abiotic disorder associated with inadequate calcium reaching the developing fruit tissue.
Secondary fungi or bacteria can move into the damaged area later, turning the lesion soft, mushy, or moldy. When that happens, the appearance of the fruit changes, and so does how you should handle it.
Treat a sunken, dry, leathery spot at the blossom end as a reasonable preliminary match for blossom-end rot, but stay open to other possibilities until you have ruled them out.
Heat and moisture stress can disrupt calcium delivery
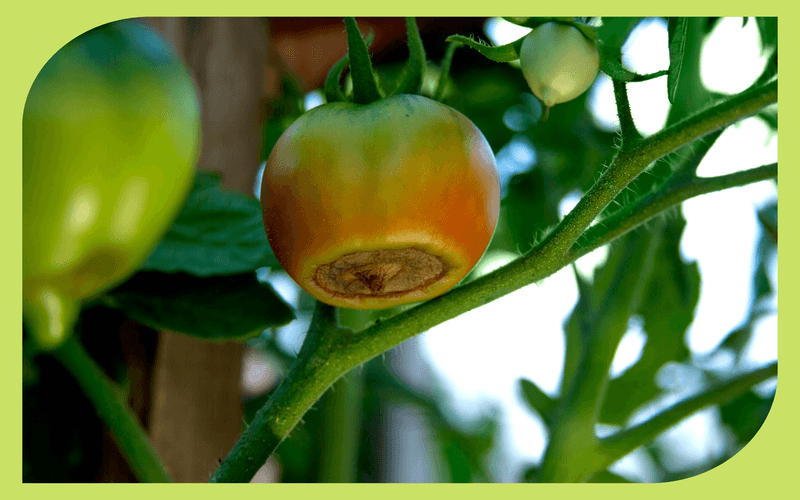
Blossom-end rot is often described as a calcium problem, but that shorthand can mislead gardeners into automatically reaching for amendments. Penn State Extension explains that the disorder reflects insufficient calcium reaching developing fruit tissue, and that soil calcium is frequently adequate – the real breakdown happens in delivery, not supply.
Calcium moves through a tomato plant almost entirely by transpiration, the same process that pulls water up through the roots. When soil moisture swings from dry to saturated and back again, roots cannot maintain the steady uptake that calcium transport requires.
Intense late-summer heat amplifies this problem by increasing water demand faster than many gardeners adjust their irrigation.
Other factors can interfere with calcium delivery even when watering is consistent. High soluble salt levels in the soil, root damage from cultivation or nematodes, waterlogged roots, excessively rapid fruit growth, and certain cultivar traits can all limit how much calcium actually reaches the fruit.
University of Florida IFAS Extension specifically warns Florida gardeners that fluctuating soil moisture can limit calcium absorption and that overwatering can produce stress symptoms similar to underwatering.
A 2014 peer-reviewed analysis published in Scientia Horticulturae raised additional questions, suggesting that localized calcium depletion may follow rather than initiate blossom-end rot, which challenges the straightforward low-calcium narrative. The practical takeaway is that inconsistent soil moisture is the first factor worth investigating and correcting during late summer, but it is not the only explanation and should not be treated as one.
Even out moisture at the root zone
Before adjusting your watering schedule, check what is actually happening below the surface. Stick a trowel or your finger a few inches into the soil near the plant.
University of Minnesota Extension recommends soaking the soil thoroughly and then using a trowel to confirm how deeply moisture has penetrated, because the top inch can look dry while the root zone remains adequately moist – or vice versa.
The goal is to wet the active root zone deeply enough that roots have consistent access to moisture between waterings, without keeping the soil saturated. A commonly cited starting point is roughly one to two inches of water per week, but University of Georgia Extension guidance on homegrown tomatoes makes clear that this figure is a flexible baseline, not a fixed schedule.
Rainfall, heat, soil type, plant size, and crop load all change what your garden actually needs.
During peak August heat in Florida or Texas, water demand rises noticeably. UGA irrigation guidance notes that summer heat can push weekly water needs higher, and that sandy soils need more frequent checks than heavier clay soils because they drain and dry faster.
If you garden in containers or grow bags, plan for even more frequent monitoring.
The pattern to break is the cycle of severe drying followed by a heavy soaking. UGA’s Commercial Tomato Production Handbook emphasizes adjusting irrigation frequency to soil conditions rather than following a rigid calendar.
Aim for steady, relatively even root-zone moisture, and resist the urge to water lightly and frequently at the surface, which encourages shallow roots and greater drought vulnerability.
Mulch and targeted irrigation prevent another swing
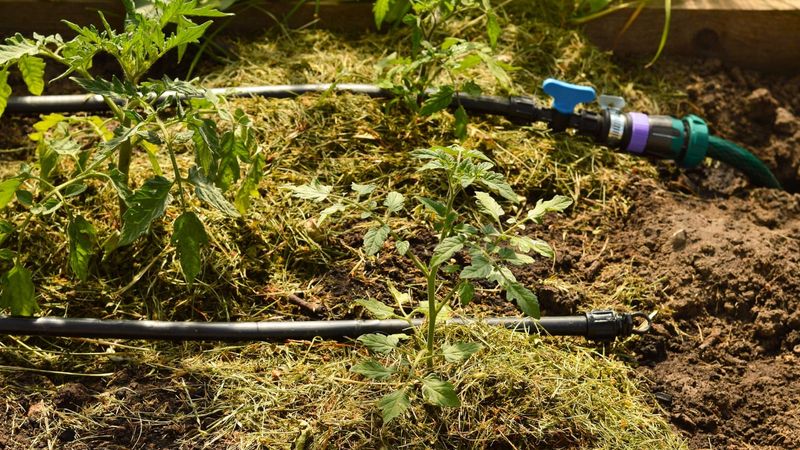
Once you have corrected an obvious moisture problem, the next priority is keeping the root zone from swinging again. Organic mulch – straw, shredded leaves, or wood chips – spread two to three inches deep around each plant can make a real difference.
University of Minnesota Extension recommends mulching around tomato plants to reduce evaporation and moderate soil moisture fluctuations, keeping the mulch slightly away from the stem to reduce moisture buildup against the base.
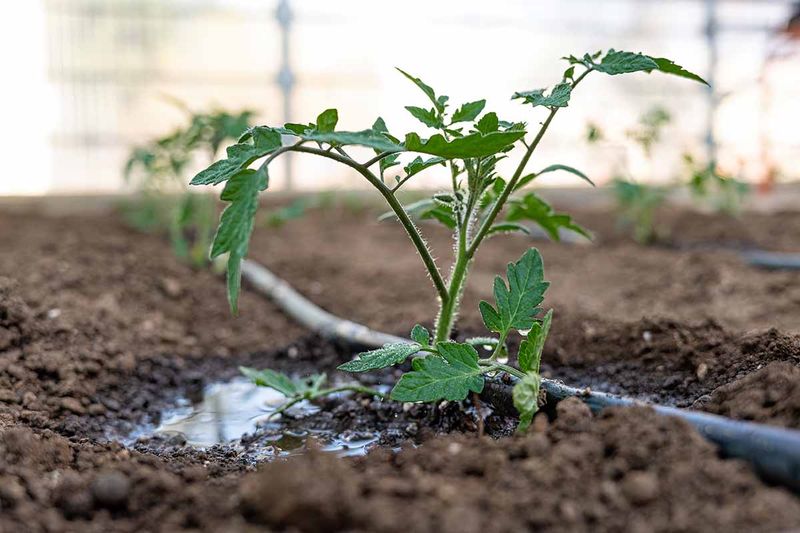
How you deliver water matters too. Drip irrigation lines or a soaker hose placed at the soil surface keep moisture where roots can use it and avoid wetting foliage.
UGA Extension guidance on watering practices favors drip or soaker methods over frequent overhead watering for tomatoes, noting that keeping foliage drier can reduce pressure from foliar diseases – though no irrigation method eliminates disease risk entirely.
Containers and grow bags present a specific challenge for Southern gardeners. They dry faster than in-ground beds, sometimes within a day during an August heat wave, but they should never remain waterlogged.
Tattnall County UGA Extension notes that container-grown tomatoes require closer monitoring precisely because the volume of soil is limited and drying happens quickly. Check container moisture by weight or by feel at least once daily during peak heat.
Test the soil before adding calcium
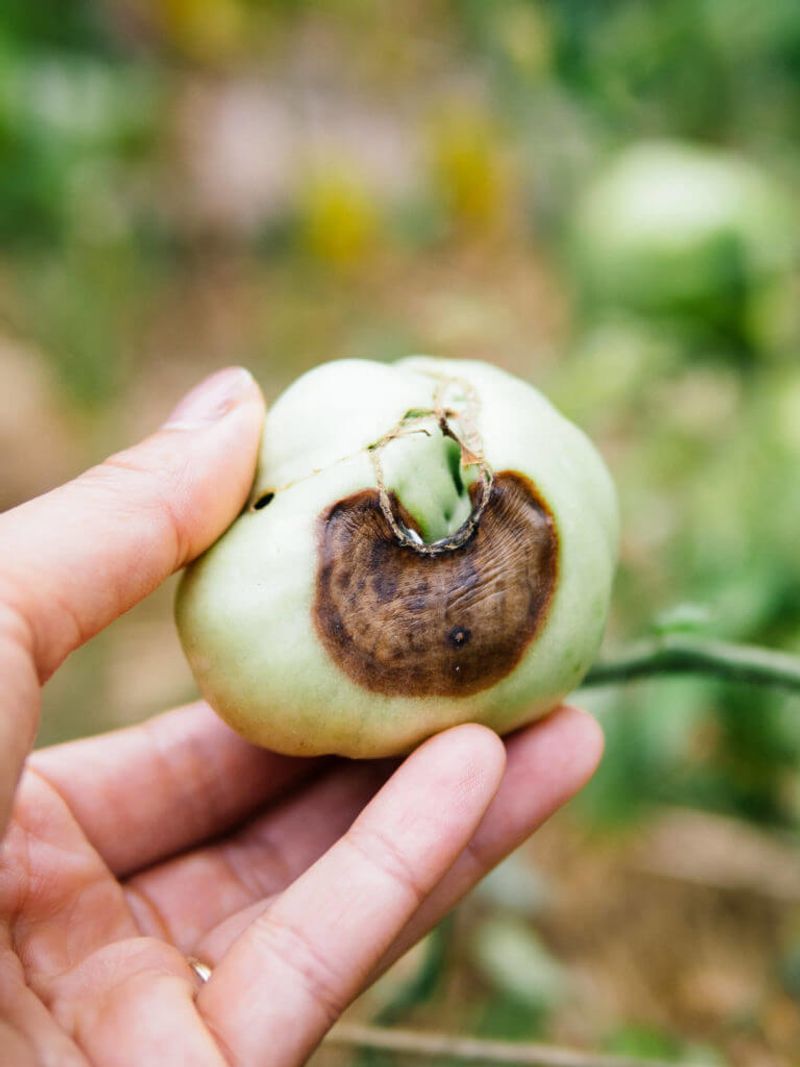
Seeing blossom-end rot on your tomatoes does not automatically mean your soil is short on calcium. Penn State Extension points out that in many BER cases the soil contains adequate calcium, and the problem lies in how the plant is moving that calcium rather than in how much is available.
Adding more calcium to already-adequate soil is unlikely to solve a moisture or root-uptake problem.
A soil test from your local cooperative extension office is the right starting point before applying lime, gypsum, or any calcium-containing fertilizer. Adding amendments without knowing your baseline can contribute to nutrient imbalances that create new problems.
University of Minnesota Extension specifically notes that crushed eggshells will not reliably correct blossom-end rot, and that Epsom salt supplies magnesium rather than calcium – making it the wrong product entirely for this purpose. Tums and similar calcium carbonate tablets are similarly unsupported as reliable garden treatments.
Foliar calcium sprays are sometimes marketed as a quick rescue for BER, but the results are inconsistent. Extension sources generally treat sprays as unreliable compared with root-zone moisture management, and they should not be counted on as a dependable fix.
UMN Extension’s tomato disorders guidance also cautions against excessive nitrogen fertilizer, which can promote rapid leafy growth at the expense of steady calcium delivery to fruit. Avoid root injury from deep cultivation, and correct any waterlogged areas that prevent healthy root function.
Rule out other causes of bottom-end damage
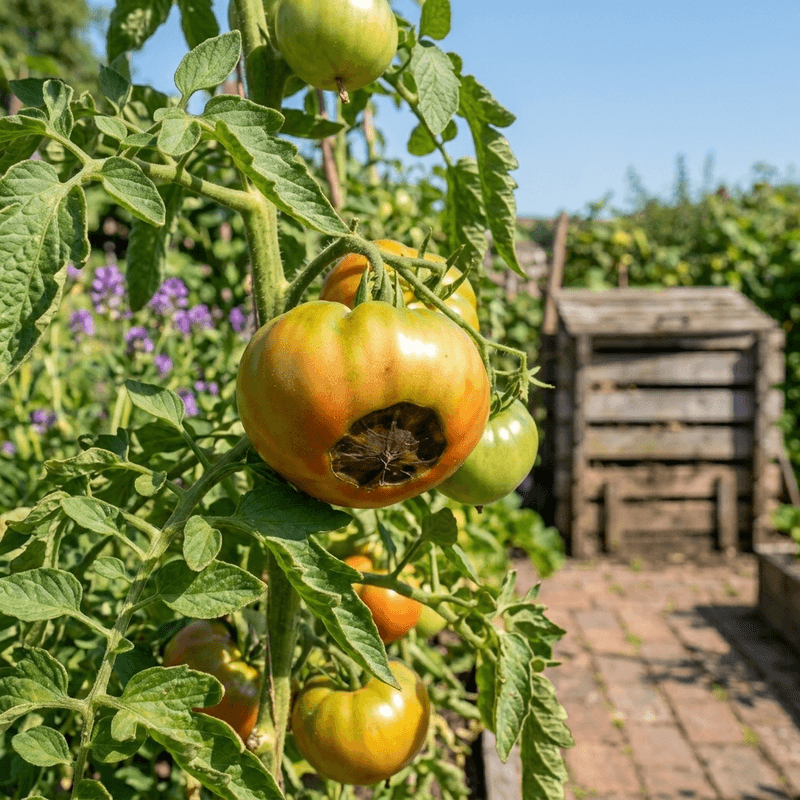
Not every lesion on the bottom of a tomato is blossom-end rot, and a misdiagnosis can lead to the wrong response. University of Minnesota Extension’s tomato fruit diagnosis tool walks through several disorders that can look similar at a glance but have distinct characteristics worth learning.
Sunscald produces pale, bleached, or papery patches on fruit that has been exposed to direct sun, usually on the side or shoulder of the tomato rather than specifically at the blossom end. Anthracnose creates sunken circular spots, often on ripe or overripe fruit, with dark centers and sometimes a pink or salmon-colored spore mass visible in wet weather.
UMN Extension’s vegetable irrigation guidance notes that heat stress is also strongly associated with blossom drop and fruit abortion, which can be confused with early BER at first glance.
Alternaria fruit rot can appear on various parts of the fruit and may show a fuzzy black center in the affected tissue. Bacterial soft rot is usually unmistakable: the flesh becomes mushy and may develop a foul odor, which BER alone does not produce in its early stages.
UMN Extension also points out that large-fruited varieties and paste-type tomatoes tend to be more susceptible to BER than cherry types, and that later fruit on the same plant may escape the problem entirely – which is useful information when assessing whether your management changes are working.
Handle damaged fruit carefully. Tomatoes with small, dry BER lesions and otherwise firm flesh can often be trimmed and eaten fresh, but discard any fruit that is extensively rotted, soft, moldy, or has an off odor.
Never use damaged tomatoes for home canning; UMN Extension home canning guidance recommends using only sound, disease-free fruit for preservation to avoid food-safety risks.
Judge the fix by the next round of fruit
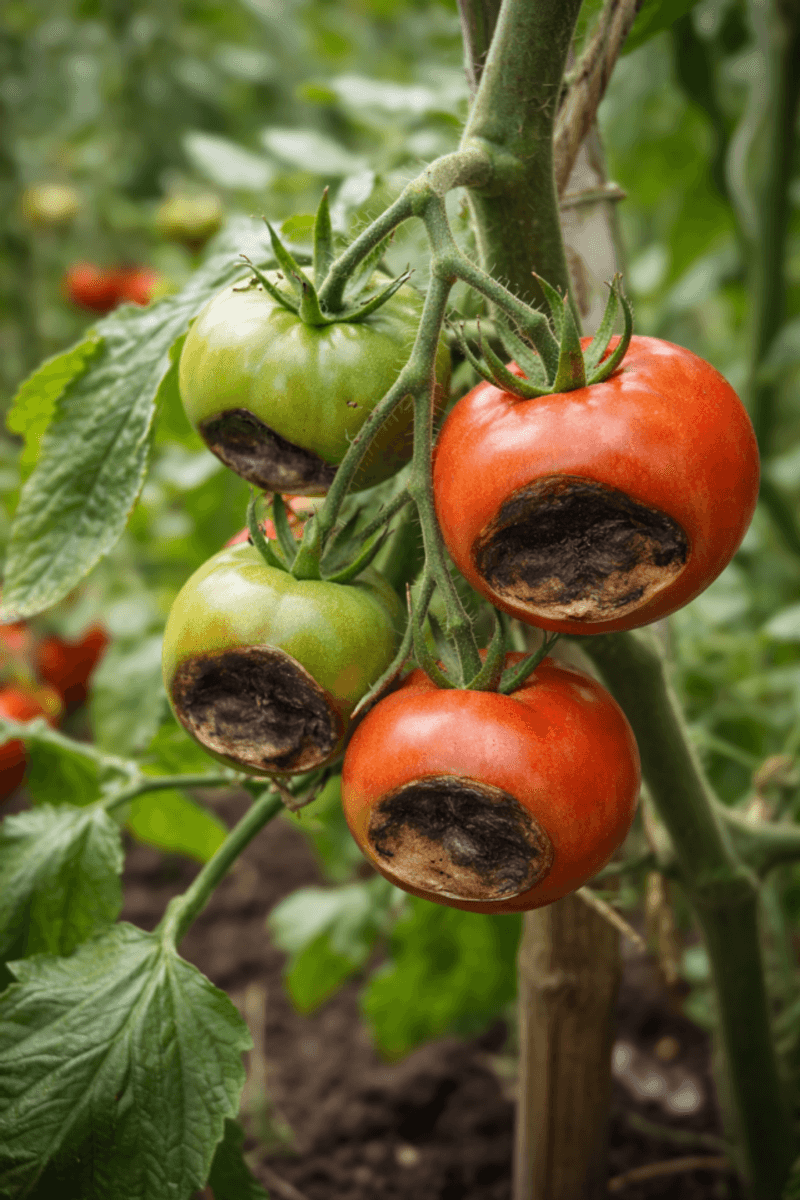
Existing lesions will not reverse. Once blossom-end rot has formed on a tomato, that tissue stays damaged regardless of how well you water going forward.
University of Minnesota Extension recommends removing severely affected fruit rather than leaving it on the plant, because removal allows the plant to redirect resources toward later-developing tomatoes instead of maintaining fruit that cannot recover.
After removing damaged fruit and stabilizing your moisture management, the measure of success is what happens to the tomatoes that set next. Penn State Extension confirms that improved conditions should reduce BER in fruit that develops after the correction, not heal the ones already marked.
Give new fruit two to three weeks to develop before drawing conclusions about whether your changes are helping.
If new fruit continues to show BER after moisture is steady, look beyond watering. Check for root damage, consider whether nitrogen fertilizer has been applied heavily, and get a soil test before adding any amendments.
Identifying the symptom correctly, stabilizing moisture first, and reserving calcium treatments for soil-test-guided decisions is the practical sequence that gives most Southern gardeners the best shot at a cleaner late-season harvest.