
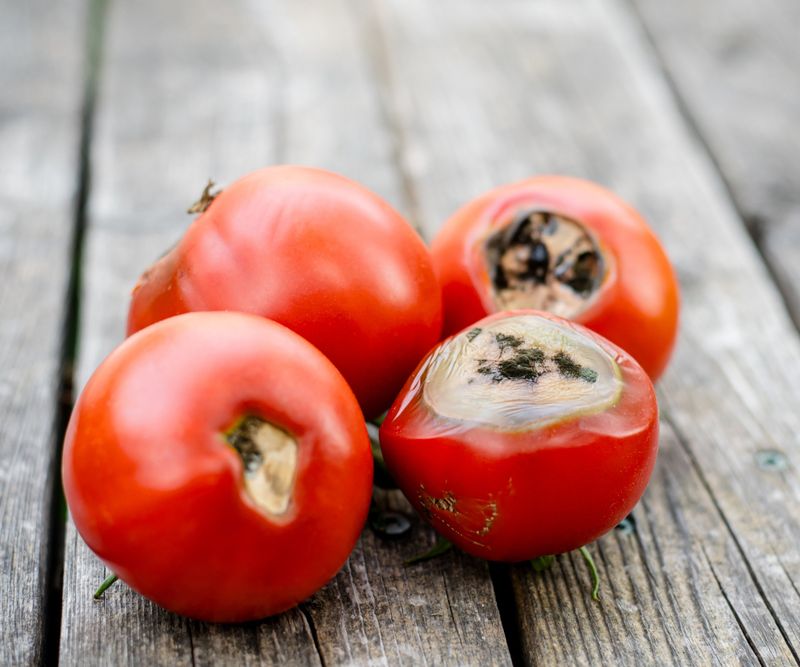
Spotting a dark, sunken patch on the bottom of your tomato can stop a gardener cold, especially after months of work in the summer heat. That blackened area at the bottom of the fruit is often blossom-end rot, a frustrating but common problem in Southern gardens during hot, dry spells.
Understanding what causes it and what to do next can save the rest of your harvest before the season slips away.
Start with the lesion’s location and texture
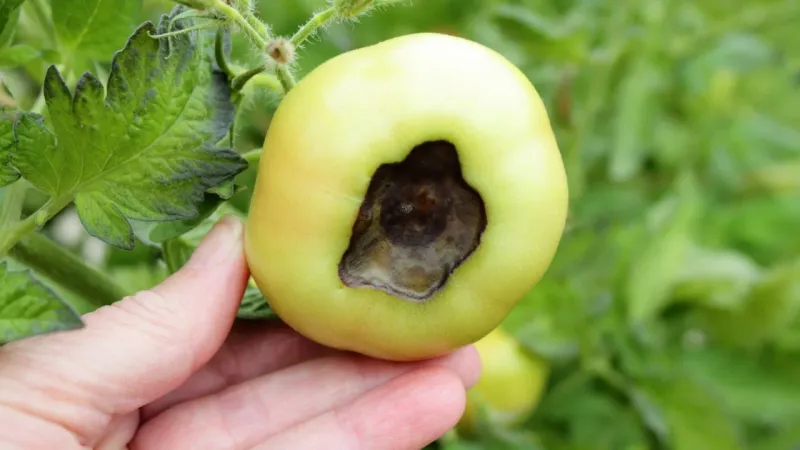
Picking up a tomato and finding a dark, collapsed area at its very bottom is one of the more disheartening moments in a summer garden. The blossom end is the rounded bottom of the fruit, directly opposite the stem.
When blossom-end rot is the cause, the problem typically begins as a small water-soaked or pale brown spot right at that location.
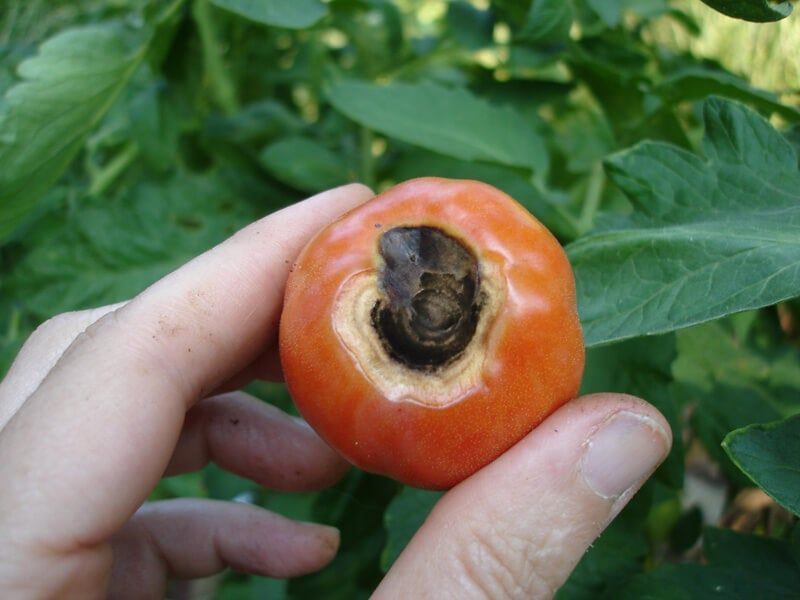
Over time, that spot enlarges, sinks inward, and turns dark brown or black with a leathery, dry texture. Texas A&M AgriLife Extension describes this progression clearly: the lesion can appear while the fruit is still green or just beginning to ripen, and it may cover a small or large portion of the bottom surface depending on how far the disorder has advanced.
Early fruit and tomatoes that are roughly one-third to one-half grown tend to show the problem first. Large slicer varieties are often more susceptible than smaller cherry types.
Later fruit on the same plant sometimes develops normally once growing conditions stabilize, which can be reassuring when you are worried the whole season is lost.
Color and location alone do not confirm the diagnosis, though. A lesion that begins somewhere other than the blossom end, spreads as a wet rot, or develops mold may point toward a different problem entirely.
The characteristic pattern matters: sunken, leathery, and starting at the bottom opposite the stem is the key combination to look for.
Heat increases stress, but it does not act alone
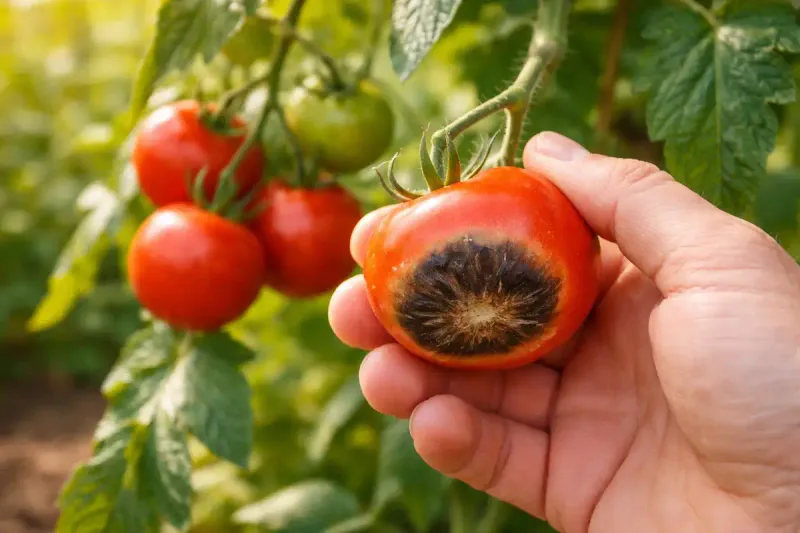
High summer heat makes blossom-end rot more likely, but heat is a contributing factor rather than a direct cause. The real problem is a disruption in how water and calcium move through the plant to developing fruit.
When that movement is interrupted during a critical growth window, the cells at the blossom end break down and collapse.
Calcium travels with water through the plant’s vascular system, and it moves preferentially toward leaves and shoots rather than fruit. A multidisciplinary review of blossom-end rot research describes the disorder as a complex interaction involving calcium homeostasis, water movement, environmental stress, plant genetics, salinity, hormones, and oxidative processes rather than a simple nutrient shortage.
Heat raises the plant’s water demand, which can intensify any existing stress on the system.
Several conditions can combine with heat to disrupt that calcium delivery. Drought, a sudden heavy rain or irrigation after a dry period, poor soil drainage, root damage from deep cultivation, high soil salinity, rapid vegetative growth, and excessive nitrogen fertilizer can all interfere with water uptake and transport.
University of Minnesota Extension notes that the soil may contain adequate calcium even when developing fruit does not receive enough.
That last point matters for how you respond. Adding calcium products without checking the soil first may not address the actual problem, and it can sometimes create new nutrient imbalances.
The disorder is physiological, meaning it arises from internal plant stress rather than an infectious pathogen, but that does not make it easy to prevent once conditions conspire against the plant.
Check for other causes before calling it blossom-end rot
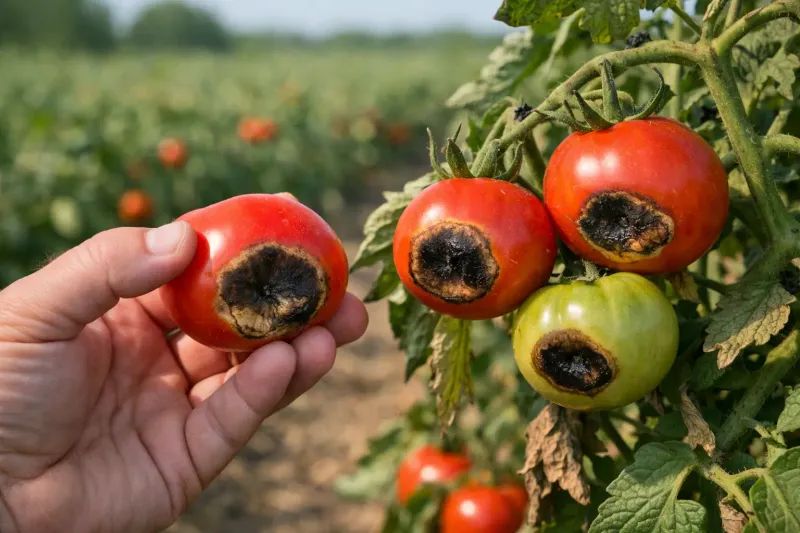
Not every dark or sunken patch on a tomato is blossom-end rot. Rushing to that conclusion can send you chasing the wrong fix while the actual problem continues.
A quick check of where the lesion sits, what it looks like, and what conditions preceded it can sharpen the diagnosis considerably.
Sunscald is a common look-alike in hot Southern gardens. It usually appears as a pale yellow, white, or gray flattened area with a papery texture on the side of the fruit that faces the sun directly.
It often follows a period when foliage has dropped or been removed, leaving fruit exposed. The appearance is quite different from the dark, leathery lesion at the blossom end that characterizes blossom-end rot.
University of Minnesota Extension’s tomato fruit diagnosis tool notes that anthracnose and Alternaria fruit rots generally produce sunken spots on the sides or elsewhere on the fruit surface rather than a lesion confined to the blossom end. Anthracnose may develop dark centers and pinkish spore masses under wet conditions, which is a useful distinguishing detail.
Buckeye rot and other pathogen-related rots can resemble blossom-end rot, particularly in warm, wet weather. Secondary fungi and bacteria may also colonize tissue that blossom-end rot has already damaged, making the affected area softer, wetter, or visibly moldy over time.
If the lesion on your fruit is spreading rapidly, oozing, or covered in fuzz, a secondary organism has likely moved in, and the fruit should be removed promptly regardless of the original cause.
Remove fruit that cannot recover
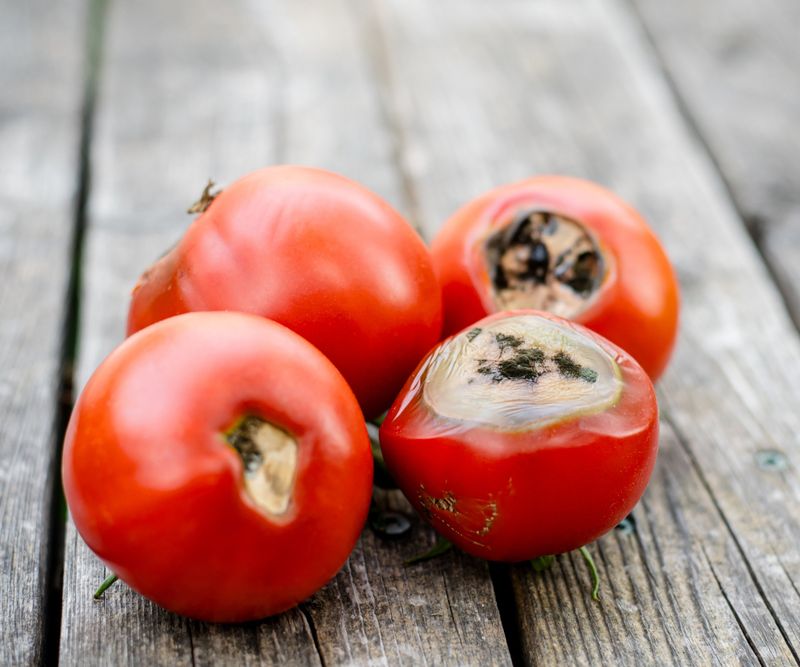
Once blossom-end rot has produced a sunken, leathery lesion, that tissue will not repair itself. The cell damage is permanent, and no spray, amendment, or watering adjustment will reverse what has already happened to an affected fruit.
The practical response is to remove it.
University of Minnesota Extension recommends removing fruit with established blossom-end rot, explaining that doing so may allow the plant to direct its resources toward the later fruit that still has a chance to develop normally. Holding onto damaged tomatoes does not benefit the plant and can create entry points for secondary rot organisms.
Food safety deserves a careful look here. UGA Extension guidance indicates that a small, dry, and well-contained spot may be trimmed away, leaving the rest of the fruit usable.
That is a reasonable approach when the damage is minor and the flesh underneath looks and smells normal.
Fruit that is soft, watery, foul-smelling, or visibly moldy is a different situation. The UGA Commercial Tomato Production Handbook makes clear that secondary organisms can enter damaged tissue, and once that happens, the decay is no longer a cosmetic issue.
When in doubt about whether fruit is safe to eat, discard it rather than trim around the problem. The rest of your harvest is worth protecting, and a single questionable tomato is not worth the risk.
Let root-zone moisture guide your watering
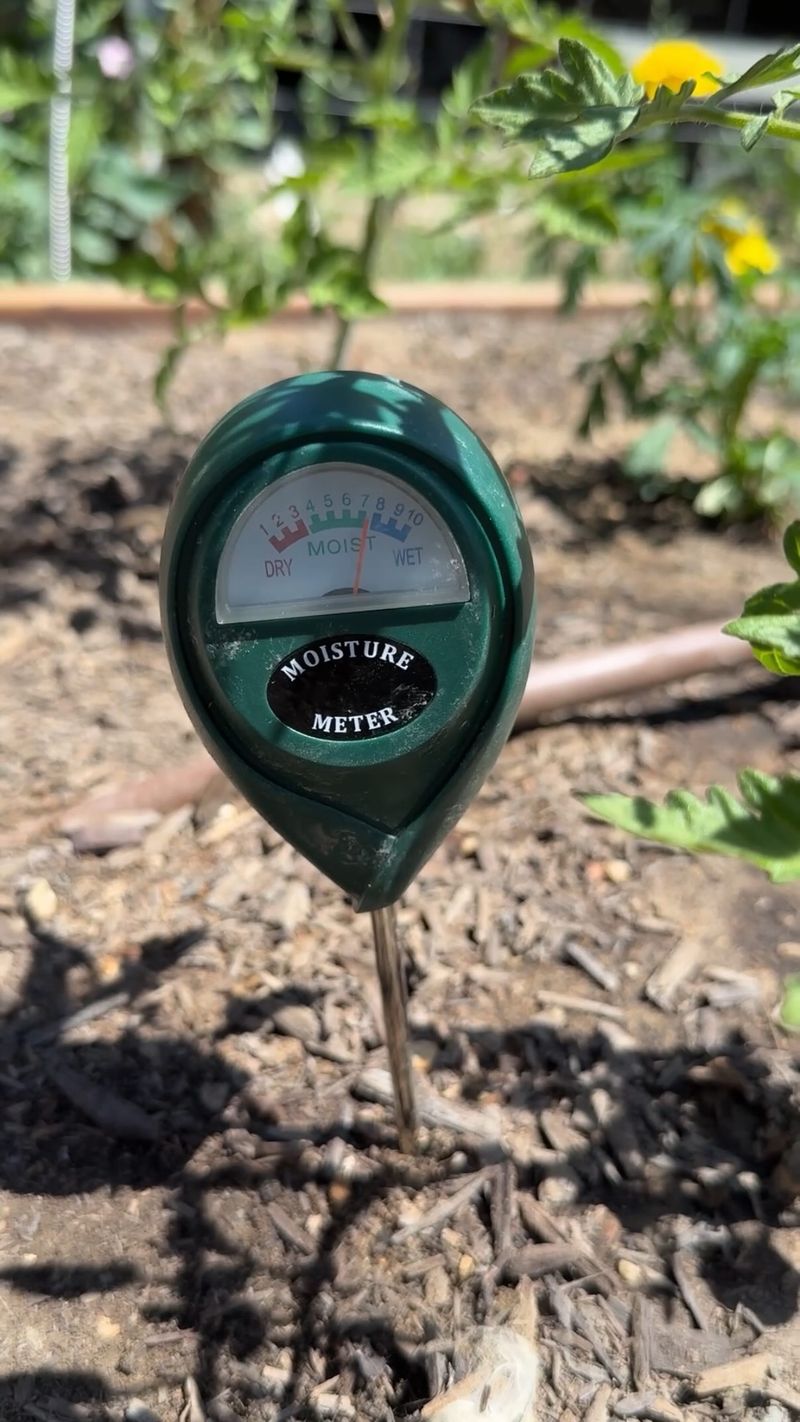
Stable soil moisture during flowering and fruit development is the most reliable way to reduce blossom-end rot risk going forward. The goal is to avoid the severe-dry-then-saturate cycle that stresses roots and disrupts the steady movement of water and calcium to developing fruit.
Consistent moisture does not mean constantly wet soil, though. Waterlogged roots and poor drainage cause their own problems with water uptake.
Watering deeply enough to wet the active root zone matters more than following a fixed schedule. University of Minnesota Extension’s tomato growing guide gives roughly one to two inches per week as a general range, while other sources cite about one inch as a baseline.
Treat those figures as starting points rather than universal rules. Sandy Florida soils, containers, raised beds, recent rainfall, and extreme heat all change how quickly the root zone dries out.
UF/IFAS guidance on efficient irrigation for edible landscapes recommends checking soil moisture several inches below the surface rather than watering by calendar alone. Pushing a finger or a thin probe into the soil near the root zone gives you real information about what the plant is actually experiencing.
Sandy beds in Florida may need attention more frequently than a heavier clay soil in Texas.
Container tomatoes dry out faster than in-ground plants and often need closer monitoring during heat spikes. Raised beds can behave similarly to containers in very hot weather.
The point is to let the soil tell you when to water rather than relying on a fixed day-of-the-week routine that cannot account for all those variables.
Use mulch and soil-line irrigation to reduce swings
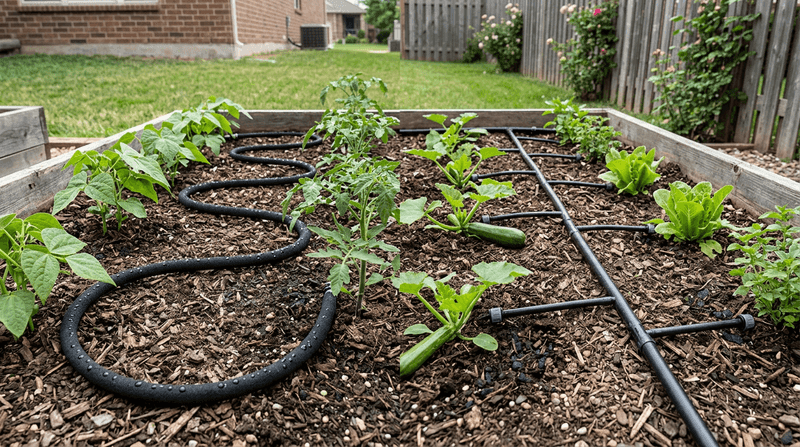
Mulch is one of the simplest tools available for keeping soil moisture more consistent between waterings. An organic mulch layer spread around tomato plants slows evaporation, moderates soil temperature, and reduces the boom-and-bust moisture swings that contribute to blossom-end rot risk.
UF/IFAS guidance on Florida-friendly edible landscaping recommends a two- to three-inch layer of organic mulch as a standard practice for edible gardens.
Keep the mulch pulled back an inch or two from the stem itself. Mulch sitting directly against the stem can trap moisture against the plant base and invite stem rot or disease problems, which would add a new complication to an already stressed plant.
A small gap is all that is needed.
How you deliver water matters as well. UGA Extension’s watering guidance for tomatoes recommends drip irrigation, soaker hoses, or careful hand watering at the soil line rather than overhead sprinklers.
Keeping water off the foliage reduces the leaf wetness that can encourage fungal diseases, which is a real concern in humid Southern conditions during late summer.
Drip lines and soaker hoses also apply water more slowly and evenly than overhead systems, giving the soil time to absorb moisture without runoff or pooling. Neither mulch nor drip irrigation guarantees that blossom-end rot will not occur, but together they create more stable root-zone conditions that reduce the stress peaks most likely to trigger the problem.
Test soil before changing fertility
Reaching for a bag of calcium supplement or a bottle of spray is a natural impulse when you see blossom-end rot, but adding products without knowing your soil’s actual status can create more problems than it solves. Excess salts, pH shifts, and nutrient imbalances can all increase root stress, which is the opposite of what a stressed plant needs.
University of Minnesota Extension’s review of common soil remedies is direct on two popular home fixes: eggshells decompose far too slowly to provide a timely correction for blossom-end rot, and Epsom salt supplies magnesium sulfate rather than calcium, making it the wrong product for this particular problem. Both are widely recommended online, and both fall short of what the evidence supports.
Foliar calcium sprays have been suggested as a quick fix for years, but current UGA guidance has moved away from that recommendation. UGA Extension’s 2024 blossom-end rot guidance states that research has not shown foliar calcium sprays to reliably control the disorder, and the Georgia Pest Management Handbook no longer recommends them for fruiting vegetables.
Sprays cannot repair tissue that is already damaged.
UGA’s guide on calcium nutrition of pepper and tomato and University of Minnesota Extension both recommend a soil test before adding lime, gypsum, calcium chloride, calcium nitrate, or any other amendment. Excessive nitrogen, particularly from ammonium-heavy fertilizers, can push rapid vegetative growth that competes with calcium delivery to fruit.
Avoid deep cultivation near the plant’s base, since root damage impairs water and nutrient uptake. Variety choice also plays a role: large-fruited slicers are generally more prone to blossom-end rot than cherry tomatoes, though no cultivar marketed as resistant should be treated as fully immune.
Follow a prevention-first decision path
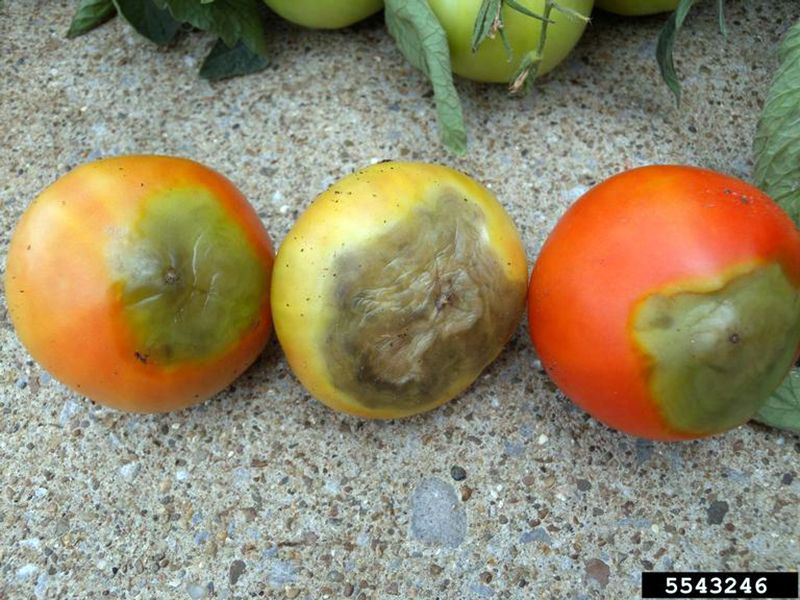
When you spot a dark, sunken area on a tomato, start by confirming its location. A leathery lesion that begins at the blossom end, the bottom opposite the stem, and matches the classic sunken texture is a strong candidate for blossom-end rot.
A lesion elsewhere on the fruit, spreading wet rot, mold, or an unusual pattern calls for a fresh look using a diagnostic resource like the UMN fruit rot guide before drawing conclusions.
Remove fruit with established damage and then shift attention to the root zone. Check moisture several inches below the surface and correct any dry or waterlogged conditions before the next fruit set.
Add mulch if the soil surface is bare, and consider switching to drip or soaker-hose irrigation if you have been using overhead sprinklers.
University of Minnesota Extension confirms that later fruit on the same plant often develops normally once stress is reduced, so the season is not necessarily over. Soil-test before reaching for any amendment, and skip the home remedies that the evidence does not support.
A garden that gets steadier moisture, protected roots, and appropriate fertility tends to recover well. Blossom-end rot is a signal worth reading carefully, not a reason to give up on the plant.