
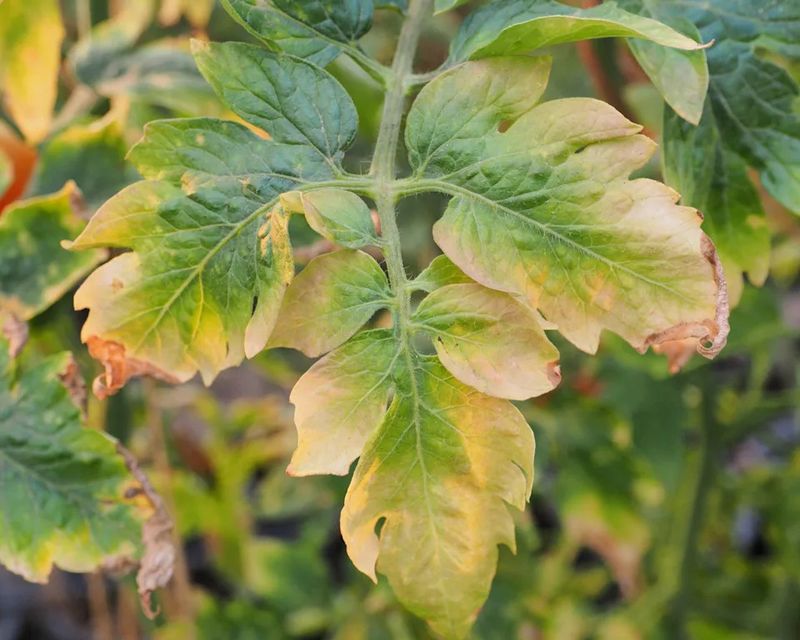
Yellowing leaves on a tomato plant can send a gardener scrambling for fertilizer, a watering can, or a spray bottle, often before they know what the plant actually needs. The color alone does not tell you what is wrong, and treating the wrong problem can make things worse.
Learning to read where yellowing starts, what pattern it follows, and what other symptoms travel with it gives you a real shot at helping the plant, not just reacting to it.
Yellowing is a clue, not a diagnosis
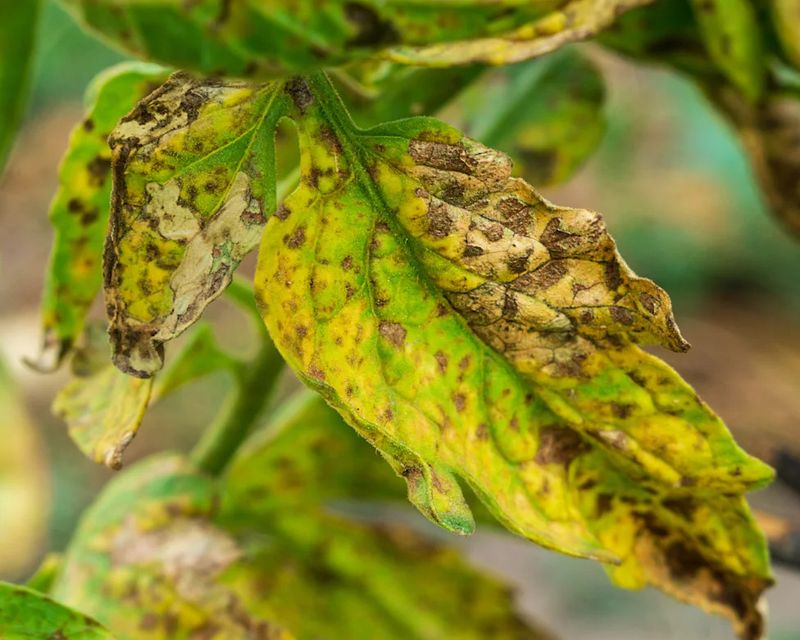
A yellow leaf on your tomato plant is like a check-engine light. It tells you something needs attention, but it does not tell you what.
The color by itself is one of the least specific symptoms a tomato can show, because nitrogen shortage, soggy soil, spider mites, foliar disease, a virus, and simple old age can all produce it. Reacting to the color before reading the pattern is the main reason gardeners keep treating the wrong problem.
Start by asking a few targeted questions before you touch a fertilizer bag or a spray bottle. Where did the yellowing begin, on the oldest leaves near the bottom of the plant or on the newest growth at the top?
Does the leaf turn pale all over, or do the veins stay green while the tissue between them fades? Are there spots, halos, dark margins, or concentric rings on the leaf surface?
What do the undersides of the leaves look like? Is the whole plant drooping, or just a few leaves?
Is new growth stunted, twisted, or unusually small?
As UGA Cooperative Extension guidance on tomato cultural problems makes clear, several disorders can produce nearly identical visual symptoms, and more than one problem can be present on the same plant at the same time. Penn State Extension’s plant-health diagnostic framework reinforces that yellowing results from a wide range of causes including disease, water stress, root damage, pests, herbicide drift, high temperatures, and natural leaf aging.
The pattern, location, and accompanying signs are what move you from a vague color observation toward a useful working diagnosis. Urgency is real when yellowing spreads rapidly, new growth is affected, or wilt and stem discoloration appear, but older leaves that yellow without any of those companions may simply be aging normally.
Older lower leaves narrow the possibilities
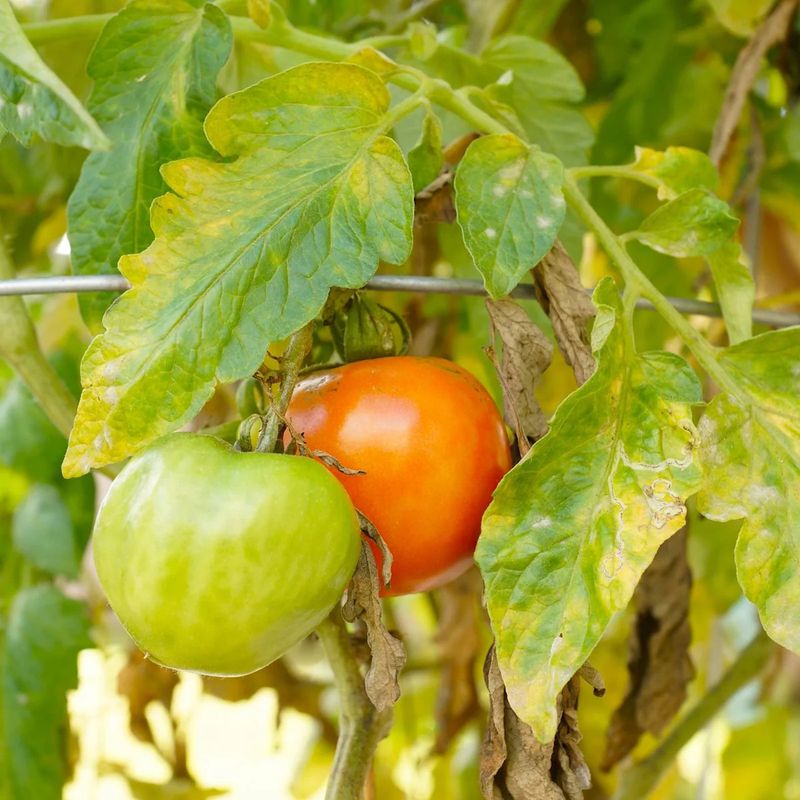
When yellowing starts on the oldest leaves at the base of the plant and moves upward gradually, leaf position becomes a useful but imperfect filter. Uniform pale yellowing on lower leaves with reduced overall vigor is one pattern associated with nitrogen deficiency, because nitrogen moves freely within the plant and gets pulled from older tissue to support new growth first.
But that same pattern can also result from magnesium or potassium availability problems, excess moisture around the roots, physical root injury, natural leaf aging, or the early stages of a foliar disease working its way up from the ground.
Before you assume a fertility problem, look at the leaf surface closely. Even pale yellowing without any distinct spots, halos, or margins points more toward nutrition, moisture, or aging.
Discrete lesions with tan or brown centers, dark borders, or concentric rings shift the picture toward disease. NC State Extension’s Septoria leaf spot profile describes small, circular spots with lighter centers and dark margins that begin on lower leaves and spread upward, which can be mistaken for a nutrient problem at first glance.
Early blight, another common North Carolina problem, produces brown lesions with concentric rings and yellow halos on older foliage. Checking the leaf surface before concluding the root zone is the source keeps you from skipping a disease diagnosis that needs a different response.
Once you have confirmed the leaves are evenly pale without lesions, think through the plant’s recent history. Has the soil been consistently wet after heavy rain or frequent irrigation?
Has the plant been in the ground long enough for nitrogen applied at planting to deplete? Is overall growth slow across the whole plant, or just the bottom leaves?
UGA’s guide to nutritional deficiencies in vegetables notes that overwatering and root injury can produce yellowing that looks nearly identical to nitrogen deficiency, so drainage and watering history matter before any fertilizer decision. NC State’s tomato home-garden guide also points out that a few yellowing lower leaves on an otherwise healthy, productive plant may simply reflect normal aging rather than a problem that needs correcting at all.
New leaves reveal a different nutrient clue
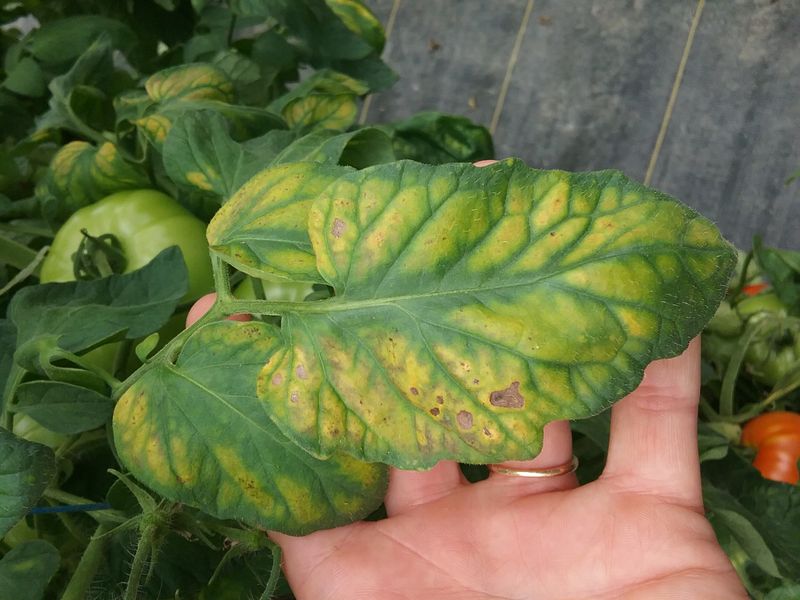
Yellowing that appears first on the newest, youngest leaves at the top of the plant tells a different story than lower-leaf decline. When a young leaf turns pale while its veins stay distinctly green, the symptom is called interveinal chlorosis, and it points more toward iron or manganese availability than toward the nitrogen shortage that older-leaf yellowing suggests.
The distinction matters because the corrective actions are different, and adding the wrong amendment can make things worse rather than better.
Iron and manganese are present in most North Carolina soils, but the plant cannot always reach them. Soil pH is the most common gatekeeper.
When pH climbs above the range tomatoes prefer, these micronutrients become chemically bound in forms the roots cannot absorb, even though they are physically in the soil. UF/IFAS guidance on nutrient management for greenhouse vegetables explains that micronutrient availability is closely tied to pH, and that a plant can show deficiency-like symptoms even when the total nutrient content of the soil is adequate.
Cold soil, compaction, waterlogged conditions, and root damage can produce similar effects by limiting the plant’s ability to take up water and nutrients regardless of what the soil test shows.
The practical step here is to resist the urge to pour on more fertilizer. UGA’s tomato cultural-problems guide distinguishes new-growth interveinal chlorosis from older-leaf uniform yellowing precisely because the causes differ and the responses differ.
A North Carolina soil test through NCDA&CS measures pH along with major nutrients and provides specific lime and amendment recommendations for your actual soil. Understanding your soil test report will tell you whether pH adjustment is needed, which is a more reliable starting point than guessing at micronutrient supplements.
If you are already in the right pH range and root conditions look healthy, the symptom may clear on its own as temperatures warm and soil conditions improve.
Spots, stippling, and webbing change the diagnosis
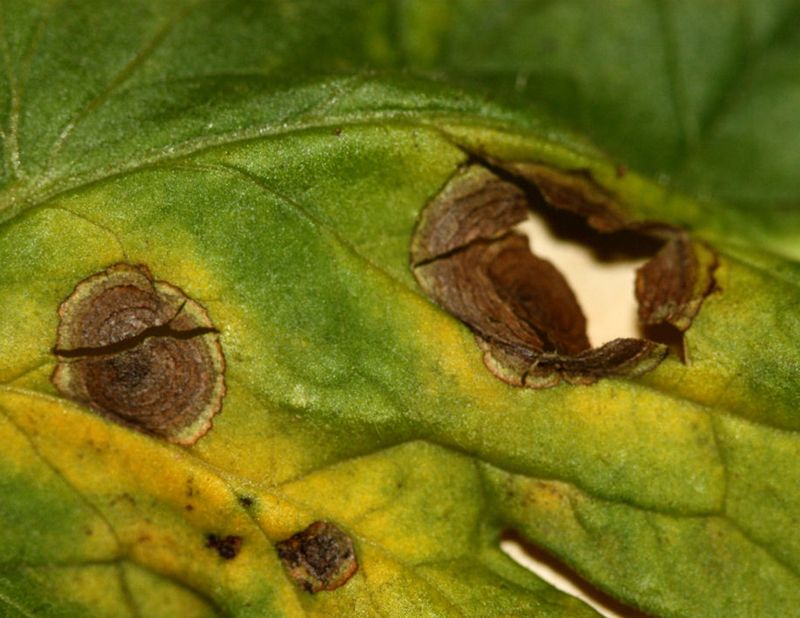
Plain yellow leaves point toward nutrition or moisture. Yellow leaves with something extra on the surface point toward a living organism causing the damage, and the type of marking is what separates foliar disease from pest feeding.
Getting this distinction right matters because the management steps are completely different, and applying fertilizer to a diseased or mite-infested plant will not help.
Small spots with tan or grayish centers, dark or water-soaked margins, or yellow halos surrounding a distinct lesion are signs of foliar disease rather than a simple nutrient shortage. NC State’s Septoria leaf spot resource describes the characteristic spots as small and circular with lighter centers, dark borders, and sometimes a yellow halo, beginning on lower leaves and advancing upward through the canopy.
Early blight produces larger lesions with the concentric-ring pattern that looks like a target or bull’s-eye, also starting on older foliage. Bacterial spot creates small, water-soaked lesions that can turn brown and scabby, sometimes surrounded by yellow tissue, and it spreads rapidly in warm, wet North Carolina conditions.
None of these diseases are confirmed by yellowing alone, and more than one can appear on the same plant, so keep every identification provisional until you have matched the lesion characteristics carefully.
A completely different picture appears when you flip the leaf over and look at the underside. Fine pale speckling or a bronzed, dusty look on the upper surface, combined with tiny moving dots or webbing on the underside, suggests spider mite feeding.
UC IPM’s spider mite guidance notes that mite damage is especially favored by hot, dry, dusty conditions, which describes North Carolina summers well. Tiny white insects that flutter when you disturb the leaf, along with sticky residue or yellowing on upper leaf surfaces, may point toward whiteflies instead.
UC IPM’s whitefly profile for tomato describes the characteristic presence of adults on leaf undersides and the yellowing and stunting that heavy infestations can cause. Spotting either pest early gives you more management options, so checking leaf undersides regularly is a worthwhile habit throughout the North Carolina growing season.
Curling and stunting call for a virus check
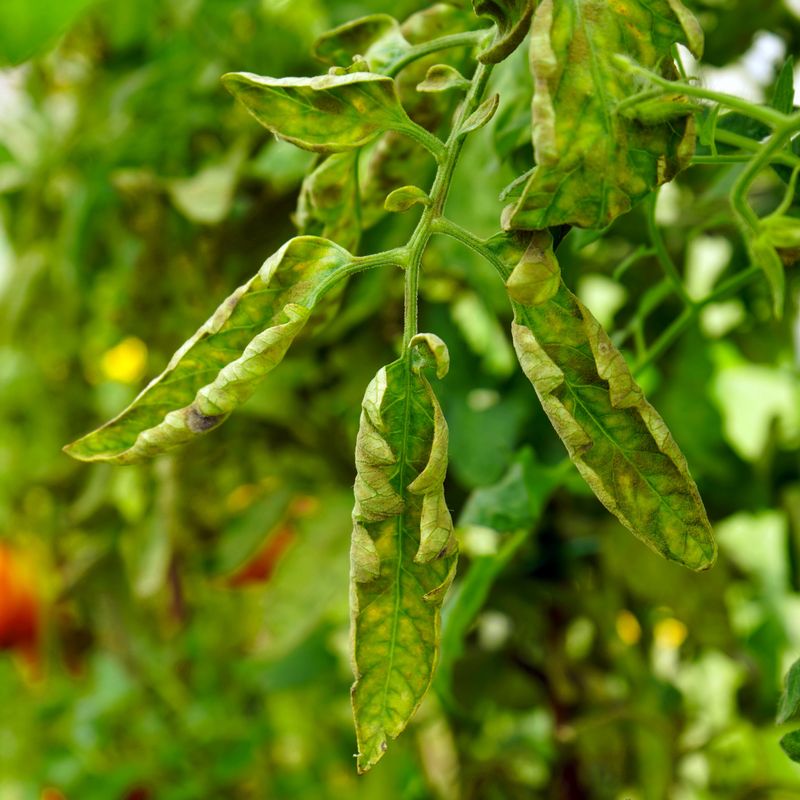
A tomato plant that yellows at the leaf margins, curls its leaves upward, produces noticeably smaller or thicker-than-normal new growth, and seems to stop growing despite regular care is showing a cluster of symptoms that goes beyond a nutrient shortage or a dry spell. When these signs appear together, especially alongside poor fruit set or severe stunting, tomato yellow leaf curl virus becomes a real possibility worth investigating.
The virus is transmitted by whiteflies, specifically the silverleaf whitefly, and it has become an increasing concern across the southeastern United States. UF/IFAS research on tomato production diseases describes the characteristic upward curling, marginal yellowing, and reduction in leaf size that the virus causes, along with severe yield loss in heavily infected plants.
UGA’s guide to whitefly-transmitted plant viruses in the South emphasizes that symptoms are not specific enough for a confident home diagnosis because other disorders, including heat stress, broad mite damage, and herbicide drift, can produce overlapping signs. Repeatedly fertilizing a virus-infected plant will not reverse the symptoms and will not improve yield.
The more productive response is to inspect the plant for whiteflies on leaf undersides, note whether the pattern matches newly transplanted or younger plants in the garden, and contact your county Extension office or the NC State Plant Disease and Insect Clinic for confirmation. If a plant is severely stunted and producing no usable fruit, removing it from the garden reduces the chance of whiteflies spreading the virus to healthy plants nearby.
Prevention centers on starting with certified disease-free transplants from reputable sources and managing whitefly populations early, before populations build to the level where transmission becomes likely. A single yellow leaf on an otherwise vigorous plant is not grounds for alarm, but the full symptom cluster described above deserves prompt attention rather than a wait-and-see approach.
Persistent wilt can mean the plant cannot recover
Every tomato plant droops during the hottest part of a summer afternoon, especially when temperatures climb into the upper 80s or 90s that are routine across North Carolina from June through August. That kind of midday droop is not a crisis.
The plant recovers on its own as temperatures drop in the evening, and the next morning it looks fine. The situation that calls for faster action is wilt that does not recover overnight, wilt that appears in the morning before heat builds, or wilt that occurs on one side of the plant while the other side stays upright.
When a plant wilts despite soil that feels adequately moist at the root zone, the problem is not a water shortage. Something is blocking water movement inside the plant, and that points toward the vascular system or the roots.
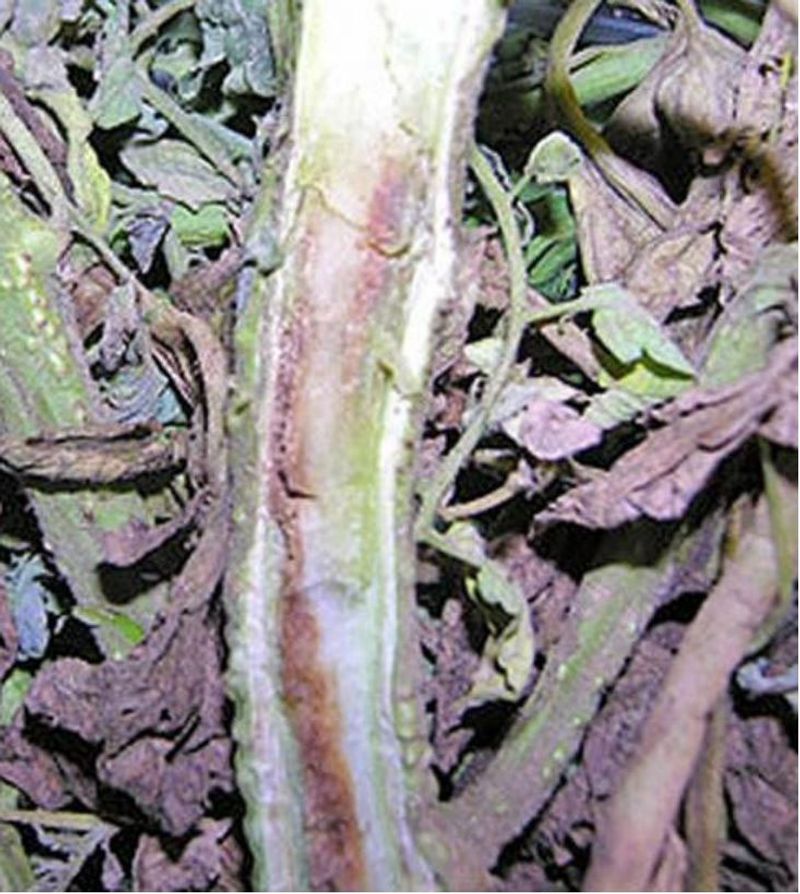
Cut the main stem near the base and look at the cross-section. Brown, tan, or orange discoloration in the ring of tissue just inside the outer layer is a sign of vascular disease rather than simple drought stress.
NC State Extension’s diagnostics guidance describes this kind of stem discoloration as an indicator that warrants serious concern and prompt action.
Fusarium wilt and bacterial wilt are two vascular diseases that can produce rapid collapse, one-sided yellowing, and stem discoloration in North Carolina tomatoes. UGA’s guide to common tomato diseases describes the progressive wilt and internal discoloration associated with Fusarium, which tends to move slowly, and the rapid, total collapse associated with bacterial wilt, which can kill a plant within days.
NC State is direct about bacterial wilt: infected plants will not recover and should be removed from the garden and destroyed rather than composted. Watering a plant with bacterial wilt more heavily will not help and may worsen drainage conditions for nearby plants.
Penn State Extension’s diagnostic framework reinforces that vascular symptoms require a different response than foliar symptoms, and that acting on the right diagnosis protects the rest of the garden.
Check moisture and soil evidence before treating
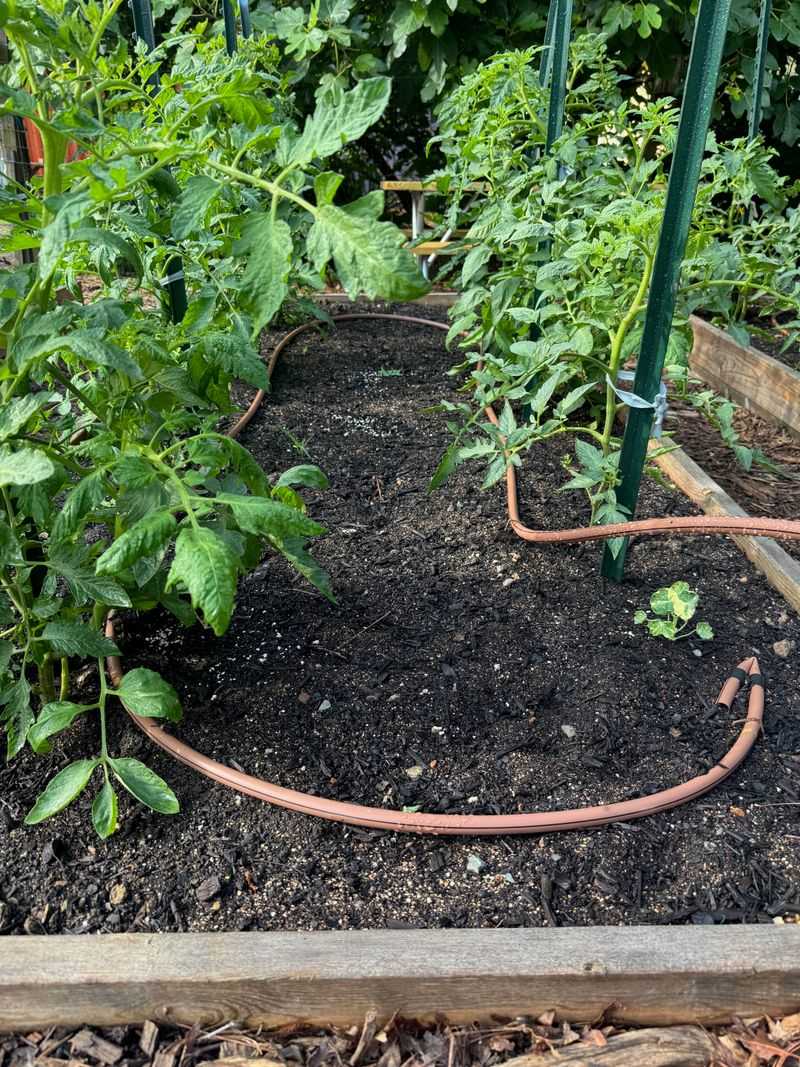
Reaching for a watering can or an amendment without checking what the soil is actually doing is one of the most common ways a yellow-leaf problem gets worse. Both overwatering and underwatering can cause yellowing, and adding more water to a plant already sitting in soggy soil accelerates root damage rather than correcting it.
The reliable check is to push your finger or a hand trowel into the soil near the base of the plant, several inches down where the roots are active, and feel the actual moisture level rather than judging by the surface.
NC State’s home tomato guide recommends keeping soil consistently moist but not waterlogged, and NC State’s vegetable gardening handbook puts the general target at roughly 1 inch of water per week for vegetables, with tomatoes needing closer to 1.5 inches per week during the fruiting period. Rainfall counts toward that total, so check recent precipitation before irrigating.
Directing water at the soil rather than the foliage and using mulch around the base of the plant both help maintain steadier moisture and reduce the splash that carries soilborne disease spores onto lower leaves.
Soil testing should come before any amendment decision. The NCDA&CS soil-testing program measures pH and plant-available nutrients and provides specific lime and fertilizer recommendations.
Reading your soil test report shows you which nutrients are actually low and which are adequate, so you are not guessing. Adding Epsom salt, calcium products, or high-nitrogen fertilizer without test evidence can disrupt nutrient balance and add a new problem on top of the original one.
Fertilizer itself can also cause yellowing, brown leaf margins, and scorched tips if it contacts wet foliage or if rates exceed what the label specifies. UGA’s nutritional deficiency guide notes that fertilizer burn produces symptoms that can be confused with disease or deficiency, so keeping product away from the plant base and following label rates is part of good diagnostic hygiene as well as good growing practice.
Match the response to the evidence
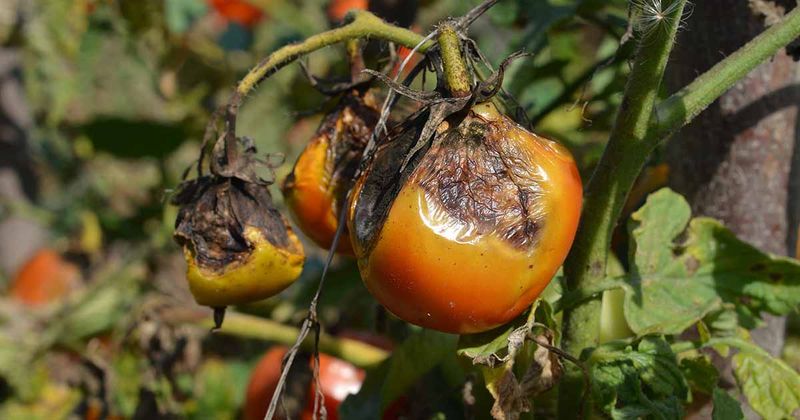
Reading the symptom pattern correctly is only useful if the action that follows matches what the evidence actually shows. A plant with evenly pale lower leaves, slow growth, and good drainage deserves a look at soil-test results and watering history before any product goes on.
A plant with spotted leaves and yellow halos needs a different response than one with pale, unmarked foliage. Jumping to a treatment before the diagnosis is clear is what keeps many gardeners cycling through products without seeing improvement.
For spotted or diseased lower foliage, removing badly infected leaves reduces the amount of inoculum in the garden and improves airflow around the plant. Keep the removal targeted rather than stripping the plant bare.
Excessive defoliation reduces the plant’s ability to photosynthesize and can expose developing fruit to sunscald. Dispose of removed foliage in the trash rather than the compost pile, since composting diseased material can preserve pathogens and reintroduce them to the garden.
Avoid handling plants when the foliage is wet, and direct irrigation water at the soil rather than the leaves to limit splash spread. NC State’s Septoria guidance, early blight resource, and bacterial spot profile all emphasize these cultural practices as the foundation of disease management.
Fungicides labeled for the specific disease can help protect healthy tissue and slow the spread of some foliar diseases, but they do not reverse existing damage or restore leaves that are already dead. Timing and label compliance matter, and a product applied after disease is already widespread will do less than one applied earlier as a protective measure.
For nutrient decisions, use NCDA&CS soil test results as the basis for any amendment rather than reflexively adding Epsom salt, calcium, or high-nitrogen fertilizer. When the pattern is unclear, spreading, or severe, send a sample to the NC State Plant Disease and Insect Clinic or contact your county Extension office.
A confirmed diagnosis gives you a specific, effective path forward instead of a series of expensive guesses.
Act faster when the pattern worsens
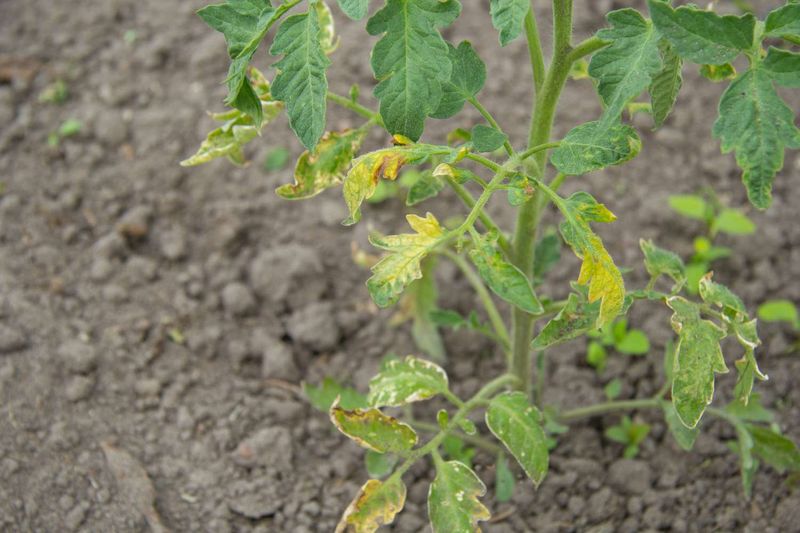
A practical inspection takes only a few minutes and gives you far more information than a quick glance at leaf color. Start at the bottom of the plant and locate the first yellow leaves.
Check whether the yellowing is even across the whole leaf or concentrated between green veins. Flip the leaves over and look for spots, webbing, or insects.
Move up the plant and compare the new growth at the top, noting whether it looks healthy and vigorous or small, curled, and pale. Feel the soil several inches down at the root zone.
Then look at the stem near the base for any discoloration.
A few yellowing lower leaves on a plant with strong new growth, no lesions, no pests, and moist but not soggy soil may simply be aging tissue, and the plant is likely fine. The picture changes when yellowing is spreading upward quickly, lesions or halos are present, insects are visible, new growth looks distorted, or the plant wilts without recovering overnight.
Those combinations call for systematic diagnosis and, if the pattern stays unclear, a sample sent to the NC State diagnostic service or a call to your county Extension office. Panic and indiscriminate treatment are not the answer; reading the plant carefully before acting is what actually protects it.
Yellow leaves are the plant’s way of asking you to look more closely, and most of the time, a close look gives you a workable answer.