
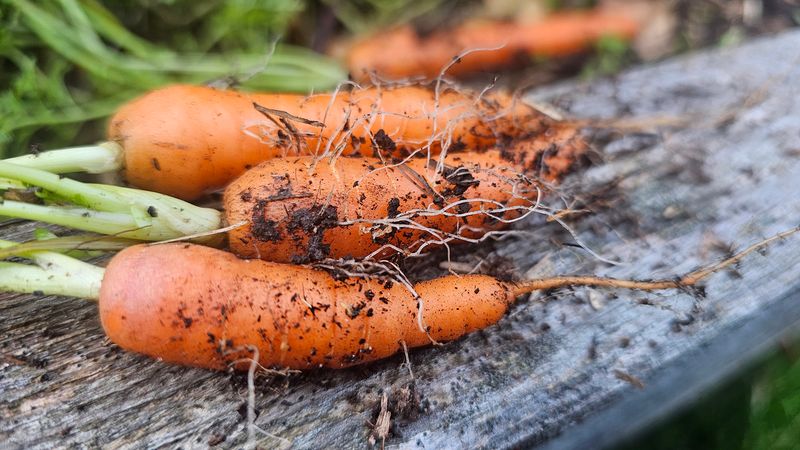
Pull up a batch of fall carrots and find a tangle of thin, whiskery roots instead of smooth taproots, and it is easy to assume something went badly wrong. The good news is that hairy or forked carrots show up for several different reasons, and most of them are fixable before the next planting.
Soil problems are often involved, but so are fertilizer choices, watering habits, diseases, and even how long the plants stayed in the ground. Knowing which cause fits your situation is the first step toward a cleaner harvest.
Hairy roots indicate abnormal development, not one diagnosis
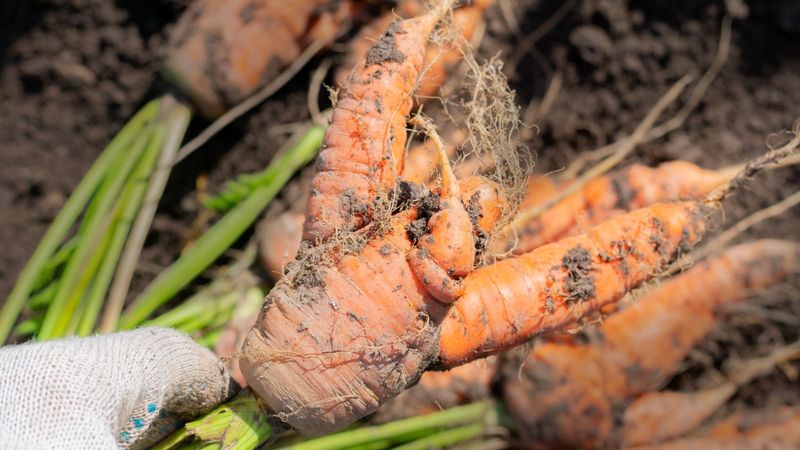
When fall carrots come up covered in whiskery side roots instead of a clean, smooth taproot, the temptation is to point at one culprit and move on. The reality is more useful: hairy, forked, or bristly roots are a sign of abnormal root development, and that symptom can come from several different directions at once.
Physical obstructions are a well-documented starting point. Rocks, compacted layers, dense clods, tree roots, or any hard barrier can deflect or injure a carrot’s growing tip.
Once the tip is damaged or forced sideways, the plant often responds by pushing out secondary roots, which is where the whiskery appearance comes from. UC IPM’s guide to dense or rocky soil in carrots identifies physical obstructions as a common pathway to branched, hairy roots.
But obstruction is not the only road to that result. Excess nitrogen, fresh manure, waterlogged soil, root injury from tools or pests, fungal root diseases, aster yellows disease, and root-knot nematodes can all produce roots that look strikingly similar.
University of Minnesota Extension’s hairy-root diagnostic tool lists these competing causes side by side, making clear that hairiness alone does not confirm any single problem.
The Texas Plant Disease Handbook’s carrot entry reinforces the same point: diseases and nematodes can mimic the look of physical soil injury. Think of hairy roots as a flag that something disrupted root development, then use the rest of this article to narrow down which cause fits your bed.
Inspect the bed for resistance, saturation, and fertilizer injury
Before reaching for a diagnosis involving disease or pests, spend five minutes actually examining the bed where the carrots grew. Push a finger or a narrow trowel straight down through the row.
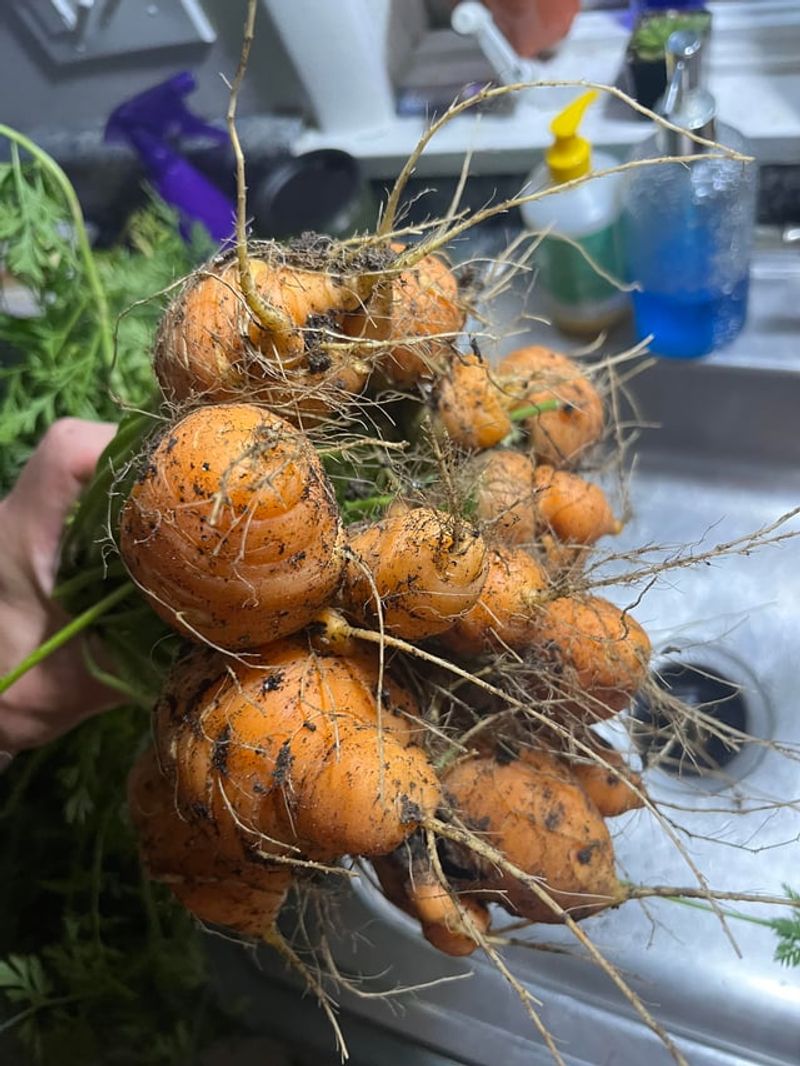
If you hit resistance before you reach 10 to 12 inches, you have likely found part of the problem. Hard layers, dense clods, gravel pockets, or old root debris can all deflect a carrot’s growing tip, and once that tip is bent or damaged, secondary roots fill in around the injury.
UC IPM’s carrot soil guide explains that the growing tip of a carrot is the most sensitive part of the root; any physical obstruction that injures or redirects it can trigger the branching and hairiness growers find at harvest. The Utah State University root-crops production guide similarly recommends removing stones and hard debris before sowing as a basic step toward clean roots.
Next, check drainage. If the bed stayed soggy for days after rain or irrigation, waterlogging may have restricted oxygen around the roots and contributed to abnormal branching or dieback.
Excess water and excess nutrients work through different pathways than physical obstruction, but they can produce roots that look nearly identical at harvest.
Finally, think about what went into the bed before planting. UC Agriculture and Natural Resources fertilizer guidance and the University of Georgia’s commercial carrot management bulletin both caution against heavy nitrogen inputs.
A concentrated band of fresh manure or a strong nitrogen fertilizer applied close to the seed row can chemically injure young roots and trigger the same whiskery branching that compaction causes through a physical route.
Check the tops and roots before choosing a remedy
Once you have looked at the soil, shift attention to the plants themselves. The foliage and the surface of the roots can tell you whether a biological problem is layered on top of, or instead of, a physical one.
A quick visual check before the next planting could save an entire season.
Aster yellows is a disease worth ruling out when hairy roots show up alongside unusual foliage. The tell is not hairiness alone; according to University of Minnesota Extension’s carrot diagnostic guide, aster yellows typically causes yellowing, twisting, bronzing or reddish older leaves, stunted or bunchy new growth at the crown, and sometimes a bitter taste in the root.
The disease is spread by leafhoppers, so if you noticed a lot of those insects during the growing season, that is worth factoring in. Hairiness without any of those foliage changes makes aster yellows less likely, though not impossible.
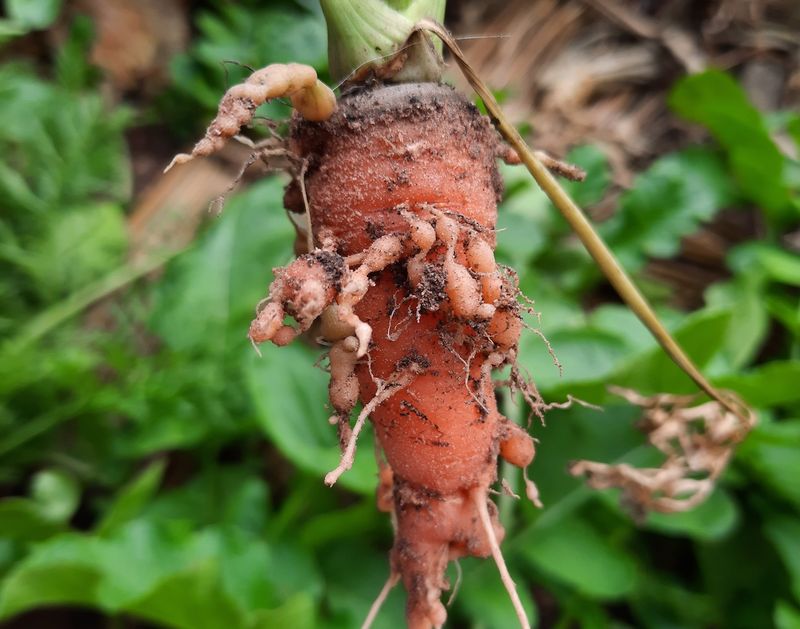
Root-knot nematodes are a separate concern, particularly in Florida and Texas sandy soils. UC IPM’s nematode management page for carrots and the UC IPM carrot pest management guidelines both emphasize that the most diagnostic sign of root-knot nematodes is firm, beadlike galls or knots on the feeder roots, not general hairiness.
Uneven patches of stunted or yellowing plants in the row can also point toward nematodes. Hairiness alone is not enough to make that call; if the symptom recurs season after season, a laboratory soil or root test is the reliable way to confirm it.
The Texas Plant Disease Handbook recommends consulting your local Extension office when nematodes are suspected.
If the roots show decay, dark lesions, soft cavities, or a foul smell, the issue has moved beyond shape into rot. That pattern points toward Pythium or another root disease, often worsened by poor drainage, rather than a simple soil texture problem.
Treat decay as a separate and more urgent signal than whiskery roots alone.
Build a loose, deep bed without working wet soil

Correcting the physical conditions in the bed is the most direct response when inspection points to compaction, hard layers, or rocky soil. Carrots need room to push straight down, and a bed that fights them at 6 or 8 inches will produce bent, branched, or hairy roots almost every time.
UF/IFAS Gardening Solutions recommends loose, well-drained soil for Florida carrot production, and the UF/IFAS nitrogen guidelines for North Florida carrots assume a properly prepared bed as the starting point for any fertilizer recommendation. Extension sources commonly call for at least 12 inches of workable, obstacle-free soil, with some commercial guidance suggesting 12 to 14 inches or deeper depending on variety.
Remove stones, clods, and any hard debris from the entire depth of the root zone, not just the surface. If a compacted layer sits below the reach of a standard garden fork, break it up or consider a raised bed filled with loose, amended material.
Adding mature compost when you prepare the bed can improve structure and drainage over time, but compost alone cannot substitute for removing major obstructions or fixing an underlying drainage problem.
Timing the prep work also matters. Texas A&M AgriLife’s home vegetable guide advises waiting to work soil until a squeezed handful crumbles rather than staying packed in a ball.
Digging or tilling saturated soil compresses it into dense clods that harden as they dry, creating exactly the kind of resistance that deflects young carrot roots. Preparing the bed a day or two after a light rain, or after light irrigation that moistens but does not soak the soil, gives you the best working conditions.
Feed modestly and keep moisture consistent

Two of the most controllable factors in carrot root quality are what you feed the bed and how you water it. Getting both wrong in the same season can produce hairy, branched roots even in soil that looks perfectly prepared.
Fresh manure and high-nitrogen fertilizers are consistently linked to rough, forked, or hairy carrot roots. UC Agriculture and Natural Resources fertilizer guidance and UMass Extension’s carrot growing tips both caution against heavy nitrogen inputs for root crops.
The practical rule is straightforward: skip fresh manure entirely, use mature compost that has fully broken down, and base any fertilizer application on a soil test rather than automatically adding a high-nitrogen product. Carrots grown in soil that was recently amended with uncomposted or concentrated organic material often show the same whiskery branching associated with rocky beds.
Irrigation requires its own balance. UF/IFAS Gardening Solutions notes that carrots need reliable moisture, especially during germination and early root expansion.
Letting the bed dry out and then flooding it can stress roots and contribute to cracking or splitting, while keeping the bed saturated restricts oxygen and can encourage root dieback or disease. UC IPM identifies waterlogged conditions as a contributing factor in abnormal root development.
The target is even, consistent moisture in well-drained soil, not a dry bed followed by a heavy soak.
In Florida’s fall season, which often falls during a relatively dry stretch after summer rains ease, consistent irrigation becomes especially important. In Texas, where soil types vary widely across the state, checking drainage before planting can prevent moisture from pooling around the root zone after rain.
Give seedlings space and protect the young taproot

Crowded seedlings compete for space underground long before the competition shows in the foliage. When carrot roots press against each other during early development, the result can be stunted, misshapen, or poorly formed taproots, even in a bed that was prepared well.
Thinning early and spacing consistently is one of the simplest interventions available.
UF/IFAS Gardening Solutions recommends spacing carrot plants roughly 1 to 3 inches apart depending on variety, and Florida Fresh IFAS planting details support that same range. Thin seedlings as soon as they are large enough to handle, using scissors rather than pulling, to avoid disturbing the roots of the plants you keep.
Starting carrots from direct-sown seed rather than transplants can also help avoid early taproot disturbance. A UF/IFAS Extension post notes that direct sowing can avoid potential early taproot disturbance that sometimes accompanies transplanting; that source is dated September 2026 and should be verified before publication, so treat the recommendation as cautious rather than definitive.
What is well established is that any kinking, circling, or compression of a very young taproot can set the stage for forking or stubbing later in the season.
Planting timing matters just as much as spacing, and the South is not a single climate. Texas A&M AgriLife’s carrot crop brief describes fall-to-winter production windows that vary across the state, while Texas A&M’s carrot information page and UF/IFAS both reflect regional differences in Florida as well, with North and Central Florida planting from August through March and South Florida from September through March.
Use your local county Extension calendar rather than a single national schedule to find the right window for your area.
Do not confuse overwintering with first-season soil trouble
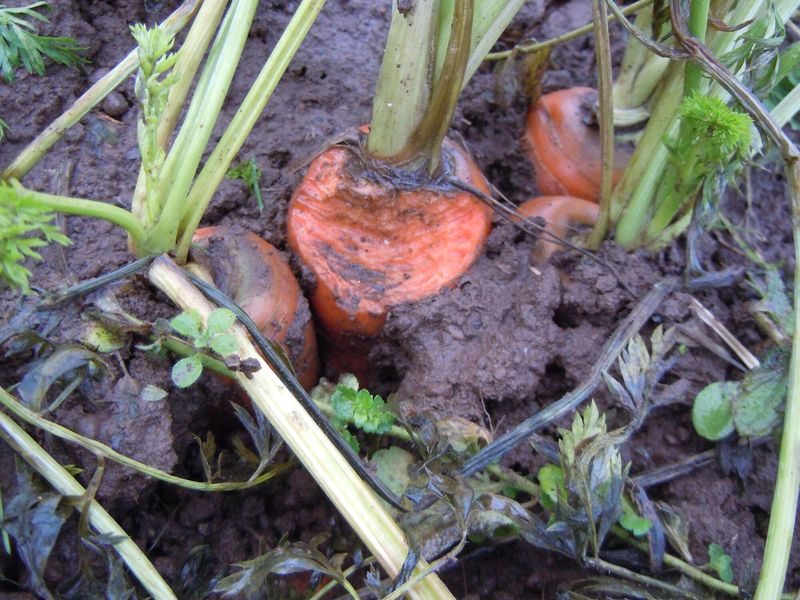
A carrot that spent the winter in the ground and then developed a cluster of new side roots in spring is doing something biologically different from a first-season carrot deformed by compacted soil. Mixing up those two situations can send a gardener chasing the wrong fix.
Carrots are biennials. They store energy in the taproot during their first growing season and use that energy to flower and set seed in the second.
UF/IFAS Gardening Solutions notes this life cycle as a reason to harvest before plants bolt. As a carrot prepares to flower, it redirects resources and can produce additional secondary roots as part of that transition, which is completely separate from the mechanical or chemical injury that causes hairy roots in a young, first-season plant.
Oregon State University Extension’s vegetable troubleshooting guide also distinguishes overwintering effects from first-season deformities caused by soil conditions. A carrot left in the ground too long in a mild Southern winter may look hairy at harvest simply because the plant has shifted into its second-year mode, not because anything went wrong with the soil.
Before blaming the bed, consider how long the carrots were in the ground and whether they showed signs of bolting, such as a thickening crown, a central flower stalk beginning to form, or leaves that had changed character from the original seedling growth. If the answer is yes, overwintering is the more likely explanation, and the remedy is simply to harvest on time next season rather than reworking the bed.
Misshapen carrots are usually edible when they remain sound
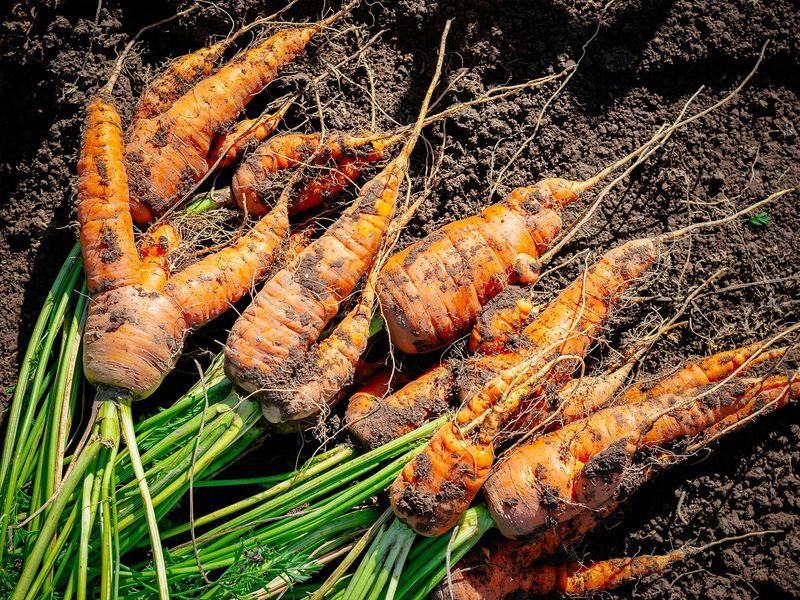
After all the diagnosing, the first practical question most gardeners ask is whether the harvest is still worth eating. For most misshapen carrots, the answer is yes, with some common-sense conditions attached.
UF/IFAS Gardening Solutions and the University of Minnesota Extension hairy-root guide both indicate that abnormal shape is primarily an appearance and handling issue rather than a safety concern. Wash harvested roots thoroughly, trim away the side roots, and peel more carefully than you would with a straight carrot.
The edible flesh underneath is typically fine.
Discard any roots that are slimy, badly decayed, foul-smelling, or show signs of rot spreading through the flesh. The Texas Plant Disease Handbook notes that carrots affected by aster yellows may taste bitter or be poor quality even when they look structurally sound, so if foliage symptoms matched that disease during the season, taste a small piece before committing the whole batch to cooking.
Going forward, the action plan is straightforward: check roots for galls and foliage for disease symptoms, correct physical bed conditions before the next sowing, avoid fresh manure and high-nitrogen fertilizers, keep moisture even rather than feast-or-famine, thin seedlings early, and contact your local Extension office if hairy or forked roots keep showing up despite those changes. A sound carrot in an odd shape is still a carrot worth eating; the goal is simply to grow more of the straight ones next time.