
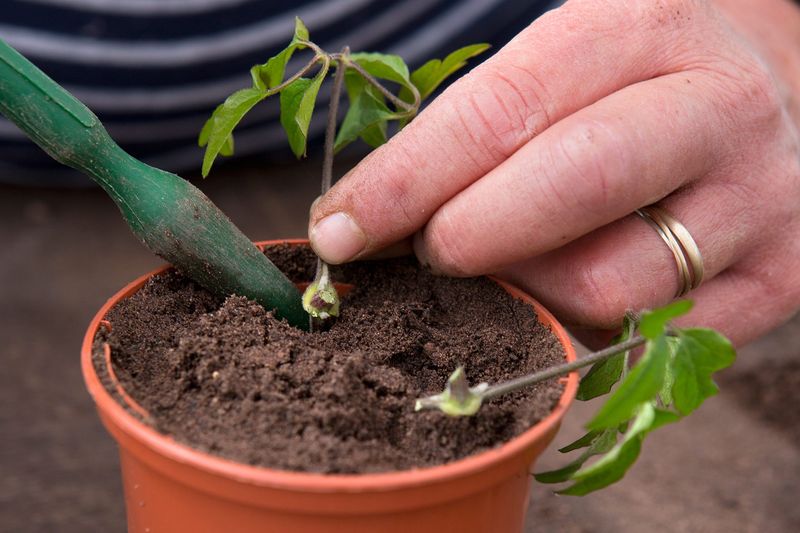
A clematis that barely flowered this year is frustrating, but it can still give you something valuable before the season ends: healthy stems you can root into new plants. Taking cuttings from current-season growth is one of the most practical ways to multiply a named cultivar you love, and it costs almost nothing beyond a little time and a bag of perlite.
The catch is that late-summer and fall stems are not true softwood – they are firmer, semi-ripe growth that needs different handling and realistic expectations. Root some now, protect them through winter, and you may have young plants ready to pot up by spring, though flowering will likely take another year or two after that.
Use the plant’s growth stage—not the calendar—to time cuttings
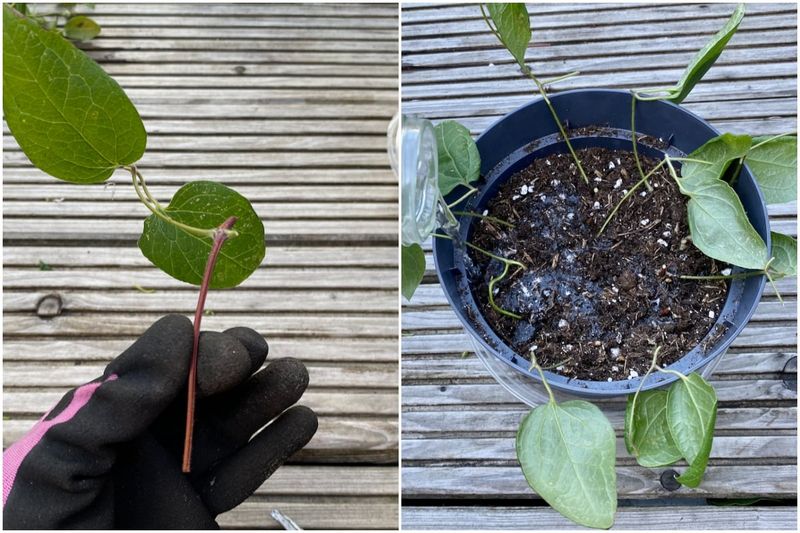
Grab a stem from your clematis and bend it gently. If it snaps cleanly, you have the kind of flexible material that works well for propagation.
That test tells you more about timing than any calendar date, because clematis stems change character as the season advances.
True softwood comes from fresh spring or early-summer growth – young, succulent shoots that root quickly under warm, humid conditions. By late summer and fall, those same stems have firmed up considerably.
RHS clematis growing guidance describes this later material as semi-ripe, meaning the base of the shoot has begun to harden while the tip may still be softer. Calling fall stems softwood is technically inaccurate, and treating them exactly like spring cuttings can lead to disappointment.
For gardeners in Florida and Texas, this distinction matters even more. Heat, humidity swings, and drought stress affect how quickly stems mature, and conditions vary widely between humid East Texas, central Texas, and the drier western parts of the state.
A study on clematis propagation timing noted that spring is the traditional optimal period for Southern propagation, with March cited for the South, though semi-ripe cuttings taken into early fall can still succeed.
The realistic payoff: under protected, humid conditions, some semi-ripe cuttings may root in roughly six to eight weeks and be ready for individual pots the following spring. No result is guaranteed, and cultivar matters enormously.
Judge your timing by what the plant is actually doing, not by a fixed date on the wall.
Start with a healthy, nonflowering stem
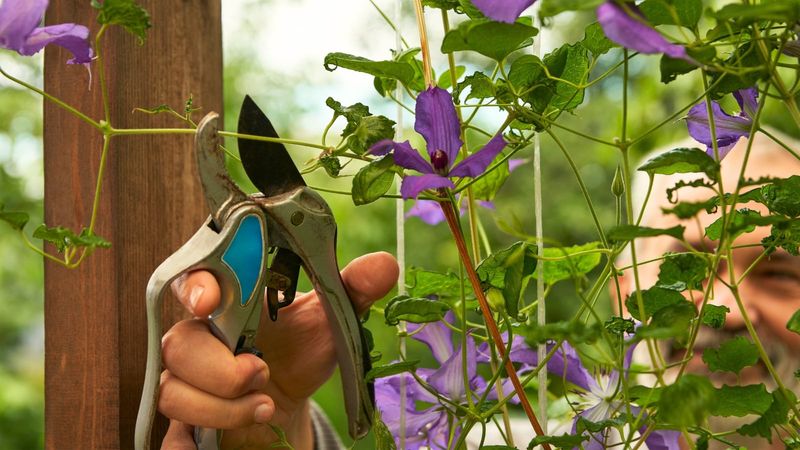
Before you reach for your pruners, look hard at the parent plant. A cutting copies the genetics of its source exactly, which means a stressed or sickly parent produces stressed or sickly offspring.
Propagating a plant that bloomed poorly because of disease, pest damage, or poor cultural conditions will not fix the problem – it will multiply it.
Choose a stem that looks vigorous: deep green, free of spots or discoloration, with no visible insects or webbing. University of Georgia Extension guidance on taking cuttings emphasizes that healthy, disease-free stock is a baseline requirement, because fungi and pathogens can kill cuttings before roots ever form.
Reject any material that looks wilted, streaked, or off-color, even if it comes from an otherwise attractive part of the vine.
Pay particular attention to signs of clematis wilt, a fungal disease that causes stems to collapse suddenly from the base upward. RHS guidance on clematis wilt recommends cutting affected stems back to healthy tissue at soil level, then disinfecting tools to avoid spreading the pathogen.
Do not take cuttings from stems showing wilt symptoms – remove and destroy that material instead.
Skip flowering stems entirely. A stem carrying open flowers or developing buds is already directing its stored energy toward reproduction rather than root development.
Find a nonflowering side shoot from the current season’s growth, and you are starting with material that has the best chance of redirecting that energy into new roots.
Prepare a short cutting around a healthy node
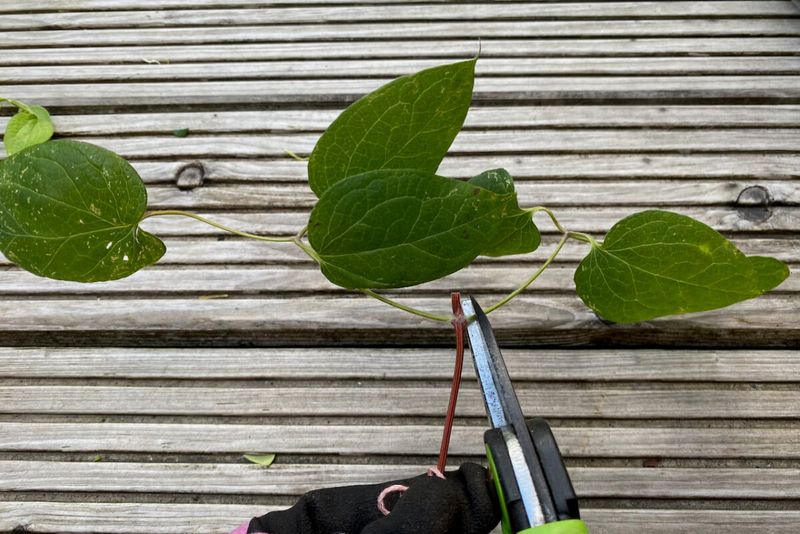
Once you have a healthy stem in hand, the preparation sequence is straightforward. Cut a section about three to five inches long, making your lower cut just below a node – the slightly swollen point where a leaf attaches to the stem.
That node is where roots are most likely to emerge, so its position matters.
Strip off the leaves from the lower half of the cutting, leaving only a small amount of healthy foliage at the top. Iowa State University Extension’s softwood cutting guide explains that removing lower leaves prevents decay in the rooting medium while retaining some top foliage allows the cutting to continue photosynthesizing.
If any flower buds or open blooms remain, remove those too.
Removing flowers is not just cosmetic. A cutting with active blooms or developing seed heads will spend its limited stored energy on those structures rather than on producing new roots.
UGA Extension’s cutting propagation guide notes that redirecting energy away from reproduction and toward root production is one of the key reasons to prepare cuttings this way.
Some guides describe a short leaf-bud cutting as an alternative: a single healthy leaf with its attached axillary bud and a short section of stem. This technique works for clematis and can be useful when stem material is limited, but the preparation logic is the same – one node covered by the medium, minimal foliage above it, and nothing that wastes energy on flowers.
Give the node an airy, well-drained rooting medium
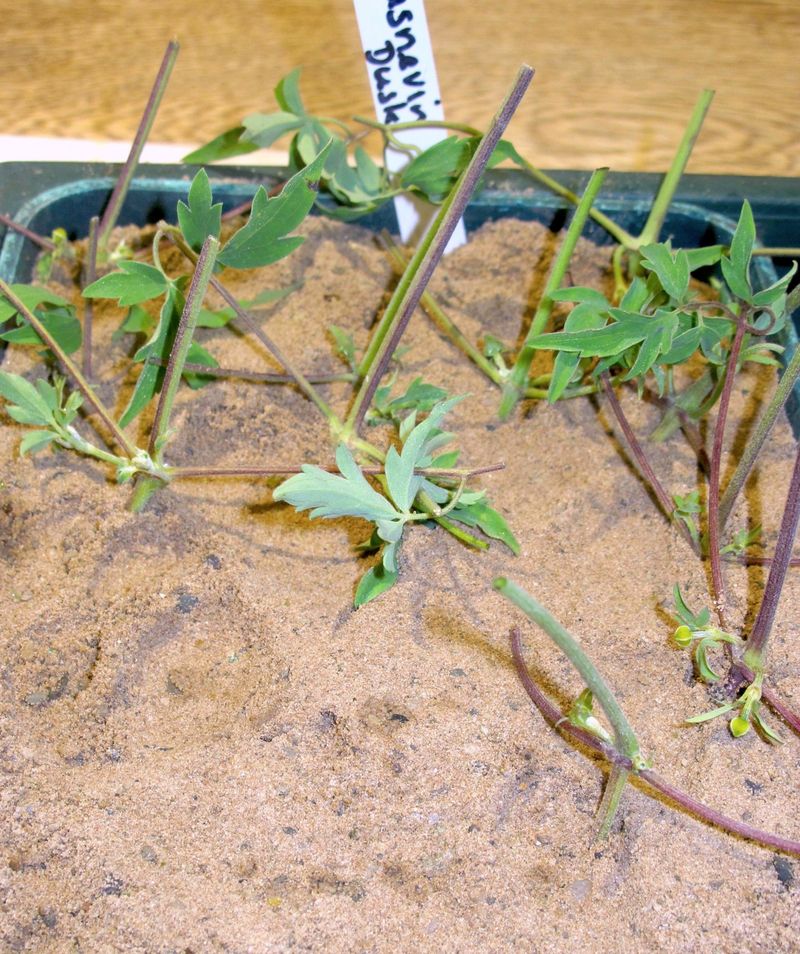
Ordinary garden soil is the wrong choice for rooting cuttings. It compacts around the stem, holds too much water, and carries pathogens that attack vulnerable tissue before roots can form.
What a clematis cutting needs is something that holds just enough moisture to prevent drying out while draining freely enough to keep the node from sitting in standing water.
Clean perlite, coarse sand, or a blend of the two are practical starting points. A peer-reviewed study on factors affecting clematis stem cutting propagation found meaningful differences in survival and rooting success among the media tested, with sand and perlite among the better performers.
No medium guaranteed success across every cultivar, which is worth remembering if your first attempt does not root as hoped.
Rooting hormone is optional. Some gardeners skip it entirely and get decent results; others find it improves the percentage of cuttings that root, the speed of rooting, or the quality of the root system – particularly with cultivars that are slow to respond.
NC State Extension’s propagation handbook describes rooting hormones as tools that can improve results for woody and semi-woody material, but notes that response varies and the product must be used according to its label.
If you choose to use rooting hormone, dip only the cut end of the stem, tap off any excess, and insert it promptly into the medium. Follow the label for application rate, storage, and any safety precautions – some products require gloves and eye protection during handling.
Protect cuttings from drying without trapping excess heat
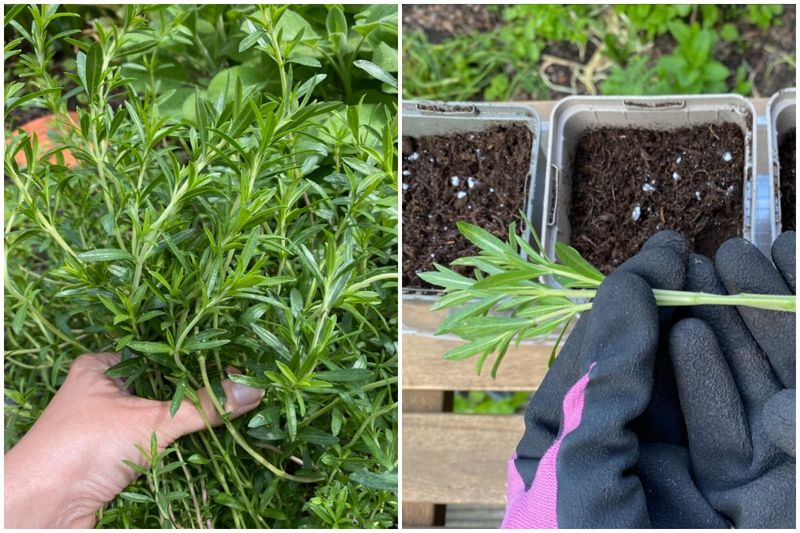
After inserting the cutting so at least one node sits below the surface of the medium, your next job is managing the environment around it. A cutting has no roots yet, which means it cannot replace the water it loses through its leaves.
Without some protection, it will wilt and fail before roots ever begin to form.
A clear plastic bag, an inverted plastic bottle, or a purpose-made propagation dome placed over the pot slows water loss significantly. Missouri Botanical Garden’s cuttings guide recommends this kind of humidity enclosure for softwood and semi-ripe material, combined with bright indirect light rather than direct sun.
Direct sun is a real hazard here. A clear cover acts like a small greenhouse, and if it sits in full sun, temperatures inside can spike fast enough to cook the cutting.
Place the covered pot in a spot with bright, filtered light – near a window that does not receive intense afternoon sun, or on a shaded porch. This matters especially in Florida and Texas, where summer and early-fall sun is intense enough to overheat even partially shaded setups.
University of Florida IFAS guidance on softwood cuttings notes that cuttings lose water rapidly and that high humidity is critical to survival. Balance that humidity with enough ventilation to reduce the risk of fungal rot – prop the cover slightly open, or lift it briefly each day to let air circulate.
High humidity without airflow creates the warm, stagnant conditions that encourage mold and decay.
Monitor moisture and check for roots carefully
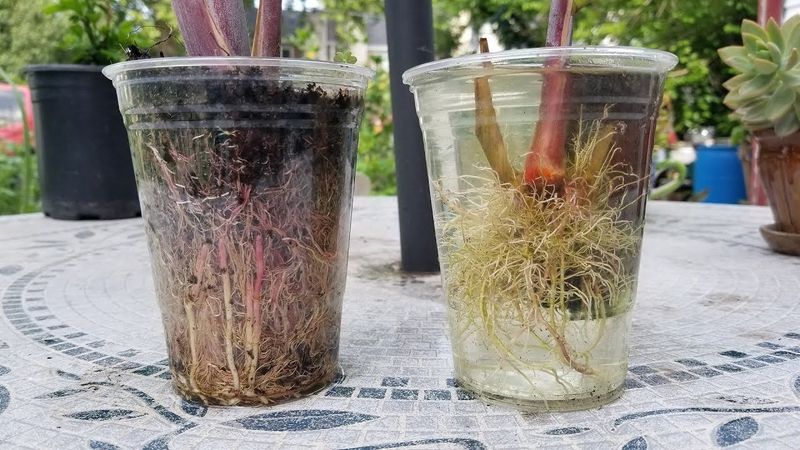
Keeping the medium evenly moist is the main maintenance task during rooting. Check it every couple of days by pressing a finger lightly into the surface – it should feel damp but not soggy.
Waterlogged medium cuts off oxygen to the developing roots and creates conditions where rot moves in quickly. If the medium feels wet rather than moist, ease up on watering and make sure the container is draining freely.
Resist the urge to check progress by pulling cuttings out of the medium. Disturbing the stem repeatedly before roots have anchored damages whatever fragile root tissue has started to form.
RHS clematis growing guidance suggests waiting until there are clear signs of establishment before moving or repotting, and notes that rooted cuttings are generally potted individually the following spring.
New leaves appearing on a cutting are encouraging, but they do not confirm that roots have formed. A cutting can push new growth from stored energy in the stem for weeks before any roots develop – or before it eventually fails.
Missouri Botanical Garden’s propagation guide recommends checking for roots by gently tugging the cutting after several weeks: if it resists being pulled out, roots have likely anchored.
Under favorable conditions, roughly six to eight weeks is a reasonable general window for rooting to begin. Cultivar, temperature, humidity, and medium all affect the timeline, so treat that figure as a starting point rather than a deadline.
Check several cuttings from the same batch rather than drawing conclusions from just one.
Pot rooted cuttings in spring, but expect flowers later
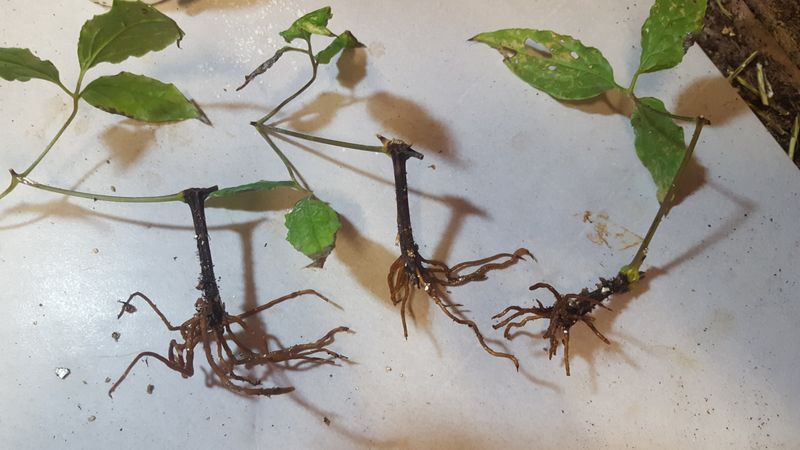
When a cutting resists a gentle tug and you can see roots emerging from the drainage holes or threading through the medium, it is ready for the next step. Move it carefully into its own small pot filled with a quality potting mix, handling the root system as gently as possible.
Young roots are fragile, and rough handling at this stage can set the plant back significantly.
Spring is a reasonable target for this transition. RHS guidance on growing clematis describes rooted cuttings as commonly potted up individually the following spring, which aligns with the idea that a cutting taken in late summer or fall spends the cooler months slowly establishing before being moved into a larger container as temperatures rise.
Not every cutting will be ready at the same time, and some may not root at all – that is a normal part of propagation, not a failure of technique.
After potting, gradually reduce the humidity around the young plant rather than removing the cover all at once. Sudden exposure to dry air stresses a plant that has been living in a humid microclimate for weeks.
Open the cover a little more each day over the course of a week or two, giving the leaves time to adjust to lower humidity before the cover comes off entirely.
Flowering is a separate milestone. RHS guidance notes that clematis grown from cuttings typically flower within about two years, and some cultivars take longer than three years.
Plan to grow young plants on for at least a full season before expecting blooms, and do not be discouraged if the first year brings mostly leafy growth.
Propagation will clone the problem behind poor flowering
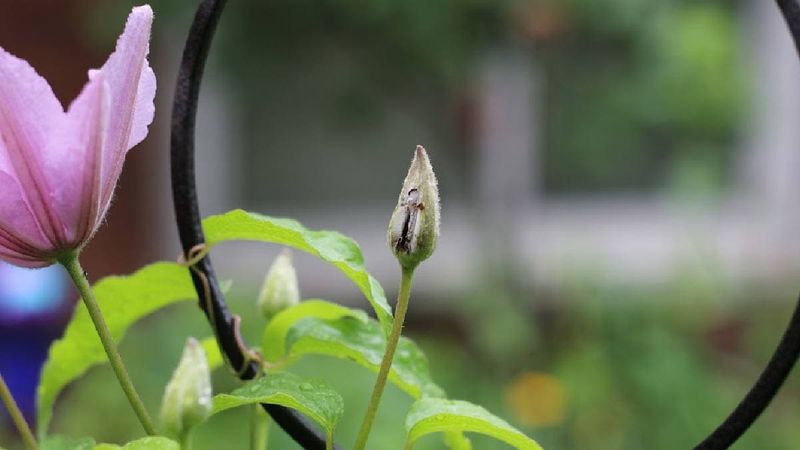
Taking cuttings from a clematis that barely bloomed can make sense if the plant is otherwise healthy and you value its cultivar. What it cannot do is fix whatever caused the poor flowering in the first place.
A cutting is a genetic copy of its parent, carrying the same traits, the same tendencies, and the same vulnerabilities.
Several common conditions reduce clematis flowering, and most of them have nothing to do with the plant’s genetics. Iowa State University Extension’s clematis growing guide identifies inadequate light, excessive nitrogen fertilizer, incorrect pruning, and winter damage as frequent causes of poor bloom.
Most clematis need at least six hours of direct sun to flower well, and a plant grown in too much shade will rarely perform the way its cultivar label promises.
Pruning is especially easy to get wrong because clematis fall into distinct groups based on whether they bloom on old wood, new wood, or both. Clemson Cooperative Extension’s clematis factsheet explains these pruning groups in detail and notes that hard-pruning a plant that blooms on old wood removes the very stems that would have carried next season’s flowers.
Before making any significant cuts, identify which group your plant belongs to.
If the poor flowering is tied to disease – particularly clematis wilt, which can cause sudden stem collapse – propagating from that plant may carry the problem forward. Diagnose the parent plant honestly before deciding whether it is worth cloning.
A healthy named cultivar in a good location is worth multiplying; a struggling plant in the wrong spot is worth fixing first.
Handle plant material safely and check local restrictions
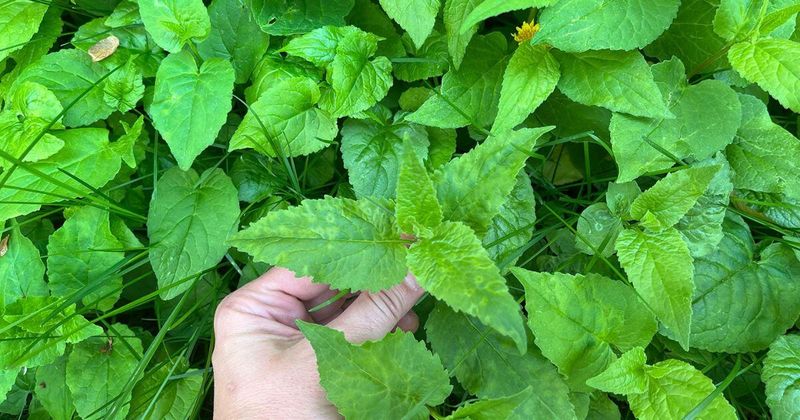
Clematis plant material can irritate the skin of some people, particularly with prolonged contact. Wearing gloves while taking and preparing cuttings is a sensible precaution, and washing your hands thoroughly after handling any part of the plant is good practice.
Poison Control guidance on skin problems from outdoor plants notes that certain garden plants can cause contact irritation even without an obvious allergic reaction.
Keep clematis cuttings, trimmings, and rooting containers out of reach of pets and children. ASPCA Poison Control lists Clematis species as toxic to dogs, cats, and horses if ingested, with symptoms that can include drooling, vomiting, and diarrhea.
This is a separate concern from rooting products – the plant itself poses an ingestion risk regardless of what supplies you use alongside it.
Rooting hormones carry their own safety requirements, which vary by product formulation. EPA-registered rooting hormone product labels specify handling, storage, and disposal instructions that must be followed.
Read the label before opening the container, store the product away from children and pets, and dispose of any unused material according to label directions.
Finally, check your regional invasive-plant lists before propagating or sharing any clematis. Clemson Extension identifies Clematis terniflora – sweet autumn clematis – as highly invasive in South Carolina because it reseeds aggressively.
Not all clematis species share the same invasive status, but local guidance varies, and distributing a restricted species is worth avoiding. The right plant in the right place is the goal worth working toward.