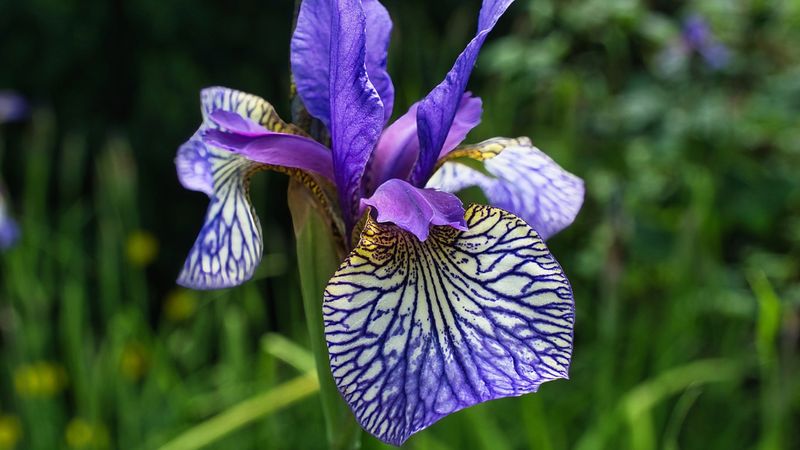
Ever noticed your iris beds looking a bit crowded, with fewer blooms each year? Dividing irises is like giving your garden a fresh start.
This simple technique breathes new life into tired plants, multiplies your collection, and keeps those gorgeous blooms coming back stronger.
Follow these twelve steps to master the iris division process and watch your garden transform.
1. Choose the Perfect Timing
Late summer to early fall offers the sweet spot for iris division. Aim for 6-8 weeks after the final blooms have faded, giving plants time to store energy before the split.
Your local climate matters too—northern gardeners should divide in July, while southern regions can wait until September. Morning hours provide cooler temperatures that minimize plant stress during this garden makeover.
2. Gather Your Arsenal
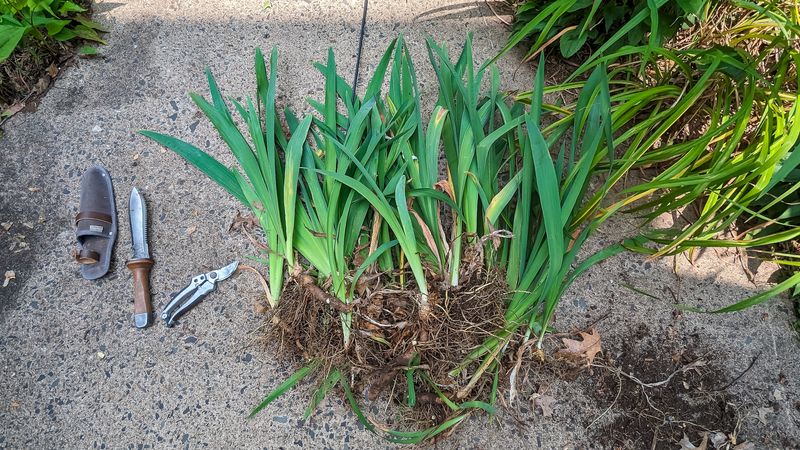
Sharp garden tools make all the difference when dividing irises. Round up a sturdy garden fork, sharp pruning shears, and a clean knife for precise cuts. Don’t forget your garden gloves!
A small tarp provides the perfect workspace to sort your rhizomes. Keep a bucket of water with a splash of bleach nearby to sanitize tools between cuts, preventing disease spread among your precious plants.
3. Trim Back the Foliage

Grab those pruning shears and give your iris leaves a haircut! Trim the fan-shaped foliage down to about 4-6 inches tall before digging up the plant. This fan-shaped trim reduces water loss and makes handling much easier.
The reduced leaf surface helps the plant focus energy on root development rather than supporting excess foliage. Those trimmed fans will mark where your new divisions should face when replanting.
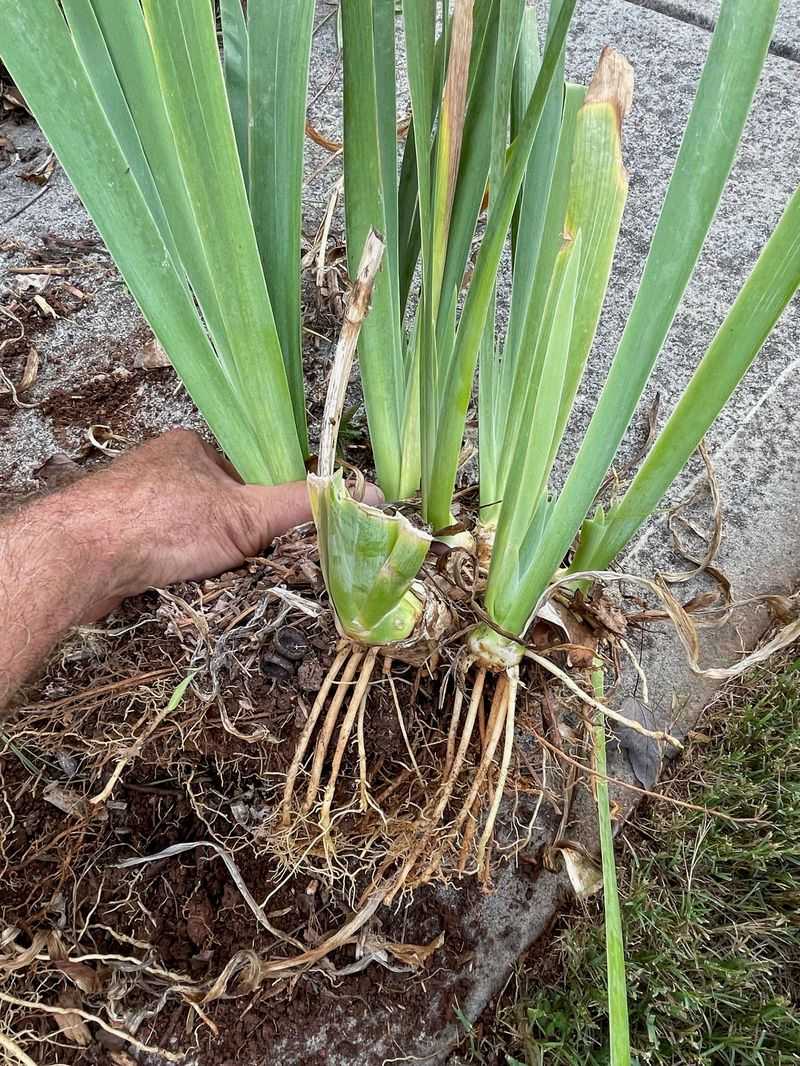
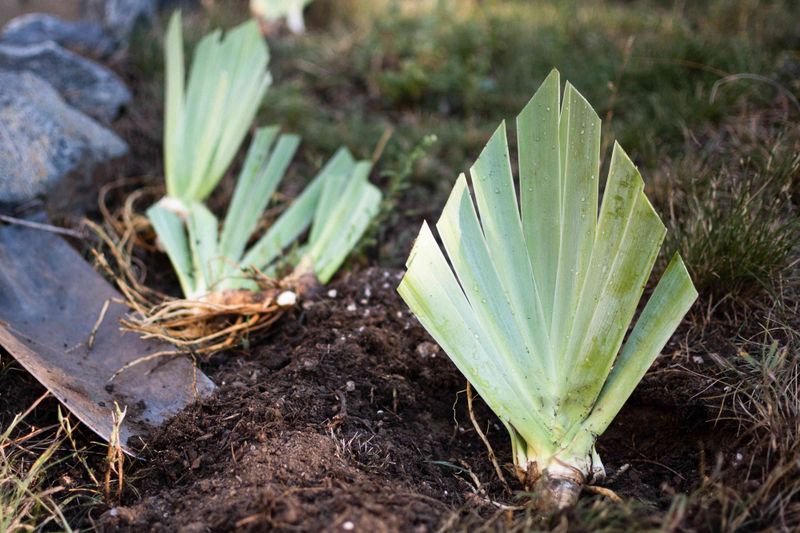
4. Excavate with Care
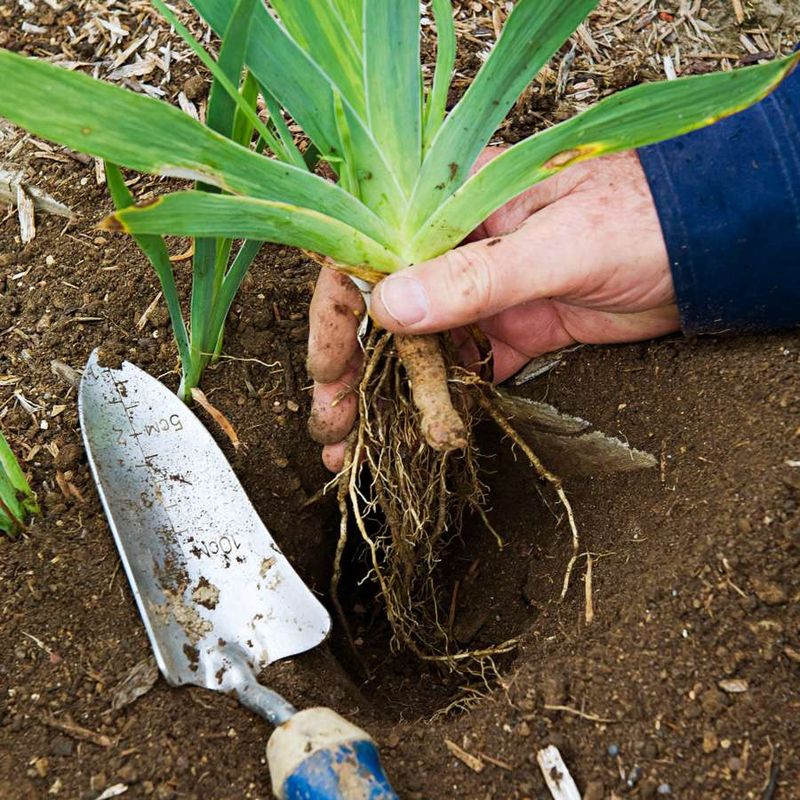
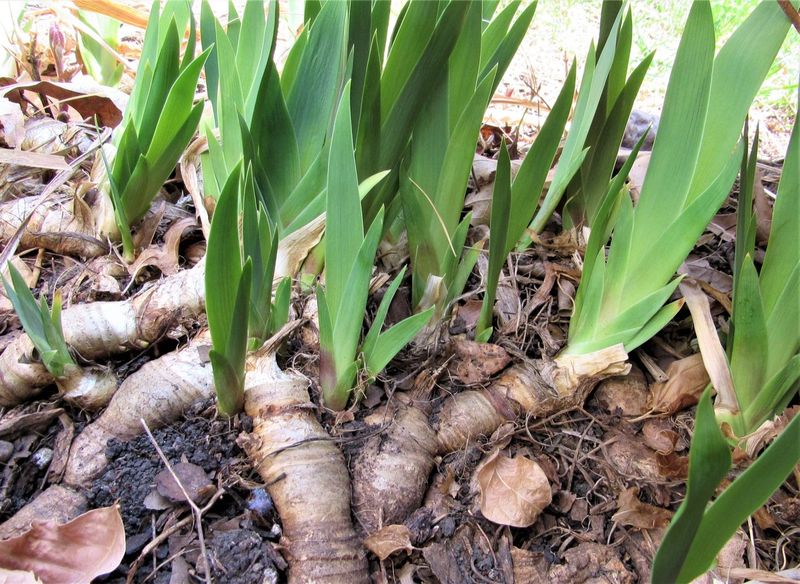
Start digging about 6 inches away from the outer edge of the clump. Work your garden fork in a circle around the iris clump, gently prying upward to avoid damaging the rhizomes.
Rock the fork back and forth to loosen the soil’s grip. Patience pays off here—rushing might snap those precious rhizomes. Once loosened, lift the entire clump and shake off excess soil to reveal the underground network.
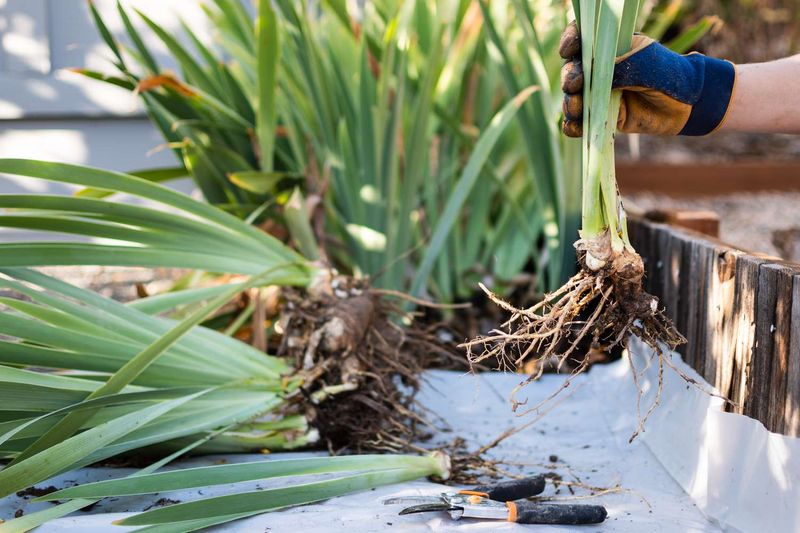
5. Rinse and Inspect
Garden hose in hand, gently spray away the remaining soil from your iris clump. This soil shower reveals the true condition of your rhizomes and makes spotting problems much easier.
Look for firm, plump sections with healthy roots. Soft spots, holes, or mushy areas signal trouble—these need removal. Those cream-colored rhizomes with pencil-thick roots and green leaf fans are your garden gold!
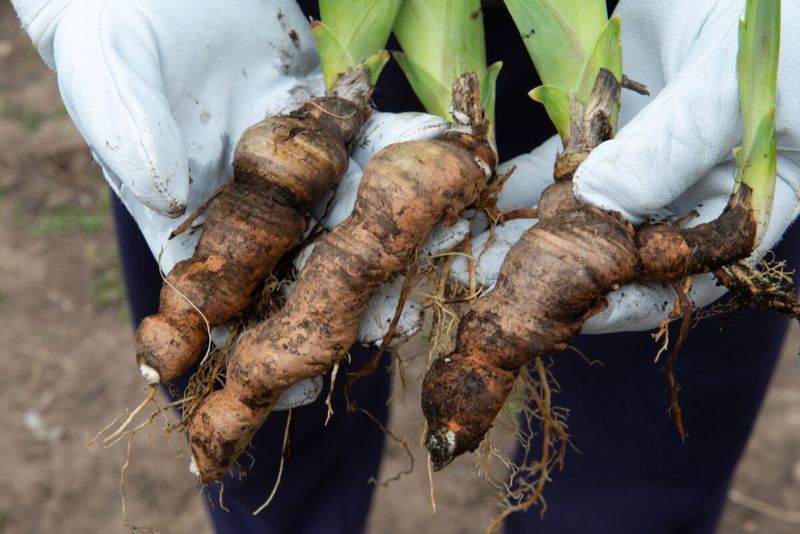
6. Divide and Conquer
Armed with a sharp knife, separate the rhizome clump into individual sections. Each division should include a fan of leaves and a 3-4 inch section of rhizome with healthy roots attached.
Natural breaking points often appear where younger rhizomes meet older ones. Fresh cuts heal better when made cleanly rather than torn. Remember to sanitize your knife between cuts to prevent spreading any hidden diseases.
7. Perform Health Inspection
Play garden detective and examine each division closely. Healthy rhizomes feel firm like carrots—not soft or squishy. Discard any sections showing signs of rot or insect damage without mercy!
Small holes may indicate iris borers have invaded. Look for the freshest sections with firm white flesh and strong fans. Those older, woody center sections with few leaves? Toss them in the compost—they’ve given their best years already.
8. Prune the Roots
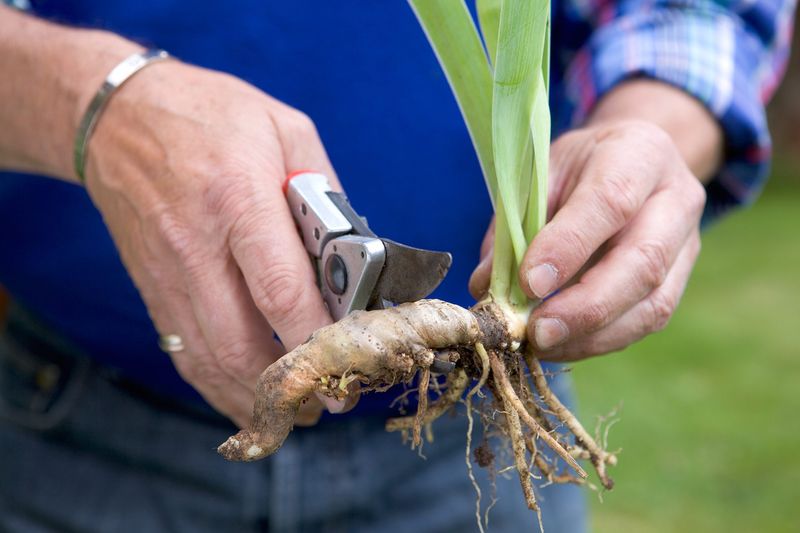
Grab those pruning shears again and trim the roots to about 3-4 inches long. This root haircut stimulates new growth and makes planting easier. Don’t worry—your irises won’t mind this trim!
While you’re at it, remove any brown, stringy roots that feel dead or mushy. Fresh, firm roots in creamy white or light tan colors signal healthy divisions. This root pruning helps prevent the divisions from competing with themselves when replanted.
9. Let Them Sunbathe

Give your freshly cut rhizomes a day to dry in a shaded, airy spot. This brief curing period allows cut surfaces to form a protective callus, reducing the risk of rot after planting.
Lay them out on cardboard or newspaper, making sure they don’t touch each other. Consider dusting the cut ends with garden sulfur or cinnamon as a natural fungicide. Just 24 hours of this air treatment makes a world of difference to their survival rate.
10. Prepare Their New Home
Before those rhizomes return to the earth, refresh their planting bed. Dig the soil 10-12 inches deep, mixing in compost to improve drainage. Irises hate wet feet more than anything!
Create small mounds in the bed where each rhizome will sit. These mini-hills ensure water drains away from the rhizome. For clay soils, add extra sand or grit to prevent future rot problems. Your irises will thank you with prolific blooms next season.
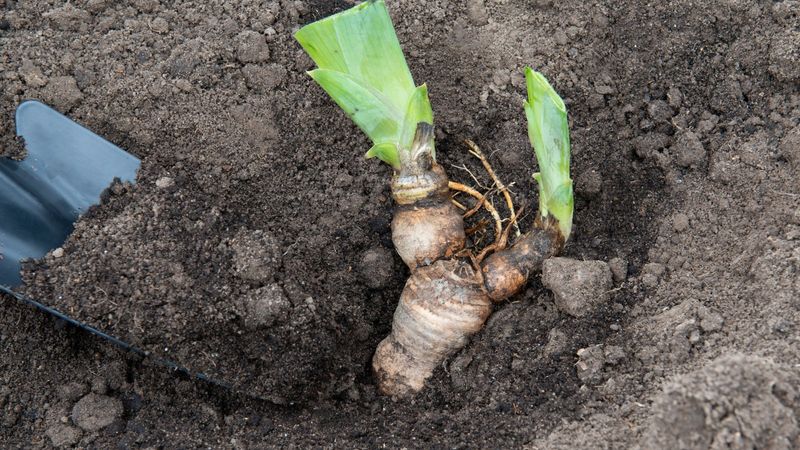
11. Plant with Precision
Position each rhizome atop its soil mound like royalty on a throne. The top should sit just at or slightly below the soil surface—never buried deep! Imagine the rhizome sunbathing while its roots reach downward.
Fan the roots down the sides of the mound and gently firm soil around them. Keep the leaf fan facing outward, away from the center of your planned clump. Space divisions 12-18 inches apart to give them room to spread their wings.
12. Water Wisely and Mulch
Give your newly planted divisions a gentle shower—just enough to settle the soil without waterlogging. Restrain your watering instincts in the coming weeks; overwatering leads to rot faster than anything.
Apply a light mulch of pine needles or straw around—but not touching—the rhizomes. This mulch blanket suppresses weeds while allowing air circulation. Water only when the top inch of soil feels dry until new growth appears, signaling successful establishment.