
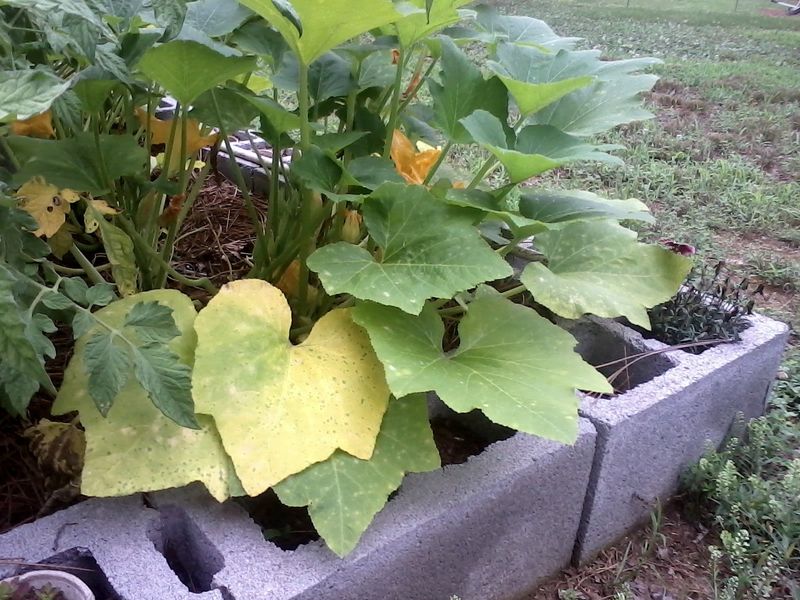
Walking out to your squash bed and finding leaves with yellow patches between the veins can feel alarming, especially mid-season when the plants seemed fine just a week ago. That pattern is a clue worth investigating, but it is not a guaranteed sign of one specific problem. Several causes – from nutrient gaps to pests to heat stress – can produce similar-looking symptoms, and treating the wrong one can make things worse. A little detective work before reaching for a fertilizer or spray will save you time, money, and possibly the plants themselves.
Yellow Between the Veins Is a Clue, Not a Diagnosis
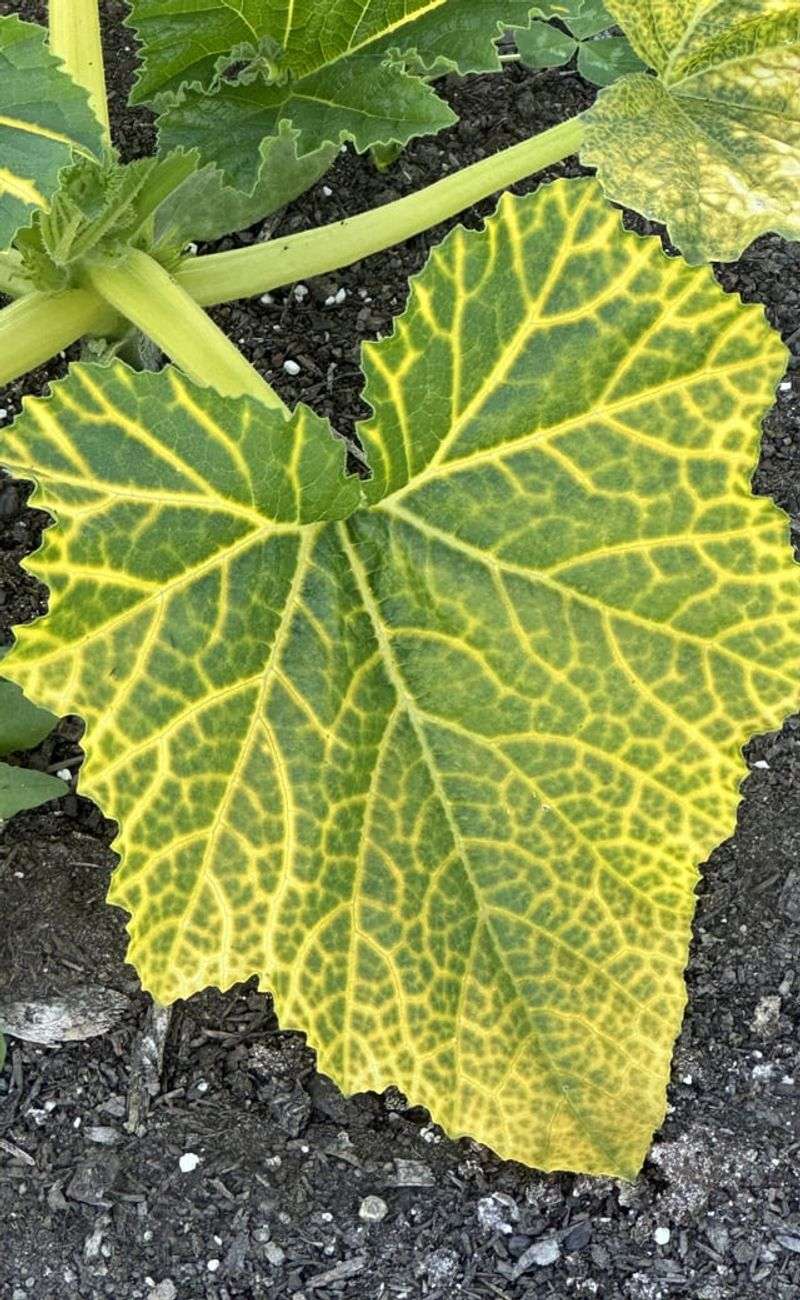
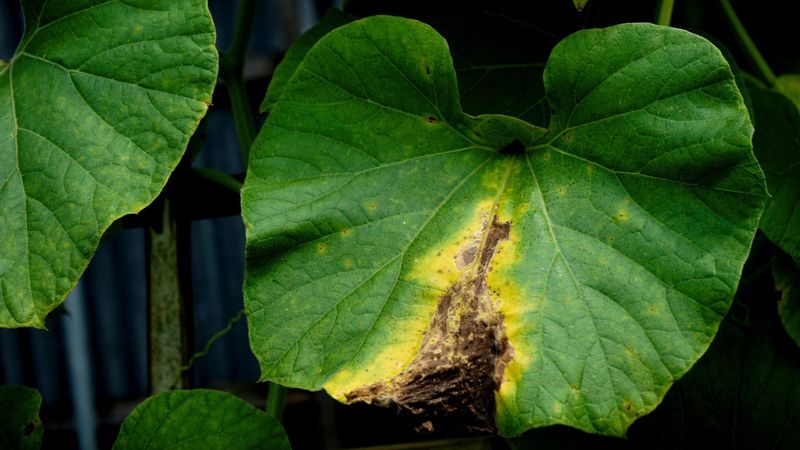
Interveinal chlorosis is the technical name for what you are seeing: yellow tissue filling the spaces between veins that stay noticeably green. On summer squash, that pattern on older or lower leaves makes magnesium deficiency worth considering, because University of Minnesota Extension research on magnesium in crop production explains that magnesium is mobile inside the plant. When the plant runs short, it pulls magnesium from older tissue first and moves it toward new growth, so the oldest leaves tend to show symptoms earliest.
Advanced deficiency can eventually produce brown, dead spots in those yellowed areas. That detail matters because it tells you the symptom can progress, which is one reason early investigation pays off.
Even so, the pattern by itself does not confirm a magnesium problem. As Penn State Extension’s guide to diagnosing poor plant health makes clear, interveinal yellowing is a symptom shared by several causes: iron deficiency, manganese issues, root injury, poor drainage, pH extremes, pests, and disease can all produce overlapping appearances. Before you add anything to the soil or spray anything on the leaves, work through what else might explain what you are seeing. Treating for a nutrient gap when the real problem is a fungal disease or a pest colony will not help – and may delay the response the plant actually needs.
When a Magnesium Problem Becomes Plausible
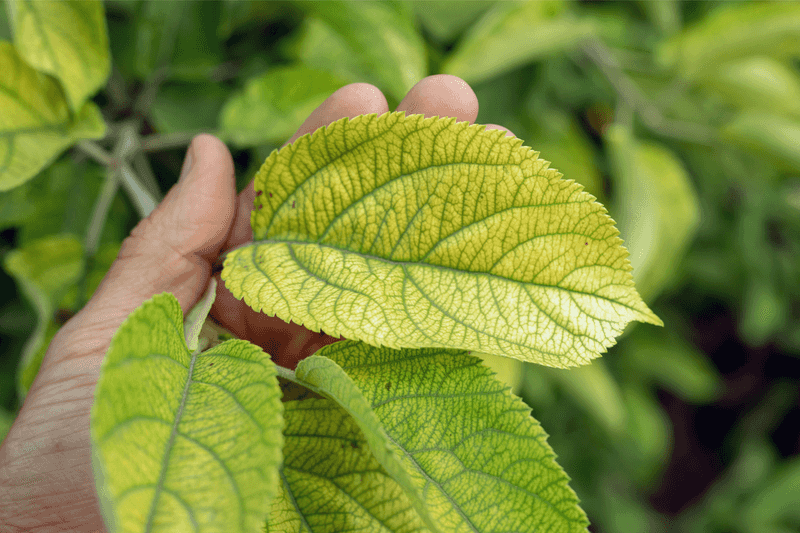
Calling it a feeding gap is a useful shortcut for the idea that something the plant needs is not reaching it in adequate amounts – but that phrase can mislead. The soil may actually contain magnesium that the roots simply cannot access. According to Illinois Extension’s overview of yellow leaves and plant problems, nutrients can be present in the soil yet unavailable because of pH that is too high or too low, excess competing nutrients, compacted or waterlogged ground, or damaged roots.
Magnesium deficiency becomes more plausible under certain conditions. Soils naturally low in magnesium are one factor. Excessive potassium is another, because potassium and magnesium compete for the same uptake sites in roots, and a lopsided ratio can push magnesium out of the picture even when soil levels look adequate. Substantial pH increases from heavy liming can also reduce magnesium availability.
Oregon State Extension’s nutrient management guide for vegetable systems notes that magnesium deficiency is rarely seen in some regions, so the risk varies considerably by location and soil history.
Comparing the pattern to other nutrient problems helps narrow the field. University of Minnesota Extension’s iron deficiency guidance points out that iron deficiency typically shows up on young, actively expanding leaves first, because iron does not move freely within the plant. Nitrogen deficiency, described in Utah State University Extension’s vegetable nutrient management resource, tends to produce a more uniform pale green or yellow appearance across older leaves along with slow growth, rather than the sharply green-veined contrast that suggests magnesium. Neither distinction is conclusive on its own, but together they help you build a stronger case before acting.
Inspect Leaves, Undersides, and Stems Before Feeding
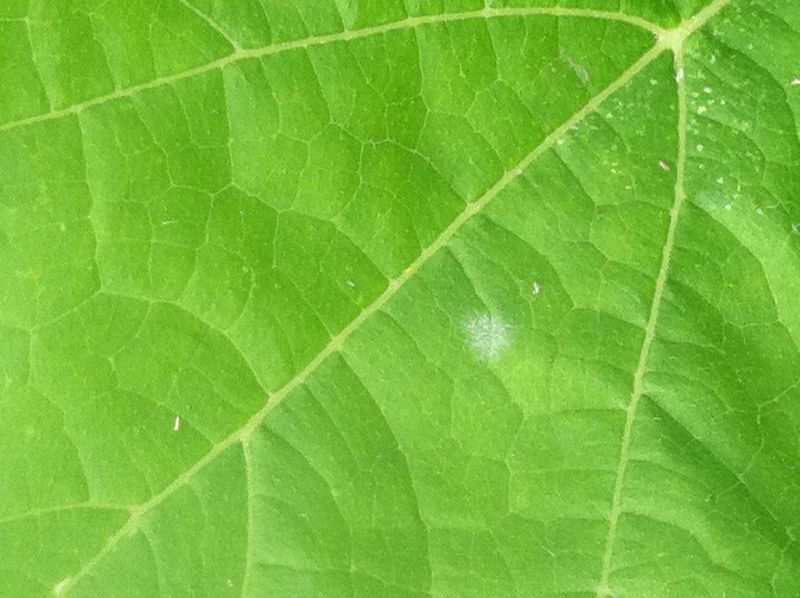
Before concluding that nutrition is the issue, give the plant a thorough physical inspection. Start with the top surface of affected leaves, then flip them over and check the undersides carefully, and finish by looking at the base of each main stem near the soil. What you find – or do not find – will tell you a great deal.
Fungal diseases are common summer squash problems that produce visible signs. Powdery mildew shows up as white or gray powdery growth on leaf surfaces and can eventually cause leaves to yellow and die, as noted in the University of Minnesota Extension summer squash leaf discoloration diagnostic tool. Downy mildew produces pale yellow spots with angular edges that follow the vein pattern; under humid conditions, a gray-purple fuzzy growth may appear on the leaf underside, a distinguishing feature that the UMN winter squash discolored-leaves diagnostic describes for cucurbit crops.
Pest damage has its own signatures. Spider mites produce pale stippling across the leaf surface and may leave fine webbing, especially during hot and dry stretches. University of Minnesota Extension’s squash bug resource explains that squash bugs cause yellow spots that turn brown and can lead to wilting; look for adults, nymphs, or bronze-colored egg masses on the undersides of leaves. For squash vine borers, check the base of the stem for small entry holes and sawdust-like frass, which signals a larva feeding inside.
Virus infections show up differently: look for irregular yellow-and-green mosaic patterns, distorted or puckered leaf surfaces, stunted growth, or misshapen fruit. None of these problems will improve with a magnesium application, so identifying them first prevents wasted effort and lost time.
Heat and Water Stress Can Still Contribute
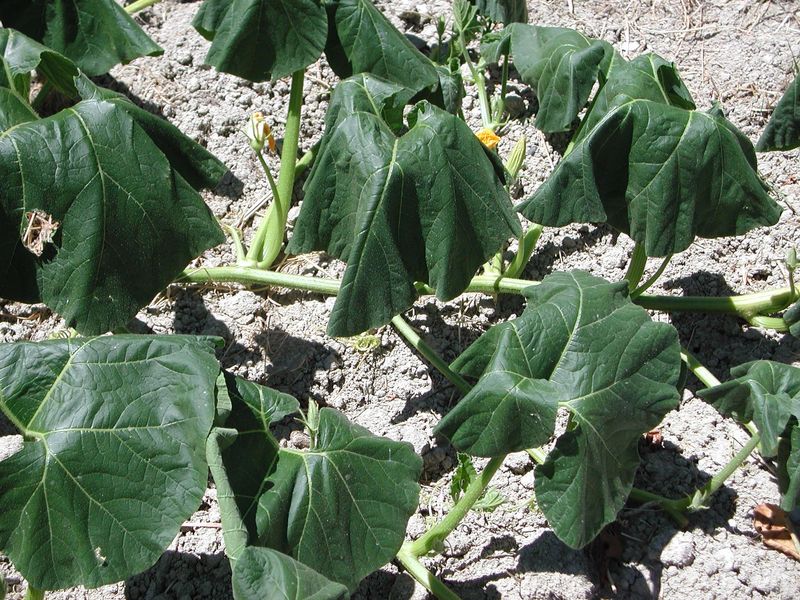
Heat is not something you can simply rule out when squash leaves look off. University of Minnesota Extension’s heat-stress gardening guidance describes the most common heat-stress signs as wilting, leaf curling, scorching or crisping at the edges, flower drop, and stalled fruit development. Those symptoms differ from clean interveinal yellowing, but heat and drought can also set the stage for spider mites, which thrive in hot, dry conditions and create yellow stippling that can look like something else entirely.
Water status deserves its own separate check. University of Minnesota Extension’s guide to growing summer squash and zucchini recommends approximately 1 inch of water per week from rainfall or irrigation during the growing season, applied thoroughly at soil level rather than overhead. That figure is a general reference point, not a fixed rule for every climate, soil type, or rainfall pattern – sandy soils dry out faster, clay soils may stay wet too long, and local conditions vary.
Drought and poor drainage can both interfere with nutrient uptake even when nutrients are present in the soil, as Illinois Extension’s yellow-leaves overview explains. Roots stressed by too little water struggle to absorb magnesium; roots sitting in waterlogged soil may be damaged and equally unable to deliver what the plant needs. Correcting water conditions is its own step – separate from any nutrient decision – and should happen before you interpret a soil test or apply any amendment.
Use a Soil Test to Weigh Magnesium Supplementation
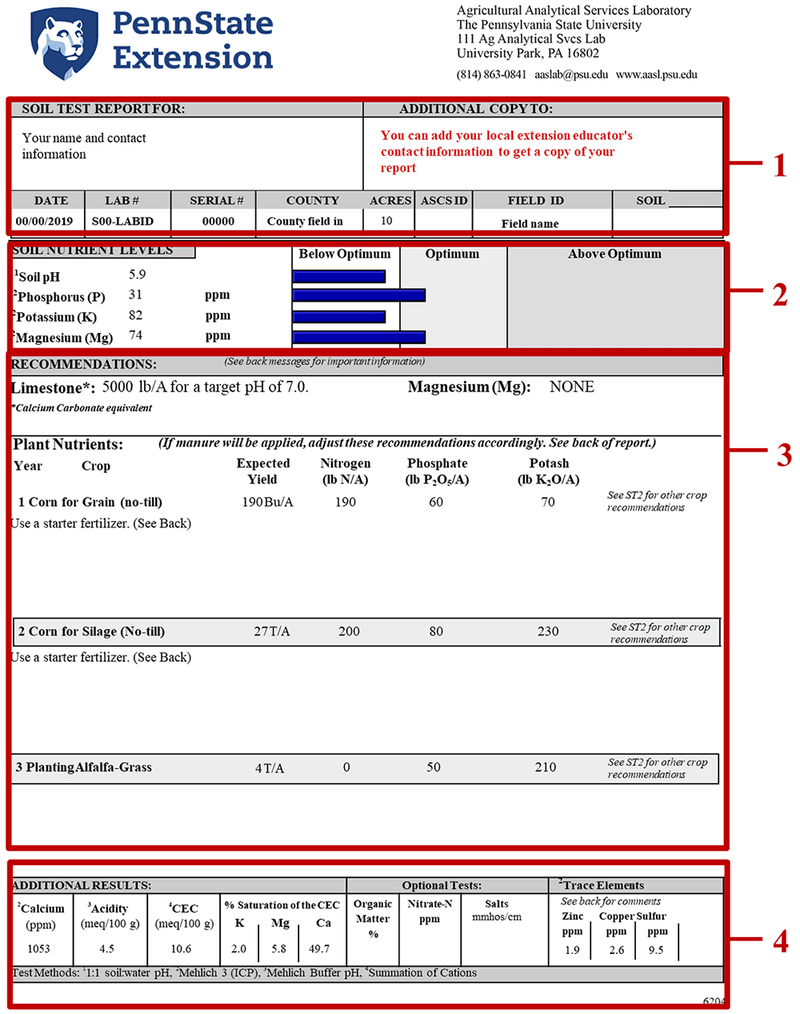
A soil test is one of the most practical tools available before adding any amendment. Rather than guessing, you get actual numbers: magnesium levels, pH, calcium, potassium, phosphorus, and often a fertilizer recommendation tailored to your results. University of Maryland Extension’s guide to reading a soil test report explains how those numbers help gardeners avoid unnecessary applications and prevent salt buildup that can harm plants over time.
Interpreting the report requires pairing the numbers with what you have observed in the garden. Low magnesium on paper is more meaningful when you also have older-leaf interveinal yellowing, no visible pests or disease signs, and adequate watering. High potassium alongside low magnesium strengthens the case further, because the competitive imbalance between the two nutrients is a known risk factor. The Oregon State Extension soil test interpretation guide walks through how pH and nutrient ratios affect availability, which helps explain why a number on a report does not always translate directly into a plant response.
Keep the broader picture in mind. As Oregon State Extension’s vegetable nutrient management publication notes, magnesium deficiency is uncommon in certain vegetable systems and regions. A soil test helps determine whether supplementation is warranted – it does not by itself confirm that magnesium caused the leaf symptoms you are seeing. Combining the test results with your leaf-age observations, pest and disease check, and water assessment gives you a much stronger basis for any decision than the test alone.
Match Any Magnesium Remedy to the Soil and the Evidence
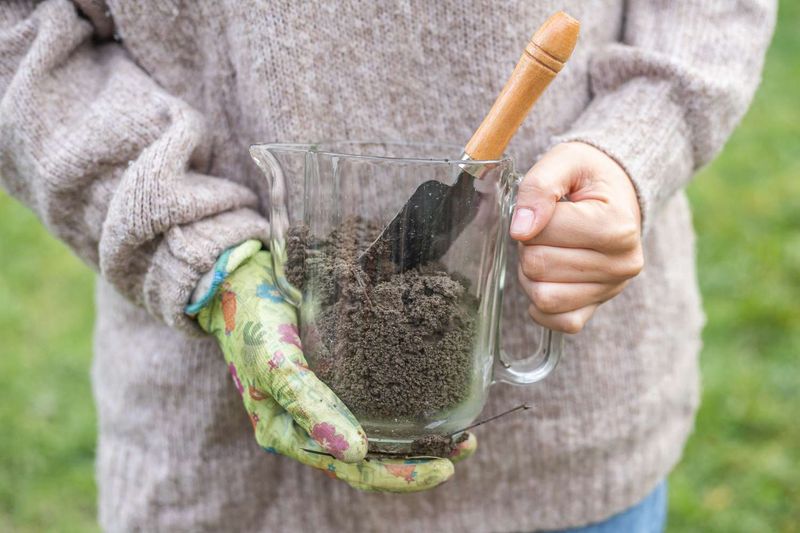
When the combined evidence – older-leaf interveinal yellowing, no pests or disease, confirmed low magnesium or unfavorable pH on a soil test, and adequate watering – points toward magnesium deficiency, choosing the right amendment still requires matching it to your soil’s full nutrient picture.
The Oregon State Extension soil test interpretation guide lists several magnesium sources used in vegetable gardens. Dolomitic lime supplies both magnesium and calcium but also raises soil pH, so it makes sense when pH is low and magnesium is deficient – not when pH is already at or above the target range for squash. Epsom salt (magnesium sulfate) provides magnesium and sulfur without substantially raising pH, making it a reasonable option when pH is acceptable but magnesium is genuinely low. Potassium-magnesium sulfate is another option that can be appropriate when potassium is not already excessive.
The University of Minnesota Extension magnesium production guide emphasizes following the soil-test recommendation and the product label rather than a generic household dose. Rates that work for large-scale production are not backyard recipes. Apply the product as directed, keep granular forms off foliage, and avoid applications during drought or heat stress when the risk of plant injury is higher.
Set realistic expectations before treating. Correcting a genuine magnesium deficiency may support healthy new growth going forward, but soil-test guidance from University of Maryland Extension reinforces that already-damaged tissue is unlikely to turn green again. Assess progress by watching new leaves, overall plant vigor, and whether the yellowing continues spreading rather than by hoping the old leaves recover.
Avoid Rescue Applications That Create More Damage
Reaching for a quick fix when leaves turn yellow is understandable, but several common responses can make the situation worse rather than better. High-nitrogen fertilizer is one example. Oklahoma State University Extension’s squash production fact sheet notes that excess nitrogen pushes vegetative growth at the expense of flowering and fruit set, which is the opposite of what a mid-season squash plant needs. Dumping extra fertilizer on yellow leaves is not a safe default.
Routine Epsom salt applications carry their own risks. Adding magnesium sulfate when magnesium is already adequate or when the problem is not magnesium-related can contribute to nutrient imbalance over time and may increase soluble salt levels in the soil. That kind of buildup stresses plant roots, particularly during dry spells when salts concentrate near the surface.
Fertilizer and pesticide products can also injure foliage directly. University of Maryland Extension’s resource on fertilizer and pesticide burn describes the result as browned leaf edges, scorched patches, and damaged margins – symptoms that can look like a new problem on top of the original one. Drought conditions make burn more likely because fertilizer salts concentrate and contact with dry leaf tissue is more damaging. Always keep granular fertilizer off foliage when applying near the base of plants.
For foliar products, the UMN Fruit and Vegetable IPM weekly update cautions that commercial spray rates are not meant to be adapted into casual backyard recipes. Follow the registered product label, apply only to the crop listed, and avoid spraying during hot conditions or in ways the label does not sanction.
Follow a Diagnosis-First Action Plan
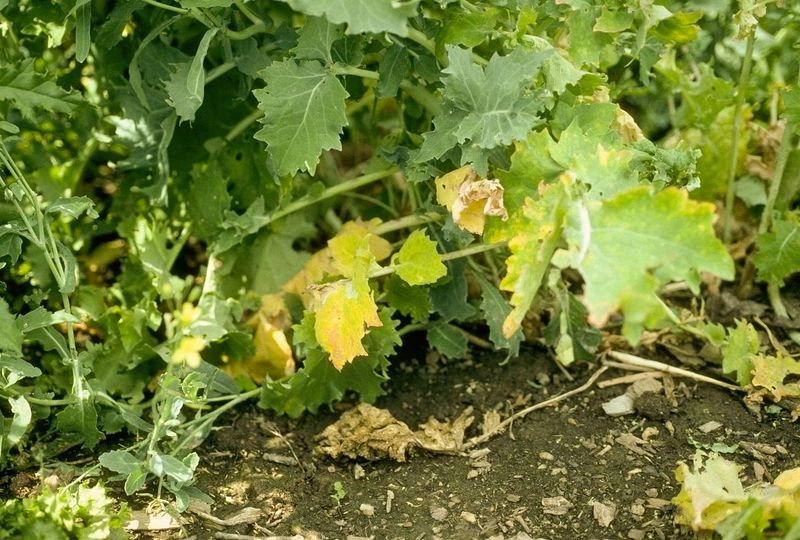
Working through a short, ordered sequence keeps you from wasting effort on the wrong fix. Start by noting which leaves show the interveinal yellowing pattern – older, lower leaves point more toward magnesium, while young expanding leaves suggest iron or another immobile nutrient. Next, flip the affected leaves over and inspect stems for pests, egg masses, webbing, or frass. Check for fungal signs on the leaf surface.
Then evaluate water and heat conditions separately, since both can mimic or compound nutrient symptoms.
If pests, disease, and water stress have been addressed or ruled out, submit a soil sample. As Penn State Extension’s plant health diagnostic guide emphasizes, combining observable plant evidence with soil data gives you a far more reliable picture than either source alone. Apply a soil-test-recommended magnesium source only when the results and the plant symptoms together support that step, and follow the product label for rate and timing.
Judge the outcome by watching new growth, overall vigor, and fruit production over the following weeks, and track whether the yellowing continues to spread. Late-season aging, disease progression, or pest pressure may explain some yellowing that simply will not respond to feeding. Yellowing between the veins calls for a careful look, not an automatic bag of Epsom salt – and a plant that gets the right diagnosis has a much better chance of finishing the season strong.