
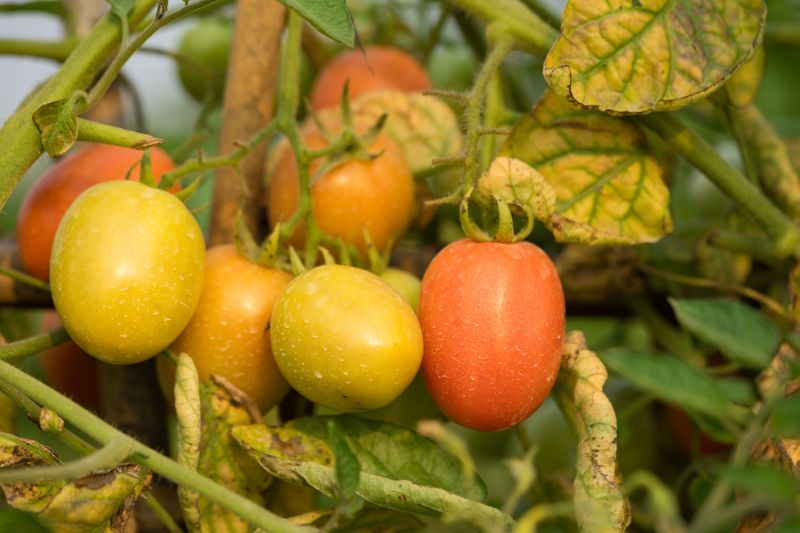
Few things worry a gardener more than walking out to check on the tomatoes and spotting leaves that have faded from healthy green to sickly yellow. The good news is that yellow leaves are your plant’s way of waving a flag and telling you something needs attention. Some causes are simple fixes you can tackle before dinner, while others take a little patience and detective work. Let’s walk through the most common reasons your tomato leaves are turning yellow and exactly what you can do about each one.
1. Overwatering and Soggy Roots
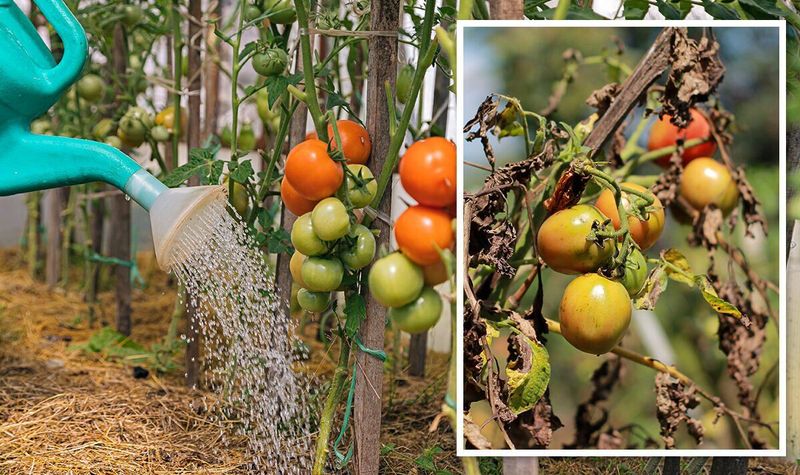
Drowning your tomatoes with kindness is more common than you might think. When soil stays waterlogged, roots can’t breathe, and the plant responds by yellowing its lower leaves first.
Soggy roots also invite rot, which slowly cuts off the plant’s ability to pull up nutrients. You’ll often notice the yellowing paired with soil that feels wet days after watering, or a faint musty smell near the base.
To check, push a finger two inches into the soil. If it comes out muddy, hold off on the hose for a few days and let things dry out.
Raised beds and containers with drainage holes can reduce the risk of standing water. Adding compost or coarse material may help heavy clay soil drain better over time.
Water deeply but less often, aiming for the base rather than the leaves, and your tomatoes will usually bounce back once their roots get some air again.
Fun fact: tomato roots can grow several feet deep when given loose, well-drained soil, which is why deep, spaced-out watering often beats daily sprinkles.
2. Underwatering and Drought Stress
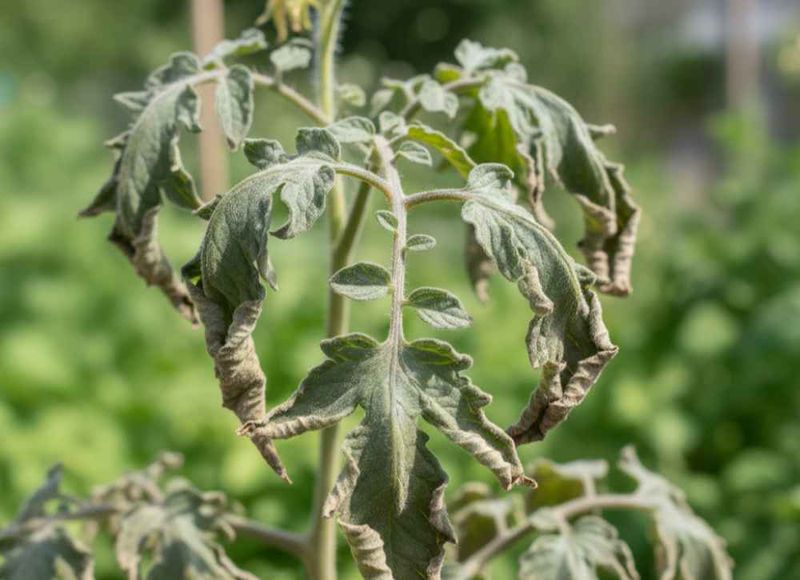
Skip a few waterings during a July heat wave and your tomatoes will let you know fast. Thirsty plants pull moisture from their oldest leaves, leaving them dry, yellow, and often curled at the edges.
Unlike overwatering, drought-stressed soil feels dusty and cracked, and the whole plant may look droopy by afternoon even though it perks up overnight.
The fix is refreshingly simple: give your tomatoes a long, deep drink at the base early in the morning. Consistency matters more than volume, so a steady schedule beats occasional flooding.
A two- to three-inch layer of mulch around the base can lock in moisture and keep roots cooler during scorching afternoons. Straw, shredded leaves, or grass clippings all work well.
Container tomatoes dry out fastest and may need water once or even twice a day in peak summer heat.
Once you settle into a reliable rhythm, new growth should stay green, though the already-yellowed leaves usually won’t turn back and can simply be trimmed away.
3. Nitrogen Deficiency
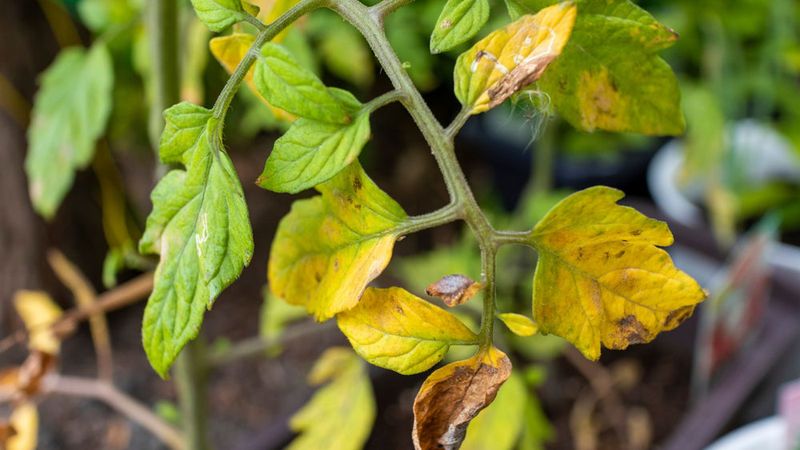
When the oldest, lowest leaves fade to a pale yellow while the top of the plant stays green, nitrogen is often the culprit. Tomatoes are hungry feeders, and nitrogen is the nutrient they burn through fastest during leafy growth.
Because plants move nitrogen from old leaves to new ones when supplies run short, the yellowing creeps upward from the bottom over time.
A balanced tomato fertilizer or a nitrogen-rich amendment like blood meal or composted manure can restore green color within a couple of weeks. Follow the label rates so you don’t overdo it.
Go easy, though, because too much nitrogen pushes leafy growth at the expense of fruit, giving you a jungle with few tomatoes.
Testing your soil first takes the guesswork out and tells you whether nitrogen is truly low or another issue is masquerading as one.
Steady, moderate feeding usually greens things up and gets your plant back to putting energy into flowers and fruit where you want it.
4. Magnesium Deficiency
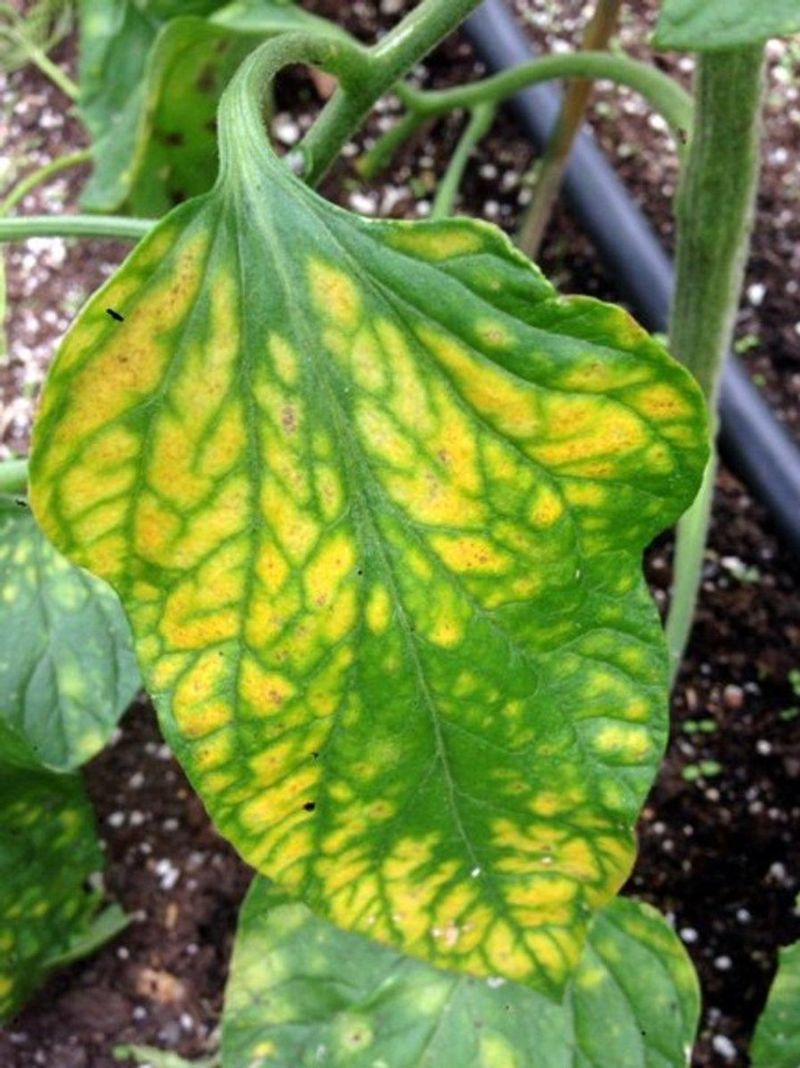
Ever spot leaves where the veins stay bright green but the tissue between them turns yellow? That telltale pattern usually points to a magnesium shortage, one of the sneakier culprits behind discolored tomato foliage.
Magnesium sits at the heart of chlorophyll, the pigment that keeps leaves green, so when it runs low the color drains away in that distinctive marbled look.
Older leaves show it first, and heavy rain or frequent watering can wash magnesium out of sandy soils faster than plants can use it.
A common home remedy is a foliar spray of Epsom salt dissolved in water, which may help green things up when the deficiency is genuine. Roughly a tablespoon per gallon is a typical mix.
Keep in mind that Epsom salt only helps if magnesium is actually the problem, so a soil test can save you from treating the wrong thing.
Correcting the pH and adding balanced amendments often prevents the shortage from returning next season.
5. Iron Deficiency
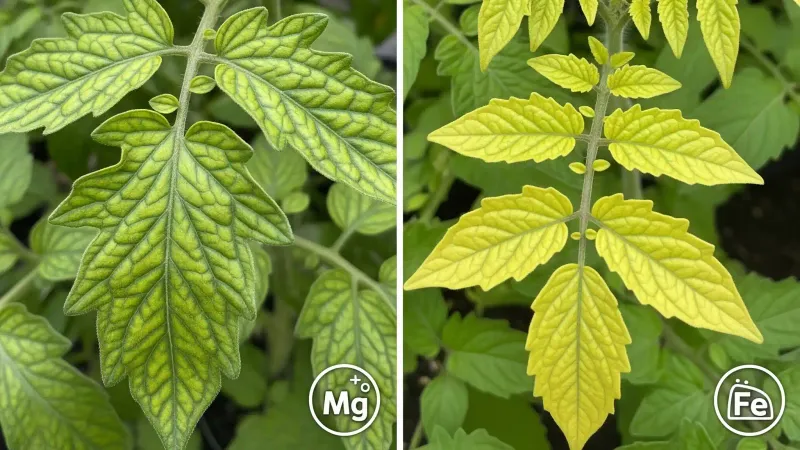
Iron trouble looks a lot like magnesium at first glance, but there’s a key giveaway: it shows up on the youngest leaves at the top of the plant, not the old ones down low.
New growth turns pale yellow with green veins, giving those upper leaves an almost bleached appearance while the veins hold their color.
Interestingly, the soil often has plenty of iron already. The real issue is usually that alkaline or overly wet soil locks it away where roots can’t reach it.
Lowering soil pH toward the slightly acidic range tomatoes prefer can free up existing iron and often improves color without adding anything.
A chelated iron product may help as a quicker fix, but correcting drainage and pH tends to solve the root cause more lastingly.
Because iron and magnesium deficiencies mimic each other, checking whether the yellowing is on new or old leaves is the fastest way to tell them apart before you treat.
6. Early Blight Fungus
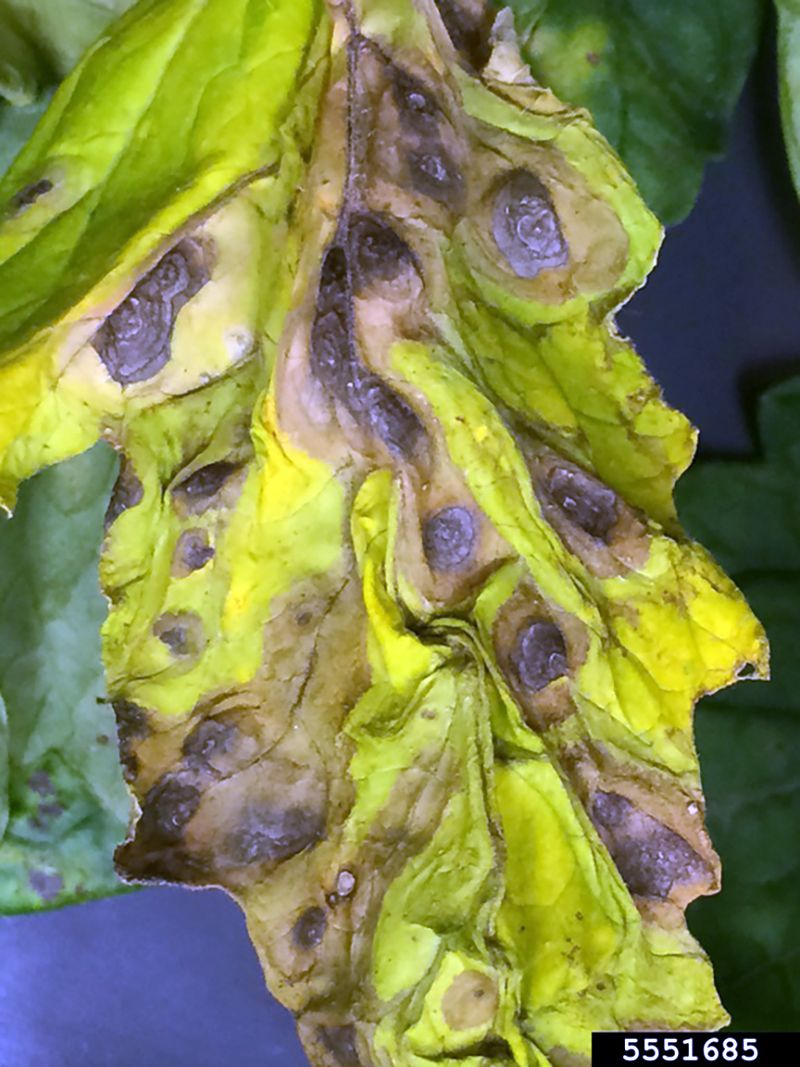
Dark spots ringed with yellow, spreading upward from the bottom of the plant, are the calling card of early blight. This fungal disease thrives in warm, humid weather and can move through a tomato patch surprisingly fast.
Look for brown lesions with a bullseye pattern of concentric rings, surrounded by a yellow halo that eventually takes over the whole leaf.
Splashing water carries the spores from soil onto lower leaves, which is why mulching and watering at the base can slow the spread.
Removing and trashing affected leaves right away, rather than composting them, helps keep the fungus from reinfecting healthy growth.
Improving airflow by spacing and pruning plants often reduces the humidity blight loves, and a copper-based fungicide may help protect remaining foliage when applied early.
Rotating where you plant tomatoes each year is one of the best long-term defenses, since blight spores can linger in the soil over winter waiting for next season’s crop.
7. Fusarium and Verticillium Wilt
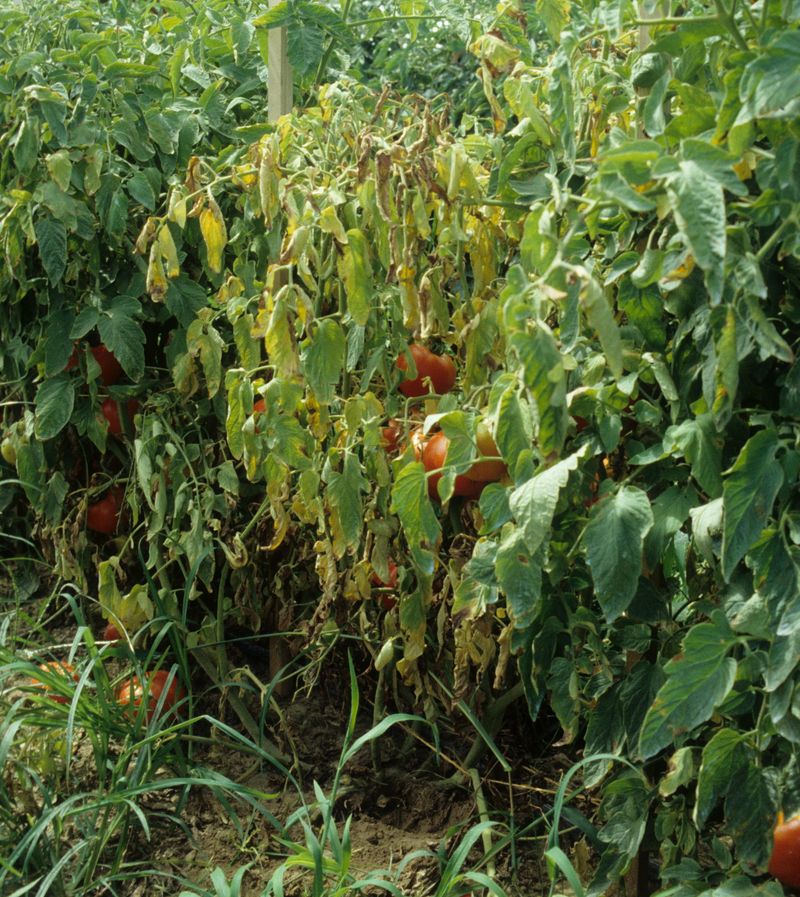
One yellow side of the plant while the other stays green? That lopsided pattern is a classic warning sign of a soilborne wilt disease taking hold.
Fusarium and verticillium wilt both invade through the roots and clog the plant’s internal plumbing, so leaves yellow and wilt even when the soil is properly watered.
The yellowing often starts on lower leaves and one branch at a time, and slicing a stem may reveal brown streaks inside where the vessels have been blocked.
Sadly, there’s no cure once a plant is infected, so the kindest move is usually to remove and discard it before the fungus spreads through the soil.
Choosing disease-resistant varieties, marked with letters like V and F on the label, is your strongest defense for future seasons.
Crop rotation and clean tools also help, since these fungi can survive in garden soil for years and quietly wait for another susceptible tomato to arrive.
8. Aphids and Sap-Sucking Pests
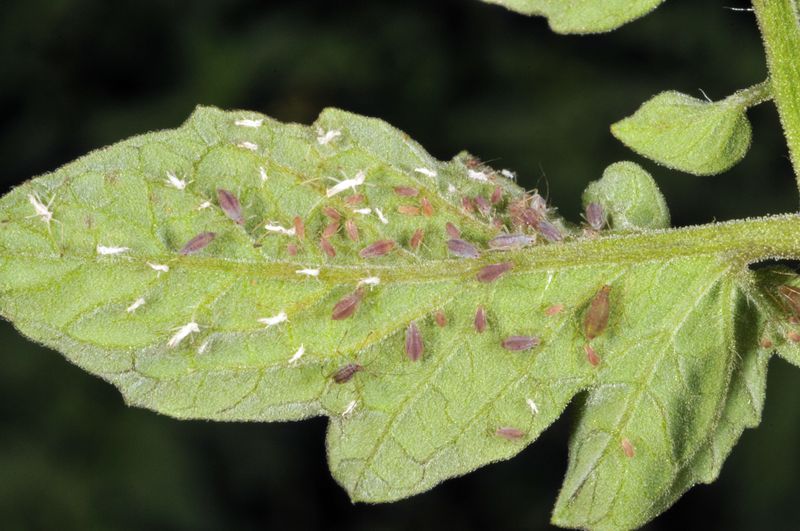
Tiny pests can cause big yellow headaches. Aphids, whiteflies, and spider mites cluster on the undersides of leaves, quietly draining sap and leaving foliage speckled, yellow, and sometimes sticky.
Flip a yellowing leaf over and you may find soft green or black specks, fine webbing, or a shiny film called honeydew that these insects leave behind.
Weakened by the constant feeding, the plant can’t keep its leaves green, and heavy infestations may stunt growth or spread viruses between plants.
A strong blast of water from the hose knocks many pests off, and insecticidal soap or neem oil can reduce populations when sprayed on the undersides of leaves.
Encouraging natural helpers like ladybugs and lacewings often keeps aphid numbers in check without any spraying at all.
Checking your plants a couple of times a week means you’ll catch these hitchhikers early, while they’re still easy to manage rather than after they’ve overrun the patch.
9. Compacted or Poor Soil
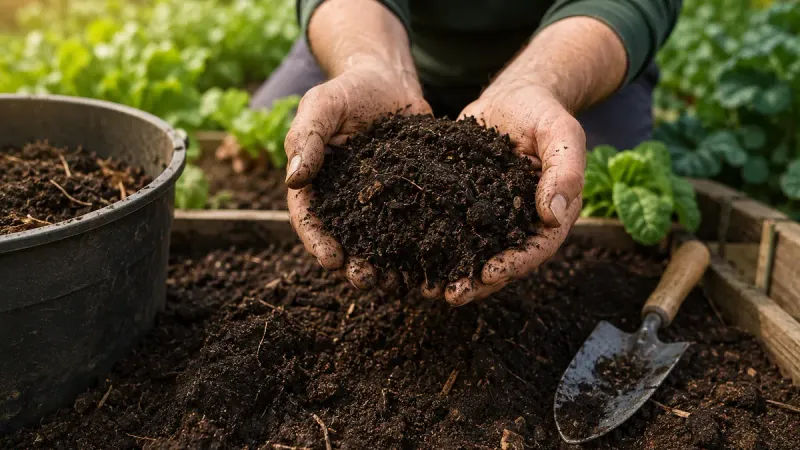
Roots that can’t stretch out will eventually show their frustration in the leaves above. When soil is hard-packed, rocky, or heavy with clay, roots struggle to find air, water, and nutrients, and yellowing follows.
Compacted ground also drains poorly, so plants swing between soggy and bone-dry, a stressful combo that fades leaves fast.
Loosening the soil and mixing in generous amounts of compost gives roots room to spread and holds moisture more evenly.
If your native ground is stubborn clay, raised beds filled with a quality garden mix can sidestep the problem entirely and give tomatoes a fresh start.
Avoid stepping on the soil around your plants, since foot traffic squeezes out the air pockets roots depend on.
Over a season or two, adding organic matter each spring transforms tired, dense dirt into the crumbly, rich soil tomatoes love, and the yellowing tends to disappear as the roots finally get comfortable.
10. Too Much Sun or Heat Stress
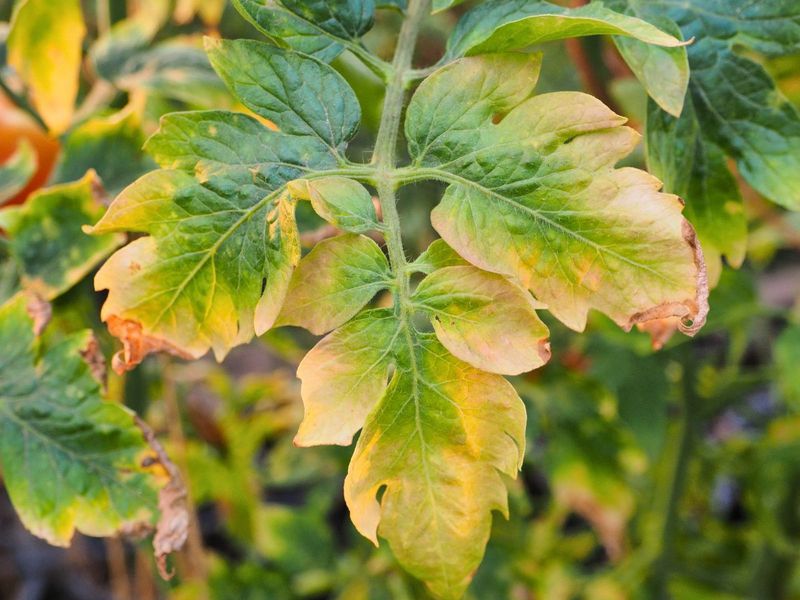
Even sun-loving tomatoes have their limits. During a brutal heat wave, intense afternoon rays can scorch and yellow leaves, especially on plants that were recently moved outdoors or suddenly exposed.
Yellow or bleached patches on the sun-facing side, sometimes with papery brown edges, are signs the foliage is simply getting cooked.
Newly transplanted seedlings are the most vulnerable because they haven’t hardened off, so easing them into full sun over several days can prevent a lot of shock.
During extreme heat, a lightweight shade cloth stretched over the plants during the hottest hours may help protect leaves while still letting them soak up morning light.
Keeping the soil evenly moist also cools the roots and helps the plant cope, since a well-watered tomato handles heat far better than a thirsty one.
Once temperatures ease, healthy new growth usually returns, and you can trim off the crispy leaves that took the brunt of the sun.
11. Natural Aging of Lower Leaves
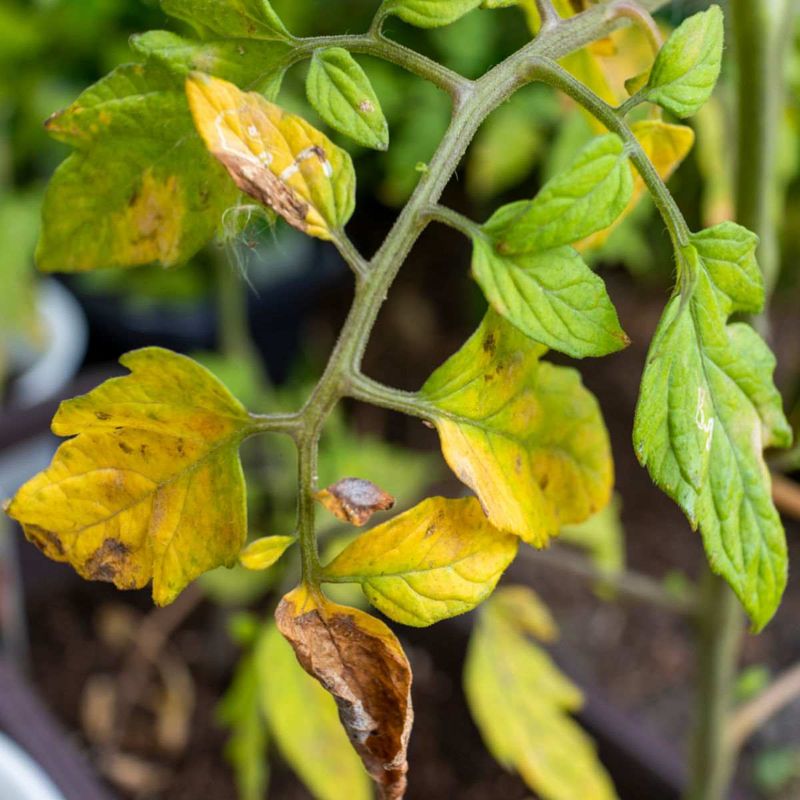
Before you panic over every yellow leaf, take a breath and look at where they are. If only the oldest leaves at the very bottom are fading while the rest of the plant looks lush, you may simply be watching nature at work.
As tomatoes mature and pour energy into flowers and fruit, they retire their lowest, shadiest leaves that no longer earn their keep.
This gradual, tidy yellowing of a few bottom leaves is completely normal and nothing to treat.
Gently pruning those spent leaves actually helps, improving airflow around the base and reducing the chance of soilborne diseases splashing up.
Just use clean snips and remove only the yellowed leaves, leaving the healthy green canopy above to keep feeding the plant.
Recognizing this harmless kind of yellowing saves you from over-fertilizing or fussing when your tomato is really just doing exactly what a healthy, fruiting plant is supposed to do as the season rolls along.