
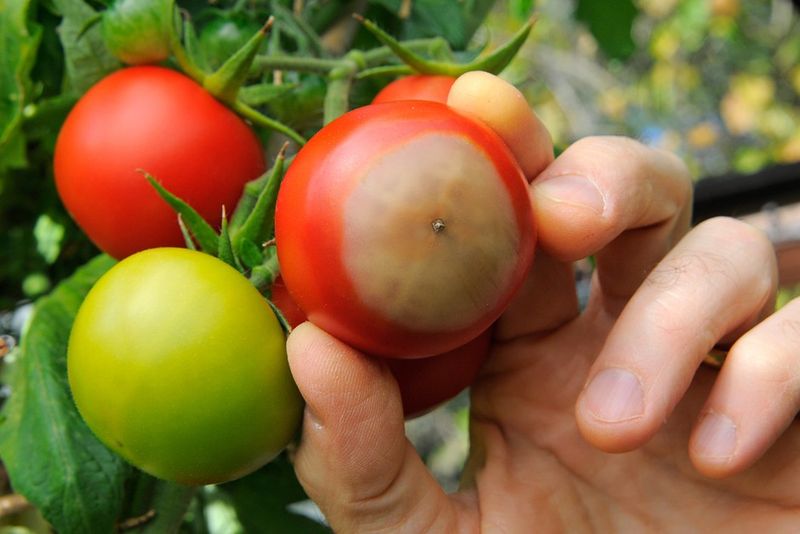
You water, you weed, you wait all summer for that first ripe tomato, and then you flip it over to find an ugly brown, sunken patch on the bottom. That frustrating sight is called blossom end rot, and it can hit even the healthiest-looking plants. The good news is it usually isn’t a disease you catch too late, and a few smart moves can stop it before it spreads to your whole crop. Here’s how to spot the early signs and rescue the rest of your harvest.
What That Sunken Brown Spot Is Actually Telling You
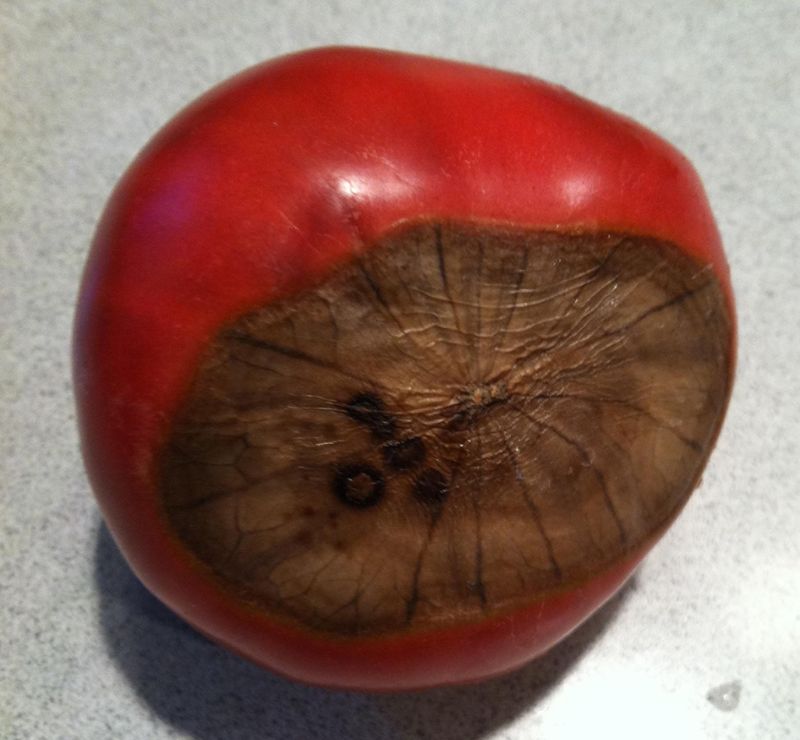
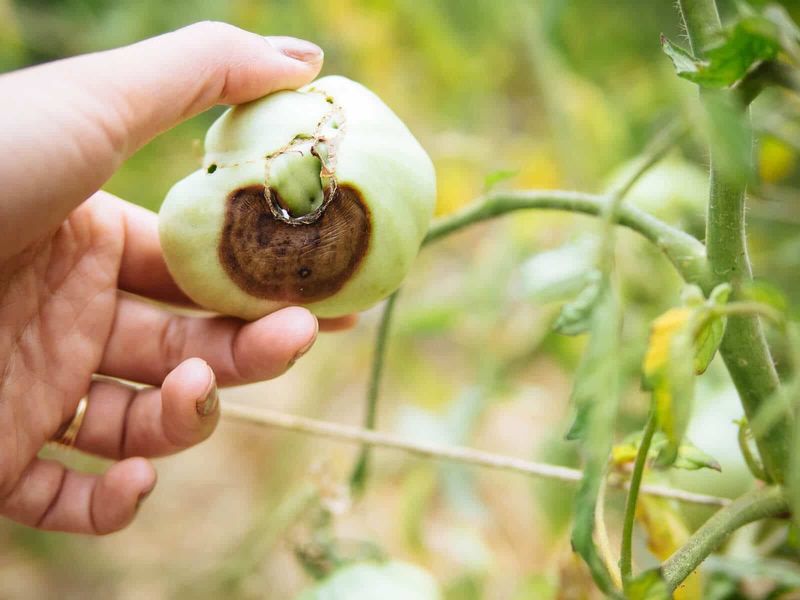
Flip over a tomato that looks perfect from the top and you might find a leathery, dark patch staring back at you. That mark is blossom end rot, and it always shows up on the bottom of the fruit, right where the flower once was.
Despite how nasty it looks, this is not a bug, a fungus, or something contagious spreading between plants. It is a physical problem inside the fruit itself, which is oddly good news because you cannot cure it by spraying, but you can often prevent the next round.
The spot usually starts small and watery, almost like a bruise, then dries into a sunken, tough brown or black area. It can swallow a third of the tomato before you notice if you are only glancing at the tops.
Peppers, squash, and eggplant can get it too, so tomatoes are not alone in this struggle. Catching that first faint discoloration early matters, because once a fruit is affected it will not heal. Knowing what you are looking at is the first honest step toward saving the tomatoes still forming on the vine.
Calcium Is the Real Culprit Behind the Damage
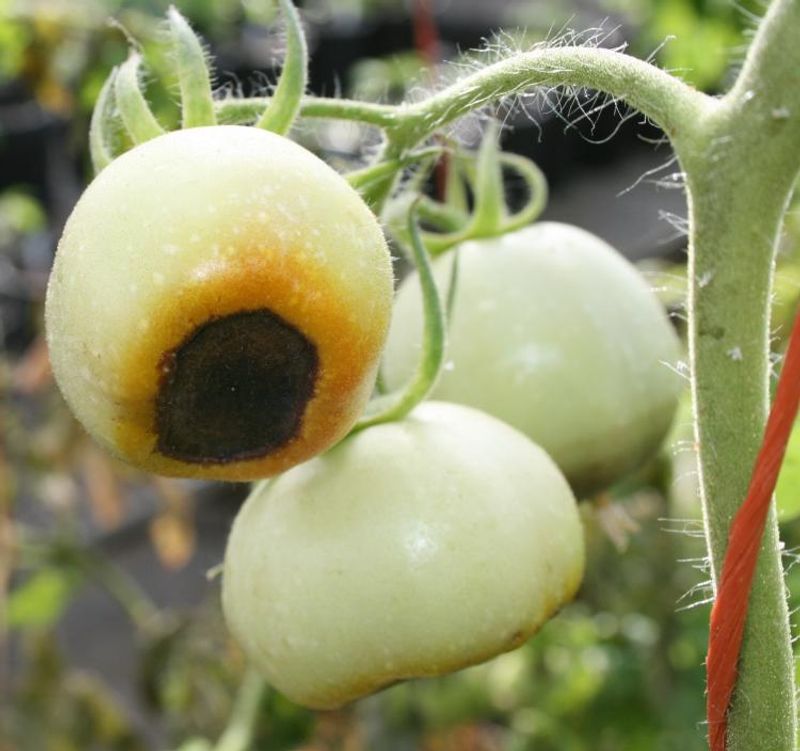
Here is the surprising part: blossom end rot is almost always a calcium problem, not a watering-can-forgot mistake alone. Calcium builds the cell walls inside a growing tomato, and when the fruit cannot get enough at the blossom end, those cells collapse and turn to mush.
Most garden soil actually holds plenty of calcium already. The trouble is usually that the plant cannot move that calcium up into the fruit fast enough, especially during quick growth spurts in early summer.
Water is the delivery truck for calcium. When the soil dries out and then floods, or swings wildly between the two, that steady flow gets interrupted and the fruit tips pay the price.
So dumping calcium tablets or crushed eggshells into the hole rarely fixes an active case, because the mineral often is not the missing piece. The real issue tends to be uneven moisture, damaged roots, or too much nitrogen pushing fast leafy growth.
Understanding this mechanism keeps you from chasing the wrong cure. Once you know calcium delivery is the weak link, the rescue steps that follow will make a lot more sense.
Why Uneven Watering Sets the Whole Problem in Motion
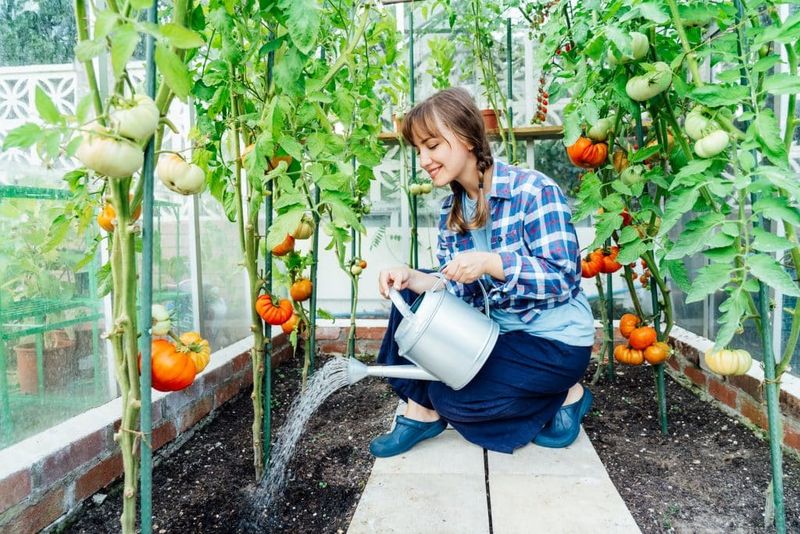
Picture a plant that goes bone dry for three days, then gets a heavy soaking, then dries out again. That roller-coaster is the number one trigger most home gardeners run into, especially during hot US summer stretches.
When roots sit in dry soil, they simply cannot pull calcium out and shuttle it toward the fruit. A sudden flood afterward does not undo the missed delivery; the damage at the blossom end is already underway.
Container tomatoes and hanging baskets suffer the most because their limited soil dries out incredibly fast on a 90-degree afternoon. Raised beds with sandy soil can behave the same way, draining before roots drink their fill.
Aiming for steady, deep moisture can make a real difference here. Watering at the base every morning, rather than a splash whenever you remember, keeps that calcium truck running on schedule.
A simple finger test helps: poke two inches down, and if it feels dry, it is time to water. Consistency often matters more than volume, and getting this one habit right tends to prevent more rot than any product on the shelf.
Spotting the Earliest Warning Signs on the Vine
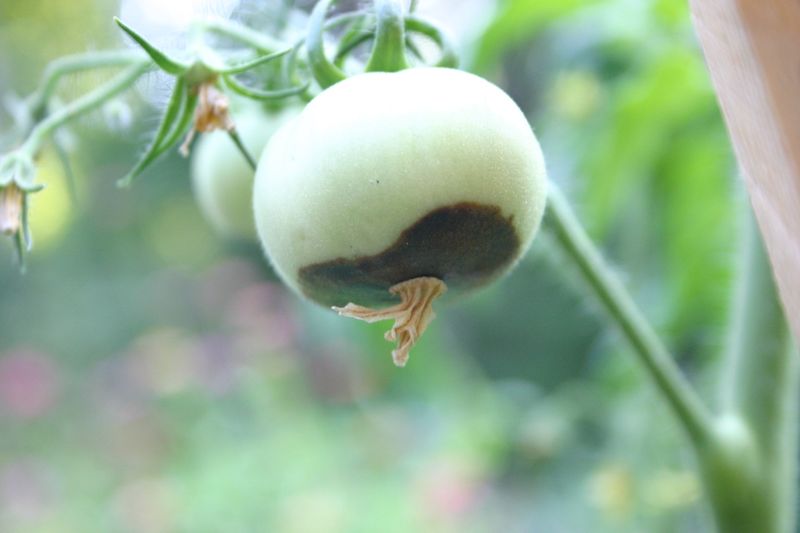
Waiting until a tomato is ripe to inspect it means you have already lost that fruit. The smarter move is checking young green tomatoes, because the rot often begins while they are still small and firm.
Look for a small, water-soaked spot on the very bottom of green fruit, sometimes no bigger than a dime. It may look slightly tan or gray at first, easy to miss unless you gently turn each tomato over.
Over a few days that spot darkens, flattens, and turns leathery as the tissue inside dies. Catching it at the pale, watery stage tells you the plant is stressed right now and the fruit still forming is at risk too.
Get in the habit of a quick weekly patrol, lifting the lower clusters and peeking underneath. The lowest fruit on the plant and the earliest fruit of the season tend to show trouble first.
Finding one affected tomato is a signal, not a disaster. Treat it as an early alarm, pull the damaged fruit, and shift your attention to fixing the watering and soil conditions before the next cluster suffers.
Testing Your Soil Before You Blame the Minerals
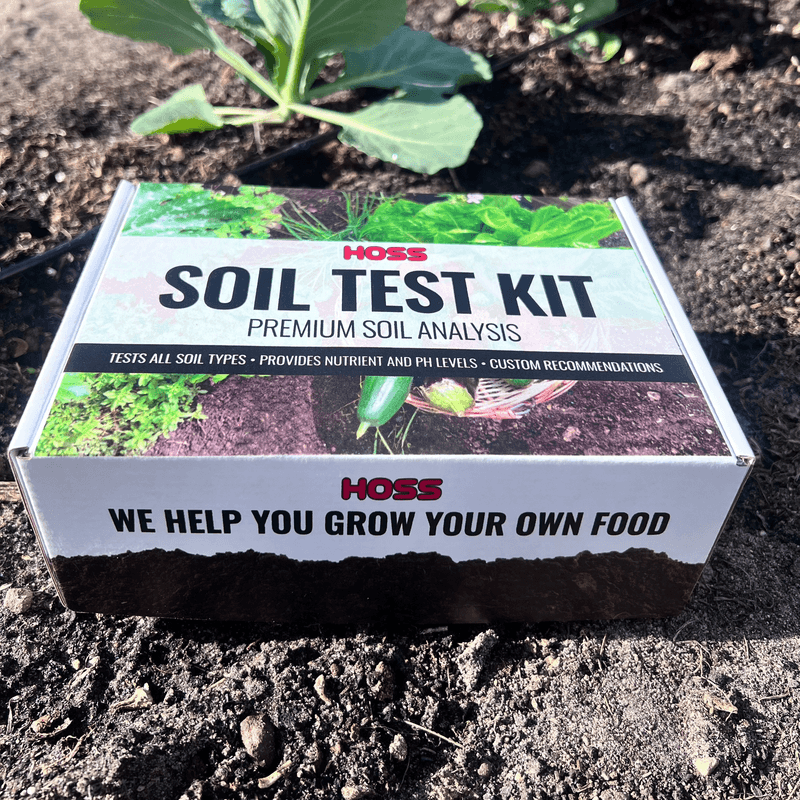
Before you spend money on calcium sprays, it pays to know what your soil is actually holding. A cheap home soil test kit or a mail-in test from your county extension office can reveal both calcium levels and pH.
Soil pH matters more than people expect. When the pH drops too low and turns acidic, tomatoes struggle to absorb calcium even when plenty sits in the ground, so the fruit still shows rot.
Most tomatoes are happiest in soil that sits around 6.5 on the pH scale. If your test comes back acidic, adding garden lime in the off-season can gently raise pH and improve calcium uptake for next year.
Testing also catches the opposite trap: too much nitrogen fertilizer. Heavy nitrogen pushes lush leaves and rapid growth that outruns the plant’s ability to move calcium into fruit.
Knowing your real numbers turns guesswork into a plan. Rather than throwing remedies at the plant and hoping, you can target the actual weak spot, whether that is pH, drainage, or an overzealous feeding schedule that needs dialing back this season.
Mulch and Steady Roots Make the Biggest Rescue
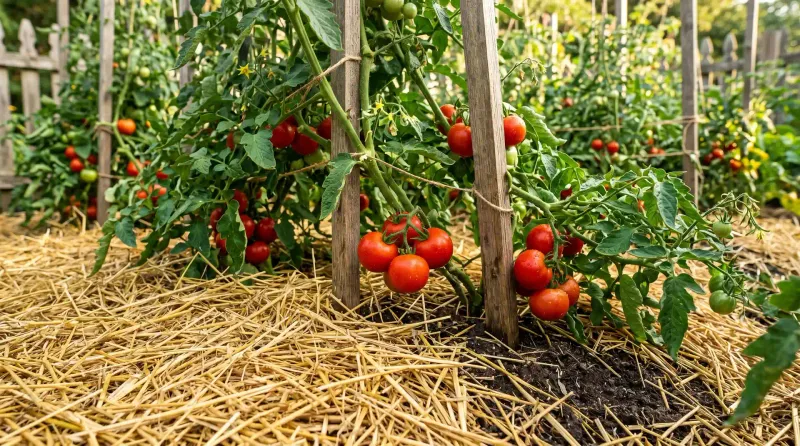
If one habit could quietly save your crop, it is spreading a good layer of mulch. A two to three inch blanket of straw, shredded leaves, or grass clippings around the base keeps soil moisture even and cool.
Mulch slows evaporation on scorching days, so the roots are not gulping and starving in cycles. Steadier moisture means steadier calcium flow, which is the whole battle with blossom end rot.
Roots themselves deserve care too. Hoeing too close or yanking big weeds can tear the fine feeder roots that pull calcium, so weed gently and shallowly near your plants.
Deep, infrequent watering encourages roots to grow downward where moisture lasts longer, building a more resilient plant. Frequent shallow sprinkles do the opposite, keeping roots lazy near the hot surface.
For container growers, choosing a larger pot with drainage holes and quality potting mix can reduce the wild drying swings that plastic pots often cause. Grouping pots together and adding mulch on top helps them hold water.
None of this guarantees a flawless harvest, but protecting the roots and locking in even moisture often turns a rot-prone plant around within a few weeks.
Do Eggshells and Calcium Sprays Actually Work?
Every gardening group swears by crushed eggshells tossed in the planting hole, and it is worth being honest about what they can and cannot do. Eggshells break down far too slowly to rescue a plant showing rot this week.
They may add a little calcium over many months as they decompose, so think of them as a long-term soil amendment rather than an emergency fix. For an active outbreak, they simply will not act fast enough.
Foliar calcium sprays get a lot of attention too. Research suggests they can help modestly at best, because leaves absorb calcium poorly and the fruit needs it delivered through the roots and water anyway.
If you want to try a spray, follow label directions carefully and apply in the cool of evening to avoid leaf burn. Treat it as a supporting player, not the star.
The most reliable fixes remain the boring ones: consistent watering, mulch, correct pH, and easing off nitrogen. Quick-fix products often disappoint because they aim at a mineral that is usually already present in your soil, just not reaching the fruit.
Handling the Tomatoes That Already Have the Rot
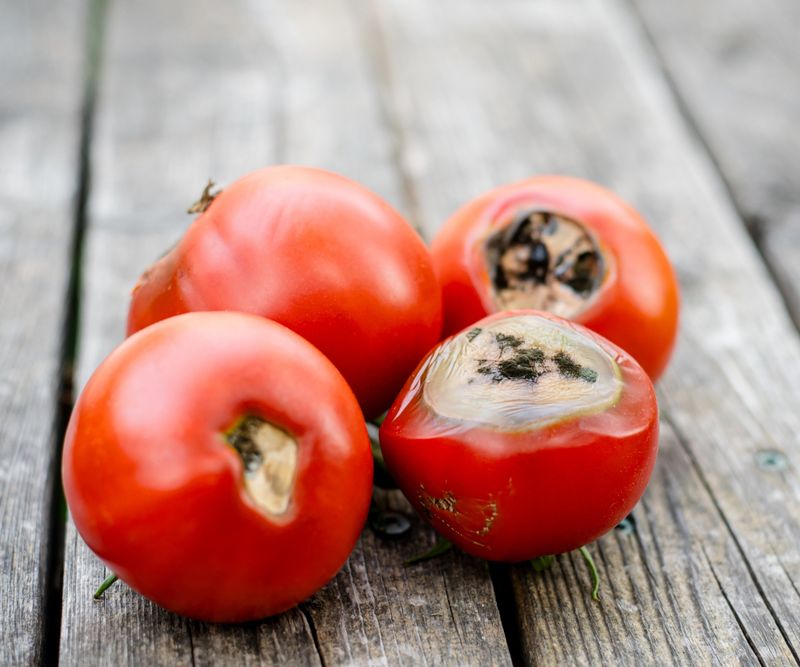
Once a tomato shows that sunken brown bottom, no amount of care will heal it, and pretending otherwise just wastes vine energy. Pick the affected fruit and get it off the plant promptly.
Removing damaged tomatoes lets the plant redirect its resources toward the healthy fruit still developing above. It also keeps the soft, rotting tissue from attracting fruit flies and secondary mold in humid summer weather.
Here is a small mercy: if only the bottom is affected and the rest looks firm and healthy, you can often cut away the bad part and eat the good portion. Blossom end rot is not toxic, just unappetizing.
Toss badly rotted fruit in the trash or a hot compost pile rather than leaving it on the ground near your plants. Cleaning up as you go keeps the bed tidy and reduces pest pressure.
Mark the calendar or snap a photo when you spot the first affected tomato. Tracking when trouble started helps you connect it to a heat wave or a missed watering, so you can adjust and protect the coming clusters.
Setting Up Next Season So It Never Comes Back
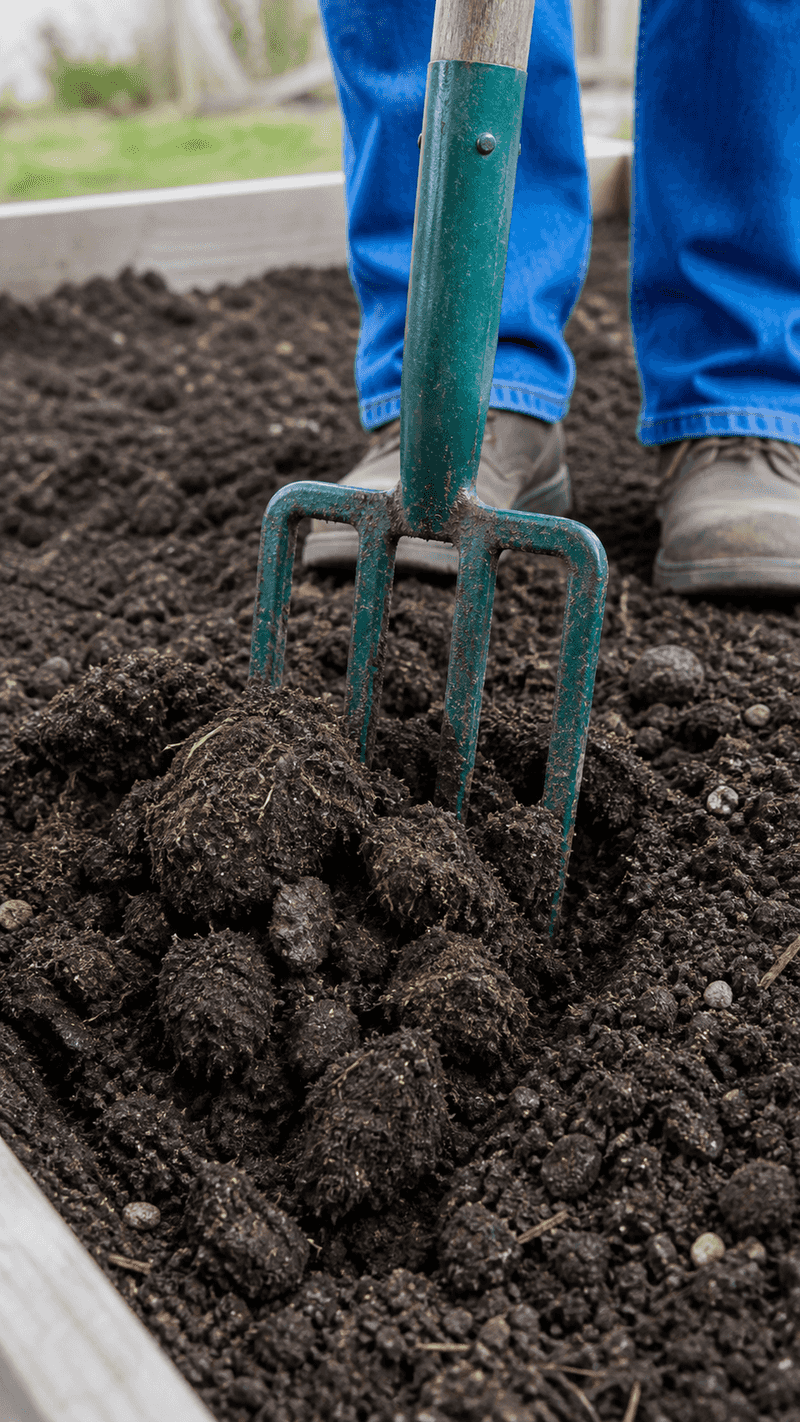
The gardeners who beat blossom end rot for good tend to win the fight before planting day even arrives. A little prep in spring saves a lot of heartbreak in July.
Start by working compost into the bed, which improves how well the soil holds moisture and buffers those harsh drying swings that trigger the rot. Rich, spongy soil is your best insurance.
Adjust pH ahead of time if your fall soil test flagged a problem, since lime needs months to do its work. Getting the number near 6.5 sets the stage for smooth calcium uptake.
Ease into fertilizer with a balanced, moderate feed instead of a nitrogen-heavy blast that races the leaves ahead of the fruit. Slow and steady growth is far less rot-prone.
Choose the right spot too, one with good drainage and full sun, and consider planting a bit later once soil warms so early cold stress does not stunt young roots.
Do these few things and you may never flip over a ruined tomato again. Your best fruit deserves a firm, blemish-free bottom, and now you know exactly how to protect it.