
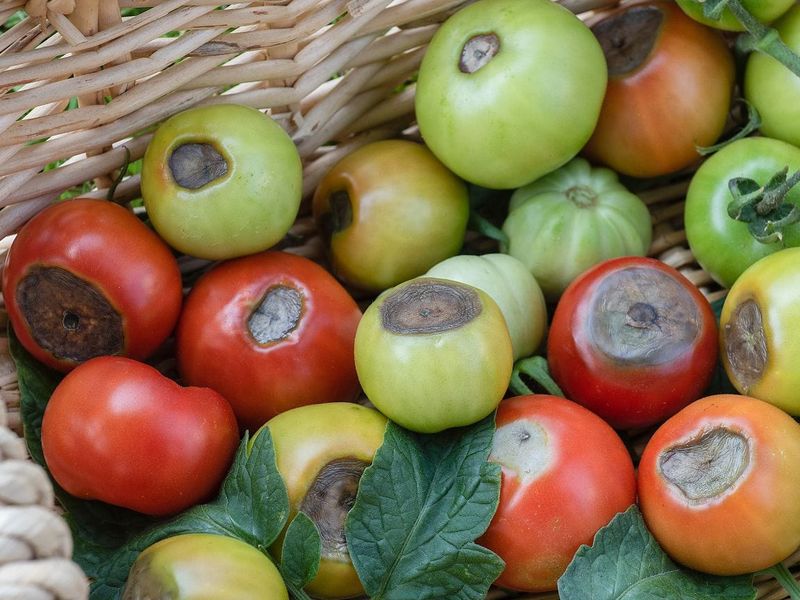
Pulling back a tomato leaf to find a sunken, blackened patch on the bottom of your fruit is one of the most discouraging sights in a summer garden. That symptom has a name, blossom-end rot, and it shows up most often during hot, dry stretches when gardeners are already working hard to keep their plants alive. The good news is that the conditions contributing to it are mostly within your control, and understanding what is really happening below ground can help you protect the fruit still forming on your plants.
Recognize the blossom-end lesion before treating the plant
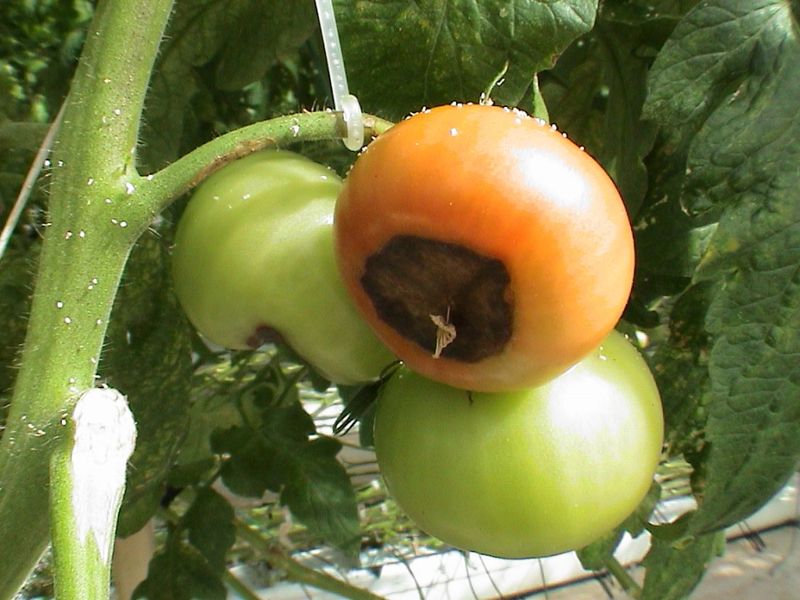
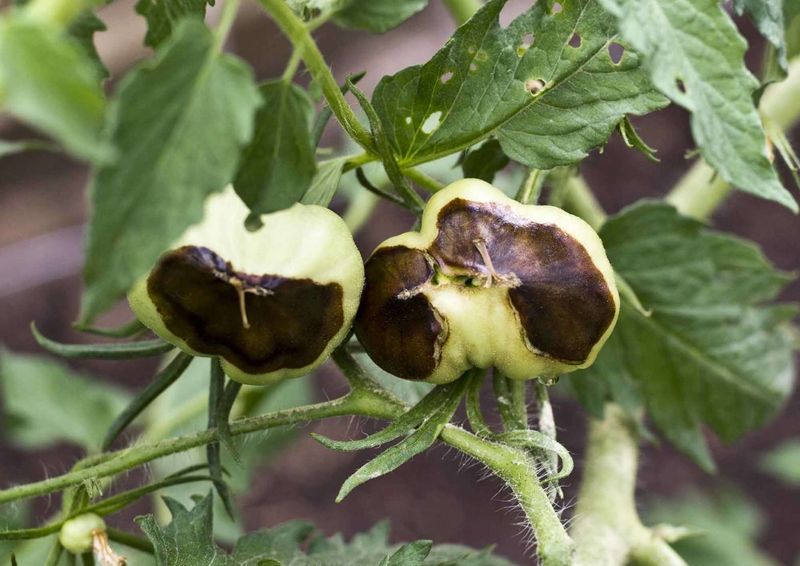
A small, water-soaked spot appearing on the bottom of a tomato, the end farthest from the stem, is the earliest sign of blossom-end rot. That spot enlarges over the following days, sinking inward and turning tan, then dark brown or black. The tissue dries out and becomes leathery, sometimes covering a quarter or more of the fruit’s surface. Oregon State University Extension describes this progression clearly and notes that secondary fungi or bacteria may eventually colonize the damaged area, making the lesion look even more alarming than the original disorder caused.
Blossom-end rot normally begins at the blossom end rather than at the stem. If you see decay starting near the stem or spreading across the side of the fruit, you are likely looking at a different problem. Sunscald, for instance, tends to show up on the exposed sidewall as a pale or bleached patch, while other fruit rots and anthracnose can produce lesions in different locations or with distinct coloring and texture. Pinpointing the correct spot matters because the remedy differs.
Once the leathery patch forms, that tissue will not recover no matter what you apply to the plant. Correct identification is still worth the effort, though, because knowing you are dealing with blossom-end rot rather than a fungal disease or sunscald tells you exactly where to focus your energy: below ground, on moisture and root conditions, to protect the fruit that has not yet developed.
The disorder develops during early fruit formation, not necessarily in deficient soil
Many gardeners assume that a rotting patch on their tomatoes proves the soil is low in calcium. Penn State Extension makes clear that blossom-end rot commonly develops even when soil calcium is adequate. The real issue is whether the developing fruit is receiving enough usable calcium, and that depends on water movement, root health, and a range of growing conditions rather than on soil calcium levels alone.
Calcium travels through a tomato plant almost entirely in the water stream moving upward from the roots. Young fruit cells are expanding rapidly and have a high demand for calcium to build stable cell walls. When anything disrupts that steady upward flow, whether heat, moisture swings, root damage, or competing ions in the soil, the fruit at the end of the vine may not receive enough calcium during the short window when those cells are forming. The UGA Commercial Tomato Production Handbook notes that visible symptoms may not appear until the fruit is much larger or beginning to ripen, even though the initiating conditions occurred earlier in development.
A published review in Scientia Horticulturae raises the possibility that environmental stress may initiate the disorder and that localized calcium shortage could be a consequence rather than the sole driver, a question researchers have not fully resolved. The practical takeaway is that treating blossom-end rot as a simple calcium-deficiency problem and reaching for an amendment often misses the underlying conditions. Managing water delivery and root health is a more reliable starting point than adding calcium to soil that may already contain enough.
Keep moisture steady through hot weather
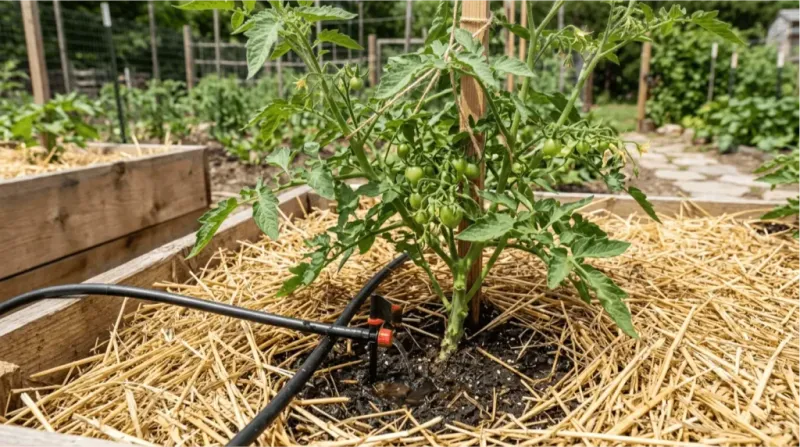
Steady moisture in the root zone is the single most actionable step you can take once you spot blossom-end rot on your first fruits. University of Minnesota Extension recommends watering deeply enough to wet the entire root zone rather than lightly sprinkling the surface, because shallow moisture produces shallow roots that become vulnerable the moment temperatures climb. A common starting point for home gardens is roughly one inch of rainfall or irrigation per week, but treat that figure as a baseline rather than a fixed rule.
Sandy soils drain quickly and may need water every two or three days during a heat wave. Container-grown tomatoes can dry out within a day in full sun and high temperatures. A heavy clay soil holds moisture longer but can become waterlogged if you overcompensate, and waterlogged roots suffer just as much as drought-stressed ones. Utah State University Extension emphasizes avoiding both extremes, since cycling between very dry and very wet conditions can increase the risk of blossom-end rot even when total water volume seems adequate.
Check moisture below the surface before deciding to water. Push a finger or a trowel two to three inches into the soil near the base of the plant; if the soil feels dry at that depth, it is time to water. Laying two to three inches of organic mulch, straw, shredded leaves, or wood chips, around the base of the plant can meaningfully reduce evaporation and buffer those dry-to-wet swings. Keep mulch pulled back a few inches from the stem itself to reduce the risk of crown and stem problems.
Protect the roots that deliver water and calcium
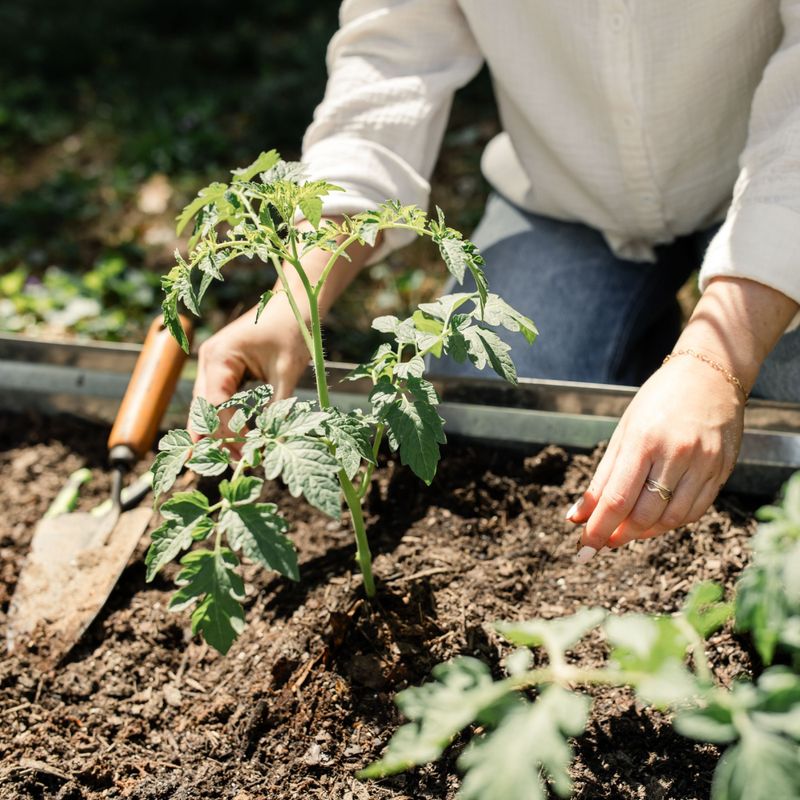
All the careful watering in the world will not help much if the roots themselves are damaged. University of Minnesota Extension specifically cautions against hoeing, cultivating, or digging close to established tomato plants, because tomato roots spread widely and shallowly. Cutting through them with a hoe while weeding, even once, can reduce the plant’s ability to take up water and calcium at exactly the moment when developing fruit need both most.
Flooding the bed when blossom-end rot appears is a common but counterproductive reaction. Saturating the soil does not flush out the disorder or push extra calcium into the fruit. Instead, waterlogged soil drives out the oxygen that roots need to function, and Utah State University Extension warns that this kind of root injury can make calcium delivery worse, not better. The goal is to keep the root zone evenly moist, not to saturate it.
Hand-pulling weeds near the base of the plant is safer than cultivating with a hoe once the plant is established. Mulch also suppresses weeds without disturbing the root zone, which is another reason it earns its place in a blossom-end rot management plan. Healthy, undisturbed roots are the delivery system for everything the developing fruit needs, so protecting them is just as important as adjusting how much water you apply.
Control excessive growth and fertilizer salts
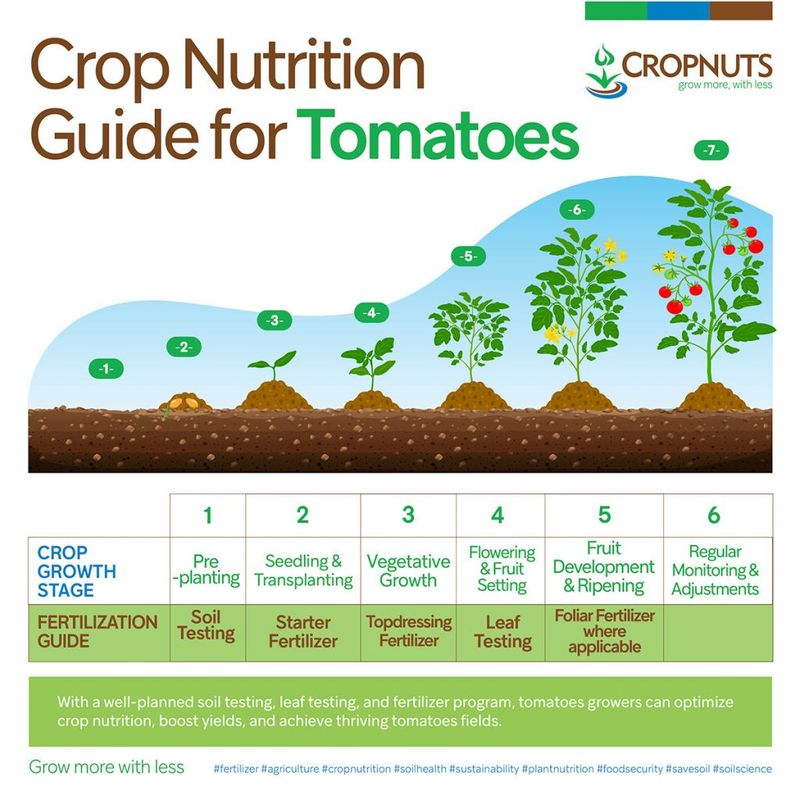
Fertilizer decisions belong in any honest blossom-end rot conversation, even though nutrients are rarely the first thing gardeners think to adjust. University of Minnesota Extension points out that excessive nitrogen can push plants into rapid vegetative growth, producing large amounts of leafy tissue that competes with developing fruit for available calcium. A plant putting out lush new growth during a hot dry stretch may be routing resources away from fruit that are in a critical early stage.
Excess salts from over-fertilizing, including high levels of potassium, magnesium, ammonium, or sodium, can interfere with the roots’ ability to take up calcium even when calcium is present in the soil. This is not a reason to avoid fertilizer entirely; it is a reason to apply it according to what a soil test actually shows rather than in response to symptoms. Adding multiple nutrient products at once because the tomatoes look stressed often makes the salt problem worse rather than better.
University of New Hampshire Extension reinforces that balanced, moderate fertilization based on soil test results is the appropriate approach. Follow product label rates carefully, and resist the urge to double up on applications when you see damaged fruit. The fruit already affected will not benefit from additional nutrients, and the goal is to create stable conditions for the fruit that forms next.
Use soil tests and local guidance before adding amendments
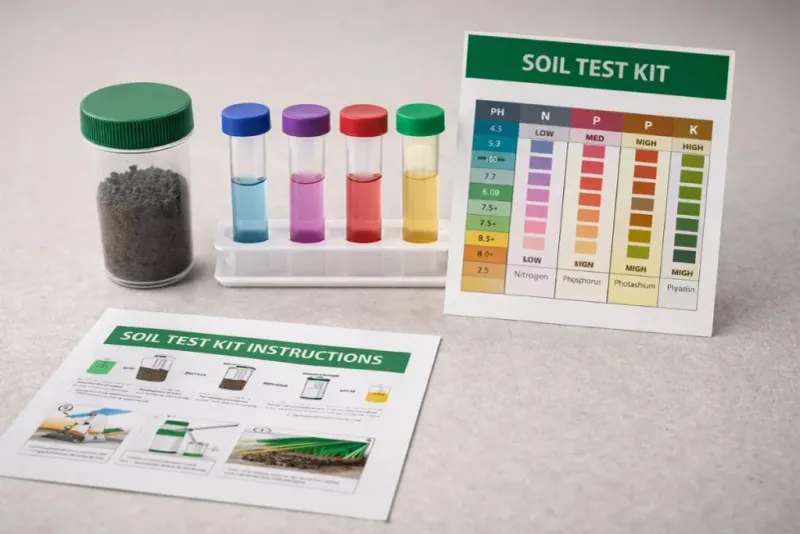
Before purchasing lime, gypsum, or any calcium product, get a soil test. Many extension services offer affordable testing through state university labs, and the results will tell you whether your soil’s calcium level and pH actually call for an amendment. Oregon State University Extension explains that lime is appropriate when soil both needs calcium and would benefit from a higher pH, while gypsum supplies calcium without changing pH, making it the better fit for soils that are already in the correct pH range. Neither product has a universal application rate, and applying either without knowing your soil’s baseline can shift conditions in an unintended direction.
Utah State University Extension notes that many soils in its region already contain sufficient calcium, making routine calcium additions unnecessary and potentially counterproductive. Your local cooperative extension office can help you interpret a soil test result in the context of your region’s typical soil conditions, which is a more reliable guide than any national recommendation.
Several popular home remedies do not hold up to scrutiny. University of Minnesota Extension explains that eggshells decompose far too slowly to address an active blossom-end rot problem, and that Epsom salts add magnesium rather than calcium. Excess magnesium can actually compete with calcium uptake, and foliar Epsom-salt solutions risk scorching leaves. Homemade foliar calcium sprays have produced inconsistent results in research settings, and they cannot repair tissue that is already damaged.
Save the amendment decisions for after the soil test, and follow label directions on any registered product you do choose to use.
Remove damaged fruit and monitor what develops next
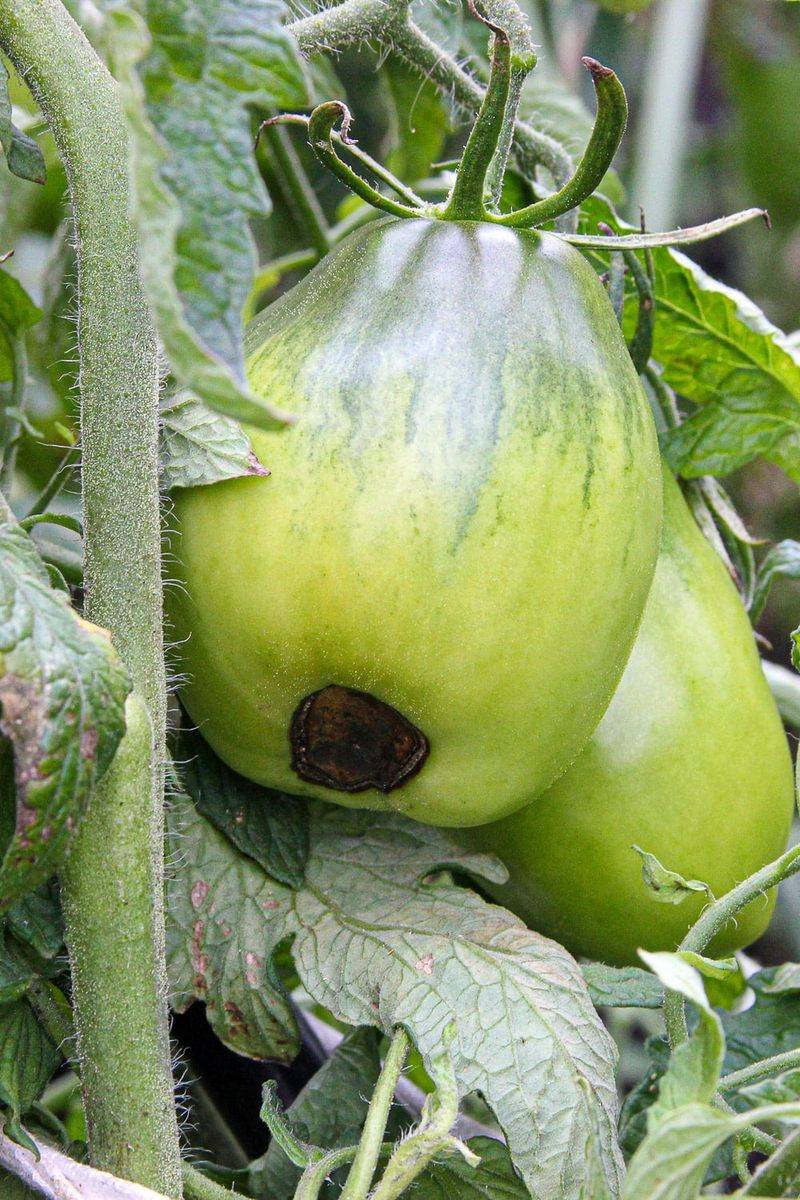
Fruit already showing the sunken, leathery patch of blossom-end rot will not recover no matter what changes you make to watering, fertilizer, or soil chemistry. Removing severely affected fruit is a reasonable step because it reduces the load the plant is carrying and may allow it to direct more resources toward the tomatoes that follow. The UGA Commercial Tomato Production Handbook confirms that removal does not cure the underlying conditions, so treat it as one part of the plan rather than the fix itself.
After removing damaged fruit, watch what develops over the next few weeks. Early fruit on a plant are often the most affected because the conditions that contributed to the disorder, heat, moisture swings, or root stress, tend to be most disruptive at the start of the season. University of New Hampshire Extension notes that later fruit may develop normally once watering becomes more consistent and the root system stabilizes, though this is not guaranteed for every plant in every season.
Several factors affect how much improvement you can expect: cultivar, weather patterns through the rest of summer, soil salinity, root health, and the plant’s growth rate all play a role. Large slicing tomatoes and some plum or paste types tend to be more susceptible than cherry tomatoes, and Colorado State University Extension advises discarding severely damaged fruit rather than eating them, while mildly affected fruit with only a small lesion may be salvageable after cutting away the damaged area. Blossom-end rot can often be reduced with consistent care, but the gardeners who manage it best are the ones who stay realistic: some seasons and some cultivars will test even the most attentive root-zone management.