
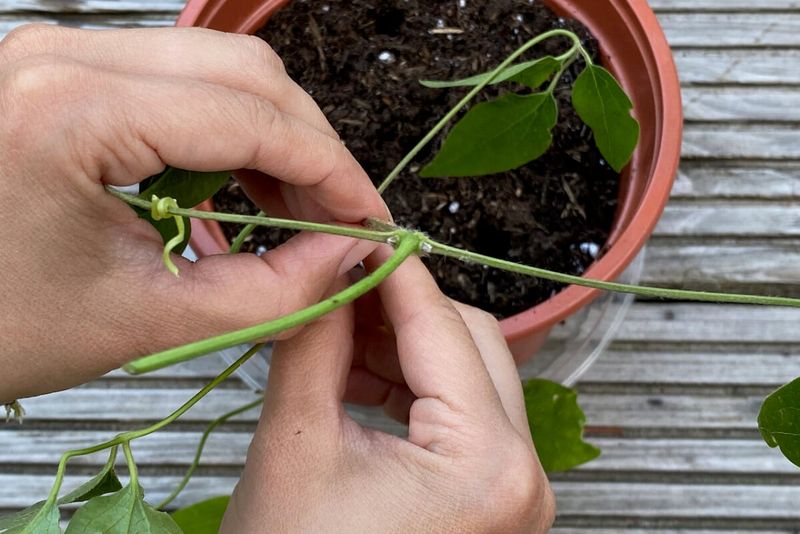
Watching a clematis bloom across a fence is one of those satisfying garden moments that makes you want more of it without another trip to the nursery. The good news is that a healthy, established plant can give you new starts through stem cuttings taken during summer into early fall.
Propagation does require some supplies, patience, and the right timing, but the reward is a set of genetically identical young plants you grew yourself. Understanding the semi-ripe window and a few basic steps makes the difference between cuttings that root and cuttings that rot.
Find the summer-to-early-fall semi-ripe window
Calendar dates alone will not tell you when to take a clematis cutting. The RHS growing guide for clematis places the semi-ripe cutting window from July through September, but the stem itself is the real signal.
Run your fingers along a shoot from base to tip: the lower portion should feel noticeably firm while the upper portion stays flexible and green or bronzy. That combination tells you the growth has matured enough to resist wilting under propagation stress without becoming so woody that rooting slows dramatically.
Professional propagation research adds a useful refinement. A propagation paper published in the IPPS proceedings found that clematis cuttings taken before mid-August tended to root best, which suggests an earlier bias within the July-to-September window rather than a reason to wait for late August.
Two extremes to avoid: a shoot tip so soft it collapses when touched is not ready, and a stem so woody it snaps cleanly is past the semi-ripe stage and better treated as a hardwood cutting. As the International Clematis Society propagation guidance notes, the correct material sits between those two points.
A late-August cutting can still succeed if the plant is actively growing and the stem passes the firmness test, but no single date works everywhere for every cultivar.
Select healthy growth from a parent worth copying
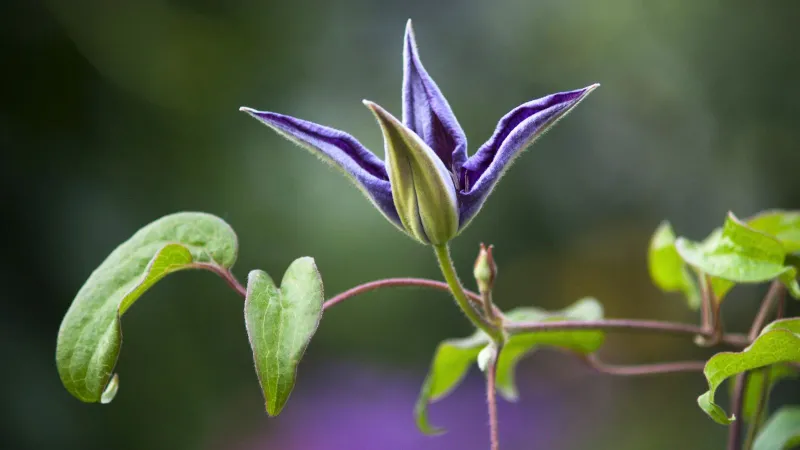
Before you pick up a blade, look hard at the parent plant. A cutting is a genetic copy, so whatever the parent carries, good or bad, transfers to every new plant you root from it.
Choose a clematis that is growing vigorously, showing no signs of wilt, discoloration, or disease, and producing shoots that look strong and full of color. A stressed or sickly parent rarely gives you cuttings worth the effort.
Once you have confirmed the parent is worth copying, look for current-season shoots that are not flowering and carry no visible buds. RHS clematis guidance specifically recommends healthy, non-flowering shoots, and Clemson Extension’s propagation guide also advises removing flowers or flower buds from cuttings before sticking them.
Energy that would go to a bloom is energy the cutting cannot spare while trying to produce roots.
Cultivar identity matters here too. University of Minnesota research on clematis propagation and an Auburn University study on clematis stem cuttings both found meaningful differences in rooting success among cultivars and species.
Some clematis, especially certain small-flowered species, root readily. Large-flowered hybrids can be more stubborn.
Knowing what you are propagating helps set a realistic expectation before you invest time and materials.
Prepare a node-bearing cutting with a clean tool
Sharp, clean tools are not optional here. A ragged cut from a dull blade crushes stem tissue and creates an entry point for pathogens before the cutting even reaches the rooting medium.
Wipe your blade with rubbing alcohol or a diluted bleach solution between cuts if you are working from multiple plants.
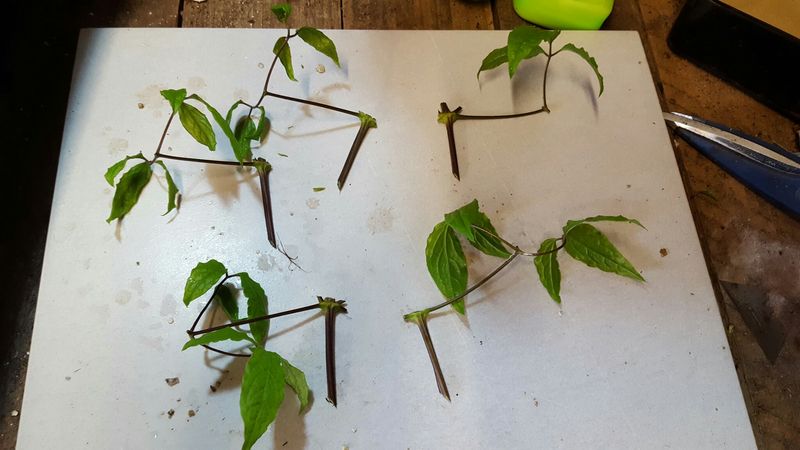
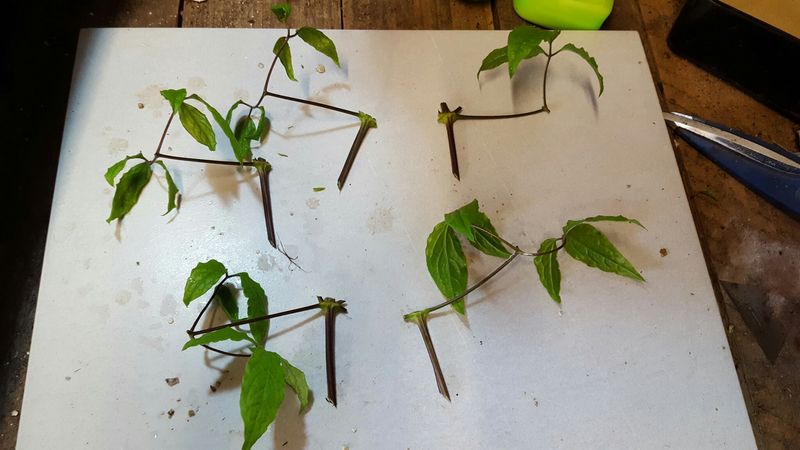
The International Clematis Society describes a one-node cutting with roughly 5 cm (about 2 inches) of stem below the node as a workable format. General extension propagation guidance often uses 4- to 6-inch cuttings with at least two nodes.
Either approach can work; the key is that at least one viable node is present and will be covered by the rooting medium. Cut cleanly just below a node, then strip any leaves from the portion of stem that will sit below the surface.
Large leaves remaining on the cutting should be reduced by about half to limit the water the cutting loses while it has no roots to replace it. Keep the freshly cut end from sitting in open air while you prepare the rest of your cuttings; even a few minutes of drying can set back the process.
UF/IFAS propagation guidance and University of Illinois Extension both note that keeping cut surfaces moist until insertion is a simple step that improves outcomes.
Rooting hormone is an option, not a requirement. Minnesota research on clematis propagation factors found that IBA (indole-3-butyric acid) improved survival in one difficult cultivar but showed little significant benefit in easier-rooting types.
If you choose to use it, follow the product label and apply only a light dusting or dip; excess hormone can inhibit rooting rather than help it.
Root the cutting in a porous, well-drained medium
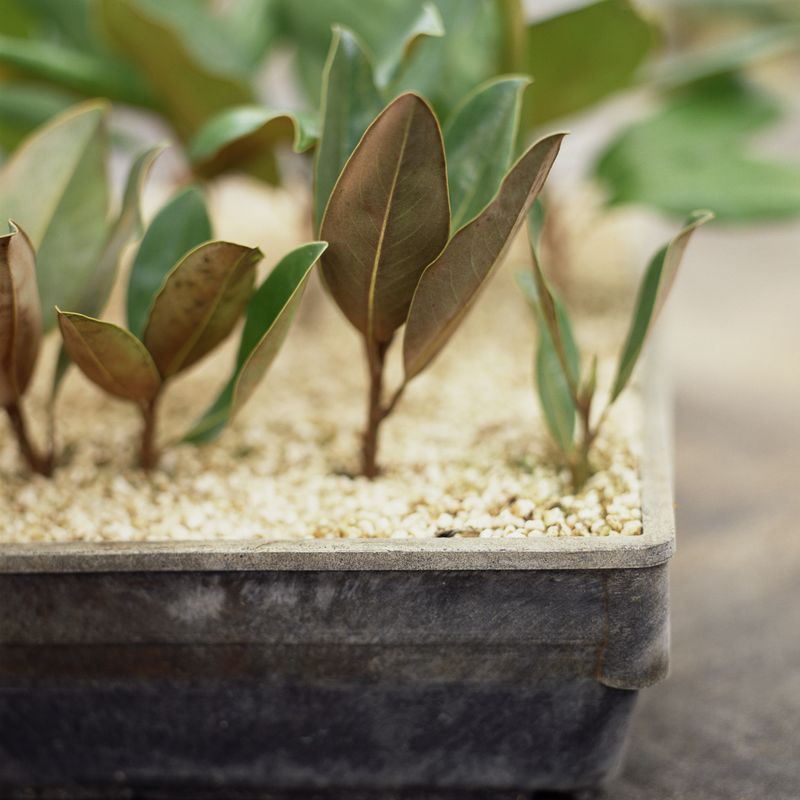
Ordinary garden soil is the wrong choice for rooting cuttings. It compacts around the fragile new root hairs, holds too much water, and carries pathogens that attack vulnerable stem tissue.
A porous, well-drained rooting medium gives developing roots the air pockets they need while still retaining enough moisture to keep the stem from drying out.
University of Minnesota clematis propagation research and a related study published in Scientia Horticulturae found that perlite and sand-based media generally outperformed heavier peat-based mixtures for clematis. One study reported 71% rooting in pure perlite versus 36% in a peat-perlite mix for the specific varieties tested.
Those numbers describe a controlled research setting, not a guarantee you will see the same results at home with a different cultivar or setup, but they do support choosing a lighter, airier mix over a dense one.
Pre-moisten the medium before you insert the cutting so you are not trying to water it in afterward and disturbing the stem. Push the cutting in so the node is fully covered, then gently firm the medium around the stem to eliminate air pockets.
University of Illinois Extension propagation guidance and Penn State Extension both emphasize even moisture without saturation. If the medium feels soggy rather than evenly damp, you are inviting rot before a single root forms.
Balance humidity and warmth with Southern ventilation
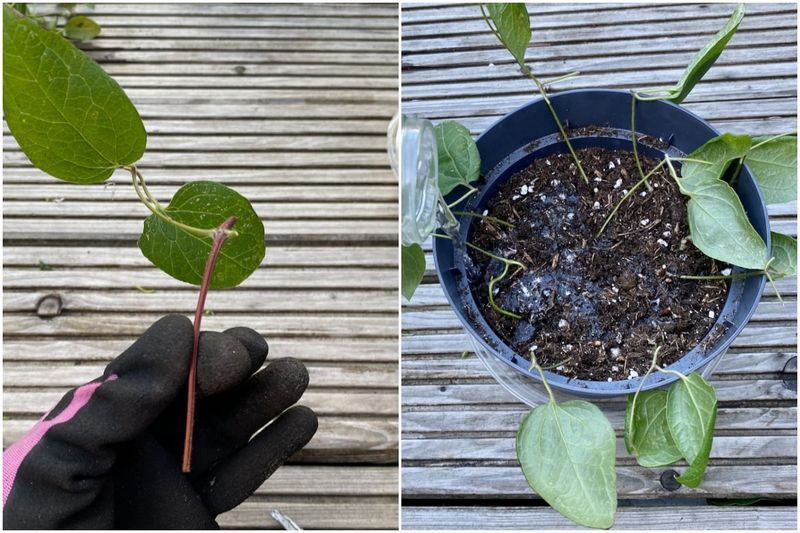
An unrooted cutting loses water through its leaves but cannot replace that water yet because it has no roots. Enclosing the cuttings under a clear propagation dome or a ventilated plastic cover raises the humidity around the leaves and slows that water loss enough for the stem to stay alive while roots develop.
Place the covered container in bright, indirect light rather than a spot where direct sun will strike the cover.
University of Illinois Extension and University of Nebraska-Lincoln Extension propagation guidance both describe warm rooting-medium temperatures as beneficial, with approximately 75 to 80 degrees Fahrenheit often cited as a useful range for many cuttings. That is general propagation guidance rather than a clematis-specific guarantee, but it gives you a practical target.
A seedling heat mat set to a low setting can help if your space runs cool.
Southern gardeners in Florida, Texas, and similar climates face an additional challenge that cooler-region advice does not address: a clear cover sitting in summer sun can trap enough heat to cook cuttings within an hour. UF/IFAS propagation guidance and Clemson Extension’s clematis fact sheet both point toward shade or filtered light for clematis culture in hot regions.
A north-facing porch, a spot under a shade cloth, or a location sheltered from afternoon reflected heat is a much safer choice than a sunny south-facing wall. Vent the cover briefly each day to release any built-up heat and refresh the air around the cuttings, and check that the medium has not dried out at the edges where small pots lose moisture fastest.
Penn State Extension notes that good air circulation helps reduce the fungal pressure that humid propagation setups can encourage.
Pot rooted cuttings individually and acclimate them gradually
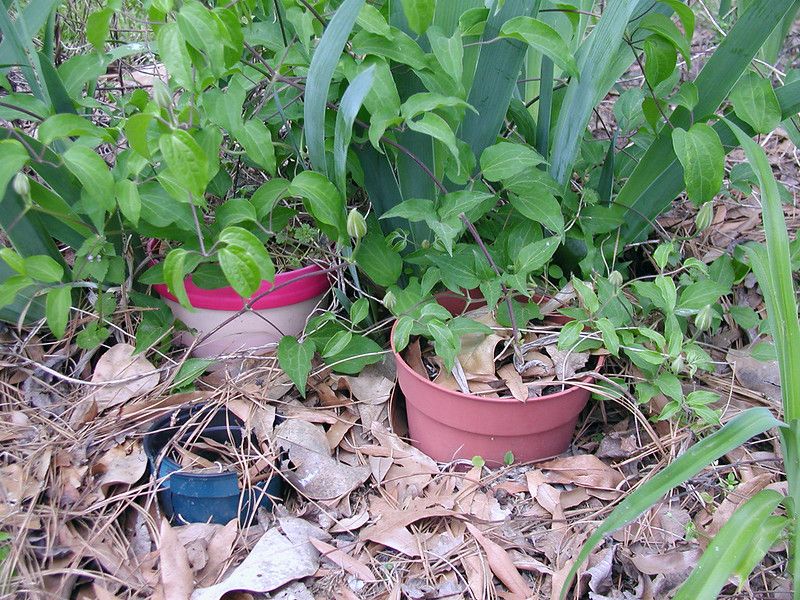
Patience matters more than checking. Tugging at a cutting to test for roots every few days disrupts any early root development and can set the whole process back.
Give the cuttings several weeks before testing gently, and look for resistance when you apply very light upward pressure rather than pulling hard. International Clematis Society propagation notes suggest that some clematis may begin rooting in under four weeks under favorable conditions, while the RHS gives about six to eight weeks as a common period before potting up.
Both figures depend on cultivar, temperature, and medium, so treat them as a range rather than a schedule.
Once roots are clearly established, move each cutting into its own pot with a well-draining potting mix. Crowding multiple rooted cuttings into one container slows development and makes later separation harder without damaging the roots.
Each young plant needs room to build a proper root system before it faces the demands of a permanent planting site.
The transition from a humid propagation enclosure to normal outdoor conditions requires a gradual step-down. UF/IFAS guidance on transplanting and establishment supports easing new plants into stronger light and lower humidity over several days rather than moving them abruptly.
The realistic outcome at this stage is a collection of small, growing plants in individual pots, not a fence line ready for coverage. Supplies including containers, potting mix, and propagation materials are part of the cost, so the process avoids purchasing additional plants rather than being literally free.
Plan for variable flowering and uncertain fence coverage
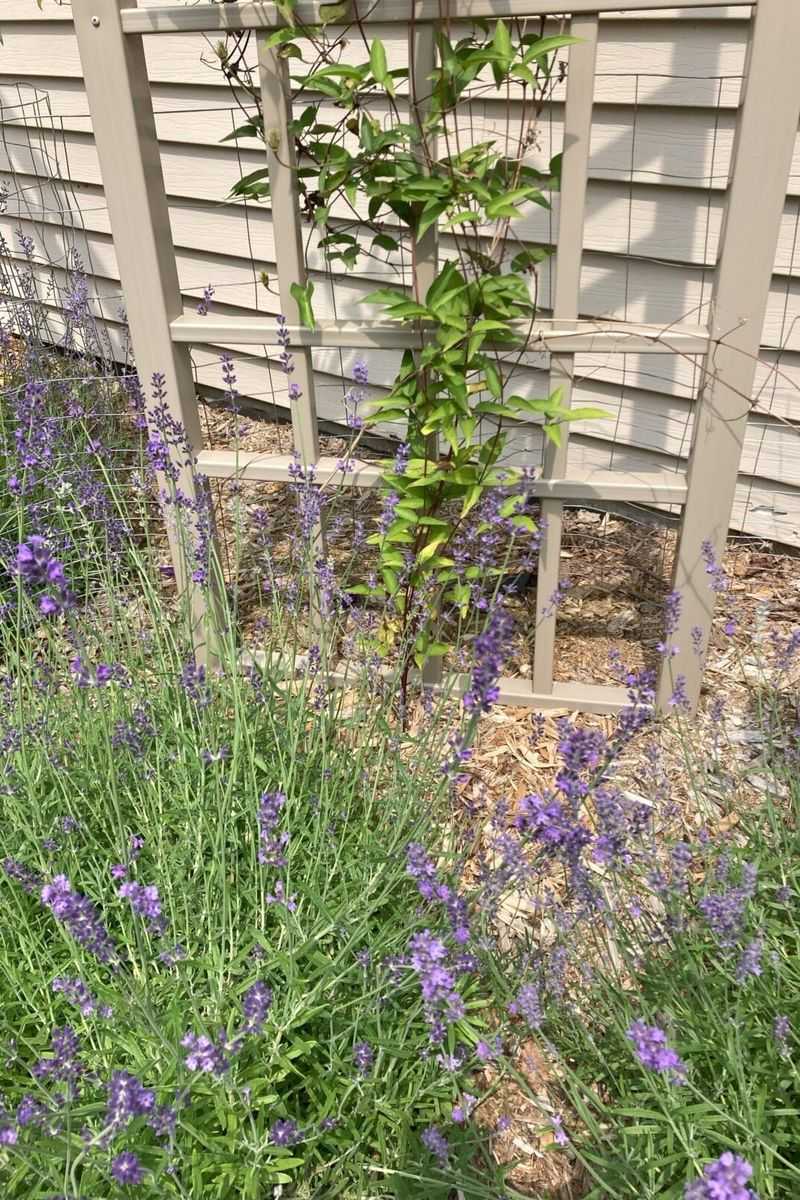
Two separate timelines govern your expectations after a cutting roots successfully: when the plant flowers and when it provides meaningful fence coverage. Conflating them leads to disappointment.
RHS clematis guidance notes that newly propagated plants may take about two years to flower under favorable conditions. That two-year figure describes an approximate time to first bloom, not a deadline by which a row of plants will fill a structure.
Fence coverage depends on factors that vary considerably from one garden to the next: how many cuttings rooted successfully, the vigor of that particular cultivar, plant spacing, the size and type of support, soil fertility, water availability, and the length of your growing season. Minnesota propagation research and the Auburn University clematis study both document how differently cultivars behave, which means a vigorous species type may advance much faster than a large-flowered hybrid even under identical care.
Pruning needs add another layer of planning. A cutting produces a plant that is genetically identical to its parent, but that does not automatically tell you how to prune it.
NC State Extension’s clematis overview explains that pruning timing depends on whether the plant flowers on old wood, new wood, or both. Group 1 types that bloom on old wood need only light tidying after flowering; Group 2 and Group 3 types have different schedules.
Identifying your clematis group before you propagate means you will know how to treat the young plants as they mature, rather than accidentally cutting away next season’s blooms on a fence that is just starting to fill in.
Check plant identity, safety, and propagation rights first
Gloves belong on your hands before you handle any clematis. NC State Extension notes that clematis can cause contact dermatitis from skin exposure and mouth pain or ulcers if any part of the plant is eaten.
Keep cuttings, trimmed leaves, and stem debris away from children and pets, and wash your hands thoroughly after working with the plant even if you wore gloves.
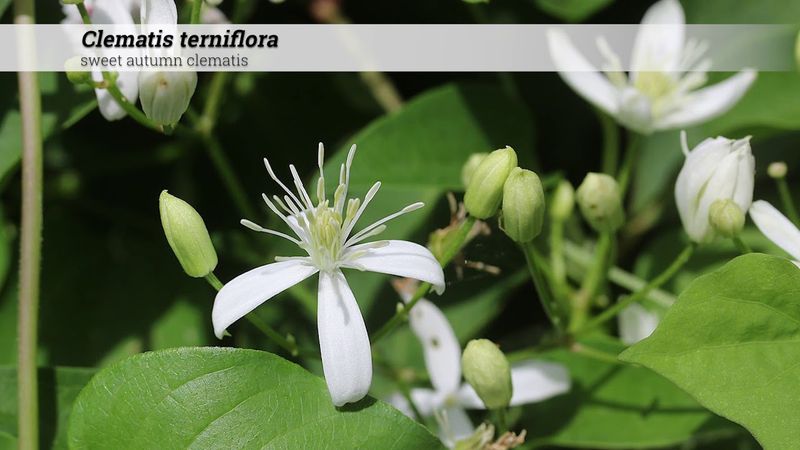
Florida gardeners need to pause before propagating any clematis sold or growing under a common name that sounds like sweet autumn clematis. UF/IFAS identifies Clematis terniflora as a high invasion risk in Florida and recommends the native Clematis virginiana as an alternative.
Because multiple plants can share similar common names, positive identification matters before you multiply any plant and introduce more of it into a Florida landscape. Spreading an invasive vine more efficiently is the opposite of a garden win.
Named cultivars carry their own consideration. The RHS warns that Plant Breeder’s Rights may prohibit propagating protected clematis cultivars for sale or commercial distribution.
USDA plant variety protection certificates can restrict propagation, marketing, and sale of protected varieties. Home propagation for personal use and commercial distribution are not treated the same way legally, so if you are ever uncertain about a named cultivar’s status, check before you multiply it beyond your own garden.
The realistic method, stripped of any oversimplified promise, comes down to this: choose correctly timed semi-ripe growth, root it under controlled conditions with porous medium and ventilated shade, and accept that mature plants and fence coverage require patience measured in seasons, not weeks. The plants you grow from your own vine are worth the wait.