
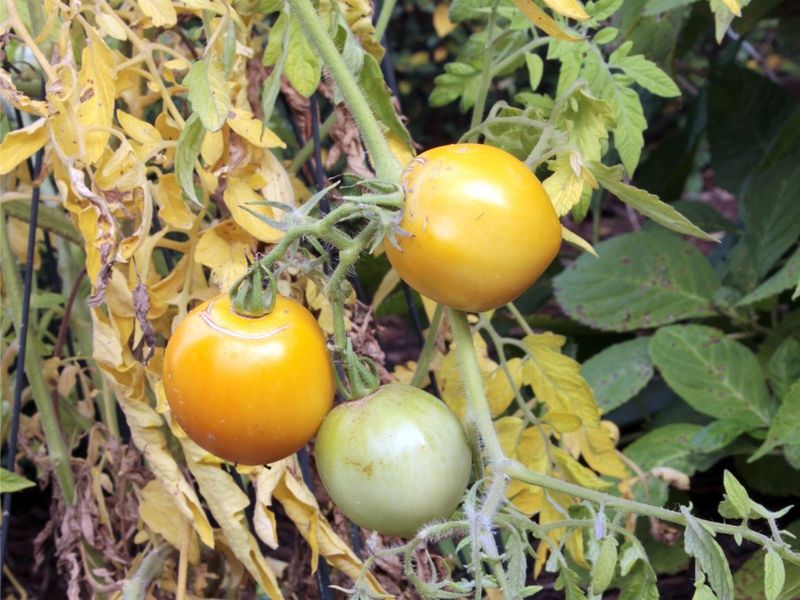
Seeing yellow leaves spread across your tomato plants in August can feel like something has gone badly wrong, especially after all the work you put in since spring. The heat is obvious, so it gets the blame, and the next stop is usually a bag of fertilizer or a spray bottle.
The problem is that heat by itself does not reliably explain yellow tomato leaves, and treating the wrong cause can make things worse. A short inspection at the plant, before you reach for any product, usually tells you far more than the calendar or the thermometer ever could.
Yellow leaves do not prove that heat is the culprit
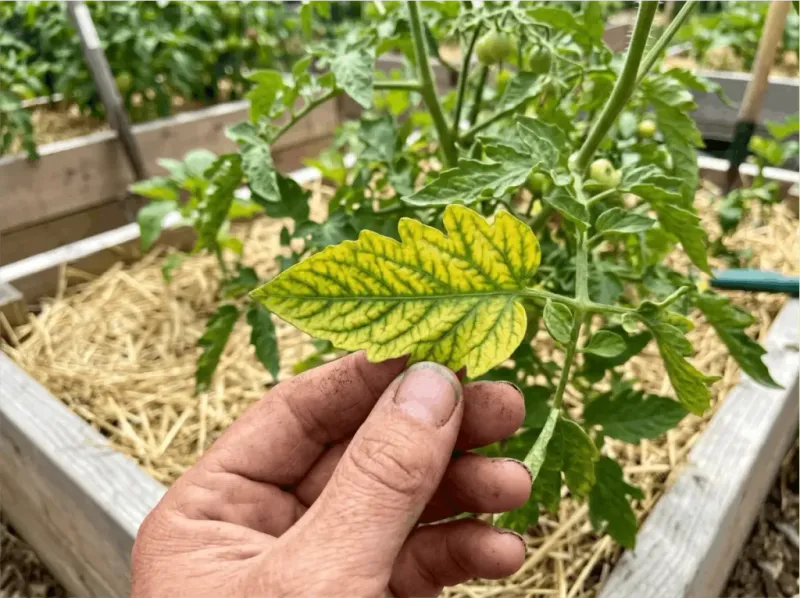
California summers can be brutal on tomato plants, and when temperatures climb above roughly 90 to 95 degrees Fahrenheit, real physiological stress sets in. UC Cooperative Extension guidance notes that high heat can reduce pollination success, stall fruit set, slow overall growth, and cause flowers to drop before they ever form fruit.
Hot, dry, or windy conditions push the plant to conserve water, and one common response is for leaves to curl or roll inward, which can alarm gardeners who mistake it for a sign of disease or deficiency.
Leaf curling and leaf yellowing are two different things, though, and conflating them leads to wrong treatments. Physiological leaf roll, as described by UC IPM’s overview of vegetable leaf roll, is a noninfectious response where leaves become thick and leathery and roll upward or inward.
It is generally harmless and does not damage fruit that develops later. Yellowing, by contrast, signals something more specific, and the cause depends heavily on where the yellowing appears, what pattern it follows, and what else is happening on the plant.
There is also a separate fruit disorder called solar yellowing, where tomatoes ripen with a yellow or yellow-orange shoulder due to intense sunlight and heat. That is a fruit problem, not a leaf problem, and it should not be confused with foliage yellowing caused by a nutrient gap or a pest.
Before assuming heat is the answer, look at the whole plant, note which leaves are affected, check the soil below the surface, and examine the undersides of leaves. Heat may be part of the story, but it rarely tells the whole one.
Start with where the yellowing appears
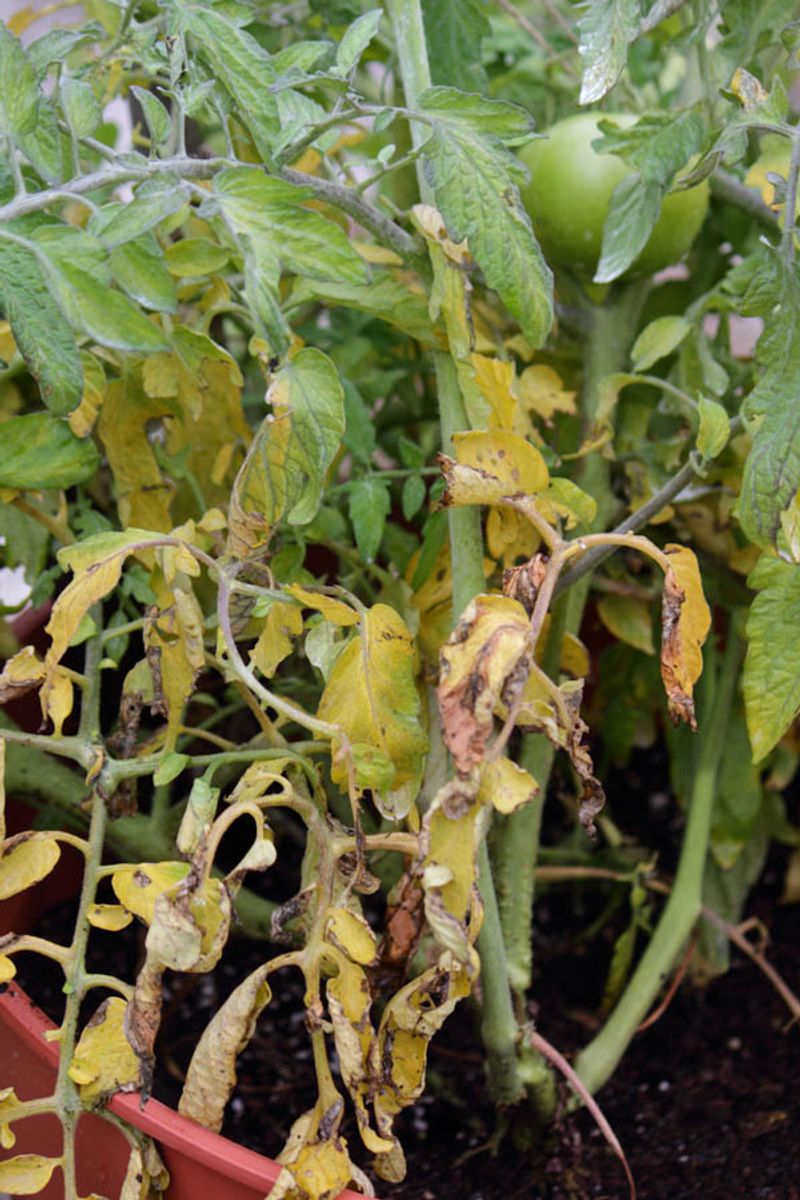
Location on the plant is the first and most useful clue a gardener can gather. A few yellow leaves near the base of an otherwise vigorous, green, actively fruiting vine often signal nothing more than normal aging.
Lower leaves that sit deep in the canopy receive little sunlight, and as the plant matures and focuses energy on fruit production, those shaded leaves can yellow and drop on their own. UC Cooperative Extension Ventura County guidance on tomato leaf yellowing points out that this kind of lower-leaf drop is normal on a healthy vine and does not call for fertilizer or other intervention.
The picture changes when yellowing is not limited to a few lower leaves. Pale coloring that spreads across older leaves throughout the plant, combined with generally slow growth and smaller-than-expected fruit, can support a suspicion of nitrogen deficiency.
Nitrogen moves freely within the plant, so when supplies run low, the plant pulls it from older tissue first, and those older leaves turn pale or yellow while younger growth may still look reasonably green. That pattern is worth noting, but location alone does not confirm a diagnosis.
New growth tells a different story. Distorted, crumpled, or stunted young leaves with yellowing or mottling point toward something other than normal aging or a simple nitrogen gap.
Viral infection, certain nutrient deficiencies that involve elements the plant cannot move as freely, or severe pest pressure can all show up first in new tissue. University of Arizona Extension’s nutrient deficiency quick-reference reinforces that symptom location on the plant, old versus new growth, is a critical first filter in any nutrient diagnosis.
Use it to decide which follow-up checks matter most before moving on.
Use root-zone moisture as a clue, not a verdict
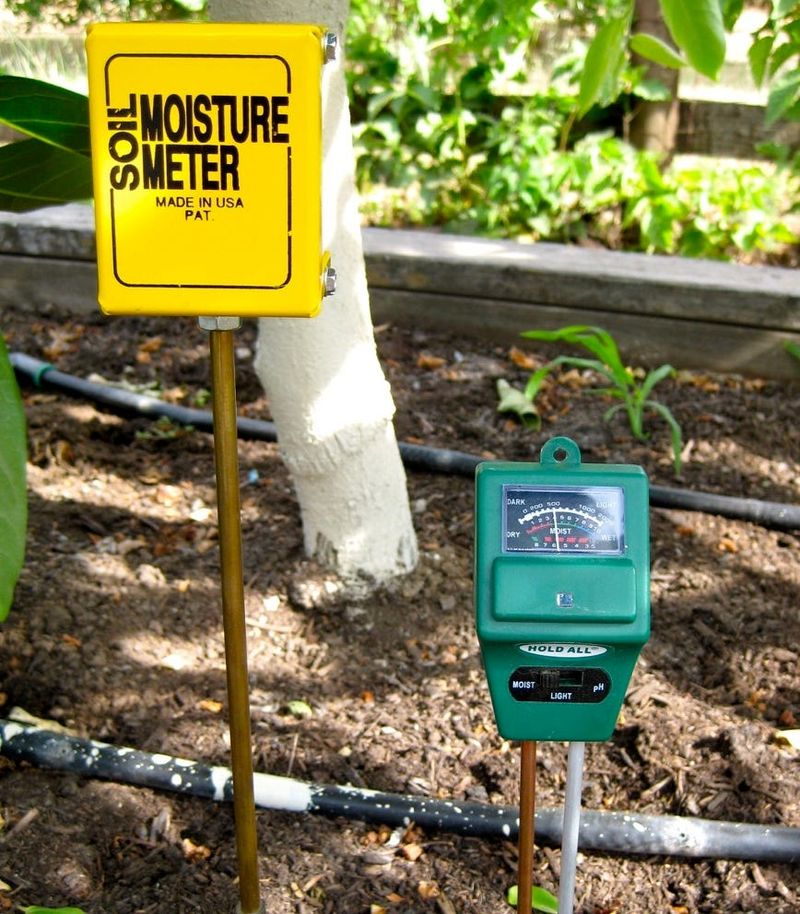
Checking soil moisture at the surface tells you almost nothing useful. The top inch or two dries out quickly in California’s summer heat, and a dry crust can sit above root-zone soil that is still adequately moist, or even waterlogged.
The only reliable check is to push a finger, a wooden dowel, or a soil probe several inches down into the root zone and feel what is actually there. UC IPM’s guidance on watering tomatoes recommends deep, slow watering that reaches the root zone while avoiding conditions that keep the soil saturated, because roots need both water and oxygen to function.
Alternating between drought and flooding is one of the more common stress patterns in California home gardens, and it creates a cycle that weakens plants even when the gardener believes they are watering regularly. Letting the soil dry out completely and then flooding it can contribute to blossom-end rot, fruit cracking, flower drop, and general decline.
Slow, consistent moisture delivered at the base of the plant, ideally through drip irrigation or a soaker hose, supports a deeper, more stable root system than frequent shallow watering does.
Wet soil is not proof that the plant has enough water, and that is an important distinction. When roots are damaged by Phytophthora or other root-rot pathogens, they lose the ability to take up water even when the surrounding soil is moist.
A plant wilting in wet soil is a red flag for root disease, not a signal to water more. California’s range of growing conditions, from cool coastal gardens to hot inland valleys, desert plots, and container gardens on patios, means there is no single watering schedule that applies everywhere.
Soil type, container size, plant size, and current weather all factor in, and root-zone moisture is the guide, not the calendar.
UC Master Gardeners of Alameda County reinforce that local conditions vary enough across California that prescriptive watering schedules can mislead gardeners who would be better served by learning to read their own soil.
Reduce heat stress without stripping the plant bare
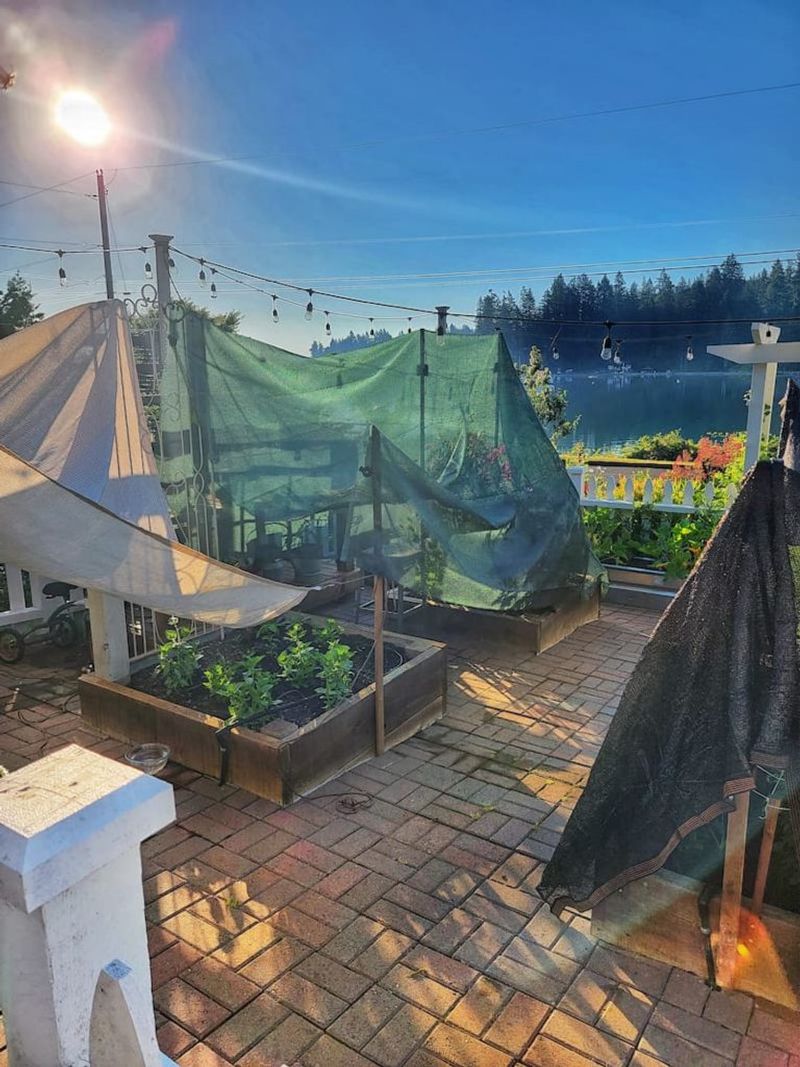
Once you have confirmed that heat and inconsistent moisture are genuine contributors, a few practical steps can meaningfully reduce the stress your plants are under. Consistent root-zone moisture is the most important one, and it works best when the soil holds that moisture between waterings rather than swinging between dry and saturated.
UC IPM’s tomato watering guidance supports slow, deep watering at the base of the plant to encourage roots to grow downward where soil temperatures are more stable.
Organic mulch is one of the most effective tools available for managing both heat and moisture. UC Master Gardeners of Contra Costa County commonly recommend roughly 2 to 3 inches of organic mulch spread around the base of tomato plants, kept a few inches away from direct contact with the stem to avoid creating conditions favorable to rot.
Mulch slows evaporation and moderates soil temperature, which reduces the stress cycle that makes plants more vulnerable to secondary problems.
Afternoon shade can also help on the hottest inland California sites. Morning sun is generally favorable for tomatoes, while filtered afternoon shade reduces heat load during the most intense part of the day.
UC guidance on shade cloth generally places tomatoes in the 20 to 40 percent shade range; stronger shade can reduce light to the point where it harms fruit production, so more is not always better.
Resist the urge to remove large amounts of healthy foliage during heat. Leaves shade developing fruit and protect it from sunscald and solar yellowing.
As University of Arizona Cooperative Extension’s tomato growing guide notes, aggressive pruning can expose fruit to direct sun and increase heat damage. These care steps support a plant under heat stress, but they will not cure a pest infestation, a virus, a wilt disease, root disease, or a confirmed nutrient deficiency.
For those problems, the fix has to match the actual diagnosis.
The undersides of leaves can expose a pest problem
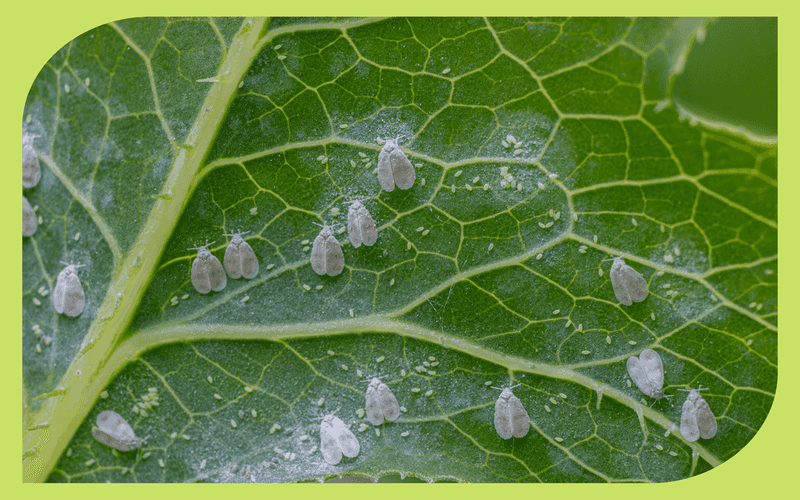
Many pest problems on tomatoes announce themselves on the underside of the leaf long before the damage becomes obvious from above. Getting into the habit of flipping leaves before reaching any conclusion about yellowing is one of the most useful habits a home gardener can develop.
Spider mites are often the first thing to look for, especially during hot, dry, or dusty conditions, which favor rapid mite population growth.
UC IPM’s spider mite resource describes the early signs as fine pale stippling on the upper leaf surface, caused by mites feeding on leaf cells from below. As populations build, that stippling can progress to broader yellowing, bronzing, and eventually leaf drop.
Fine webbing on the undersides of leaves or at stem junctions is a reliable confirmation of heavy mite activity. Plants that are already stressed by heat or inconsistent watering tend to suffer more severe mite damage, which is one reason mite outbreaks often appear to follow heat waves.
Whiteflies leave different clues. They tend to cluster on the undersides of younger leaves, and their feeding can cause leaves to yellow and curl.
A cloud of tiny white insects lifting off when you disturb a branch is a strong indicator. Whitefly feeding also produces sticky honeydew, which can coat lower leaves and develop into sooty mold, a gray or black fungal coating that reduces the leaf’s ability to photosynthesize.
Confirming the pest before considering any control is essential. Broad-spectrum insecticides applied without a confirmed pest identification can kill the natural predators, including predatory mites and parasitic wasps, that keep pest populations in check.
Removing those natural controls can cause mite populations to rebound faster and in larger numbers than before the spray. Identification comes first, then a targeted response if one is warranted.
Patterned yellowing points toward disease
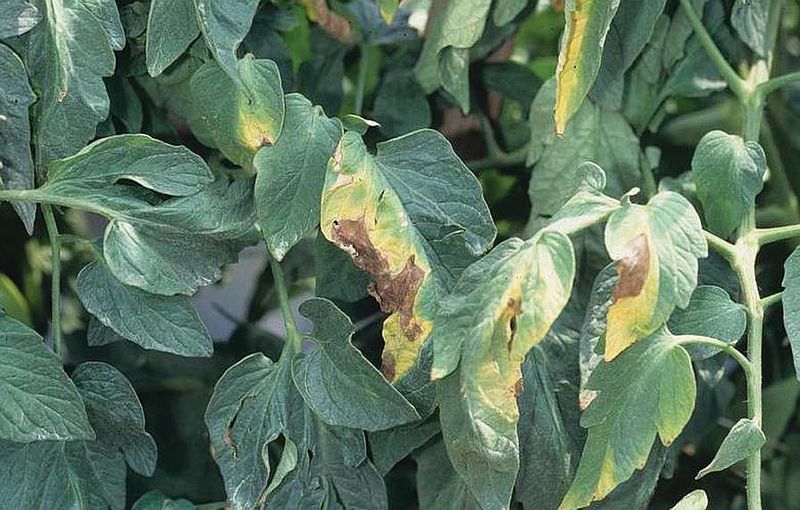
Some yellowing patterns on tomatoes cannot be explained by heat, water stress, or normal aging, and recognizing those patterns early can prevent a diseased plant from infecting others or from wasting the rest of the season on ineffective treatments. The location and distribution of symptoms across the plant are key to separating disease from other causes.
When yellowing and wilting affect only one branch or one side of the plant rather than spreading evenly, vascular wilt disease becomes a serious concern. UC IPM’s home-garden Verticillium wilt page describes a pattern where older leaves develop yellow, V-shaped areas that eventually turn brown, often starting on one side of the leaf or one part of the plant.
Cutting into the lower stem of a suspected plant and looking for brown or tan discoloration in the vascular tissue can support a field diagnosis of Fusarium or Verticillium wilt, though UC IPM’s agricultural guidelines for Verticillium wilt note that the two diseases can be difficult to distinguish without laboratory analysis.
Brown spots surrounded by yellow halos, especially spots that show concentric rings resembling a target or bullseye, are more consistent with early blight than with heat stress or a nutrient gap. UC Cooperative Extension’s early blight guidance points out that this fungal disease tends to start on older lower leaves and moves upward, and it can spread more quickly when plants are stressed or when foliage stays wet.
A different and more alarming pattern involves small, crumpled, upward-curling new leaves with yellowing margins and severely reduced fruit set. This combination, especially when whiteflies are present, warrants concern about tomato yellow leaf curl virus.
UC IPM’s tomato yellow leaf curl resource describes it as a serious but geographically limited disease in California, spread primarily by Bemisia whiteflies and through infected transplants. It is not the default explanation for heat-season yellowing, but it deserves consideration when the symptom pattern fits.
UC Master Gardeners of Sacramento County note that heat or water stress can make some disease symptoms more visible without being the original cause, which is why a diseased plant may suddenly look much worse during a heat wave.
Fertilizer belongs after diagnosis, not before it
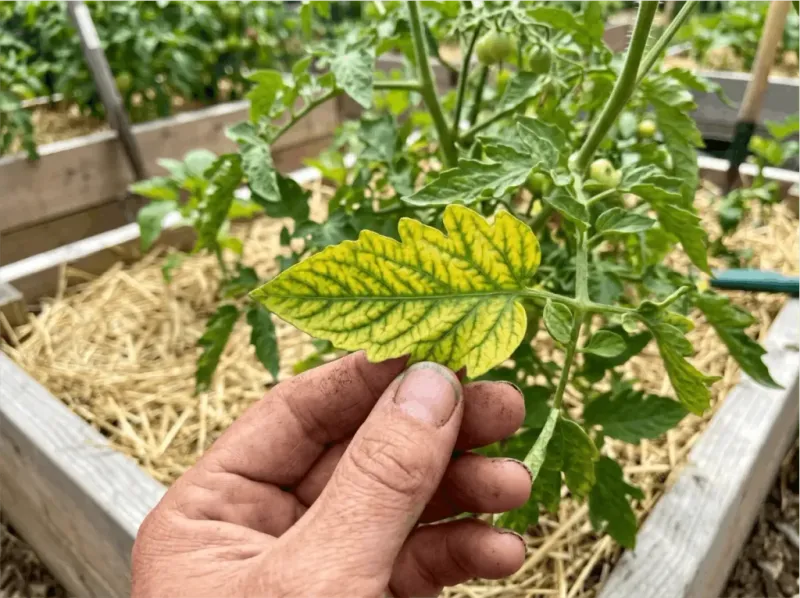
Reaching for fertilizer when tomato leaves turn yellow is a completely understandable first instinct, and it is not always wrong. Nitrogen deficiency does cause yellowing, and when the diagnosis supports it, adding nitrogen can genuinely help.
The problem is applying fertilizer before confirming what is actually happening, because the right treatment for nitrogen deficiency is exactly the wrong treatment for several other causes of yellow leaves.
UC IPM’s fertilization guidelines for tomatoes recommend soil or tissue testing when a nutrient deficiency is uncertain, rather than applying repeated heavy doses based on symptoms alone. Excess nitrogen promotes leafy growth at the expense of fruit production and can contribute to problems including salt buildup in the root zone.
A plant that is yellowing because of root disease, a mite infestation, or a virus will not benefit from extra nitrogen, and the additional fertilizer may stress an already compromised root system further.
UC Cooperative Extension Ventura County guidance suggests that generally pale growth across older leaves, combined with slow growth and undersized fruit on an otherwise active vine, can support a nitrogen-deficiency hypothesis. Even then, the label on whatever product you choose matters: follow the application rate, timing, and edible-crop intervals rather than assuming more is better.
A few popular remedies deserve a direct correction. Epsom salts, eggshells, and foliar calcium sprays are frequently suggested online as fixes for yellow leaves or blossom-end rot.
UC Marin Master Gardeners’ review of garden myths explains that Epsom salts are not a general fertilizer and can worsen nutrient imbalance in soils that do not have a confirmed magnesium deficiency. Blossom-end rot, meanwhile, is primarily a water-uptake problem: the plant cannot move calcium into developing fruit fast enough because of inconsistent soil moisture, and spraying calcium onto leaves does not fix that underlying issue.
Use this inspection order before you intervene
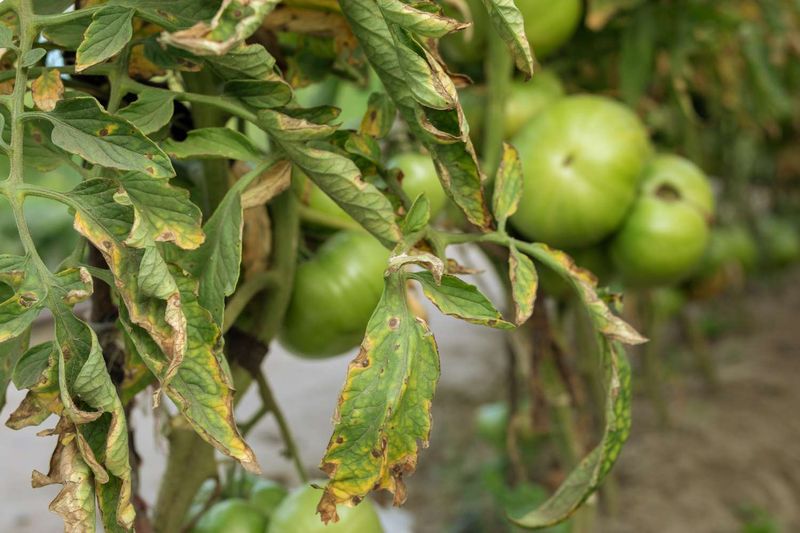
Having a consistent inspection sequence prevents the kind of reactive treatment that makes yellow-leaf problems worse. Running through a short checklist at the plant, before buying anything or changing your watering schedule, takes only a few minutes and gives you something much more reliable than a guess based on the weather.
Start by identifying whether the yellow leaves are old and low on the plant or whether they include new growth near the top. Old lower leaves yellowing on an otherwise vigorous vine are often normal aging.
New growth that is distorted, crumpled, or mottled points toward a different category of problem. Next, check root-zone moisture several inches below the surface, not just at the top, as described in UC IPM’s tomato watering guidance.
Adjust watering if the root zone is clearly too dry or too wet before considering other interventions.
Then flip several leaves and look at the undersides carefully. Fine stippling, webbing, or clusters of tiny insects are pest indicators that require a targeted response, not a fertilizer application.
Sticky residue or sooty mold on lower leaves suggests whitefly activity. UC IPM’s spider mite guidance emphasizes confirming pest presence before considering any control measure.
After that, step back and look at whether symptoms affect one branch, one side of the plant, or the whole vine. One-sided or single-branch wilting with brown vascular tissue inside the stem points toward wilt disease.
Whole-plant yellowing with pale older leaves and slow growth is more consistent with a possible nutrient issue. For ambiguous disease symptoms, UC Master Gardeners of Sacramento County and UC IPM both note that laboratory testing may be needed for a reliable diagnosis.
Correct clear watering or heat problems first, and turn to fertilizer only when deficiency signs are specific and strong. Avoid routine pesticide or fungicide sprays without a confirmed target, following extension diagnostic guidance that supports identification before treatment.
Match the first fix to the symptom pattern
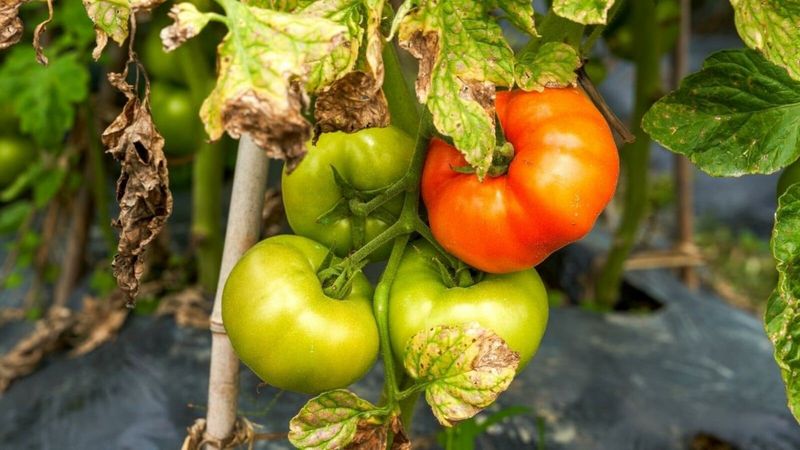
Late-summer heat is real, and it genuinely stresses California tomato plants in ways that affect growth, flowering, and fruit production. But yellow leaves are a symptom with multiple possible causes, and the heat outside does not tell you which one is at work in your garden.
Reaching for fertilizer, cranking up the water, removing healthy foliage, or spraying something before you know what you are dealing with can delay the right fix and sometimes make conditions worse.
The inspection sequence in this article, starting with leaf location, then root-zone moisture, then leaf undersides, then symptom distribution across the plant, gives you the information needed to make a proportionate response. Supporting a heat-stressed plant with consistent moisture, mulch, and filtered afternoon shade is a reasonable starting point when no other cause is apparent.
Treating a confirmed pest, nutrient deficiency, root problem, or disease requires matching the fix to what you actually found, not to what the thermometer says. UC Cooperative Extension and University of Arizona Extension both reinforce that symptom-based diagnosis is more reliable than seasonal assumptions.
Yellow leaves are the plant’s signal that something needs attention, and the gardener’s job is to figure out what that something actually is.