
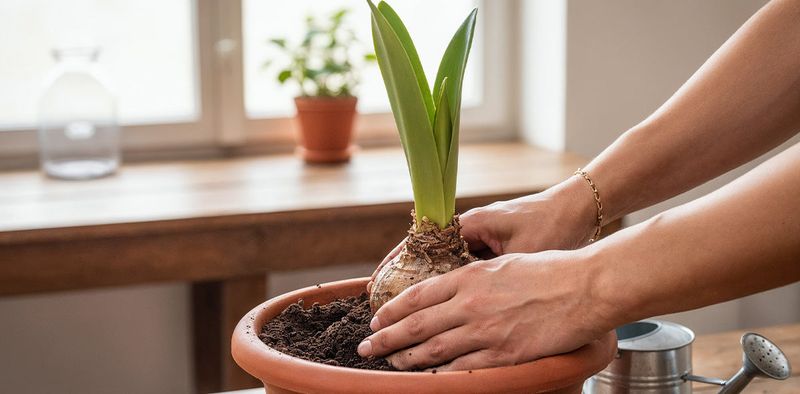
That big amaryllis bulb gave you a stunning show, and now it just sits there with floppy green leaves. Many people toss it in the trash, thinking it was a one-time flower.
The truth is that an amaryllis can bloom again for years if you give it the right care at the right time. Follow these 12 steps and you have a good shot at seeing a brand new flower stalk rise next season.
1. Cut Off the Spent Flowers
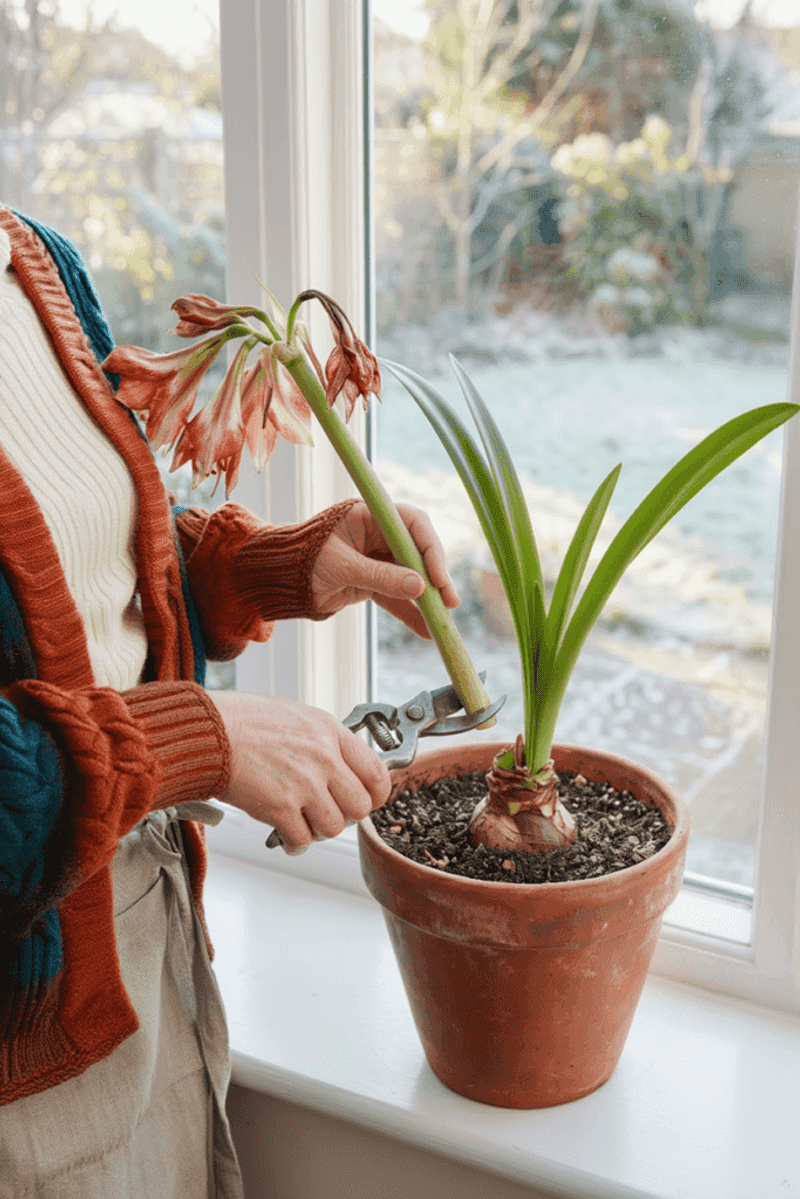
Wilted petals might look harmless, but they quietly drain energy your bulb needs for next year. Once each bloom fades and shrivels, snip it off right where it meets the stalk.
Leaving it in place lets the plant start forming seed pods, and seed making is hungry work.
Use clean scissors or pruning snips so you do not spread any disease. Wipe the blades with rubbing alcohol before you start.
A clean cut heals quickly and keeps rot from creeping in.
Here is a fun bit of history worth knowing. The amaryllis most of us grow is actually a Hippeastrum, native to South America, while the true Amaryllis belladonna comes from South Africa.
Plant sellers mixed up the names long ago, and the nickname stuck for good.
Do not rush to remove the whole flower stalk yet. Only take off the faded blooms at this stage.
The green stalk still makes food through photosynthesis, so it is helping the bulb even without flowers. Think of it as a small solar panel that keeps working after the party ends.
This first step takes just a minute or two. It sets the stage for everything that follows and gives your bulb a head start on rebuilding.
2. Remove the Stalk Once It Yellows
Patience pays off with the stalk. After the flowers are gone, keep watching it day by day.
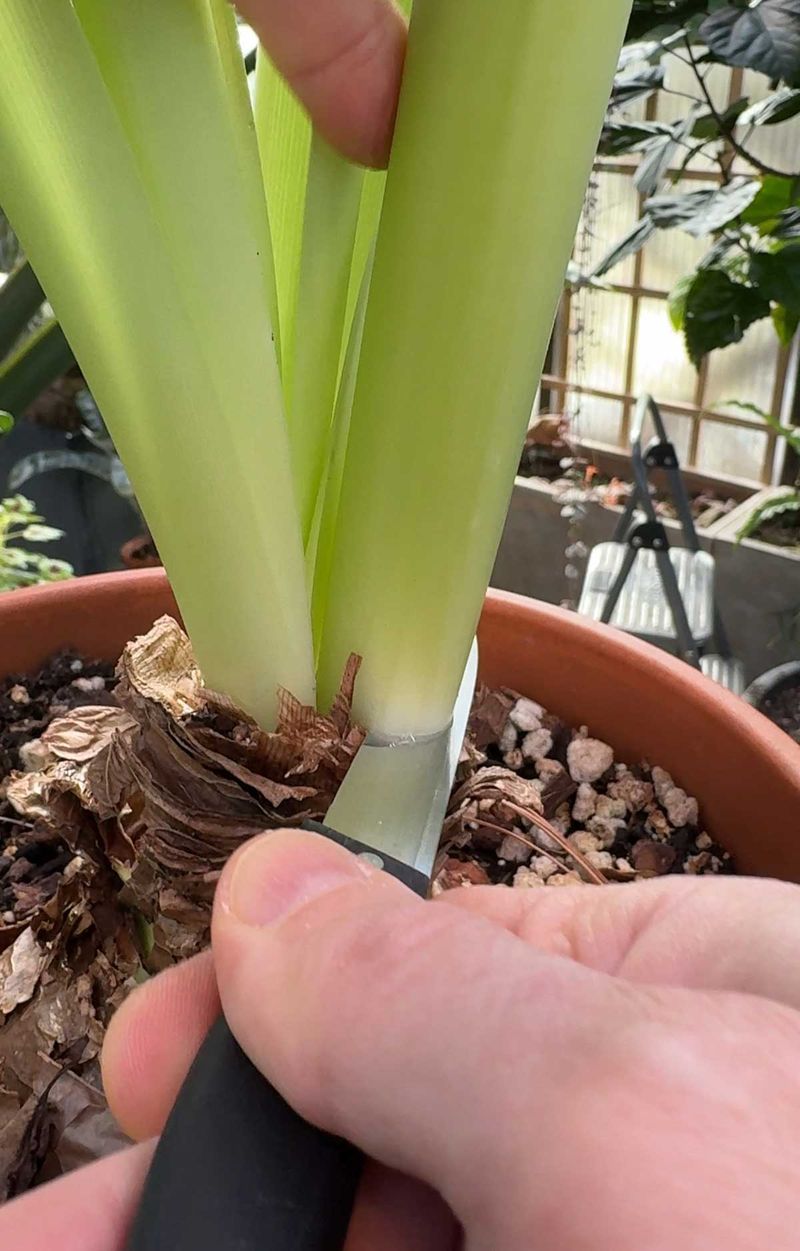
When it starts turning yellow and slumping over, it has finished its job and you can remove it.
Cut it about one to two inches above the top of the bulb. Avoid slicing into the bulb itself, since any wound can open the door to fungus.
A clean, angled cut tends to dry faster than a flat one.
You may notice sticky sap oozing from the cut. That is normal, and it usually dries within a day.
Keep the area dry and avoid splashing water onto the stub while it seals over.
Some gardeners pull the stalk out with a gentle twist once it is fully dry and brown. That method can work, but only if it slides out easily.
If it resists, leave it and try again in a week.
Whatever you do, keep every leaf in place. The leaves are now the main engine powering your bulb back to full strength.
Removing them early is one of the most common reasons an amaryllis refuses to rebloom, so protect that foliage carefully through spring and summer.
3. Give the Leaves Bright Light
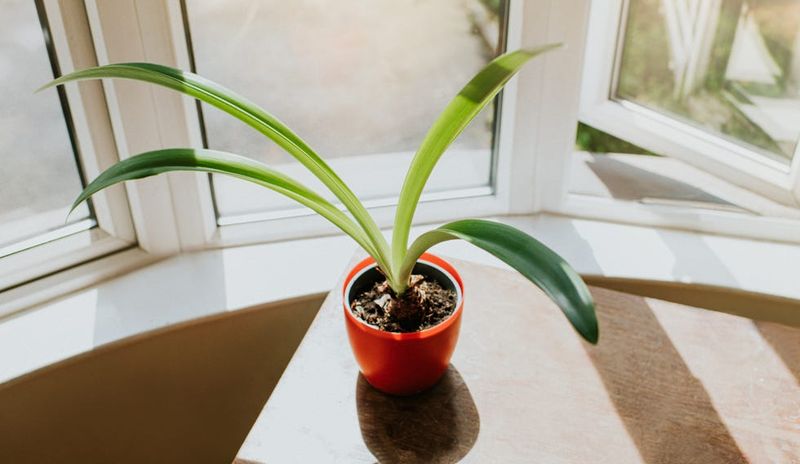
Sunshine is basically the fuel that builds next year’s flower. After blooming, your amaryllis switches into growth mode, and those long strap leaves need as much light as you can give them indoors.
A south or west window works best in most American homes. Aim for at least six hours of bright light daily.
If your leaves stretch, lean hard toward the glass, or look pale, the plant is likely asking for more sun.
Turn the pot a quarter turn every few days. That small habit keeps leaves growing evenly instead of all bending in one direction.
It also helps every leaf soak up its share of light.
No bright window? A simple LED grow light placed about a foot above the leaves can fill the gap.
Run it around 12 to 14 hours a day on a timer so you do not have to remember.
Healthy, deep green leaves are your best sign of progress. Each one is packing sugars down into the bulb, swelling it for the future.
A plump, firm bulb in fall usually means a stronger chance of a tall, flower-loaded stalk later. Light is where that whole process begins.
4. Water Only When the Top Inch Dries
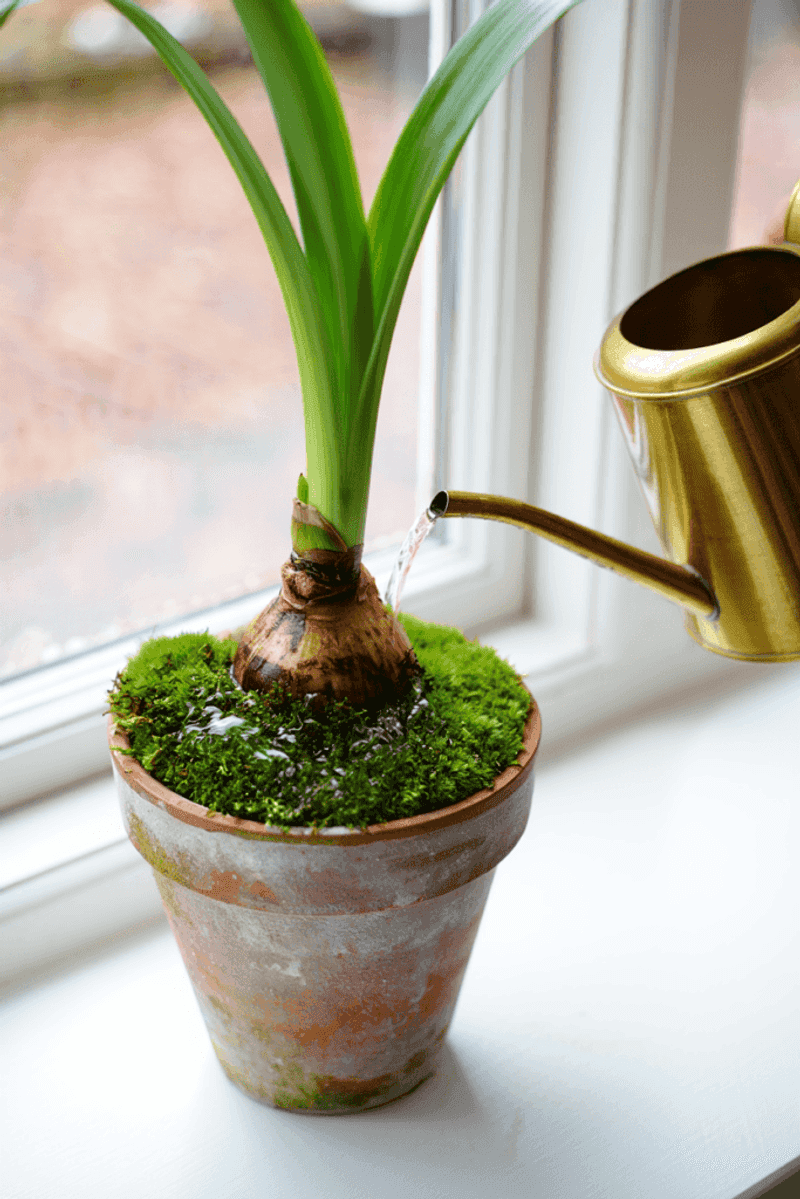
Soggy soil has quietly killed more amaryllis bulbs than any pest. These bulbs store water inside their thick layers, so they would rather be a little dry than sitting in a puddle.
Push your finger into the soil near the edge of the pot. If the top inch feels dry, water thoroughly until it runs out the drainage holes.
If it still feels damp, wait another day or two and check again.
Always empty the saucer after watering. Standing water at the bottom of the pot can lead to root rot, which often shows up as a soft, mushy bulb or yellowing leaves that collapse.
Catching it early may save the plant.
Try to water the soil rather than pouring directly over the top of the bulb. Moisture trapped in the neck of the bulb can invite rot and fungal problems.
A narrow-spout watering can makes aiming much easier.
During warm months, especially outdoors, you might water once or twice a week. Indoors in cooler rooms, it could be every week or so.
Let the soil, not the calendar, guide you, and your bulb will usually stay firm and healthy.
5. Feed Every Two to Four Weeks
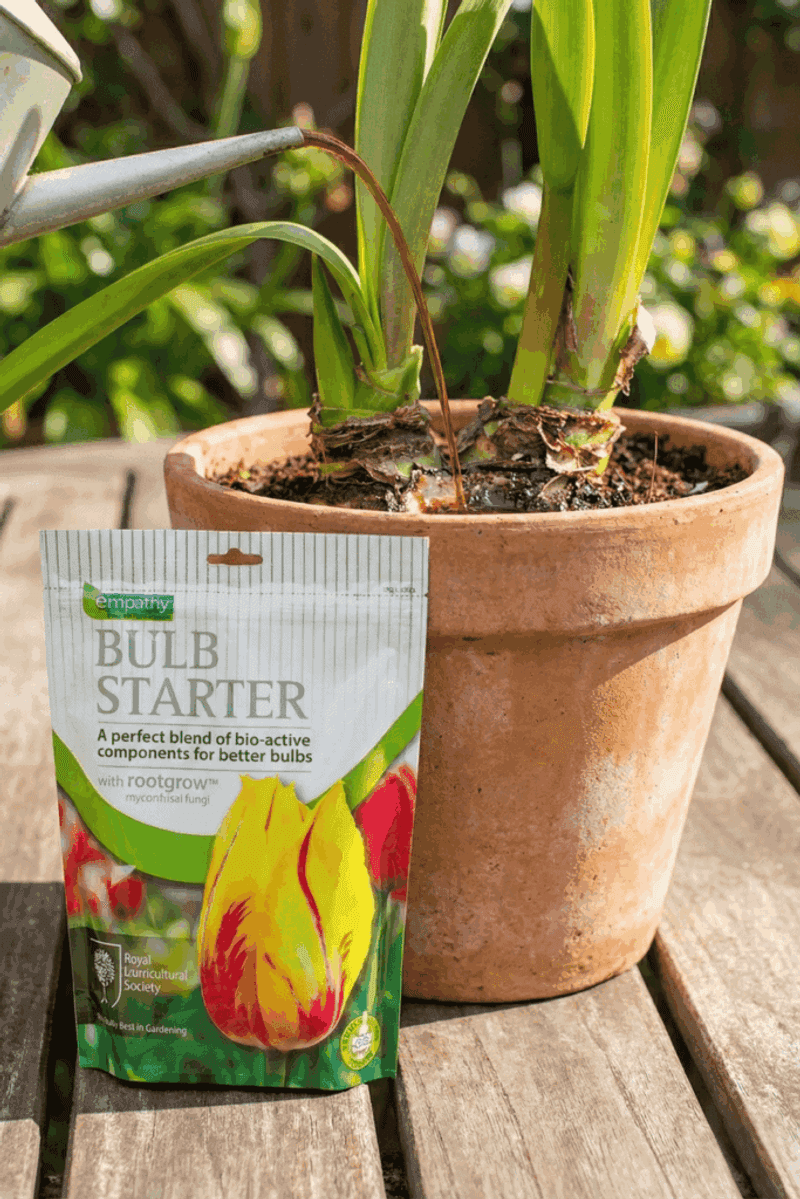
Think of fertilizer as groceries for a bulb that just ran a marathon. Blooming used up a big chunk of stored food, and your plant needs to restock before it can put on another show.
Once flowers fade and new leaves are growing, start feeding with a balanced liquid houseplant fertilizer. Mix it at half strength and apply every two to four weeks.
Many growers like a formula with a little extra phosphorus, the middle number on the label, which can support future blooms.
Always water the soil lightly first, then add fertilizer. Feeding a bone-dry pot can burn tender roots.
A moist root zone soaks up nutrients more evenly.
More is not better here. Overfeeding can cause salt buildup, which looks like a white crust on the soil or pot rim.
If you spot that, flush the pot with plain water a few times to rinse it out.
Keep feeding through spring and summer while the leaves stay green and active. Stop in late summer when you begin the rest period.
Steady meals during the growing months often mean a bigger bulb and, with luck, more than one flower stalk.
6. Move It Outdoors After Frost Passes
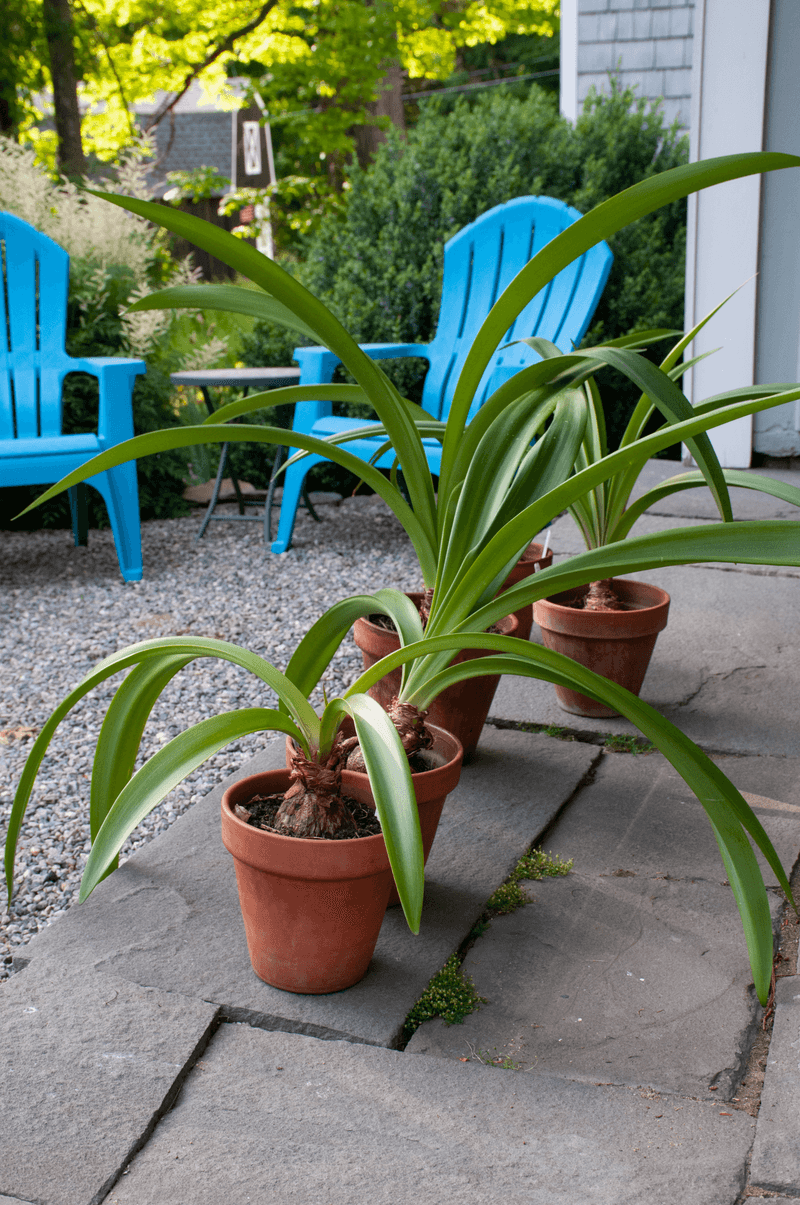
Many amaryllis owners swear by a summer vacation for their bulbs. Outdoor light is far stronger than any window, and plants often bulk up fast once they are outside.
Wait until nighttime temperatures stay above 50 degrees. In much of the temperate US, that lands somewhere between late April and early June, depending on your region.
Check your local last frost date to be safe.
Do not jump straight into full sun. Start the pot in shade for a few days, then give it morning sun, then gradually more.
Skipping this hardening off step can scorch leaves, leaving pale or brown patches.
Once settled, most bulbs enjoy morning sun with some afternoon shade, especially in hot southern summers. You can keep it in its pot or plant it straight into a garden bed.
Pots make it easier to bring inside later.
Keep an eye out for slugs, snails, and the occasional curious squirrel digging around. Mealybugs and thrips can also show up.
A quick weekly look under the leaves can help you catch problems before they spread. Your bulb will likely reward you with a summer of strong growth.
7. Check the Bulb for Problems
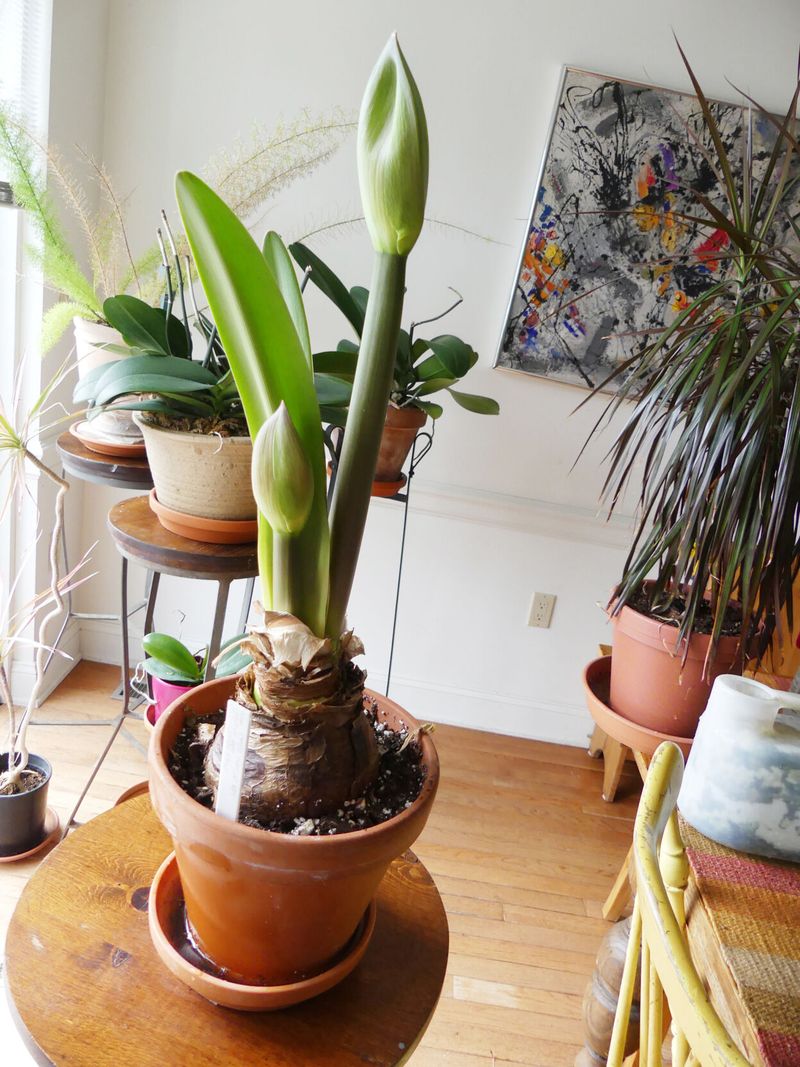
A quick squeeze tells you a surprising amount. Gently press the sides of your bulb every few weeks.
A healthy one feels firm, a lot like a fresh onion.
Softness or a sour smell is a warning sign. It often points to rot from too much water.
Cut back on watering right away, and if only a small spot is soft, the bulb may still recover.
Look for red streaks or blotches on the bulb or leaves. That is often red blotch, a fungal disease common in amaryllis.
Remove badly marked leaves, improve airflow, and keep water off the bulb to help slow it down.
Tiny insects deserve a look too. Bulb mites, mealybugs, and narcissus bulb fly larvae can attack these plants.
Wiping pests off with a cotton swab dipped in rubbing alcohol can reduce small infestations.
Also check that the top third of the bulb sits above the soil. Buried necks stay damp and are more likely to rot.
A bulb that stays firm and clean through summer is in good shape for the steps ahead, so this little checkup is time well spent.
8. Start the Rest Period in Late Summer
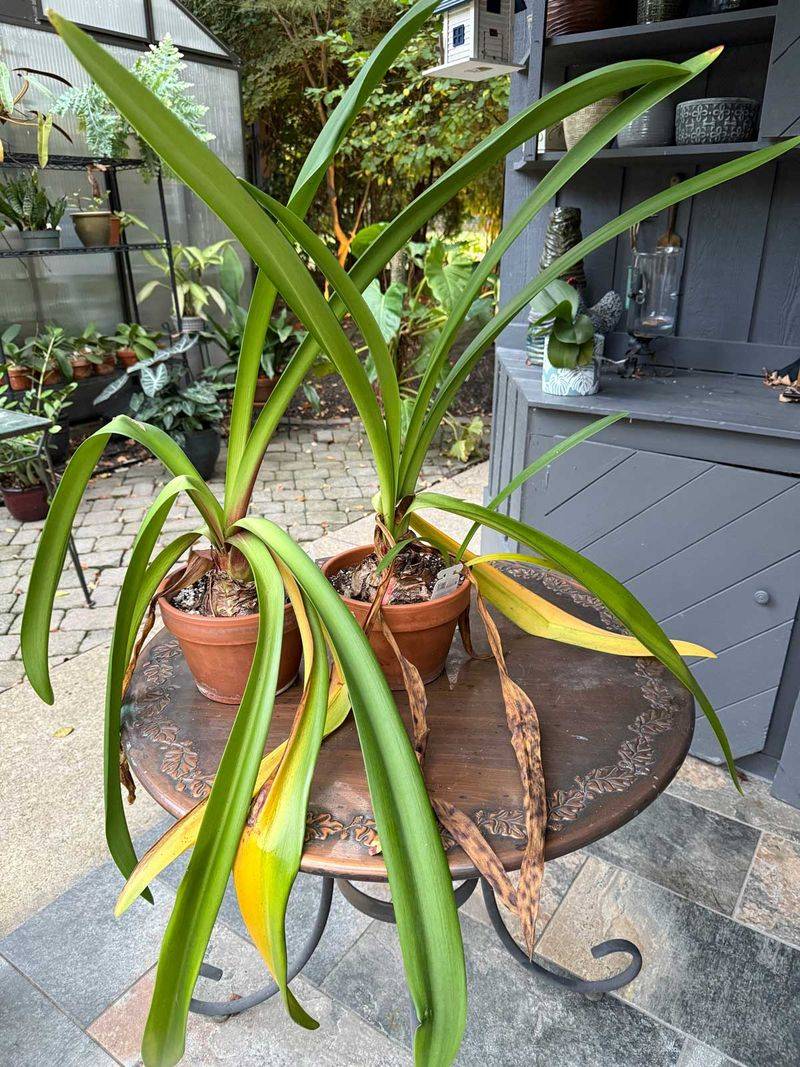
Here is the step most people skip, and it is often the missing piece. Amaryllis bulbs usually need a rest before they will form a new flower stalk.
Around late August or early September, stop feeding and slowly cut back on water. Bring the pot indoors if it spent summer outside.
The goal is to signal that the growing season is ending.
Over the next few weeks, the leaves will start turning yellow and flopping over. It can look alarming, but nothing is wrong.
The bulb is pulling the last nutrients out of the foliage and storing them inside.
Once the leaves are fully yellow or brown, cut them off about an inch or two above the bulb. Some bulbs keep a few green leaves stubbornly, and that is fine.
You can leave those in place while the rest dries.
Timing matters if you want holiday flowers. Most bulbs bloom about six to ten weeks after waking up, so count backward from when you want color.
Starting rest in early September often lines up nicely with blooms around December or January. Planning ahead turns a hopeful guess into a real schedule.
9. Store It Cool and Dark
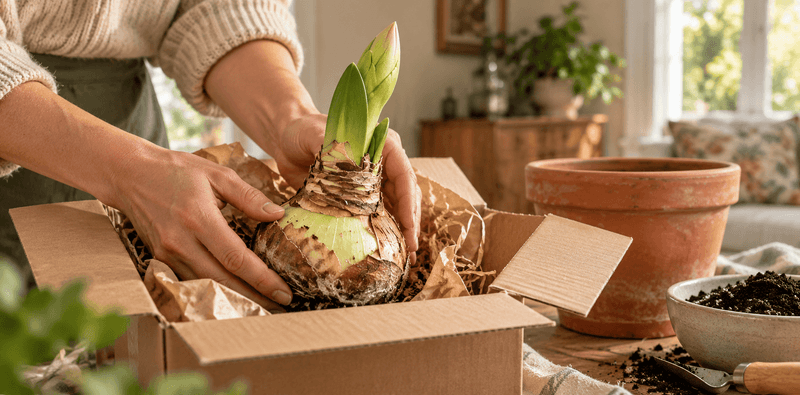
Picture a bear tucked into its winter cave, and you have the right idea. Your bulb now wants a cool, dark, quiet spot to rest for about eight to twelve weeks.
Aim for temperatures between 50 and 55 degrees. A basement, unheated closet, or cool garage often works well.
Just make sure it never drops to freezing, because frost can kill the bulb outright.
You can store it right in its pot or lift it out of the soil. If you remove it, brush off loose dirt, let it air dry, and tuck it into a paper bag.
Skip plastic bags since trapped moisture can cause mold.
Keep fruit away from your stored bulbs. Apples and some other fruits give off ethylene gas, which may damage the flower bud forming inside.
It is an odd detail, but bulb growers take it seriously.
Do not water during this time. Peek every couple of weeks to make sure the bulb stays firm.
Sometimes a bud tip pokes up early, and if that happens, you can end the rest and move straight on to waking it up.
10. Repot With Fresh Soil if Needed
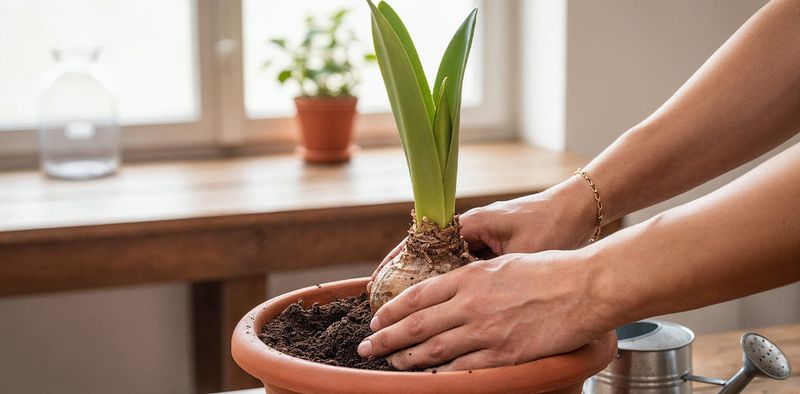
Roots love a snug home, which surprises a lot of new growers. Amaryllis tend to bloom better when slightly crowded, so you usually do not need a much bigger pot.
Repot every two or three years, or when the bulb nearly touches the pot sides. Pick a container about one to two inches wider than the bulb.
Heavy clay or ceramic pots help keep tall stalks from tipping over.
Use a fast-draining potting mix. Regular houseplant mix with a handful of perlite usually works well.
Avoid heavy garden soil, which holds too much water and can suffocate roots.
Before planting, trim away any dead, brown, or mushy roots. Healthy roots look white or pale tan and feel firm.
Leave as many good roots as you can.
Set the bulb so the top third sits above the soil line. Firm the mix around it gently but do not pack it hard.
Water once lightly to settle everything.
Fresh soil gives the bulb new nutrients and better drainage. It is a small refresh that can make a real difference when the new stalk starts climbing upward.
11. Wake It Up With Warmth and Water
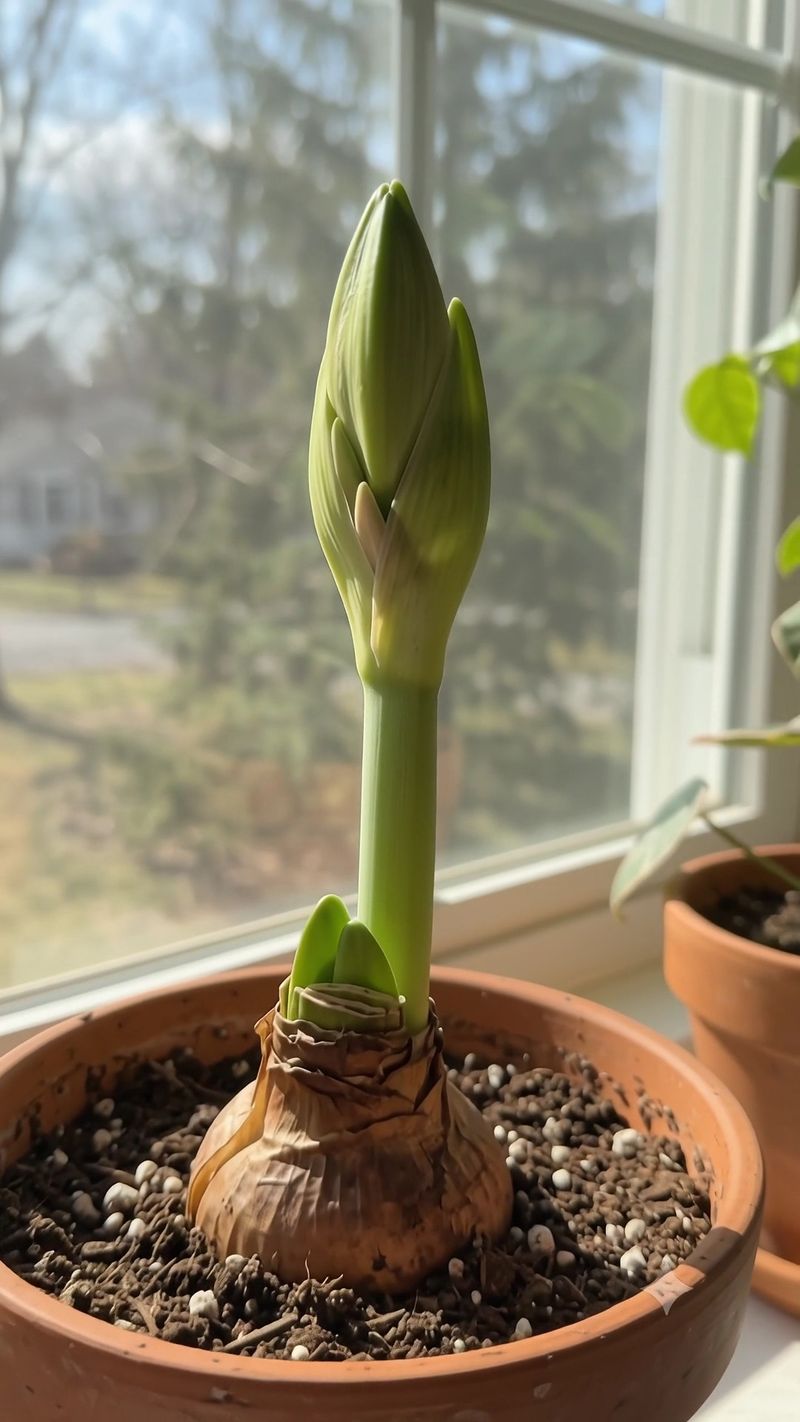
Waking day feels a little like Christmas morning for plant lovers. After the rest period ends, bring your bulb into a warm, bright room around 70 to 75 degrees.
Give it one good drink of water, then hold back. Water sparingly until you see growth appear.
Too much water before roots wake up can lead to rot, which would be a sad ending after all your effort.
Bottom heat often speeds things along. Setting the pot on top of a refrigerator or a seedling heat mat can encourage roots to stir.
Many growers notice new growth within two to eight weeks.
Watch closely for what pokes out first. A flat, rounded tip usually means a flower bud is coming.
Thin, flat leaves first may mean the bulb needs more time to build energy, though some bulbs send both together.
Once you spot green, resume regular watering when the top inch dries. Keep it in bright light so the stalk grows sturdy instead of stretching thin.
From here, things move quickly, and you may see the stalk grow an inch or more in a single day.
12. Support and Rotate the New Stalk
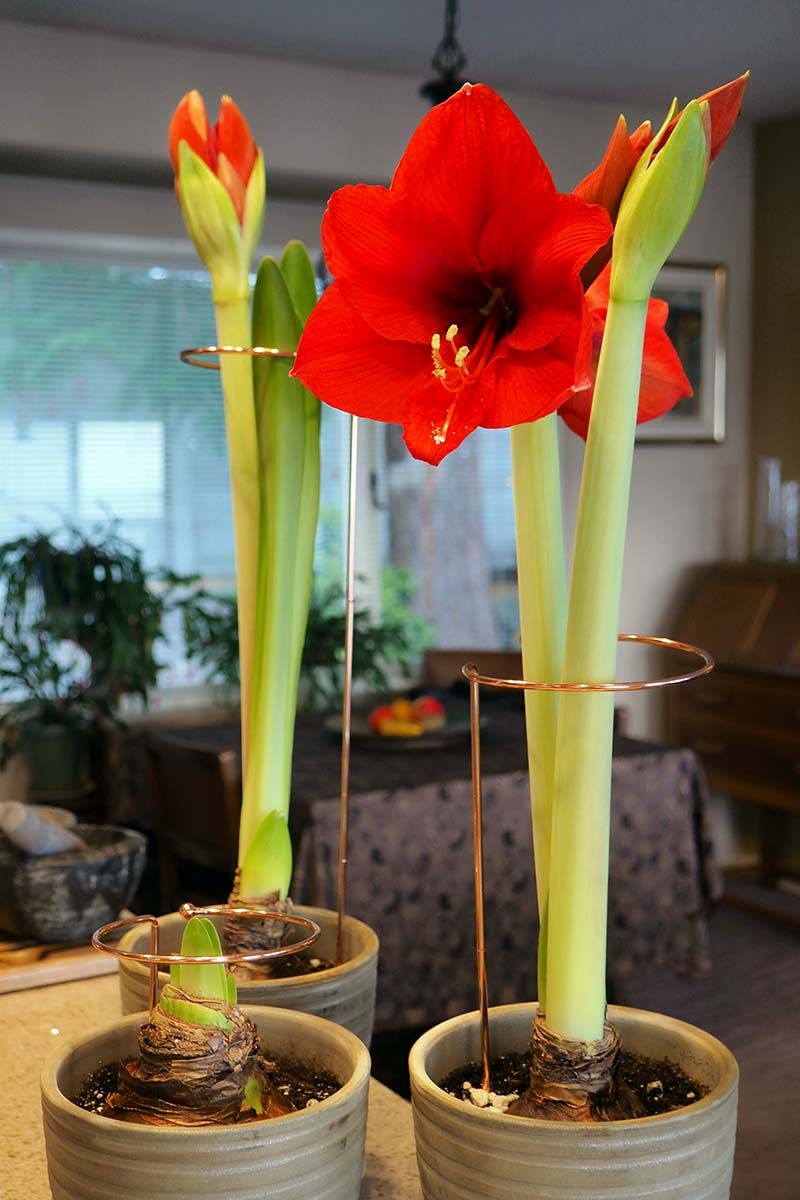
A tall stalk topped with four giant blooms is gorgeous, and it is also top-heavy. Planning for support now saves you from finding it snapped on the floor.
Slip a thin bamboo stake into the soil near the edge of the pot. Keep it away from the bulb so you do not stab it.
Tie the stalk loosely with soft garden tape or twine as it grows taller.
Rotate the pot every day or two. Stalks lean hard toward light, and turning them keeps growth straight.
It sounds minor, but it can mean the difference between an upright display and a sideways one.
Once buds open, move the plant out of direct sun into bright, indirect light. Cooler room temperatures, around 65 degrees, often help flowers last longer.
Some blooms may stay fresh for two weeks or more.
Do not feel discouraged if the first rebloom is a bit shorter or has fewer flowers than the store-bought one. Bulbs often build strength over several years.
Keep repeating these twelve steps, and each season gives you another chance at that big, bold display that made you fall in love with amaryllis.