
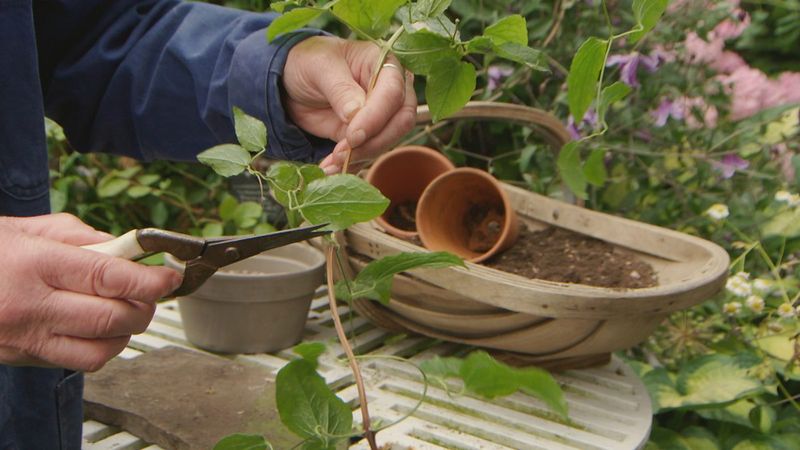
Your clematis vine is putting on a show this season, and a neighbor already asked where you bought it. Here is the good news: that one plant can be the source of several potential new vines, all sharing the same flower color and growth habit as the original.
The method is not a guaranteed shortcut, but with a bit of patience and the right technique, you can work toward a whole row of matching plants without spending a dollar. Read on to learn how to take firming current-season cuttings, root them properly for Southern heat, and grow the survivors into a coordinated planting.
One vine can supply several propagation attempts
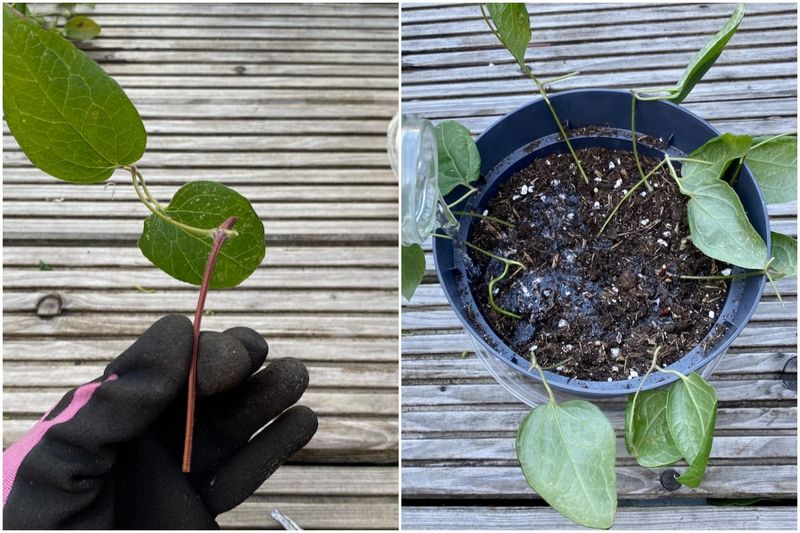
Your established clematis is already doing the hard work. One healthy vine can supply several suitable stem sections during a single growing season, which means you have multiple chances to root new plants rather than just one shot at success.
The catch is that each individual cutting typically produces one potential rooted plant, not a cluster, so the path to a row runs through quantity: take several cuttings, expect that some will fail, and grow the survivors on together.
Cuttings that root successfully are genetic clones of the parent, meaning they should carry the same flower color, leaf shape, and other cultivar traits into the next generation. The NC State Extension propagation handbook confirms that asexual propagation methods like stem cuttings produce clones that retain the parent plant’s characteristics.
That is a meaningful advantage over growing from seed, where offspring vary unpredictably.
Keep your expectations calibrated from the start. University of Minnesota research on clematis stem cutting propagation found that rooting success differs meaningfully among cultivars, stem maturity stages, rooting media, and handling conditions.
Some types root readily; others are comparatively difficult. RHS guidance on clematis frames this as a workable home method rather than a guaranteed one.
Go in treating it as a worthwhile experiment, and you will be well positioned to appreciate whichever plants successfully take root.
Choose stems that are firming, not floppy
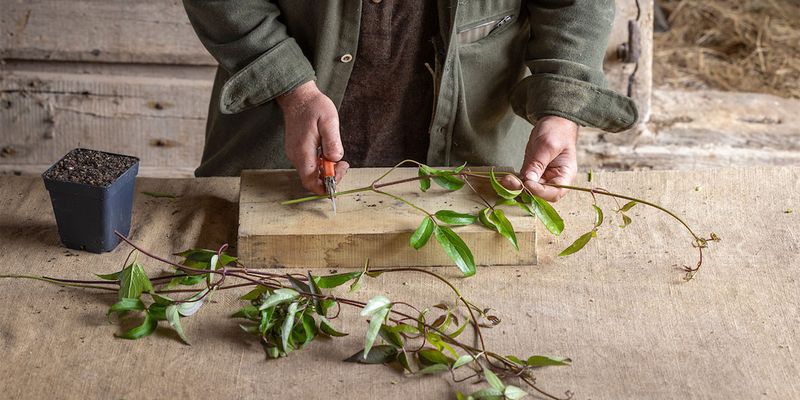
Picking the right stem is where most home propagation attempts either succeed or stall before they begin. Skip the extremely soft, floppy tips at the very end of a shoot.
You want current-season growth whose base has begun to firm up while the upper portion still has a little flex to it. That in-between stage is sometimes called semi-mature or semi-ripe, and it is a better target than purely “softwood,” which can mean different things depending on who wrote the guide you are reading.
Nebraska Extension’s propagation guide recommends healthy semi-mature current-year wood for clematis, while RHS specifically describes semi-ripe cuttings taken from summer into early autumn. For Southern gardeners in Florida or Texas, UGA Extension’s plant propagation bulletin emphasizes using the plant’s growth stage as the guide rather than a fixed calendar window, since active growth may start earlier and extend longer in warm climates.
Also look for shoots that are disease-free, vigorous, and not carrying open flowers or developing buds. Flowering material is directing its energy toward reproduction rather than rooting, so nonflowering shoots give you a better starting point.
Pruning group matters here too. NC State’s clematis plant profile and Clemson HGIC’s clematis factsheet both explain that Group 1 plants flower on old wood, Group 2 on old and new wood, and Group 3 on current-season growth.
Removing material from a Group 1 or Group 2 vine at the wrong time can cost you next season’s bloom, so take cuttings thoughtfully and leave plenty of healthy growth on the parent.
Prepare each node as its own chance to root
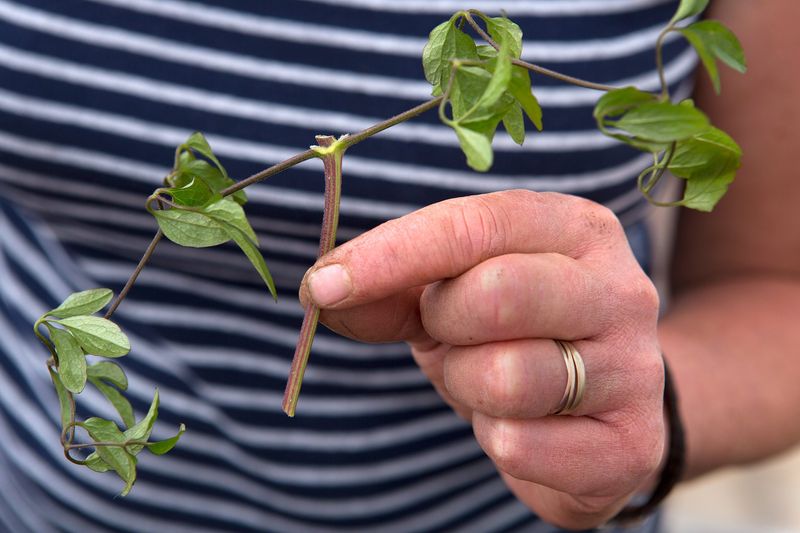
Every cut you make should be deliberate. Use clean, sharp pruners or a blade, and make each cut just below a node, which is the slight swelling or joint where a leaf or leaf pair attaches to the stem.
That node tissue is where root initiation happens, and a cutting without a viable node has very little chance of producing roots at all.
Keep each cutting short: one or two nodes is plenty, and a single leaf-bud section can also work. Remove the leaves from the lower node so buried foliage does not rot in the medium, but keep at least one leaf or leaf pair above the surface so the cutting can still photosynthesize.
NC State Extension’s propagation handbook and UF/IFAS propagation guidance both describe this node-centered preparation as standard practice for stem cuttings. If the remaining leaves are very large, trim them by half to reduce moisture loss without removing them entirely.
Remove any flowers or buds from the cutting. A stem trying to open a flower is competing with itself for resources that should go toward rooting.
Also, skip any material that is old, damaged, wilted, diseased, or lacks visible leaf buds. Nebraska Extension’s propagation guidance reinforces that suitable tissue quality is not optional.
Work quickly so prepared cuttings do not dry out, and if you are working with more than one cultivar, label each batch right away so there is no confusion later when the plants are growing on and looking similar.
Build a cool, airy rooting station
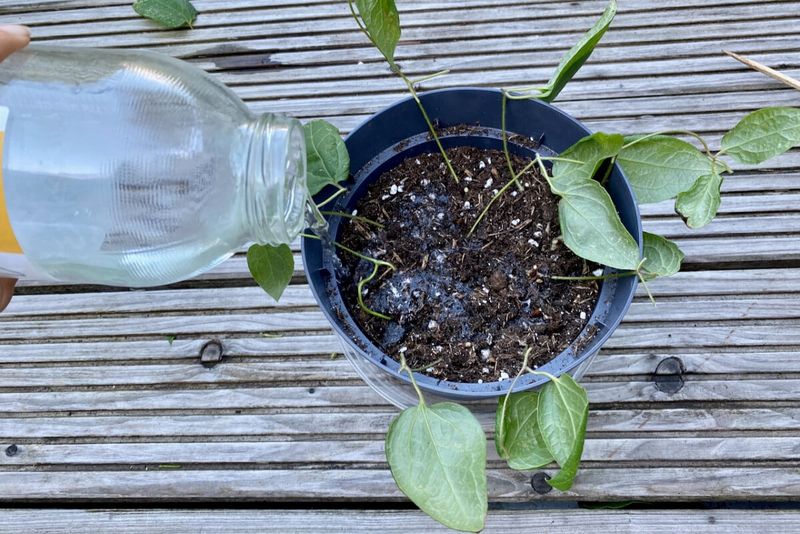
Rooting clematis cuttings at home is really about managing two things at once: keeping the cutting hydrated enough to survive while giving it enough air circulation to avoid rot. Start with a clean container that has drainage holes, and fill it with a sterile or clean, well-drained medium.
Perlite, coarse sand, or a purpose-made propagation mix are all reasonable choices. Regular garden soil is not, because it compacts, holds too much moisture unevenly, and can introduce pathogens right when the cutting is most vulnerable.
Insert the basal node into the medium so the lowest leaf node is just below the surface, and make sure the remaining leaves sit above the medium and are not buried or pressed against the container walls. Place the container in bright indirect light.
UF/IFAS propagation guidance and UGA Extension’s propagation bulletin both stress protecting unrooted cuttings from hot midday sun, since the stems lose water rapidly before any roots form to replace it.
A clear plastic bag or a humidity dome placed loosely over the container helps slow moisture loss from the leaves without sealing the cutting in stagnant air. That distinction matters in Florida and Texas, where a sealed bag sitting in direct afternoon sun can heat up fast enough to cook the cuttings inside.
Prop the bag open slightly or lift the dome daily to let fresh air in. Virginia Tech’s propagation resource notes that ventilation and drainage are both important for preventing fungal problems during propagation.
Keep the medium consistently moist but never waterlogged, and do not let water pool on the foliage for extended periods.
Use hormone and medium as optional aids
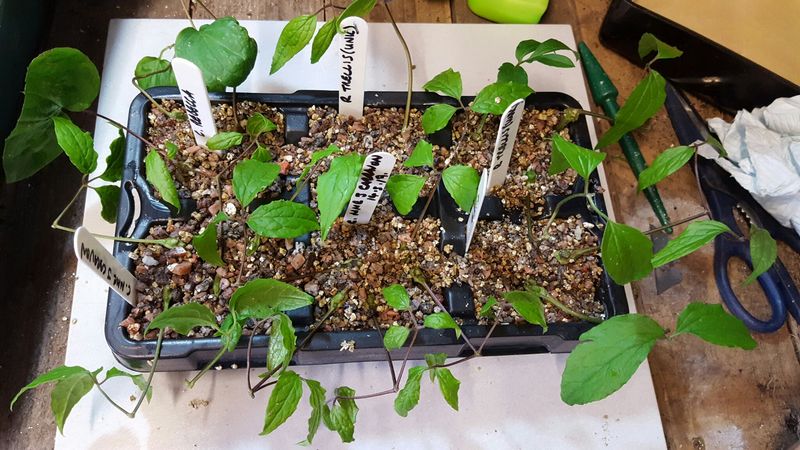
Rooting hormone and medium choice are tools, not magic fixes. Both can nudge results in a better direction, but neither one overrides the quality of the cutting itself or the cultivar’s natural rooting tendency.
On medium selection, perlite and sand have performed well in clematis propagation research. University of Minnesota research on clematis propagation factors found perlite and sand generally preferable to heavier mixes, and a separate study published in Scientia Horticulturae reported faster or higher rooting in pure perlite than in a peat-perlite mixture.
The practical takeaway is that good aeration and drainage matter more than a specific brand or formula.
Rooting hormone is worth considering but should not be treated as a guarantee. The University of Minnesota research found that IBA (indole-3-butyric acid) improved survival for the notoriously difficult-to-root cultivar ‘Jackmanii’ but provided no measurable benefit for the easier-rooting ‘Gypsy Queen.’ NC State’s asexual propagation reference notes that excessive hormone concentration can injure the cutting base rather than help it.
Follow the product label, use the recommended amount, and tap off any excess powder before inserting the cutting. If your cultivar roots easily on its own, hormone may add nothing.
If it is a stubborn type, it may help at the right dose.
Give roots time before expecting flowers
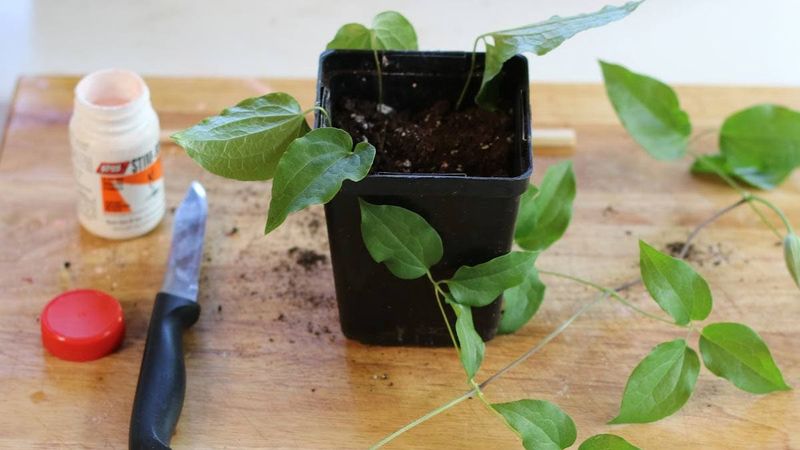
Rooting is the first checkpoint, not the finish line. Once a cutting develops roots, it still needs time to grow into a plant sturdy enough to handle garden conditions, and considerably more time before it produces its first real flush of flowers.
RHS guidance on clematis says that cuttings under warm, humid conditions generally root in about six to eight weeks. That estimate is a reasonable home benchmark, but it is not a hard deadline.
Specialized propagation studies have reported root initiation in roughly 15 to 24 days under mist systems, bottom heat, and tightly controlled greenhouse conditions, as documented in published clematis propagation research and USDA plant materials propagation data. A backyard setup without bottom heat or mist will likely run closer to the longer end of that range, and some cuttings may take longer still.
Check for rooting by gently tugging the cutting after several weeks. Resistance means roots are anchoring in.
Once you see a meaningful root system, move each rooted cutting into its own small pot with a well-drained potting mix. Harden the plants gradually by increasing their exposure to outdoor air and direct light over the course of one to two weeks before leaving them fully exposed.
RHS notes that rooted cuttings are typically potted individually the following spring and may not flower until roughly the second year after propagation. Plan your row timeline around that reality rather than expecting blooms by summer’s end.
Grow the survivors before planting the row
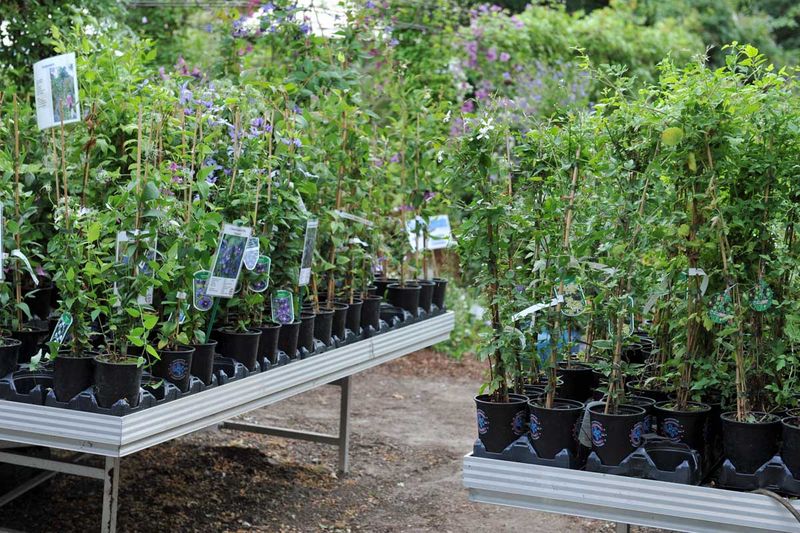
Getting rooted cuttings into the ground is a separate project from the propagation itself, and rushing it is one of the most common ways to lose plants you worked hard to root. Give each survivor time in its own pot to build a root system that can handle transplant stress before you commit it to a permanent spot.
When the plants are ready, choose a site that gives them what clematis generally wants: a root zone that stays cool and moist while the top growth gets good light. Clemson HGIC’s clematis factsheet and University of Illinois Extension’s clematis guide both note that mulching the root zone helps keep soil temperatures down, which is especially practical in the Southern heat of Florida and Texas.
Space plants according to the mature size of your cultivar so the eventual row looks intentional rather than crowded.
Plan for support from the start. Clematis vines need something to grab, whether that is a trellis, wire, fence, or other structure, and putting support in place at planting is much easier than retrofitting it later.
RHS clematis guidance and UGA Extension’s propagation bulletin both emphasize post-rooting establishment as a distinct phase that requires its own attention. Keep the parent vine healthy throughout this process by leaving enough foliage and stem on it to sustain normal growth, particularly if it is a Group 1 or Group 2 cultivar where cutting timing affects future bloom.
Identify and handle the plant responsibly
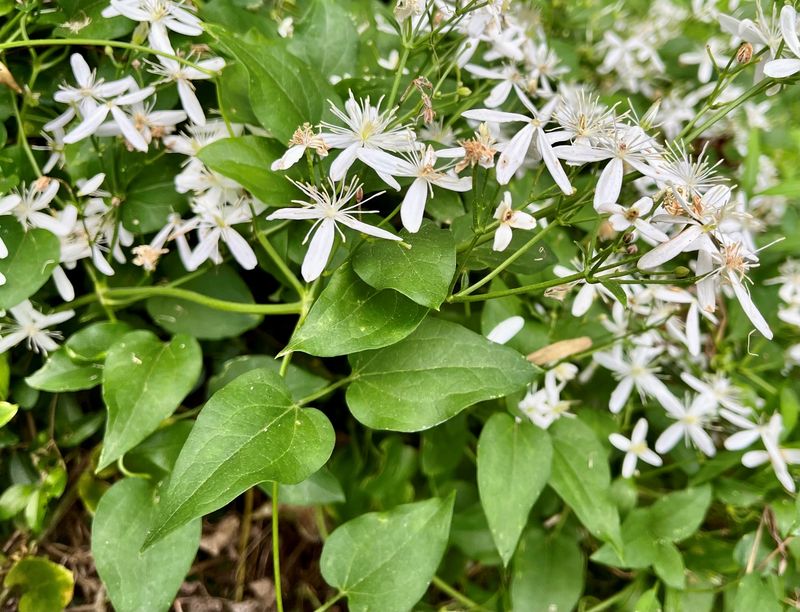
Before multiplying any clematis, take a moment to confirm what you actually have. Not every clematis is a good candidate for spreading across a yard or sharing with neighbors, and one species in particular raises a serious red flag for Florida gardeners.
Japanese or sweet autumn clematis, Clematis terniflora, is listed by the UF/IFAS plant directory as high invasion risk in Florida, and UF/IFAS Gardening Solutions does not recommend planting it there at all. The UF/IFAS invasive species assessment for Clematis terniflora details why it poses a landscape threat.
Native Clematis virginiana can look similar, so if you are not certain which species you have, get a reliable identification from a local extension office or master gardener program before propagating and spreading any material.
Handle cuttings carefully regardless of species. NC State’s clematis plant profile notes that clematis sap and plant material can irritate skin, and the ASPCA’s toxic plant list confirms that clematis is poisonous if eaten by pets.
Wear gloves while taking and preparing cuttings, and keep all plant material away from children and animals.
One more check before you share or sell rooted plants: named cultivars may carry plant patent protections or plant variety protections administered by USDA AMS, and USPTO plant patent guidelines restrict propagation of protected varieties for sale or distribution without authorization. The safest approach is to propagate unprotected cultivars for your own garden and check the plant tag or contact the breeder before giving rooted clones away.
A row of healthy, legal, correctly identified clematis is worth the extra few minutes of homework.