
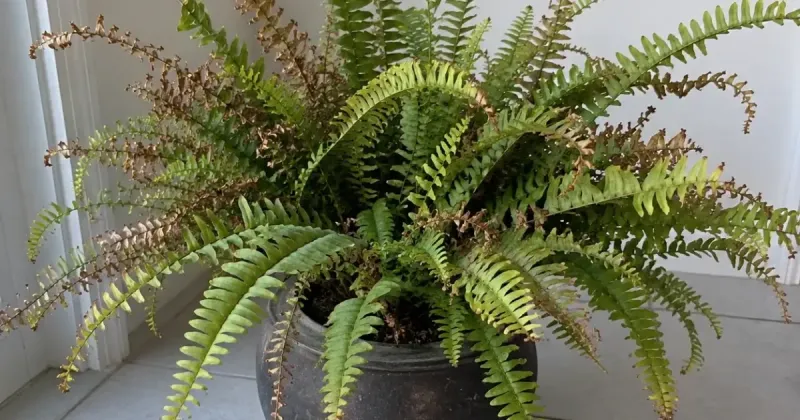
Waking up to find your Boston fern looking like it spent the night near a campfire is genuinely alarming, especially when it looked fine just yesterday. Those crispy, brown-tipped fronds are your plant’s way of signaling that something in its environment is off – but that signal alone does not point to one single problem.
Several different stresses can produce the same symptom, and knowing which one is affecting your fern makes all the difference between a quick fix and weeks of continued decline. Before you grab the scissors, take a few minutes to read through what your plant is actually trying to tell you.
The brown tip is a symptom, not a diagnosis
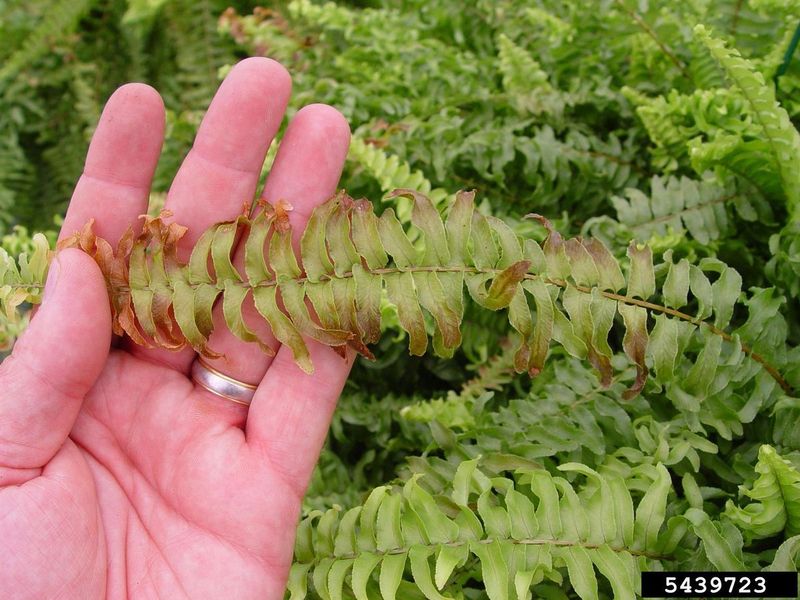
Sudden browning on a Boston fern can feel like it happened in a single night, and sometimes the visible damage does appear that fast. What the color alone cannot tell you, though, is which stress caused it.
University of Illinois Extension houseplant troubleshooting guidance lists improper watering, low humidity, cold drafts, excess fertilizer, sudden environmental changes, and excessive light as separate potential causes of brown or crispy fronds – all producing tips that look remarkably similar.
Browning concentrated at the tips and margins of fronds may suggest drying or salt stress, while widespread collapse or browning in the center of leaves raises different concerns. Even those pattern clues are useful starting points rather than firm diagnoses.
RHS guidance on houseplant leaf damage distinguishes brown tips and margins from browning patterns more consistent with overwatering, but emphasizes that pattern alone does not confirm a cause.
The underlying stress that triggered the browning may have been building for days before the fronds showed obvious color change. UF/IFAS Boston fern production guidance connects tip burn and frond decline to several distinct problems, including high soluble salts, chemical phytotoxicity, and drought.
Reviewing recent conditions – moisture, light, air temperature, fertilizer use, and any location changes – gives you a far better starting point than the brown color by itself.
Start with the pot: check moisture and roots first
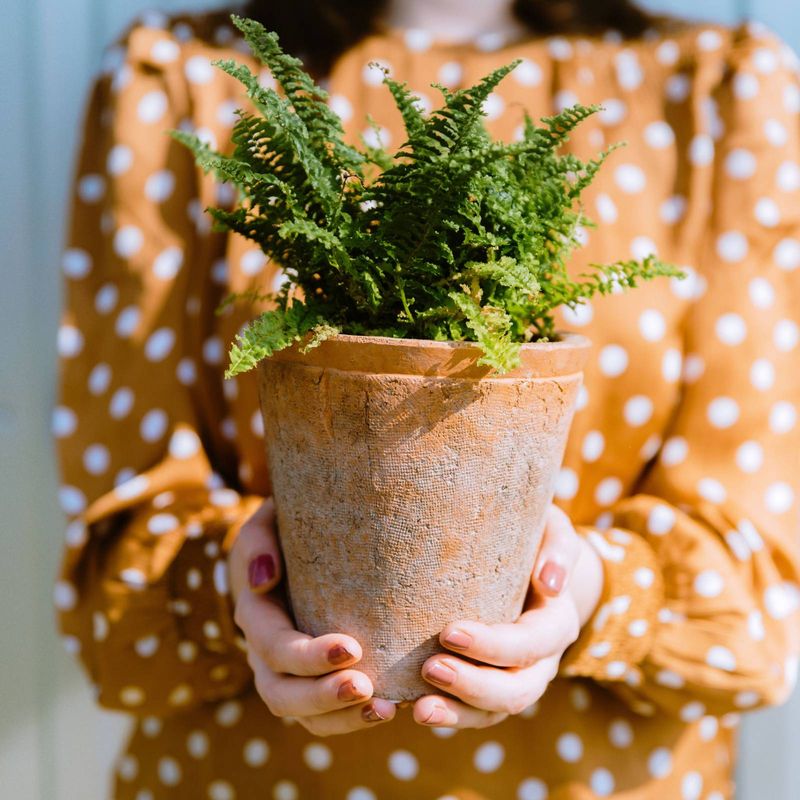
Before adjusting anything else, pick up the pot and feel the potting mix about an inch down. A bone-dry root ball and a waterlogged one can both produce browning fronds, which is why watering habits are the first place to look rather than the last.
Boston ferns perform best with consistently moist but not waterlogged media. University of Illinois Extension winter houseplant guidance notes that allowing the root ball to become very dry can cause tip burn and weakened, gray-looking foliage.
Keeping roots constantly saturated is equally harmful, as prolonged waterlogging can lead to root problems that show up in the fronds just as reliably as drought stress does.
The practical target is simple: water when the mix is just beginning to dry out, then let excess water drain completely through the drainage holes. University of Minnesota Extension spring houseplant care guidance reinforces that containers should never sit in standing water, since submerged roots cannot get the oxygen they need.
If your pot has a saucer, empty it within an hour of watering. Check drainage holes for compaction or blockage while you are at it, because even a well-watered fern will suffer if water cannot move through the medium freely.
UF/IFAS Boston fern guidance supports moist, well-drained conditions as the baseline for healthy frond production.
Dry indoor air can crisp the edges even when soil is moist
A fern sitting in properly moist soil can still develop crispy edges if the surrounding air is too dry. Heating and air-conditioning systems are common culprits, pulling moisture out of indoor air and leaving ferns in an environment they were never built to tolerate.
University of Illinois Extension fern care guidance suggests approximately 40 to 50 percent indoor humidity as a useful target for keeping ferns comfortable. That number is a reasonable benchmark, not a guarantee – a fern near a heat vent or in a particularly drafty room may still struggle even if a hallway hygrometer reads within range.
Placement matters as much as the reading.
University of Georgia Extension fern culture guidance identifies humidity as one of the most limiting factors in growing ferns successfully indoors. A small humidifier placed near the plant, grouping several plants together so they share transpired moisture, or a pebble tray filled with water kept just below the pot’s drainage holes can all raise local humidity without keeping roots or fronds constantly wet.
Misting is sometimes suggested, but it is not a universal fix. University of Minnesota Extension winter houseplant tips note that surrounding air moisture differs from wet foliage, and dense or ruffled fern fronds can be sensitive to prolonged surface moisture.
Raising ambient humidity through a humidifier or pebble tray is generally a more consistent approach than repeated misting.
Light, heat, and drafts can create sudden-looking damage
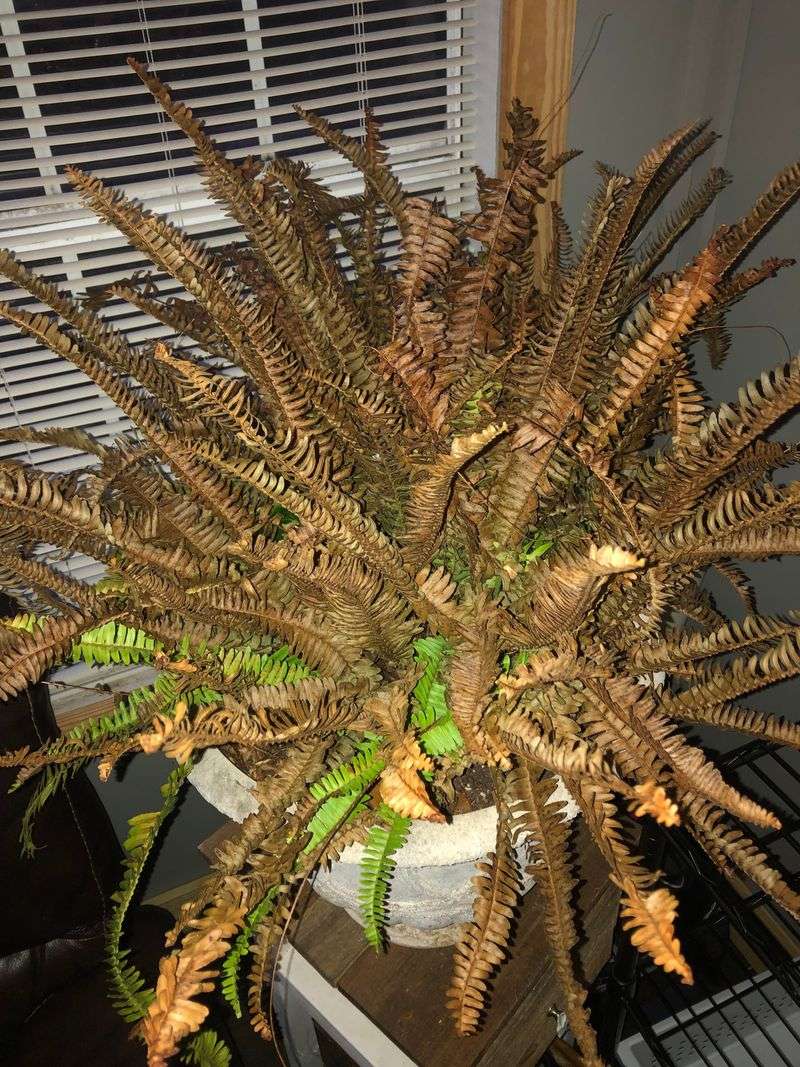
Think back over the past week and retrace where the fern has been sitting. A pot moved two feet closer to a window, a door left open to summer heat, a ceiling fan aimed directly at the plant, or a first trip outdoors for the season can each stress a Boston fern quickly enough that fronds show damage within a day or two.
Boston ferns generally prefer low to filtered light indoors and shade or partial shade when grown outside. University of Illinois Extension houseplant lighting guidance places ferns in the low-light-tolerant category, and UF/IFAS Boston fern production guidance recommends partial to deep shade for landscape plantings in Florida.
Pale or washed-out foliage can also signal excessive light, not just browning at the tips.
For Southern gardeners, the outdoor transition deserves special attention. Florida and Texas summers bring intense afternoon sun, hot dry wind, and rapid soil drying in containers – conditions that can scorch fronds within hours even when outdoor humidity is high.
University of Minnesota Extension guidance on moving houseplants outdoors recommends gradual acclimation rather than placing a fern directly into full sun or wind. Humid outdoor air does not protect a container fern from radiant heat or midday sun exposure.
Cold drafts from air conditioning, an open window on a cool night, or proximity to an exterior door can produce similar sudden-looking browning from the opposite direction. University of Illinois Extension troubleshooting guidance and University of Minnesota Extension spring care guidance both identify cold drafts and abrupt environmental changes as recognized causes of houseplant frond damage.
If the fern moved recently or its surroundings changed, that shift is worth investigating before anything else.
Fertilizer and water salts can burn tips and margins
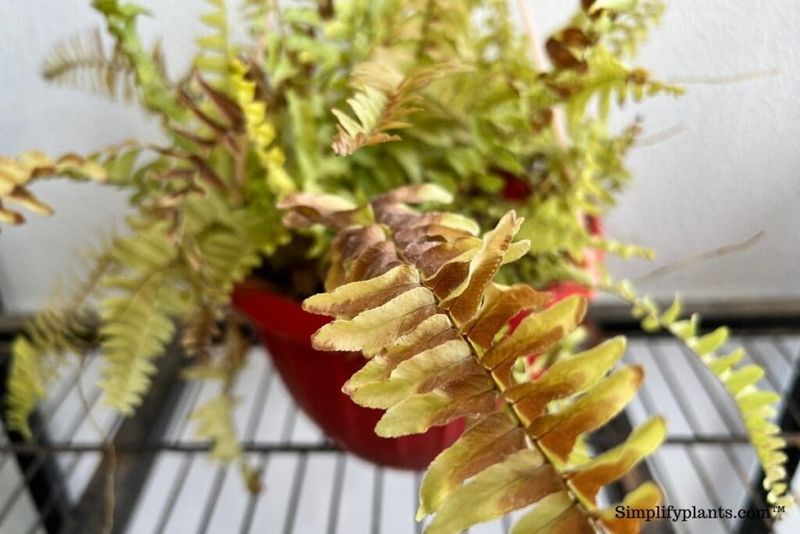
Consider whether the fern received fertilizer recently, particularly a heavy or concentrated application. Soluble salts from fertilizer can accumulate in the potting mix and draw moisture away from root cells, producing burned-looking tips and margins that closely resemble drought damage.
UF/IFAS Boston fern production guidance specifically links burned frond tips and runners to high soluble-salt levels and chemical phytotoxicity. The fix in a production setting involves reducing fertilizer input and, when needed, leaching the medium with good-quality water to flush accumulated salts.
At home, the first step is simply to stop applying fertilizer until the plant stabilizes, then reassess once new growth appears.
Irrigation water can also contribute to salt accumulation over time, particularly when a container is watered frequently without letting enough water flush through and carry salts out. Penn State Extension guidance on interpreting irrigation water tests notes that sodium, chloride, alkalinity, and other dissolved materials in water can all contribute to salt buildup in soil.
That does not mean tap water automatically harms every Boston fern, but if you have been watering heavily without adequate drainage, accumulated salts are a reasonable suspect.
Penn State Extension bedding plant disease guidance reinforces that salts from both fertilizer and irrigation sources can cause tip and margin burn in container plants. Commercial electrical-conductivity thresholds used in greenhouse production are not practical household diagnostic tools, but the underlying principle applies: too many dissolved salts in the root zone causes visible leaf damage.
Improving drainage and holding off on fertilizer are sensible first corrections.
Pests and disease need specific clues before they lead the diagnosis
Not every brown fern has a bug problem, and jumping to pest treatment before checking moisture, light, and salts can waste time and potentially add chemical stress to an already struggling plant. Pests are a real possibility, but they belong later in the diagnostic sequence and require specific supporting evidence before they lead the conclusion.
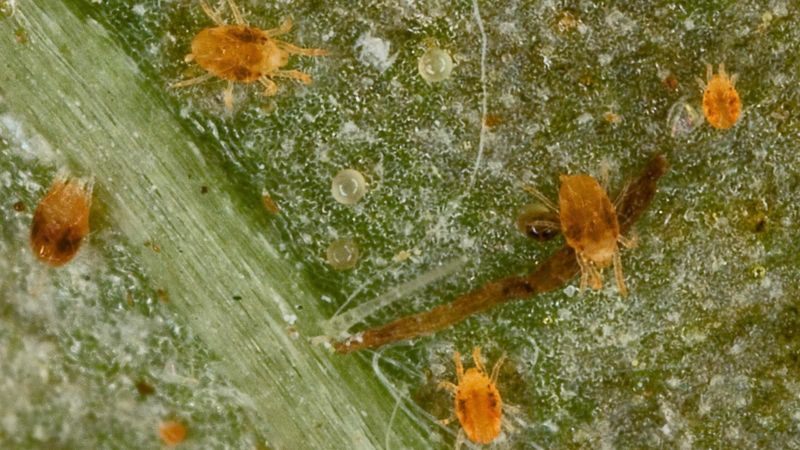
Spider mites are the most commonly blamed insect on indoor ferns, but they leave recognizable signs beyond brown tips. University of Minnesota Extension spider mite guidance describes tiny yellow or white speckles on leaf surfaces, bronzing, fine webbing on the undersides of fronds, distorted new growth, and leaf drop as characteristic signs.
If those specific clues are absent, ordinary dry tips are not enough to confirm mites. Inspect frond undersides with good light or a hand lens before drawing that conclusion.
Scale insects and other sap-feeding pests can cause discoloration and general decline, sometimes accompanied by sticky residue on fronds or nearby surfaces. University of Illinois Extension guidance on outdoor pests moving to indoor plants notes that bringing plants inside after a summer outdoors is a common way to introduce hitchhiking insects.
Check the stems and frond bases as well as the leaf surfaces.
Disease is possible but should not be the default explanation for straightforward dry tips. Penn State Extension fern disease guidance describes more specific signs for fern diseases, including translucent spots, gray foliage, reduced runner production, and rapidly spreading lesions that differ from ordinary tip browning.
When pests or disease are confirmed, rinsing foliage can help dislodge some insects, and any pesticide or fungicide product must be labeled for the intended use and followed exactly according to label directions.
Prune after the check, then watch the new growth
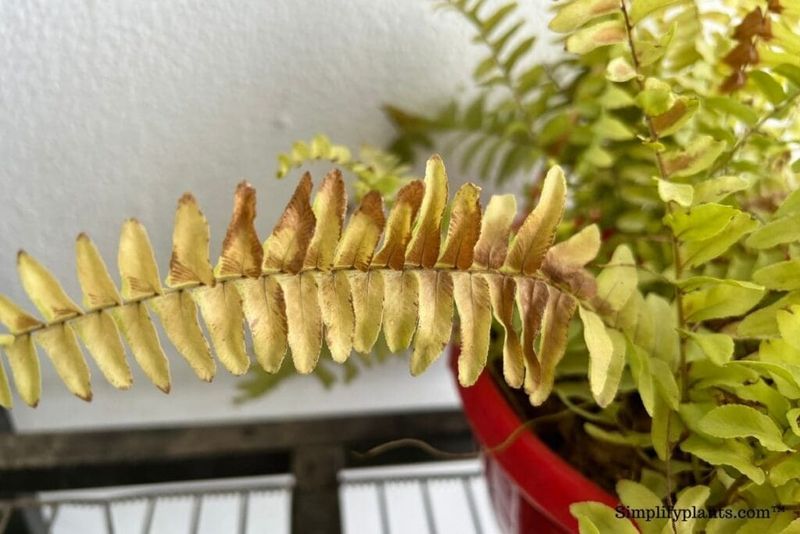
Once you have worked through the checklist – moisture, drainage, humidity, light, temperature, salts, and pest signs – and corrected the most plausible problem, pruning dead or badly damaged fronds makes sense. The key word is after.
Cutting first and diagnosing later leaves the underlying stress in place, so new growth faces the same conditions that damaged the old fronds.
University of Illinois Extension fern care guidance notes that removing brown fronds is primarily a cosmetic step that can also make room for fresh growth. RHS Boston fern care guidance confirms that dead fronds can be cut back, but that the plant’s recovery depends on correcting its growing conditions rather than the pruning itself.
Brown tissue will not turn green again regardless of how well you water afterward.
Some browning of older fronds is a normal part of a Boston fern’s growth cycle, particularly if the plant is still producing healthy new fronds from the center. UF/IFAS Boston fern guidance describes healthy production as involving active runners and fresh frond development.
If new growth continues to emerge green and firm after you correct the likely stress, that is the real measure of progress. Judge the plant’s recovery by the health of what grows next, not by whether the trimmed spots look better immediately.
The safest first move is a cause check, not a haircut
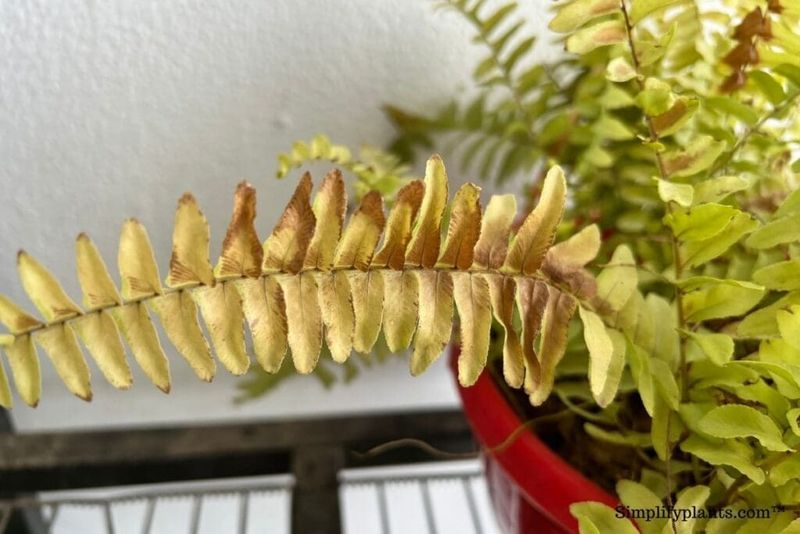
Brown tips that seem to appear overnight are worth taking seriously, but the right response is a quick inspection before any cutting. Check the soil moisture and drainage, consider the humidity near the plant, think through any recent placement changes, review fertilizer use, and look for pest signs on the frond undersides.
That sequence covers the most likely causes without requiring any special tools.
Trimming dead fronds can improve how the plant looks and is a reasonable step once you have addressed the most plausible stress. University of Illinois Extension troubleshooting guidance and RHS leaf damage guidance both support correcting the underlying condition as the step that actually protects future growth.
Correcting care may not restore already-damaged tissue, but it gives the next round of fronds the best environment to stay healthy.
A Boston fern that gets the right moisture, filtered light, reasonable humidity, and a break from excess fertilizer is a resilient plant. The brown tips are a message worth reading carefully – not a reason to panic, and not something scissors alone can solve.