
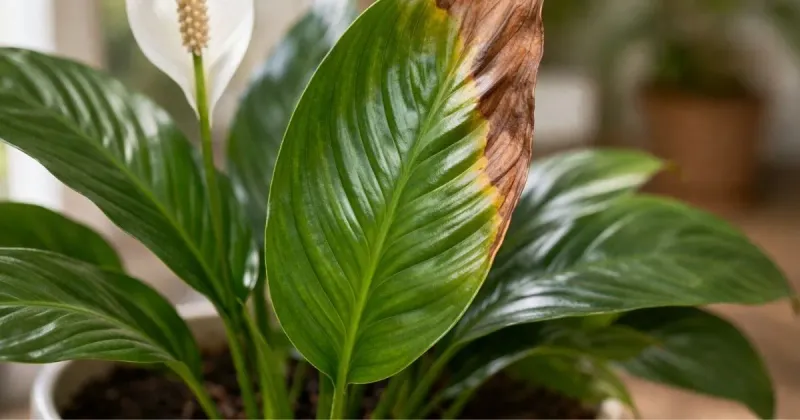
Peace lily leaves turning brown at the tips can feel alarming, especially when the plant otherwise looks healthy. The good news is that those brown edges are telling you something useful, even if they cannot hand you a single, simple answer.
Reading the pattern of the damage, then checking how the plant is actually being grown, gives you a real shot at stopping new browning before it spreads.
Brown tips are clues, not a diagnosis
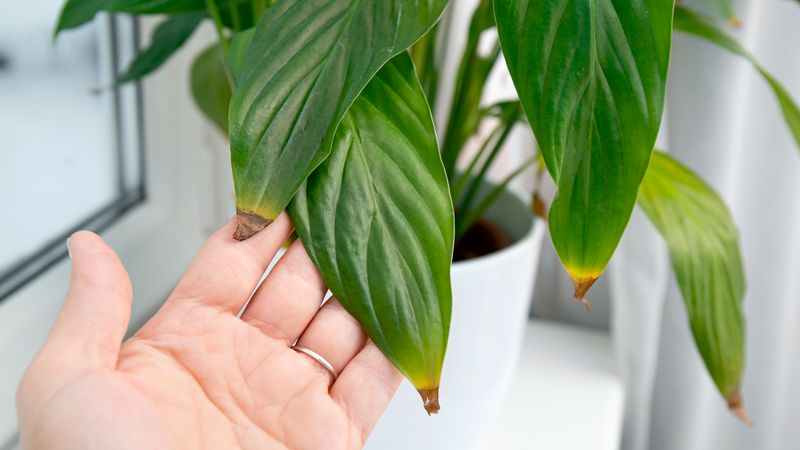
Peace lily leaf tips turn brown when plant tissue dies, and dead tissue does not recover its green color no matter what you do afterward. That fact matters because it shifts the goal: the job is not to reverse the damage you can see but to stop new damage from forming.
UC Statewide IPM guidance on houseplant problems lists inconsistent watering, excess fertilizer or soluble salts, low humidity, direct sun, heat, drafts, and poor water quality as common causes of brown tips and margins, and notes that multiple stresses can occur at the same time.
That overlap is exactly why the damage pattern can narrow your list of suspects but cannot name the culprit on its own. A crisp brown tip looks the same whether it came from dry air, salt buildup, or a cold draft.
Picking the right correction requires comparing what you see on the leaf with what is actually happening in the soil, the pot, the light, and the room temperature.
Before reaching for a watering can or a bottle of fertilizer, run through the full checklist: soil moisture, drainage quality, root condition, light exposure, proximity to vents or cold windows, recent temperature swings, fertilizer history, and water source. Iowa State University Extension’s houseplant diagnostic guide and Virginia Tech Extension’s plant problem guide both emphasize that visual symptoms alone are not enough to choose a fix.
The pattern opens the investigation; the growing conditions close it.
Where and how the leaf browns narrows the possibilities
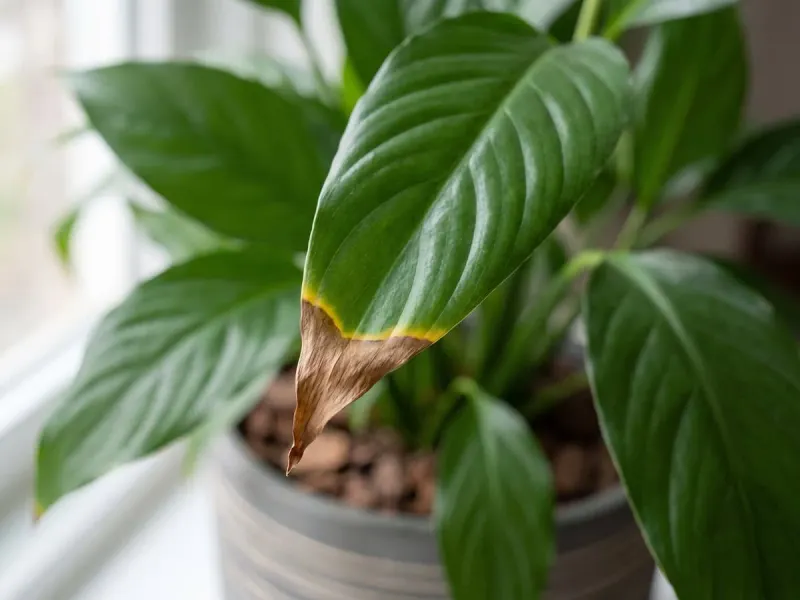
Not all browning looks the same, and paying attention to where the damage sits on the leaf, and what texture it has, can point you toward a shorter list of likely causes. Crisp, dry browning confined to the very tips or along the outer edges, while the rest of the leaf stays a healthy dark green, fits the pattern of environmental or cultural stress.
UC IPM’s houseplant problem resources and Clemson Extension’s houseplant disease and disorder factsheet both describe this pattern as nonspecific, meaning it can result from inconsistent watering, low humidity, soluble salt accumulation, excess fertilizer, drafts, or direct sun without pointing to any one of them exclusively.
Browning or bleaching that is concentrated on the side of the leaf facing a window, especially after the plant was recently moved to a brighter spot, is more consistent with sun or heat injury. UF/IFAS guidance on Spathiphyllum care is clear that peace lilies prefer bright, indirect light and do not tolerate direct sun exposure.
Damage that begins at the tips and progresses inward after a cold night, an open window in winter, or placement near an air-conditioning vent is a timing clue pointing toward chilling or draft injury rather than a watering problem.
A third pattern deserves separate attention. Spots that are circular or irregular, expand over time, develop yellow halos around them, merge into larger lesions, or appear water-soaked on the leaf surface are more suggestive of disease or a different kind of injury than simple dry-tip burn.
University of Maryland Extension’s leaf-spot resource recommends improving air circulation and avoiding splashed or persistently wet foliage when this pattern appears. None of these visual clues are conclusive on their own, but each one steers your investigation in a more useful direction.
Check soil, drainage, and roots before adding water
Soil moisture is the first thing to check, not the last. Push a finger about an inch into the potting mix; if it feels damp, the plant does not need water yet.
Peace lilies prefer a consistently moist mix that never sits soggy, and UF/IFAS Spathiphyllum care guidance specifically warns against following a fixed weekly watering schedule because the right frequency changes with pot size, light level, temperature, and soil type.
When the mix is genuinely dry, water thoroughly with room-temperature water until some flows freely from the drainage holes, then empty the saucer or decorative cachepot so the roots are not sitting in standing water. UF/IFAS houseplant care guidance recommends using a pot with drainage holes or placing a nursery pot inside a decorative outer pot so excess water can escape easily.
Allowing a container to sit in runoff is one of the ways overwatering happens even when the gardener is not watering too frequently.
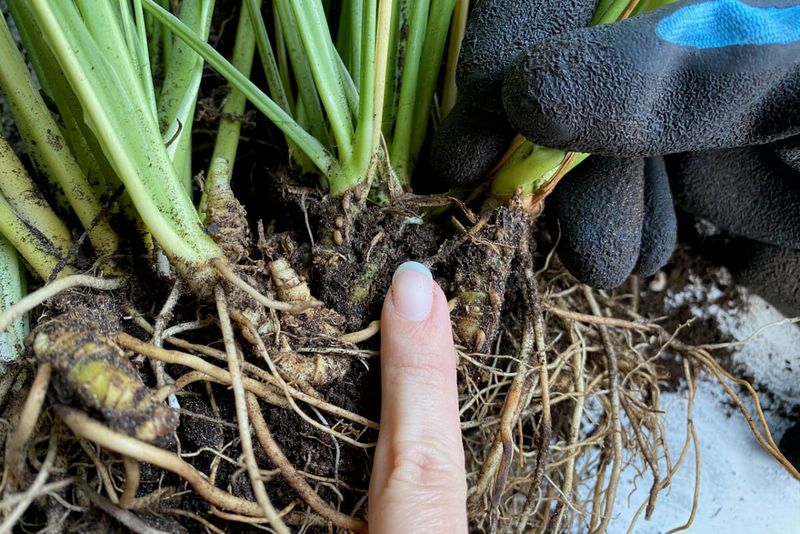
A wilted peace lily with soil that still feels wet is a warning sign, not a call to add more water. University of Wisconsin Extension’s root health resource and University of Maine Extension’s houseplant problem guide both explain that persistently wet soil can damage roots, causing the plant to wilt even when moisture is present.
If roots look brown, soft, or decayed when you slide the plant from its pot, repotting into fresh, well-drained potting mix is the correction, not more frequent watering.
Test light, drafts, temperature, and humidity
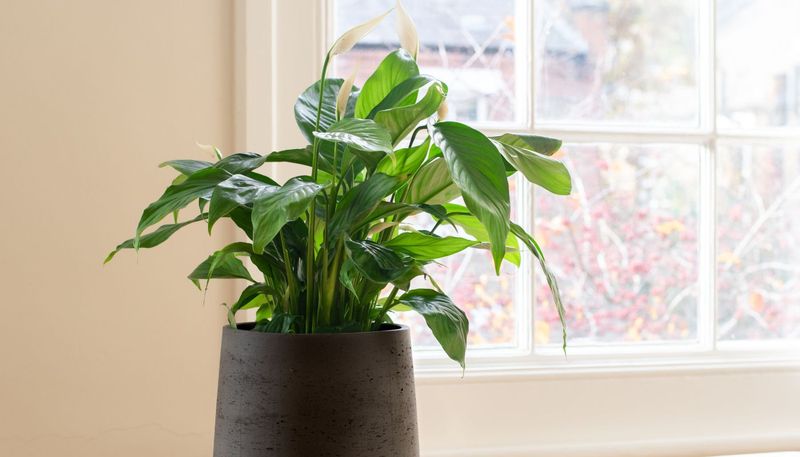
Once you have ruled out a soil or drainage problem, shift your attention to the environment around the plant. Bright, indirect light is the standard recommendation for indoor peace lilies, and UF/IFAS Gardening Solutions guidance on peace lilies confirms they have no direct-sun tolerance.
If the damaged leaves are on the side of the plant closest to a south- or west-facing window, or if the browning appeared shortly after a move to a sunnier location, reducing direct sun exposure is a reasonable first step.
Heat sources and cold spots deserve equal scrutiny. Heating vents, the tops of appliances, and glass that heats up in afternoon sun can all raise the temperature around the foliage well above what the plant tolerates comfortably.
On the other side, cold drafts from air-conditioning units, cracked windows, or exterior doors can cause chilling injury that starts at the tips and moves inward. NC State Extension’s peace lily profile notes that extended temperatures below 40 degrees Fahrenheit can damage leaves, stems, and roots, so placement matters year-round in Southern homes where air conditioning runs for months at a time.
Low humidity can contribute to tip browning, but it should not be treated as the automatic explanation when other stresses have not been ruled out. Penn State Extension’s humidity and houseplants resource and Iowa State University Extension’s indoor humidity FAQ both recommend a portable humidifier, grouping plants together, or choosing a naturally humid room as more reliable approaches than misting.
NC State Extension’s container plant handbook notes that misting produces only a brief humidity increase and that keeping foliage persistently wet can raise the risk of leaf-spot disease.
White residue raises a salt or water-quality question
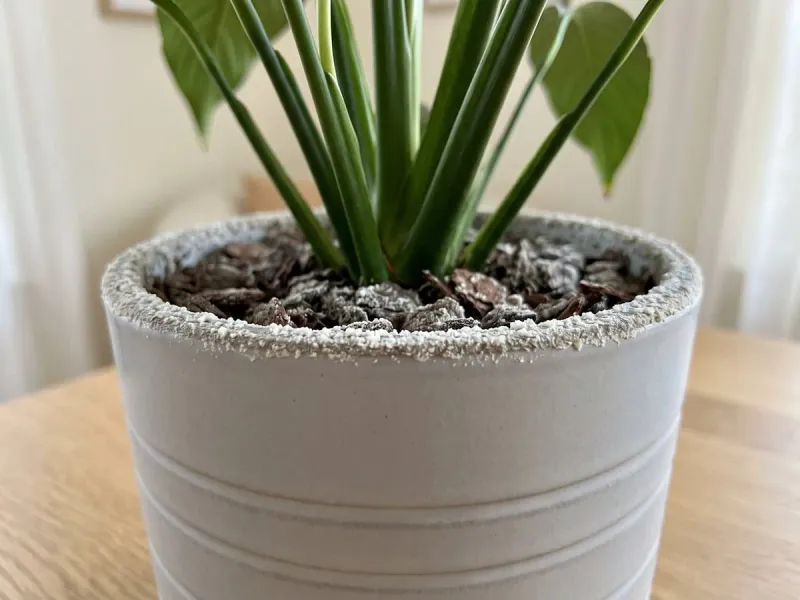
A white or tan crust on the soil surface, around the pot rim, or in the drainage area is a visible clue that soluble salts have been building up in the potting mix. Salts accumulate from fertilizer residue, certain water sources, or both, and high concentrations can burn root tips and cause the leaf tips and margins to turn brown.
University of Connecticut Extension’s fertilizing guidance recommends low fertilizer rates for houseplants and warns that overfertilizing is a common source of salt damage.
When salt buildup is suspected, the correction is to flush the potting mix thoroughly with water that can drain freely from the pot. Colorado State University Extension’s guide on leaching salts from potting mixes explains the process and notes that severe buildup may require replacing the mix entirely.
Stop adding fertilizer until the plant stabilizes, and discard the runoff rather than letting the pot sit in it.
Water quality deserves a conditional look, not a reflexive switch to distilled water. Softened water is a more consistent concern because it introduces sodium salts that accumulate over time.
Ordinary tap water is generally acceptable for many houseplants, though University of Connecticut Extension’s watering guidance and Utah State University Extension’s houseplant resource both note that fluoride, alkalinity, and dissolved minerals can affect sensitive plants. Letting tap water sit overnight is sometimes suggested, but it does not reliably remove fluoride, minerals, or all water-quality concerns.
If symptoms persist after addressing other factors and salt crust is visible, trying a filtered or non-softened alternative water source is a reasonable next step.
Spots need a more cautious response
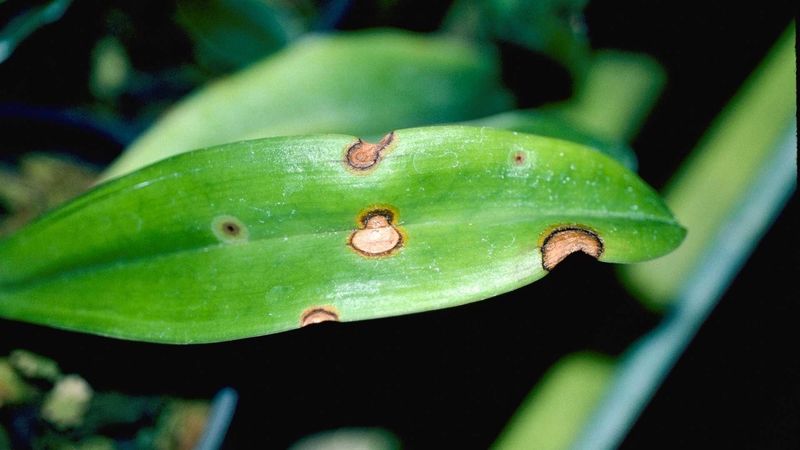
Dry brown tips and actual leaf-spot disease can look superficially similar, but the details that separate them matter for choosing the right response. Ordinary tip burn from environmental stress tends to stay at the leaf edges, remains dry and crisp, and does not spread in a pattern that suggests something is moving through the tissue.
Disease becomes more plausible when you see something different: spots that are circular or irregular, grow larger over several days, develop yellow halos around a darker center, merge into bigger lesions, or appear water-soaked and soft rather than dry and papery.
University of Maryland Extension’s fungal leaf spot resource and Iowa State University Extension’s disease diagnostic guide both recommend removing badly affected leaves promptly and improving air circulation around the plant. Avoid splashing water onto the foliage when you water, and do not mist a plant that already has suspicious spots, since persistently wet leaves create favorable conditions for pathogens to spread.
University of Minnesota Extension’s tool disinfection guidance recommends cleaning and disinfecting cutting tools between plants when disease is suspected, to avoid transferring a pathogen from one plant to another. Clemson Cooperative Extension’s houseplant disease factsheet is clear that indoor houseplant problems are more often cultural or environmental than disease-related, so expanding spots should raise the question of disease without immediately assuming it.
Home care steps can limit damage, but they are not a guaranteed cure if a pathogen has taken hold.
Trim brown tissue for appearance, not recovery
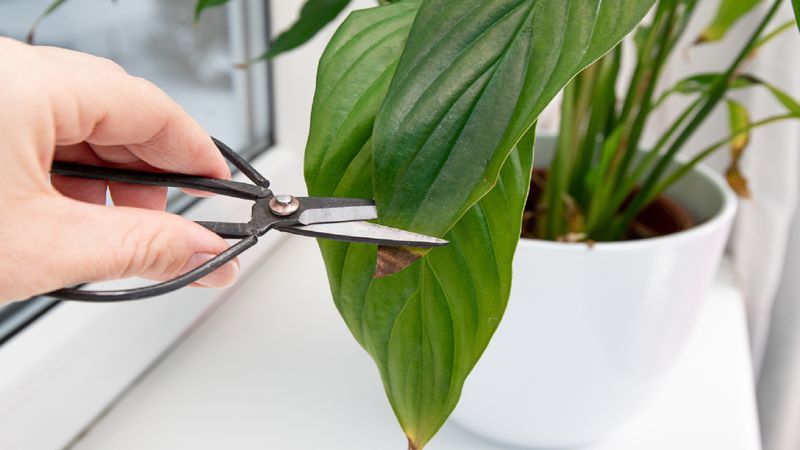
Once you have identified and begun correcting the underlying stress, trimming the brown tissue is a reasonable cosmetic step. Sharp, clean scissors work better than dull blades because a clean cut is less likely to tear the surrounding healthy tissue.
Follow the natural curve of the leaf rather than cutting straight across, and leave a very narrow strip of brown at the edge instead of cutting deeply into green tissue. University of Maryland Extension’s indoor plant grooming guidance and University of Arizona Extension’s indoor plant care publication both support this approach for maintaining the plant’s appearance without causing additional damage.
The most important thing to understand about pruning is what it cannot do. Dead tissue will not turn green again, and Iowa State University Extension’s brown leaf tip FAQ makes clear that trimming improves appearance but does not correct the cause of the browning.
If the stress that created the original damage is still present, new brown tips will keep forming on the same leaves or on new growth, regardless of how carefully you trim.
Grooming works best as a finishing step after diagnosis and correction, not as a substitute for them. Leaves that are more than half brown, badly distorted, or showing signs of disease can be removed entirely at the base.
Wiping the scissors with rubbing alcohol between cuts reduces the risk of spreading any pathogens from one part of the plant to another.
Follow a safe rescue sequence and watch new leaves
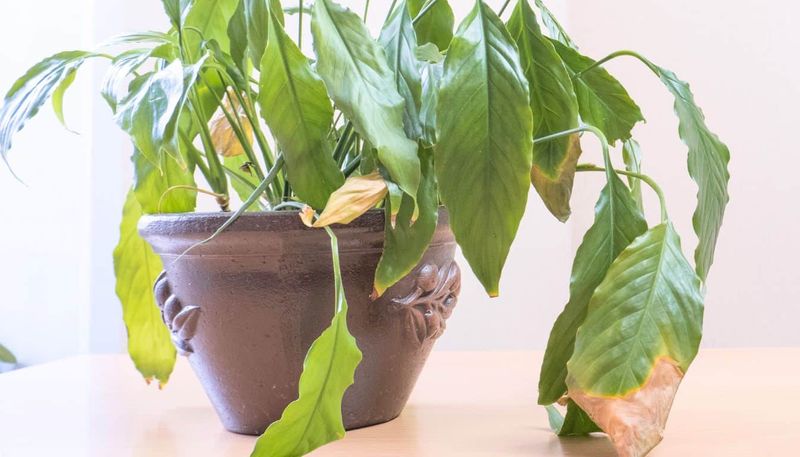
Pulling a stressed peace lily back from the edge works best when the steps follow a logical order. Start by checking soil moisture and drainage.
If the mix is dry, water thoroughly and let the excess drain completely. If the mix stays wet, inspect the roots and correct the drainage before doing anything else.
Move the plant away from direct sun, hot glass, heating vents, and cold drafts, and position it in bright, indirect light.
For readers growing peace lilies outdoors in Florida, Texas, or other parts of the South, the diagnosis must account for conditions that do not apply indoors. UF/IFAS Gardening Solutions and a UF/IFAS Lake County newsletter on outdoor peace lily browning both describe the plant as having no direct-sun tolerance and limited cold tolerance.
Outdoor placement in deep shade or filtered light is not the same as indoor care: intense summer heat, heavy rain that saturates soil, and unexpected cold snaps each change what you should check first. UF/IFAS Spathiphyllum care guidance notes that injury from extended temperatures below about 45 degrees Fahrenheit can begin at the tips and progress inward.
Address severe dryness or visible salt buildup after the light and drainage corrections are in place, then trim dead tissue as a final cosmetic step. Judge the plant’s recovery by what happens next: Iowa State University Extension and University of Wisconsin Extension both confirm that healthy new growth and an end to new browning are the real signs of success.
Old brown tissue stays brown; a plant that has turned a corner shows you with fresh green leaves.