
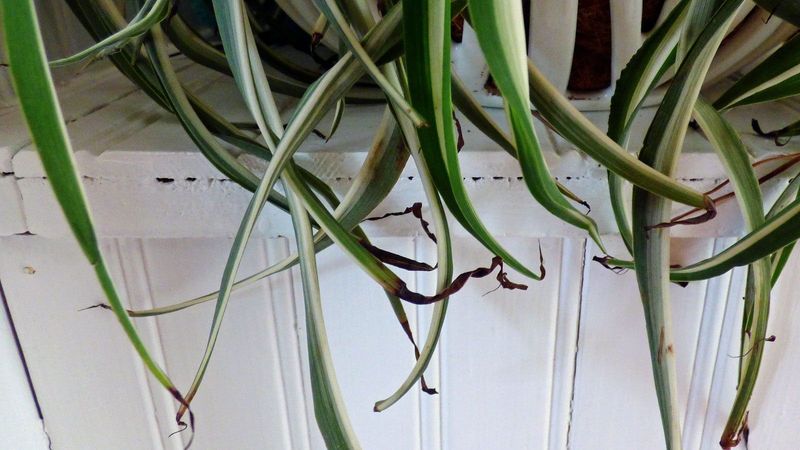
Spider plants are tough, cheerful houseplants, but those brown, crispy leaf tips can make even a healthy-looking plant seem like it’s struggling. Watering habits are often part of the problem, though they’re not always the whole story.
Before you grab the watering can, it helps to know what you’re actually looking at, because the fix depends on the real cause.
Brown tips can involve watering—but they do not prove underwatering
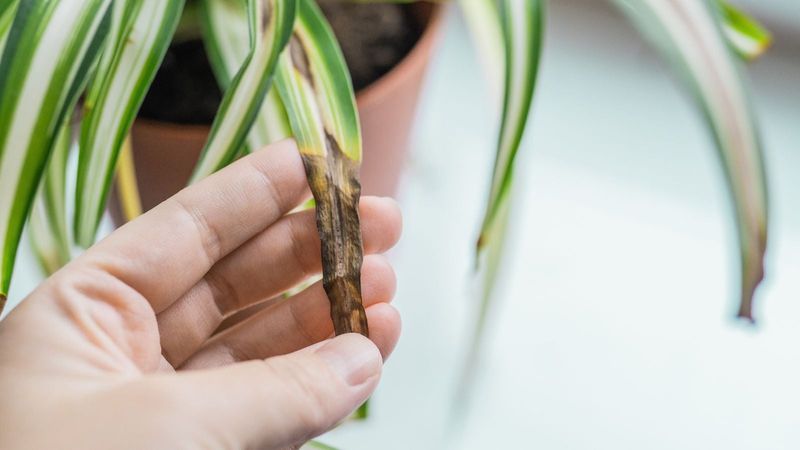
Crispy, brown leaf tips on a spider plant are genuinely frustrating, and watering is often the first thing gardeners blame. Allowing the potting mix to become excessively dry or watering inconsistently can stress the plant and produce those telltale brown edges.
But the symptom alone does not confirm underwatering as the cause.
Iowa State University Extension lists several documented causes for brown houseplant tips, including soluble-salt buildup, low indoor humidity, fluoride-sensitive water, direct sun, and pests. Clemson Extension specifically names spider plants as prone to tip burn from multiple sources, not just drought.
That matters because the remedy for each cause is different, and treating the wrong one wastes time while the browning continues.
One distinction worth making early: both too little water and too much water can produce brown, crispy tips. When soil stays continuously wet, oxygen around the roots decreases and root damage can follow.
University of Maryland Extension explains that damaged roots lose the ability to take up water normally, leaving the plant in a drought-like state even when the pot feels heavy and wet. Before choosing a remedy, check the soil, look at the roots, consider the light, think about water quality, and assess the indoor environment around the plant.
Check the potting mix before you water
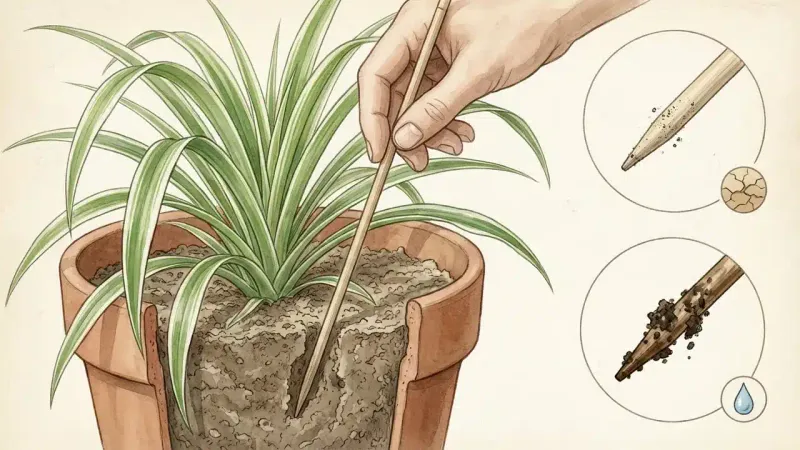
Rather than watering on a set day each week, make the potting mix itself your guide. Push your finger about one to two inches into the soil.
If the mix feels dry at that depth, the plant is ready for water. If it still feels cool or slightly moist, hold off and check again in a day or two.
University of Maryland Extension and Oklahoma State University Extension both recommend moisture assessment over calendar schedules, because drying speed depends on a combination of factors: pot size, potting mix composition, available light, indoor temperature, ambient humidity, the season, and whether the container is plastic, clay, or ceramic. A four-inch clay pot on a sunny porch in July dries out far faster than a six-inch plastic pot sitting in a shaded corner in January.
A few physical clues also signal that the plant has dried too far or experienced inconsistent watering. Soil that pulls away from the sides of the pot, leaving a visible gap, often means the mix has dried and shrunk.
Repeated wilting between waterings is another indicator worth noting. These observations strengthen the case for a watering-related cause, but they still do not rule out other contributors.
Use them as supporting evidence, not a final verdict, and treat the moisture check as the decision point for your next step rather than assuming brown tips always require more water.
Water thoroughly and let the container drain
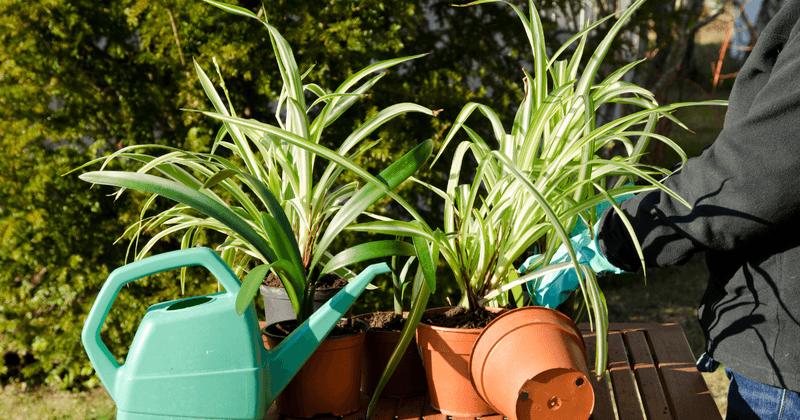
Once the potting mix has dried slightly, the goal is to soak the entire root zone, not just wet the surface. Pour water slowly and steadily until it flows freely from the drainage holes at the bottom of the pot.
That steady drainage tells you the water has moved through the full depth of the mix rather than channeling down one side.
Florida IFAS and Wisconsin Extension both recommend allowing the upper portion of the mix to dry somewhat between thorough waterings, which keeps roots healthy without leaving them starved for moisture. A quick splash on the surface may wet the top inch while the root zone stays dry, so resist the urge to give just a small amount and walk away.
After watering, empty any water that collects in the saucer or cachepot within about 30 minutes. University of Maryland Extension recommends discarding runoff so roots are not sitting in standing water between waterings.
Repeated cycles of severe drying followed by emergency soaking also stress the plant, so the aim is steady, responsive care rather than a rigid schedule. Return to the finger-test routine as seasons shift, because the same plant will need water more often in summer heat and less often during cooler months.
Wet soil and poor drainage can mimic thirst
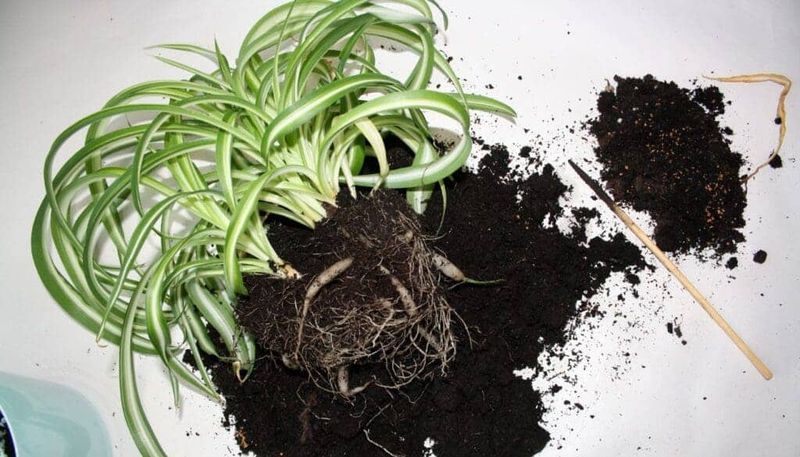
Adding more water when the soil is already wet is one of the more common ways well-meaning gardeners make the problem worse. Before you water again, pick up the pot.
A container that feels heavy for its size likely still holds plenty of moisture, and the roots do not need more.
Look for other warning signs that point toward excess water rather than drought. Yellowing lower leaves, a sour or musty smell coming from the soil, and roots that appear dark, soft, or mushy when you gently remove the plant from its pot all suggest that the mix has stayed too wet for too long.
University of Maryland Extension notes that continuously wet soil reduces the oxygen available to roots, which can lead to root damage and leave the plant unable to absorb water normally. The result is browning that looks identical to drought stress even though the soil is soaked.
University of Illinois Extension and University of Maryland’s indoor plant diagnostic guide both point to drainage as a foundational requirement. If the pot has no drainage hole, the mix is compacted and slow to drain, or the saucer regularly holds standing water, address those structural issues first.
Clemson Extension specifically advises that spider plants need good drainage to thrive. Correcting root health and drainage conditions before adding more water gives the plant a chance to recover rather than compounding the damage.
White crust can signal salt or mineral buildup
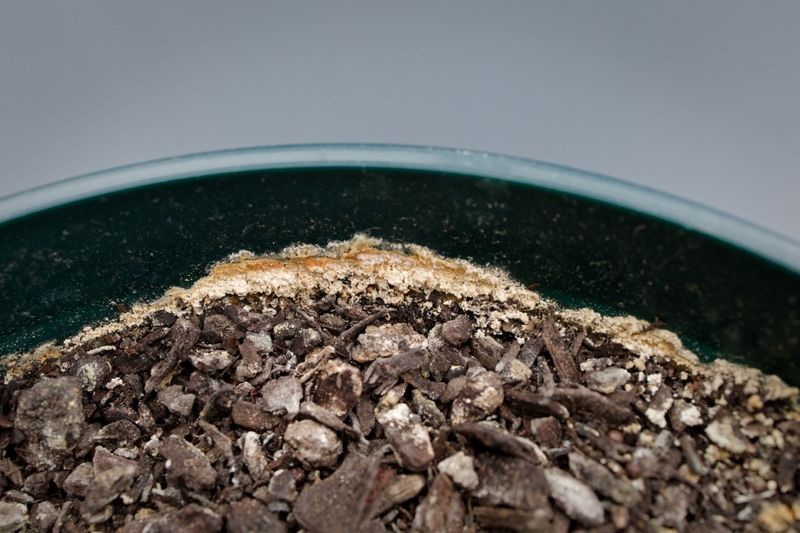
A white or gray crust forming on the soil surface, the pot rim, or around the drainage holes is a useful clue worth paying attention to. That crust often points to soluble-salt or mineral accumulation in the potting mix, and it can contribute to brown leaf tips by drawing moisture away from root cells.
The source of those salts matters for choosing the right fix. Clemson Extension’s houseplant disorders guide and Utah State University Extension both note that excess fertilizer is a common culprit, as is softened water.
Water softeners can introduce elevated sodium or other soluble salts, and USU Extension specifically discourages using softened water for routine houseplant watering. Ordinary tap or well water is not automatically a problem, and water quality varies significantly by municipality and well source.
To reduce salt accumulation, water from the top and allow substantial drainage each time. Periodically leach the pot by running clear water through it slowly.
University of Maryland Extension recommends using at least twice the pot’s volume of water during a leaching session and allowing it to drain completely, which requires adequate drainage holes. If browning continues after the watering routine is corrected, check your local water provider’s consumer confidence report or have well water tested before drawing conclusions about mineral content.
Florida IFAS notes that spider plants are particularly sensitive to fluoride in some water supplies and recommends rainwater or distilled water when fluoride-related tip burn is suspected. Reverse-osmosis water may also reduce fluoride, but only if the system is labeled or certified for that contaminant.
Letting tap water sit overnight may reduce some chlorine, but CDC fluoridation guidance makes clear that fluoride does not evaporate from standing water, so that approach should not be relied on when fluoride is the concern.
Check humidity, light, and pests when the soil looks right
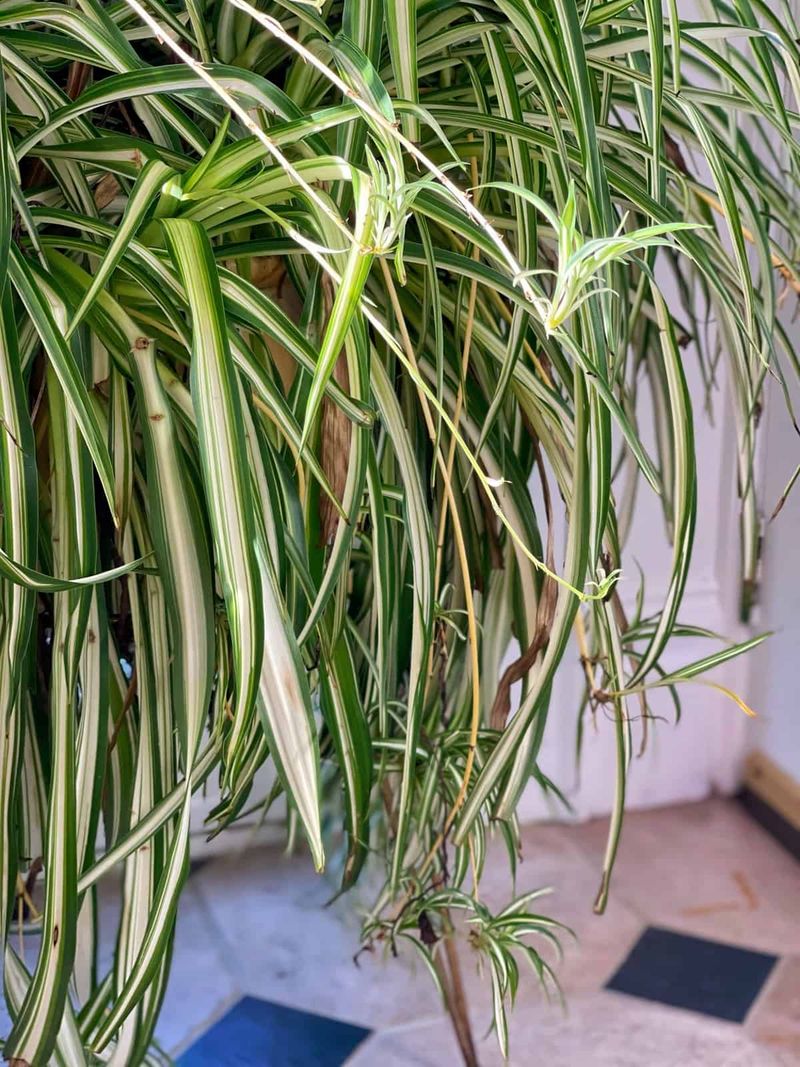
Soil that passes the moisture check and a pot with good drainage are encouraging signs, but they do not automatically explain persistent browning. Indoor air conditions and light exposure deserve a close look when the watering routine appears sound.
Air conditioning keeps Southern homes comfortable through long, hot summers, but it also pulls moisture from the air. Even in Florida or Texas, the indoor humidity around a spider plant can drop low enough to cause tip browning.
Penn State Extension explains that low indoor humidity is a documented cause of brown houseplant tips. A humidifier placed nearby or grouping several plants together can help raise local humidity to a more comfortable range.
Iowa State University Extension notes that routine misting provides only a brief humidity increase and is not a reliable long-term solution.
Light placement also matters. Florida IFAS and Wisconsin Extension both describe spider plants as preferring bright, indirect light.
Browning that concentrates on the side of the plant facing a sunny window, or that develops on leaves closest to the glass during the hottest part of the day, may indicate heat or light scorch rather than a watering issue. Moving the plant a few feet back from direct sun is worth trying before adjusting watering.
Finally, check the leaves closely for fine stippling, a sandy or dusty texture on the undersides, visible webbing, or tiny moving insects. Colorado State University Extension’s houseplant pest guide identifies spider mites and other common pests as sources of leaf damage that can resemble environmental stress.
Each of these clues points toward a specific, targeted correction rather than another round of watering adjustments.
Trim old damage and measure recovery by new growth
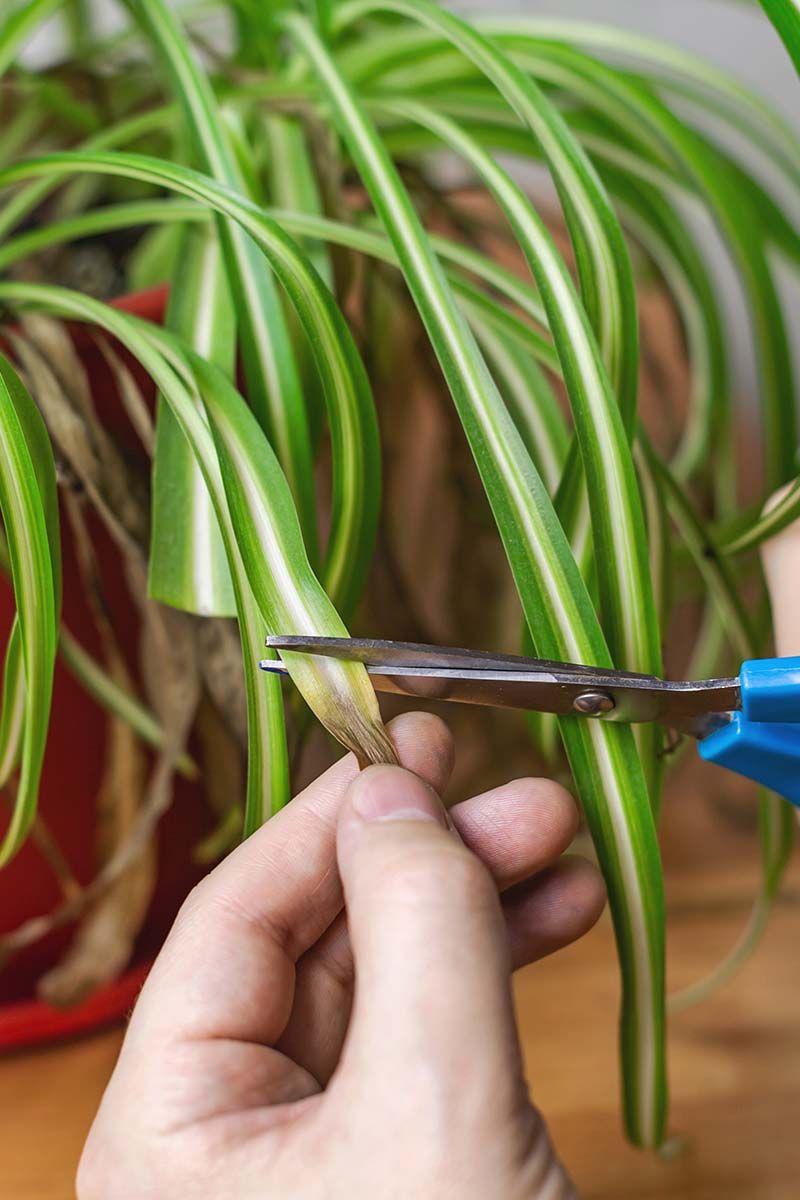
Once you have identified and corrected the most likely cause, the brown tissue itself can be cleaned up. Sharp, clean scissors or pruning shears used to trim the damaged portion will improve the plant’s appearance right away.
Cut at a slight angle just inside the brown area to leave a natural-looking edge.
That cosmetic step does not fix anything on its own. Iowa State University Extension is clear that dead tissue cannot turn green again, and University of Arizona Extension reinforces that recovery depends on correcting the underlying cause, not on pruning.
If the original problem is still present, new browning will appear on previously healthy leaves even after the old damage is trimmed away.
The most reliable sign of real recovery is new leaves emerging without progressive browning at the tips. That is the measure worth watching over the following weeks.
One corrective watering will not reverse established damage, so give the plant time and keep monitoring soil moisture, drainage, and the indoor environment as conditions change with the season.
A practical decision sequence helps when the cause is still unclear: check the soil first and correct watering and drainage before anything else. If fresh browning continues after that, look at salt or mineral buildup, water quality, indoor humidity, light placement, and pests in turn.
Each clue narrows the field, and the plant’s new growth tells you when you have finally found the right answer.