
When summer winds down and your garden beds look worn out, it can feel like the season is over before fall even starts. But cleared or heat-stressed beds across Georgia, Florida, and Texas can often be planted again, sometimes right away, with the right crops and a little prep work.
The key is knowing what your bed actually needs, which crops fit your local window, and how to get plants established while warmth lingers.
A cleared summer bed is not automatically ruined
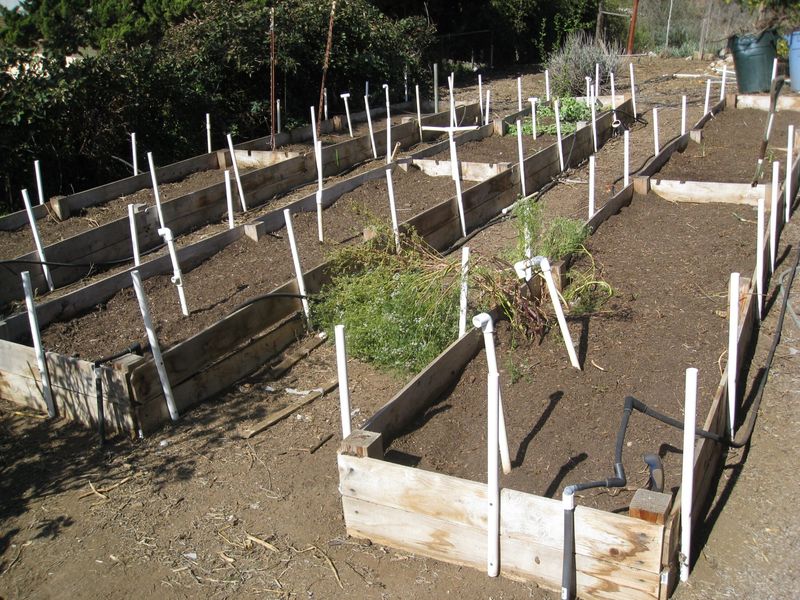
Pulling out the last of the summer tomatoes or squash and staring at bare soil can feel discouraging, but that cleared bed is rarely a lost cause. Texas A&M AgriLife Extension notes that a site where a spring or summer garden succeeded can often work just as well for fall crops, which is a reassuring starting point rather than a reason to panic.
What matters is understanding why the bed looks the way it does. Summer crops remove nutrients as they grow and fruit, and repeated watering can leach nutrients downward through the soil profile.
Compaction from foot traffic, disease organisms left behind in plant debris, pH that has drifted, poor drainage, salinity buildup, uneven irrigation, nematode pressure, or insect damage can all contribute to a bed that underperforms, and heat alone rarely tells the whole story.
Before you plant anything or haul in amendments, spend a few minutes assessing what you actually have. Check whether the soil is compacted or waterlogged, whether last season’s crop showed disease symptoms, and whether the bed drained well through summer storms.
Texas A&M’s vegetable soils guidance points out that poor crop performance can stem from pH, drainage, salinity, or fertility issues that a visual check alone cannot diagnose. That assessment shapes every decision that follows.
Reset the bed before planting
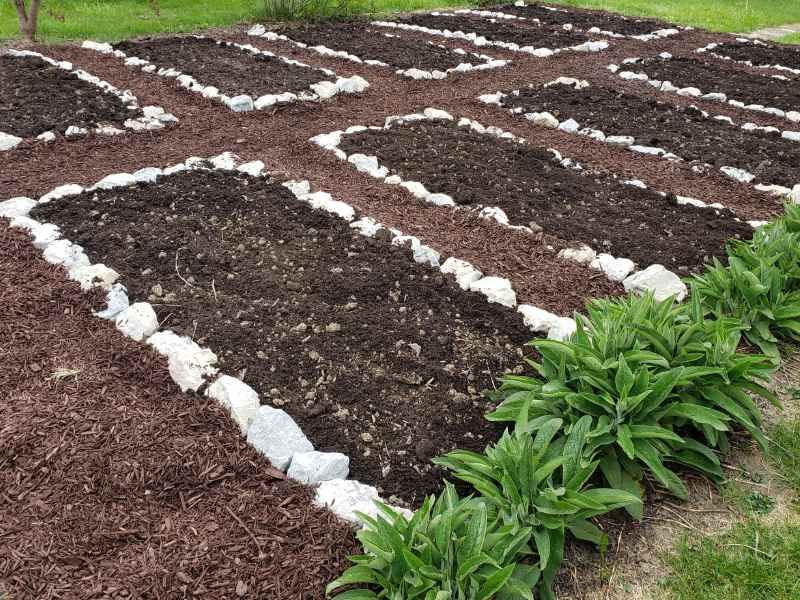
Bed preparation does not have to be complicated, but skipping it often creates problems that show up weeks later. Start by pulling out every spent plant, weed, and root mass you can find.
Work through the bed methodically so nothing is left to rot in place or harbor insects over the coming weeks.
Diseased plant material deserves special attention. Utah State University Extension plant health guidance advises discarding diseased plants rather than adding them to a home compost pile, because most backyard piles do not reach the temperatures needed to kill pathogens reliably.
Healthy crop residue that showed no disease symptoms can be composted under appropriate conditions, but keep the two streams separate.
Once the bed is cleared, test the soil before reaching for fertilizer or lime. A soil test tells you what the bed actually needs rather than what you assume it needs, and it prevents over-application that can injure plants or run off into nearby water.
UGA Cooperative Extension’s fall vegetable gardening guide recommends basing fertilizer and lime applications on test results rather than guessing.
Finished compost can be a useful addition in modest amounts. Oregon State University Extension’s compost guide explains that compost improves soil structure and water-holding capacity, but its fertilizer value is relatively low and it should not substitute for a soil test.
Roughly a quarter to one inch annually on established beds is a reasonable starting point, with fertilizer rates tied to what the test recommends.
Choose quick crops for the earliest harvest
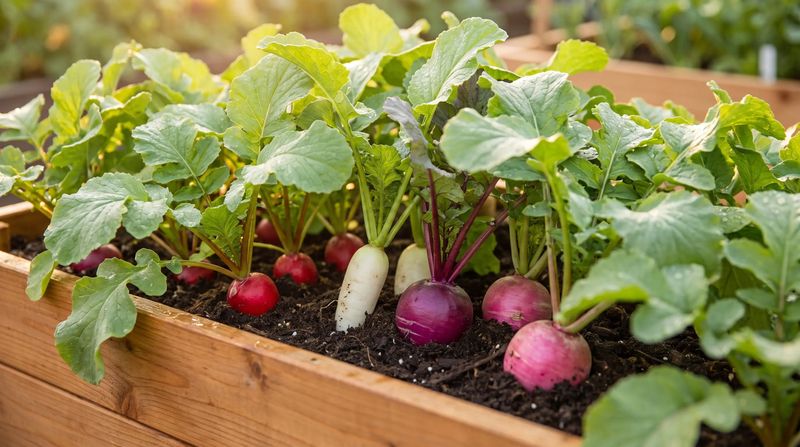
If your local planting window is open and the bed is ready, fast-maturing crops give you the most flexibility. Radishes, mustard greens, spinach, Swiss chard, lettuce, and turnips are all well-suited to fall direct seeding across much of the South, and they can begin producing before slower crops even get established.
As a regional illustration rather than a universal promise, UGA’s fall vegetable gardening publication lists radishes maturing in roughly 20 to 40 days, mustard greens in about 40 to 50 days, and spinach and Swiss chard in the range of 50 to 60 days. Those figures reflect Georgia conditions and will vary with your specific location, variety, and weather, but they give a useful sense of the pace you can expect from quick crops planted now.
Pairing fast crops with longer-season choices is a practical strategy for getting the most from a single bed. Collards, kale, cabbage, broccoli, cauliflower, carrots, beets, onions, and kohlrabi all take more time to reach harvest, but they can occupy the same bed in a different corner or row while the radishes and mustard are already on your table.
Think of the quick crops as a bridge harvest that keeps the bed productive while the slower, heartier crops work toward maturity through the cooling weeks of fall. Spacing and succession planting, putting in a new short row of radishes or lettuce every two weeks, can extend that bridge harvest well into the season.
Match the sowing method to the crop
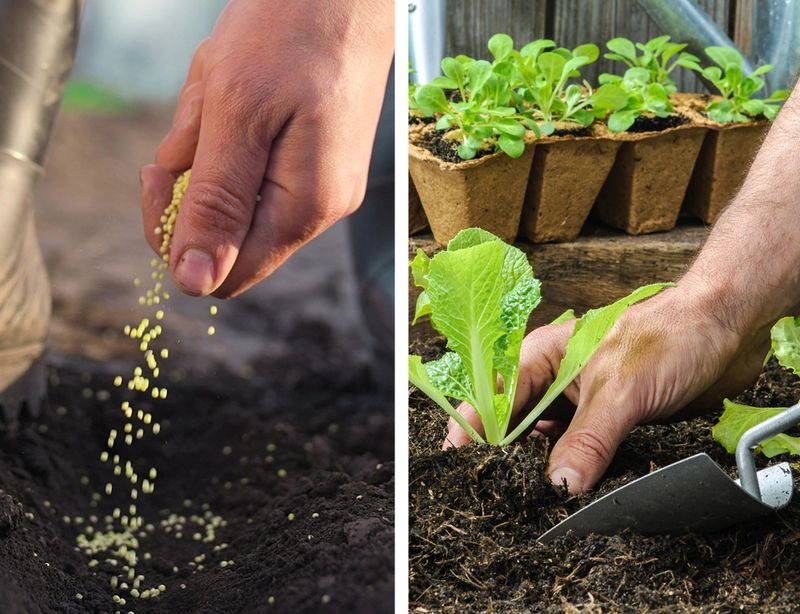
Not every fall crop goes into the ground the same way, and choosing the wrong method can cost you weeks or an entire planting. Lettuce, carrots, radishes, turnips, spinach, and most leafy greens are well-suited to direct seeding, meaning you sow them straight into prepared soil at the spacing the seed packet recommends.
These crops either grow quickly enough that transplanting offers little advantage, or they have root systems that dislike disturbance.
Slower brassicas tell a different story. Broccoli, cauliflower, cabbage, and Brussels sprouts are often more reliable as transplants, particularly when the remaining frost-free period in your area is tight.
UGA’s fall vegetable guidance recommends transplants for these crops, and Texas A&M AgriLife Extension similarly emphasizes matching crop selection and starting method to regional planting dates.
The practical rule is to count backward from your expected first frost or the end of your fall window using the crop’s days-to-maturity figure. If there is not enough time for a slow crop to reach harvest from seed, buy healthy, appropriately sized transplants at a local nursery rather than gambling on seed.
A stocky, pest-free transplant with good root development will establish faster and waste less of the season than a seedling struggling to catch up.
Let your region define “now”
One of the most common mistakes in fall planting is treating a single date as a universal green light for every Southern garden. The South spans an enormous range of climates, and what counts as “fall planting time” shifts considerably depending on where you live.
In Georgia, UGA Cooperative Extension lists fall planting windows that run from roughly August 15 through October 15, varying by crop. That range reflects the state’s mix of piedmont, coastal plain, and mountain regions, and it means some Georgia gardeners are already a bit late for the earliest crops while others still have the full window ahead of them.
Florida is more complex. UF/IFAS divides Florida into north, central, and south regions, defined roughly by State Roads 40 and 70, because the planting calendar differs substantially across those zones.
In north and central Florida, September is a reasonable starting point for collards, kale, mustard, radishes, turnips, and Swiss chard. South Florida’s longer warm season pushes many planting windows later, sometimes well into winter months.
Texas carries its own complexity. Texas A&M AgriLife Extension uses five gardening regions, with broccoli and cabbage dates ranging from July or August in northern regions to October or November in southern areas.
Before committing bed space to a slow crop, check your county Extension office’s calendar or your state’s regional planting chart to confirm the window is actually open where you garden.
Protect seedlings from lingering heat
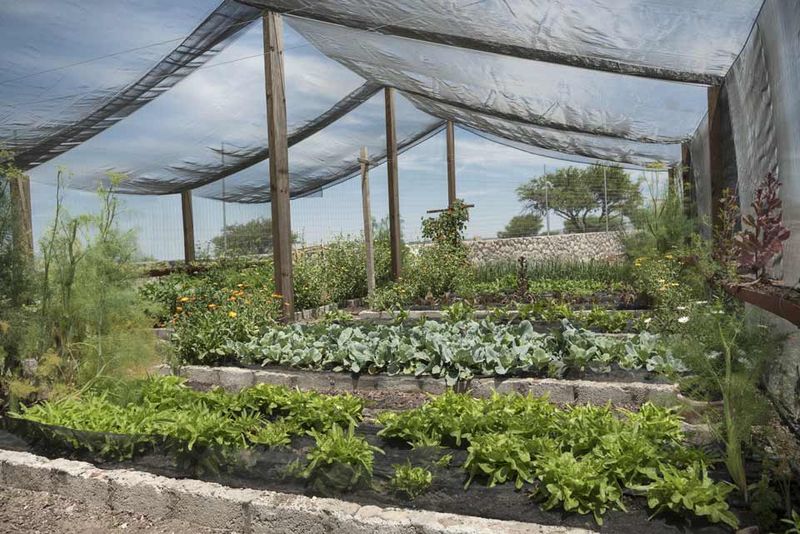
Planting cool-season crops while summer heat lingers is one of the trickier parts of Southern fall gardening. Hot soil can cause poor germination, wilting, bolting in leafy crops, or transplant shock severe enough to set plants back by weeks.
Starting seeds in protected trays or in partial shade can make a meaningful difference when outdoor soil temperatures are still extreme. UGA Extension’s Colquitt County guidance on fall collard and cabbage planting points out that starting seeds in a cooler, shaded environment and moving transplants into the bed once conditions moderate can improve establishment rates noticeably.
Temporary lightweight shade cloth placed over young plants during the hottest part of the afternoon is another practical tool. It reduces heat load without blocking enough light to stunt growth, and it can be removed once nighttime temperatures begin to drop consistently.
UGA’s fall vegetable publication supports shade and consistent moisture as ways to improve establishment, while being clear that these tactics improve the odds rather than guaranteeing success during peak heat.
When the remaining warm season is too short for a slow crop to start from seed, buying healthy transplants from a reputable nursery is a sound alternative. Choose stocky plants with no visible pest damage or yellowing, and plant them in the early evening or on a cloudy day to reduce the immediate heat stress of transplanting.
Keep new plantings evenly moist
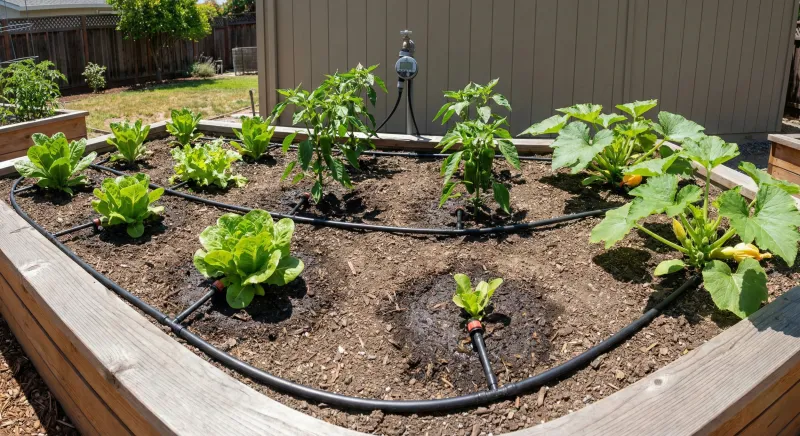
Consistent moisture is the single most important factor in getting fall seedlings and transplants through their first days in the ground. Dry spells right after planting can set back germination or cause transplant shock that lingers for weeks.
UGA Cooperative Extension’s fall vegetable guide recommends watering newly planted areas daily during the first week, then adjusting based on weather and how quickly your particular soil dries out. Once plants are established, UGA suggests roughly one to two inches of water per week as a general Georgia benchmark, though that figure reflects Georgia conditions and should be adapted to your own soil type, rainfall, and local temperatures rather than applied as a fixed Southern rule.
Mulch is a useful partner to any watering routine. A two- to three-inch layer of straw or shredded leaves moderates soil temperature, slows moisture loss between waterings, and can reduce weed pressure.
Keep the mulch pulled back slightly from plant crowns so stems stay dry and air can circulate.
Drip lines or soaker hoses deliver water directly to the root zone and keep foliage drier than overhead sprinklers, which can matter for disease-prone crops like brassicas. If overhead watering is your only option, watering in the morning gives foliage time to dry before evening, which reduces conditions favorable to fungal problems.
Rotate families after pest or disease trouble
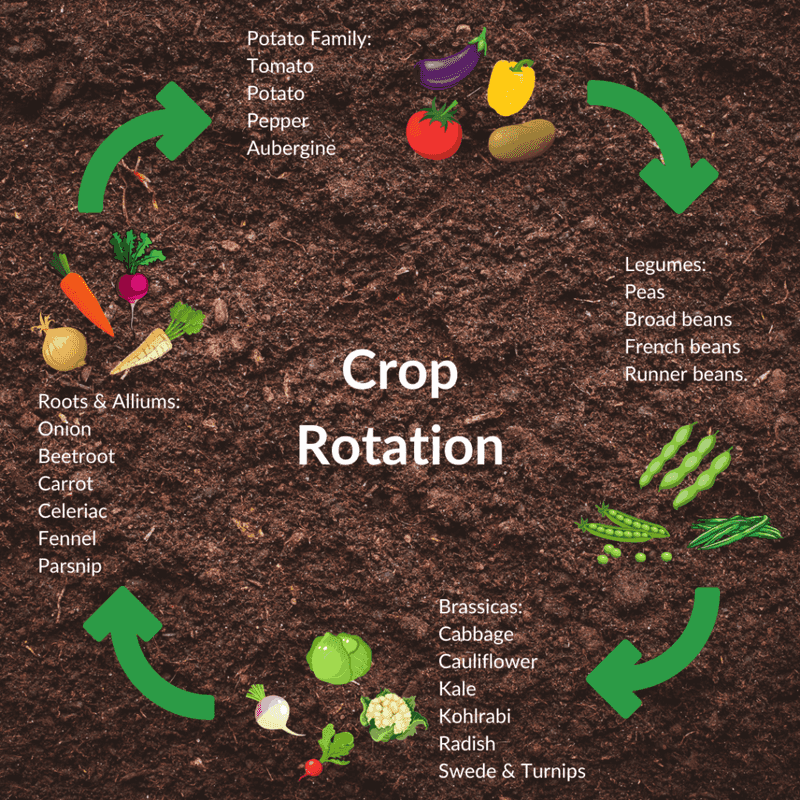
Repeating the same crop family in a bed that had serious pest or disease pressure is one of the most reliable ways to carry problems forward into fall. Rotation by plant family, not just by species, is the key concept here.
Tomatoes, peppers, eggplant, and potatoes all belong to the solanaceous family. Cucumbers, squash, and melons share the cucurbit family.
Broccoli, cabbage, cauliflower, radishes, turnips, and kale are all brassicas. Penn State Extension’s crop rotation guide explains that switching between families, rather than merely swapping one tomato variety for another, is what reduces the buildup of family-specific pests and soilborne pathogens.
If last summer’s tomatoes or peppers showed signs of bacterial wilt, early blight, or other disease pressure, planting a brassica or a leafy green in that spot for fall is a reasonable move. The same logic applies to beds where squash or cucumbers struggled with disease: a fall planting of collards or carrots puts a different plant family in the ground and gives the soil a break from cucurbit-specific problems.
Rotation helps but carries limits. Penn State’s ecological disease management guidance notes that some pathogens survive for multiple years, have broad host ranges, or spread through wind, water, and tools regardless of what you planted before.
Cooler fall weather may reduce some insect pressure, but UGA warns that cabbage loopers and other pests can still cause significant damage. Keep scouting your beds through the season.
Leave an unused bed protected with a cover crop
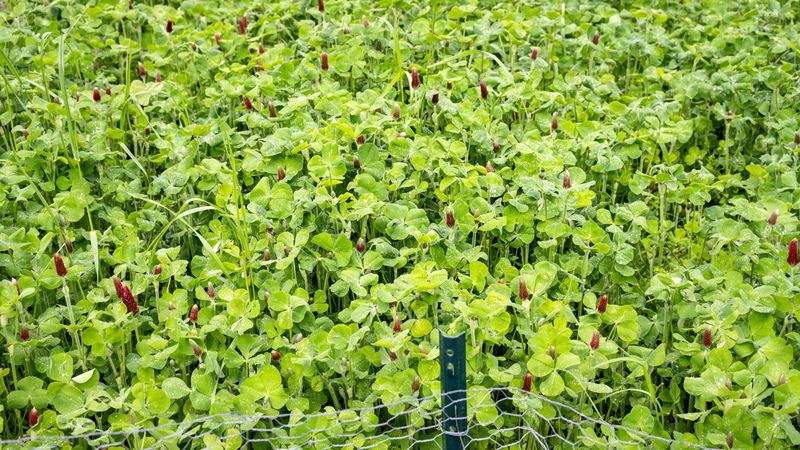
Sometimes a bed genuinely needs a rest from food production, whether because of unresolved disease, structural soil problems that require more time to address, or simply because your planting calendar is full. A cover crop is one practical option for keeping that bare soil protected through the off-season.
Combinations such as cereal rye, wheat, or oats paired with a legume like crimson clover or winter peas are commonly used in the South. UGA’s fall vegetable gardening guide mentions these combinations as options for protecting soil and adding organic matter when a bed will remain out of food production.
The cereal component provides ground cover and biomass; the legume can fix atmospheric nitrogen and contribute it to the soil after termination.
Cover crops are not a substitute for diagnosing and addressing serious underlying problems. If a bed has persistent nematode pressure, drainage issues, or severe compaction, a cover crop will protect the surface but will not resolve those problems on its own.
Texas A&M’s soils and fertilizers guidance reinforces that soil problems require targeted diagnosis and management rather than a blanket amendment approach.
Plan to terminate the cover crop before it sets seed or begins to compete with your next planting. A productive bed that rested well through winter is often easier to work in spring than one that was left bare and compacted.
The best cover crop is the one you actually manage through to a clean finish.