
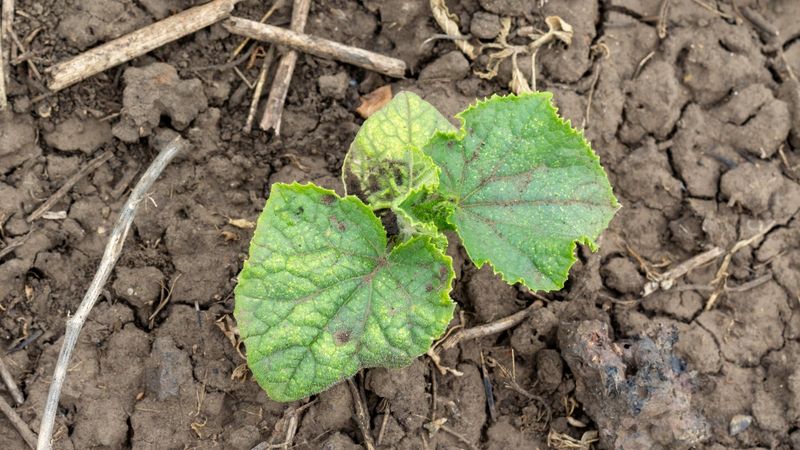
Planting a second cucumber crop in late summer is one of the smartest moves a Southern gardener can make, but watching those seedlings turn yellow just days after sprouting can feel like the whole effort is about to fail. Before you reach for a fertilizer bottle or blame the heat, the most useful thing you can do is look closely at exactly which leaves are turning yellow.
That single observation changes everything about how you respond.
Start with the leaf that is turning yellow
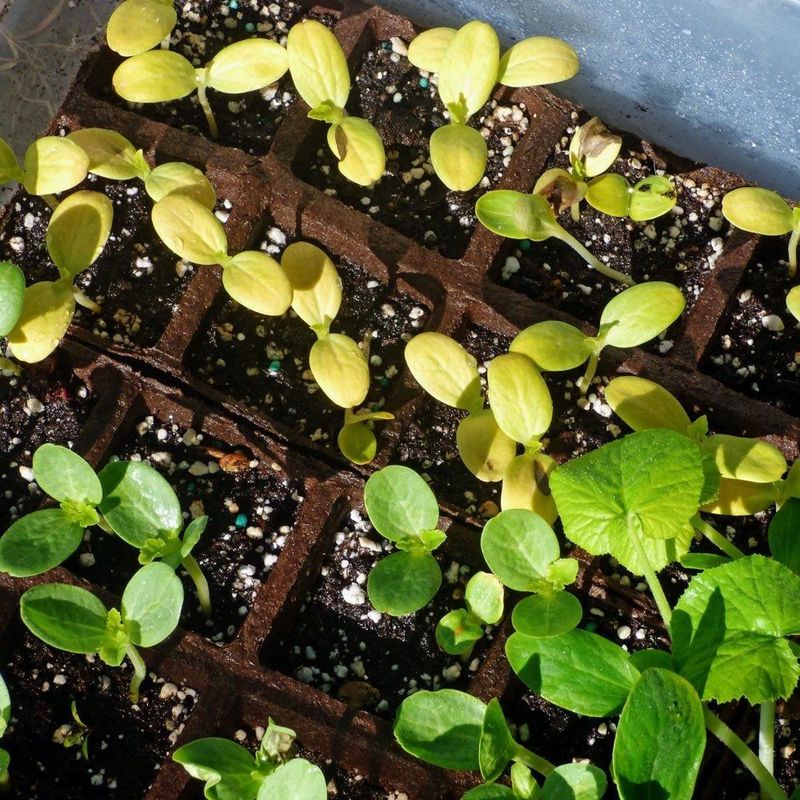
Knowing which leaf is yellow matters more than any other step in this process. A cucumber seedling carries two types of leaves at once: the rounded, smooth seed leaves called cotyledons that pushed up first through the soil, and the first true leaves that follow with a serrated or slightly lobed edge.
These two leaf types have completely different jobs, and their yellowing means very different things.
University of Missouri Extension seedling guidance explains that once true leaves begin producing food through photosynthesis, the cotyledons are no longer needed and will naturally turn yellow and die. Peer-reviewed cucumber research also documents this cotyledon senescence as a normal part of seedling development.
So if only the two bottom rounded leaves are yellowing while the true leaves above them look green and are continuing to expand, you may be watching a completely normal transition.
The situation changes when yellowing reaches the true leaves themselves. Yellow, curled, wilted, or slow-to-expand true leaves combined with stunting or collapse are the signs that point toward a real problem requiring diagnosis.
Penn State Extension’s plant health diagnostic guidance lists several possible causes for poor seedling growth, and none of them can be identified from leaf color alone. Use the leaf type as your first decision point before taking any corrective action.
Warm soil supports germination, but excessive heat can stall seedlings
Cucumbers are warm-season plants that genuinely need warm soil to germinate reliably. Alabama Cooperative Extension soil temperature guidance places the practical minimum for cucumber germination around 60 to 65 degrees Fahrenheit, with optimum germination occurring across a broader warm range.
University of Wisconsin Extension similarly recommends checking soil temperature before planting rather than relying on calendar dates alone. Warm soil is not the enemy here.
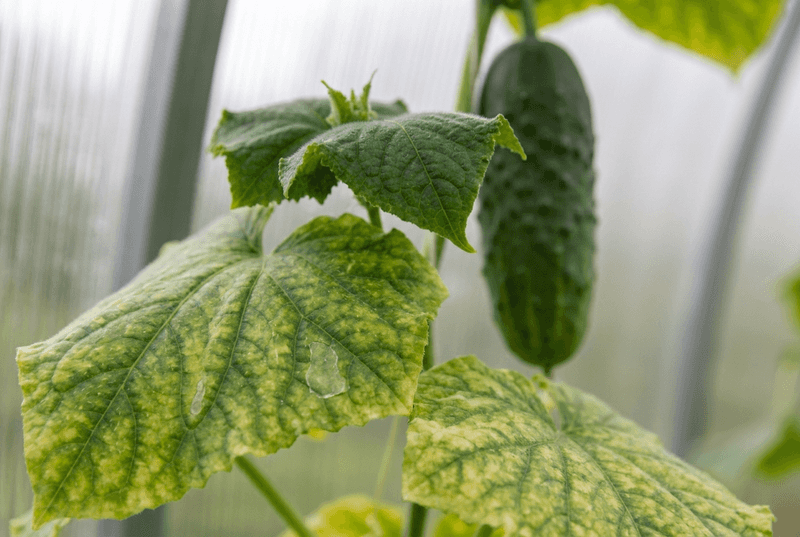
The problem is that late-summer conditions in Florida and Texas can push well beyond reliably warm into genuinely extreme. When root-zone temperatures climb into the upper ranges and humid air settles around young seedlings with little airflow, the plant’s ability to manage stress breaks down.
Published research on high-temperature and high-humidity stress in cucumber seedlings found severe chlorosis, curled growing tips, reduced chlorophyll content, and reduced biomass in plants exposed to these combined conditions. Separate peer-reviewed heat-stress research confirmed that elevated temperatures accelerate chlorophyll degradation and restrict cucumber growth.
The distinction worth holding onto is this: warm soil helps cucumbers start, while excessive heat combined with humidity, poor air circulation, or moisture problems can harm seedlings that have already emerged. University of Georgia Extension cucumber guidance supports evaluating the full growing environment rather than treating a single temperature reading as a diagnosis.
Assess air temperature, humidity, shade patterns, and soil drainage together before drawing any conclusions.
Check the soil before changing the watering schedule
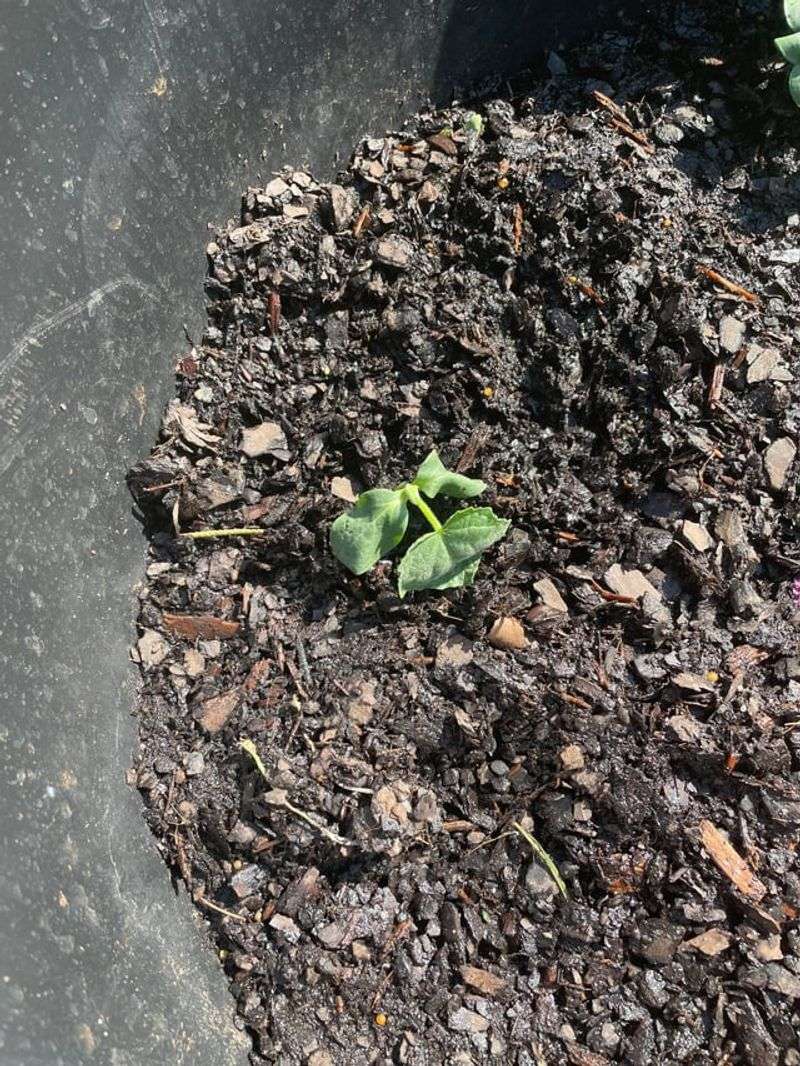
Soil moisture is one of the most common reasons young cucumber seedlings yellow and stall, and the trouble is that both too little and too much water can produce symptoms that look nearly identical from above. Before adjusting anything, press a finger an inch or two into the growing medium.
Dry, crumbly soil that pulls away from the roots tells a different story than soil that stays cold, heavy, and waterlogged long after the last watering.
A seedling sitting in dry soil may wilt, curl its leaves, and slow down because it cannot move nutrients or stay turgid. A seedling sitting in saturated soil faces a different threat: the roots are deprived of oxygen, become damaged, and lose the ability to absorb water even when plenty is present.
Both situations can cause yellow leaves and stalled growth, and the correction for one will make the other worse. University of Minnesota Extension cucumber guidance recommends keeping soil evenly moist rather than allowing extreme swings in either direction.
UC IPM cultural tips for cucumbers and NC State Extension’s cucumber profile both support watering at the soil surface rather than overhead to keep foliage dry and reduce disease pressure. A drip line or soaker hose placed at the base of seedlings is a practical way to maintain consistent moisture without wetting leaves.
Good drainage is equally important: if water pools after rain or irrigation and does not clear within an hour or two, the bed structure itself may need adjustment before any watering schedule change will help.
A damaged stem makes damping-off more likely
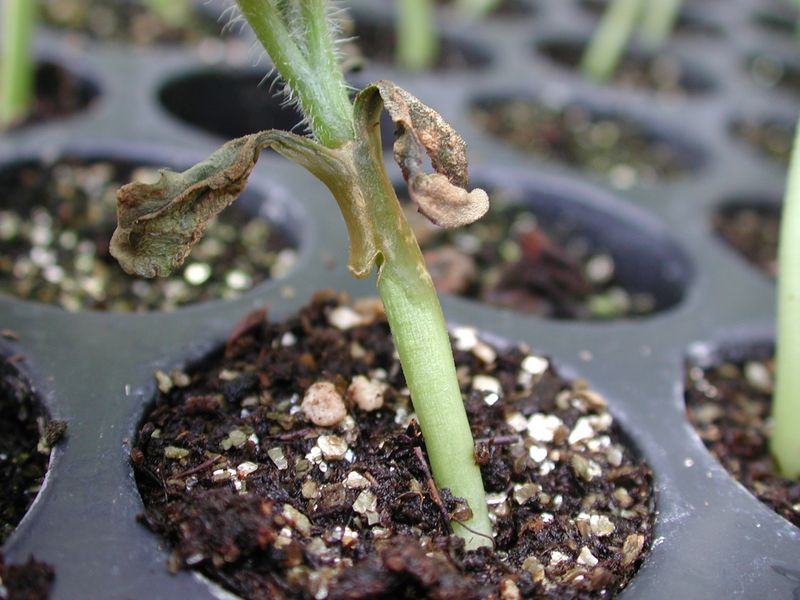
Not every yellow seedling has damping-off, and it is worth resisting that conclusion until you have actually looked at the stem. Kneel down and examine each seedling right where it meets the soil surface.
A pale or slow-growing seedling that is still standing upright with no visible stem damage is not a strong candidate for this disease. The seedlings that genuinely raise concern are the ones with a water-soaked, brown, sunken, or pinched-looking area at or just below the soil line, often wilting and toppling even when the soil is moist.
Penn State Extension’s damping-off prevention guidance and UC IPM’s damping-off resource both connect this disease primarily with excess moisture, poor drainage, densely sown seedlings, and inadequate sanitation rather than with heat alone. Washington State University’s damping-off fact sheet describes cool, wet, and waterlogged conditions as particularly favorable, though warm, humid conditions can still create the persistent moisture that feeds the disease.
Texas A&M Plant Clinic and NC State Extension both emphasize that prevention through clean containers, fresh disease-free seed-starting medium, and proper drainage is far more reliable than trying to treat an active outbreak.
If you find seedlings that have already collapsed with clear stem lesions, remove them promptly along with the surrounding medium rather than attempting to revive them. Badly collapsed seedlings rarely recover, and leaving them in place allows the pathogen to spread to healthy plants nearby.
Thinning dense stands, improving airflow, and watering at the soil surface are the practical steps that protect the seedlings still standing.
Uniform yellowing can reveal a shared medium or chemical problem
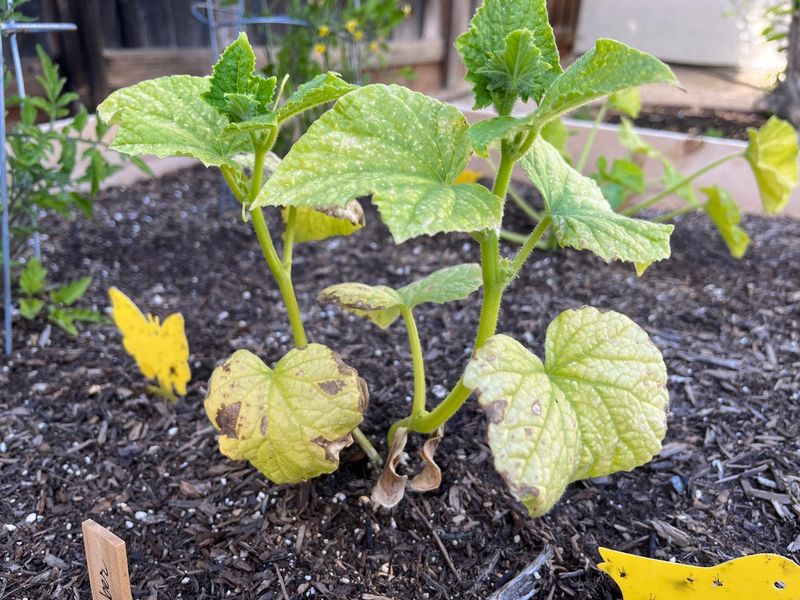
When every seedling in a flat or bed looks equally pale and slow, that pattern is a useful clue. Problems that hit one plant randomly tend to be localized, but when the entire batch yellows at once, the cause is more likely something all of the seedlings share: the growing medium, the water source, a recent chemical application, or the light and temperature conditions affecting the whole space.
Penn State Extension’s plant health diagnostic resource lists inadequate light, poor fertility, excessive heat, and chemical injury among the causes of uniform poor seedling performance. Iowa State University Extension guidance on yellow-green seedlings associates pale, slow growth with nitrogen deficiency, but also cautions that poor-quality or depleted growing medium can produce the same appearance without any fertilizer deficiency being the primary driver.
Before applying any fertilizer, check the stage of the plants: newly germinated seedlings with roots still developing around fresh medium are sensitive to concentrated products, and overfertilization or soluble salt buildup can injure roots and worsen yellowing. Alabama Cooperative Extension greenhouse cucumber guidance recommends plain water until true leaves emerge, then diluted fertilizer applied carefully according to the product label.
Chemical exposure is an important possibility that gardeners sometimes overlook. If the bed was recently treated with a weed killer, or if compost, manure, hay, or treated lawn clippings were added, herbicide residue may be present.
UC IPM’s herbicide symptom resource and Virginia Tech Extension guidance on herbicide residue injury both describe yellowing, distortion, and stunting as possible early symptoms. Ask whether any lawn product, runoff from a treated area, or contaminated organic material reached the seedling bed before adding any amendments.
Patchy symptoms and feeding damage require a separate inspection
Scattered collapse, a few plants wilting while neighbors look fine, or visible holes in leaves alongside yellowing all point toward something more localized than a bed-wide environmental problem. When symptoms are patchy rather than uniform, the investigation shifts toward disease concentrated in one spot, isolated soil conditions, or insect activity.
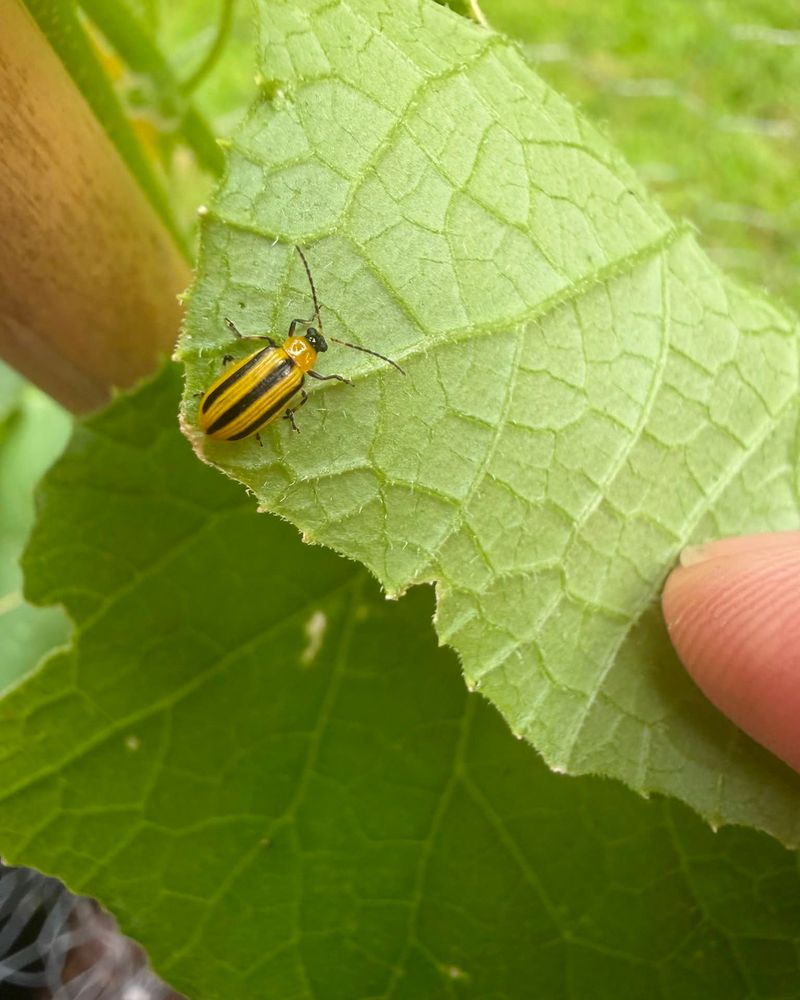
Cucumber beetles are worth checking for, especially in Southern gardens where they are active during the late-summer planting window. University of Georgia Extension cucumber guidance notes that cucumber beetles can attack seedlings at the cotyledon stage and may transmit bacterial wilt, which causes sudden collapse.
Look for the beetles themselves, feeding holes in leaves or stems, or rapid wilting that does not match the soil moisture level. That said, beetles are less likely to explain uniformly yellow seedlings across an entire bed when no feeding damage is visible, though their absence from a quick glance does not rule them out completely.
UC IPM’s damping-off resource and Penn State Extension’s diagnostic guide both support reading symptom distribution as a diagnostic clue. Rapid plant-to-plant collapse spreading outward from one area fits a soilborne disease pattern better than a shared environmental stress.
Once you have mapped where the problem is concentrated, that location often points toward where to look first: a low spot with poor drainage, a patch of soil with old debris, or an area where beetles were feeding days before symptoms appeared.
Give young plants a cooler, steadier start
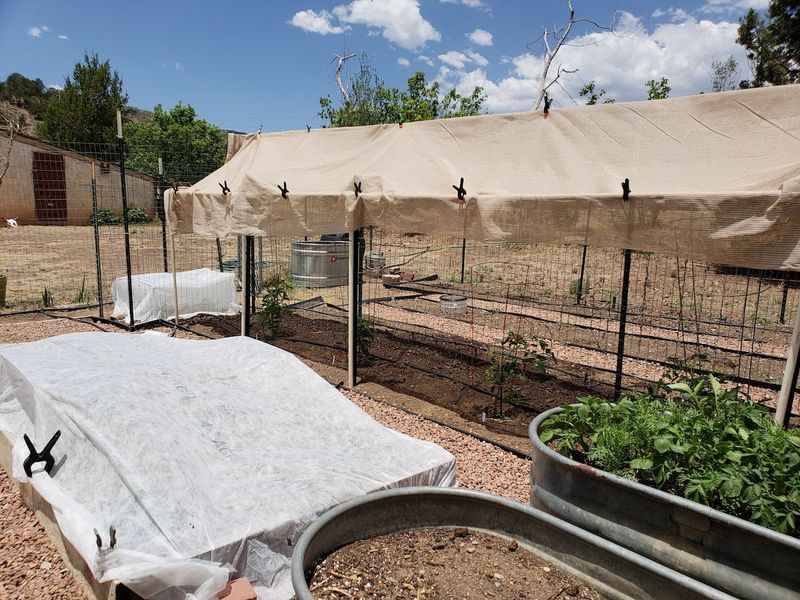
Once you have identified what is likely causing the problem, the corrections fall into a short, practical sequence. Start with physical protection during the harshest part of the day.
UC IPM’s cultural tips for cucumbers recommend shading summer-transplanted cucumbers during midday for the first week or using a floating row cover. This is temporary protection, not a permanent solution: cucumbers need strong light to grow well, and keeping them shaded all day will produce weak, stretched growth.
The goal is to take the edge off the most extreme afternoon heat while the root system establishes.
Stabilize moisture next. Water when the top inch of soil is beginning to dry rather than on a fixed schedule, and direct water to the soil surface rather than over the foliage.
University of Minnesota Extension supports consistent moisture in well-drained soil as a foundation for healthy cucumber growth. If drainage is slow, address that before adjusting how often you water.
Hold off on fertilizer until true leaves are actively growing and the plant looks stable. Newly germinated seedlings are sensitive to concentrated products, and root injury from fertilizer salts can worsen yellowing rather than correct it.
Alabama Cooperative Extension greenhouse guidance and NC State Extension’s damping-off resource both caution against overfeeding young seedlings. When you are ready to feed, follow the product label and start with a diluted rate.
If you plan major fertility or pH changes to the bed, UGA Extension recommends a soil test first, with a preferred cucumber pH of roughly 6.0 to 6.5.
Match the fall crop to your local planting window
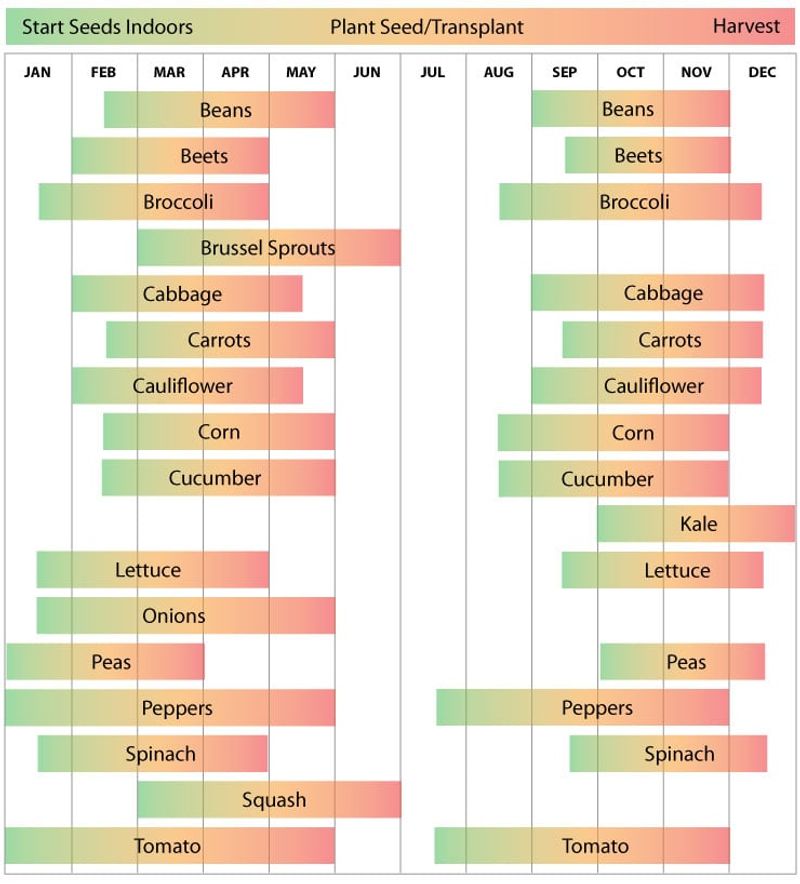
Seedling care and regional timing work together. Planting too early in the season means seedlings face the most brutal heat before conditions moderate; planting too late risks frost cutting the harvest short.
Neither Florida nor Texas uses a single statewide fall cucumber date, and following a generic Southern schedule can put seeds in the ground at the wrong time for your specific location.
UF/IFAS cucumber guidance and the UF/IFAS cucurbit production calendar show North Florida planting in July through August, Central Florida in September, and South Florida from September into February. Texas is equally varied: Texas A&M AgriLife’s fall vegetable gardening guide and the Texas A&M vegetable garden planting guide both provide region-specific windows rather than one date for the whole state.
Combine your local planting window with the checks covered throughout this guide: confirm that the yellowing leaf is a true leaf rather than a cotyledon, examine the stem at the soil line, verify that moisture and drainage are balanced, and rule out chemical exposure before reaching for any amendment. Getting the timing right reduces how much stress young seedlings face from the start, but the three things that most often separate a recovering seedling from a failing one are the leaf type, the stem condition, and the soil moisture level.