
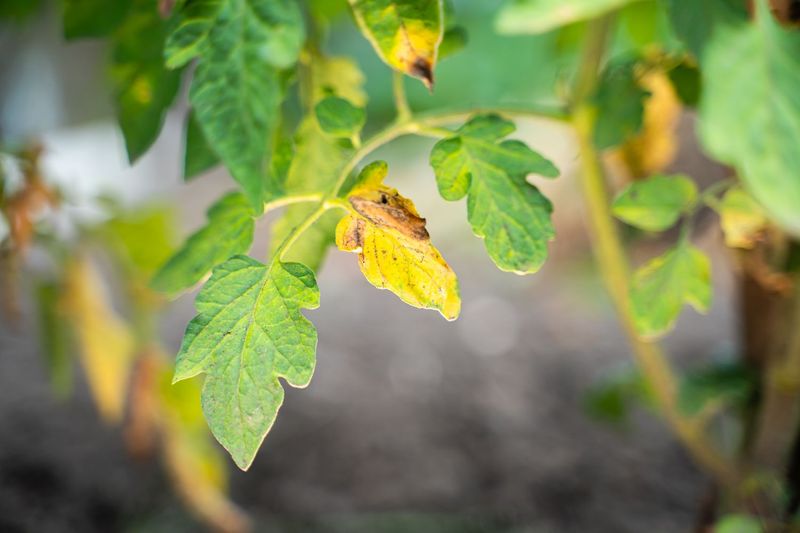
Walking out to your tomato plants and finding curled, yellowing leaves can stop you cold, especially when summer heat is already pushing your garden to its limits. The good news is that not every curled leaf means your plant is in serious trouble, and not every yellow leaf points to the same problem.
Watering is worth checking first, but it rarely explains both symptoms at once. This guide walks you through what to look for and when to call in extra help.
Heat can curl tomato leaves, but yellowing broadens the diagnosis
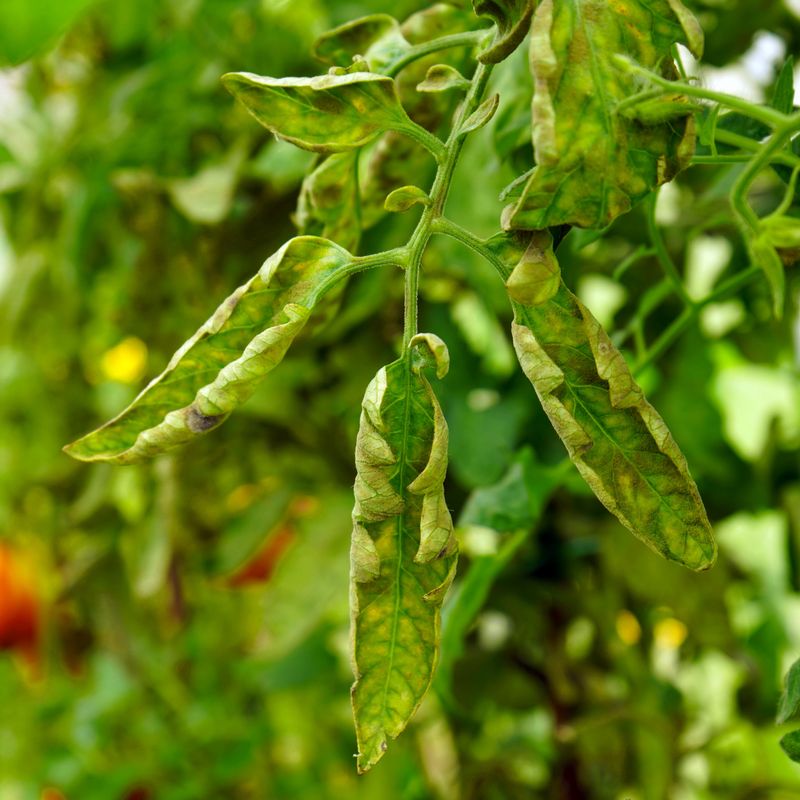
Curled tomato leaves on a hot afternoon can look alarming, but the pattern matters a great deal before you reach for the hose or start pulling plants. University of Minnesota Extension guidance on tomato disorders describes physiological leaf roll as a condition where older, lower leaves curl upward or inward, feel firm or leathery, and appear on a plant that is otherwise green, growing, and setting fruit normally.
That picture, lower leaves rolling on a vigorous plant with no mottling or severe stunting, is more consistent with heat or uneven moisture than with a serious disease.
Yellowing is a different story. Pale or yellow leaves can reflect nitrogen deficiency, early blight, Septoria leaf spot, Fusarium or Verticillium wilt, viruses, whitefly feeding, herbicide injury, excessive soil moisture, or root damage.
None of those causes respond to more water, and some get worse if you add it. Utah State University Extension’s overview of plant heat stress notes that heat can intensify existing problems and mask their true origin, making diagnosis harder in late summer.
Oklahoma State Extension’s fact sheet on non-infectious tomato diseases confirms that physiological leaf roll has several triggers beyond drought, including rapid growth, heavy pruning, root injury, and even cultivar genetics. The article that follows uses watering as a first diagnostic check, not as an automatic answer to either symptom.
Check the root zone before you reach for the hose
Leaf curl during the hottest part of the day does not reliably tell you whether the soil is dry. University of Minnesota Extension’s heat gardening guidance points out that heat alone can cause temporary wilting or leaf movement even when soil moisture is still adequate, so reacting to the leaves without checking the ground can lead to overwatering.
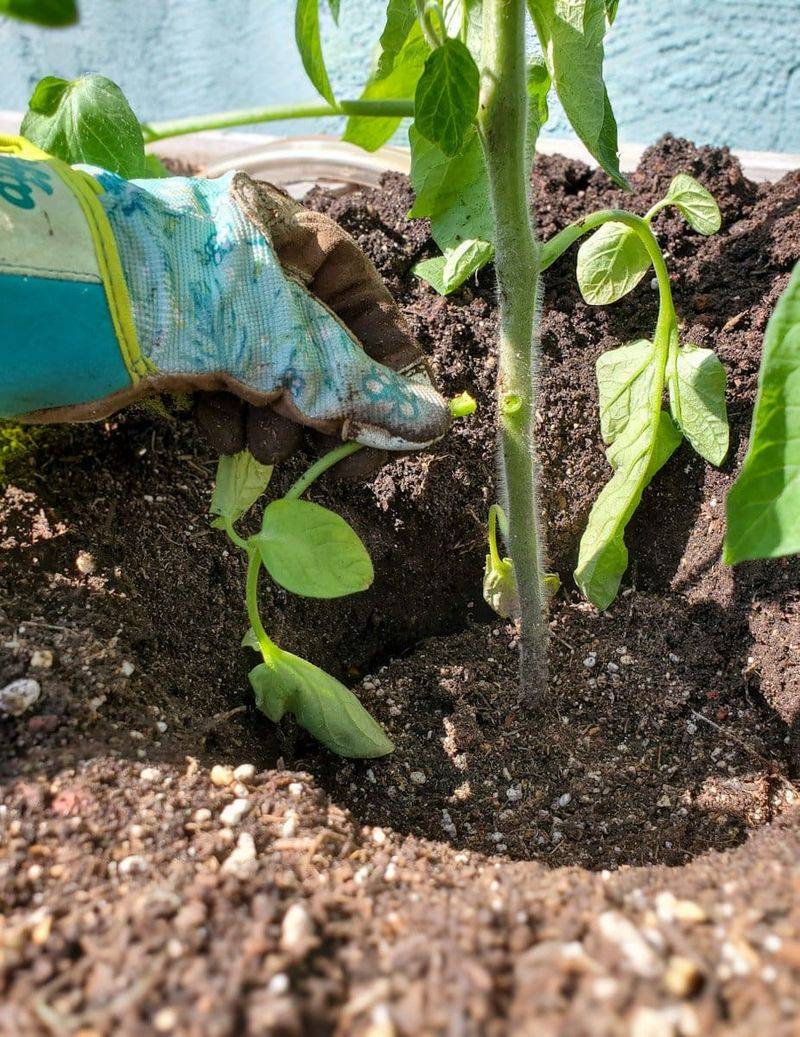
The most practical first step is a simple finger or trowel check. Push your finger two to three inches into the soil near the drip line of the plant, or use a hand trowel to pull back a small plug of soil at the root zone.
If the soil feels moist and cool at that depth, the plant may be reacting to air temperature rather than thirst. Utah State University Extension’s tomato growing guide recommends checking the root zone directly as the most reliable way to decide when watering is actually needed.
Checking at the same time each morning, before the heat of the day sets in, gives you a cleaner read. If the soil feels dry or barely damp at three to four inches down, that is a meaningful signal.
If it is still holding moisture, hold off on watering and reassess in the evening or the following morning. This single habit can prevent both drought stress and the root problems that come from waterlogged soil.
If the soil is dry, restore deep and even moisture
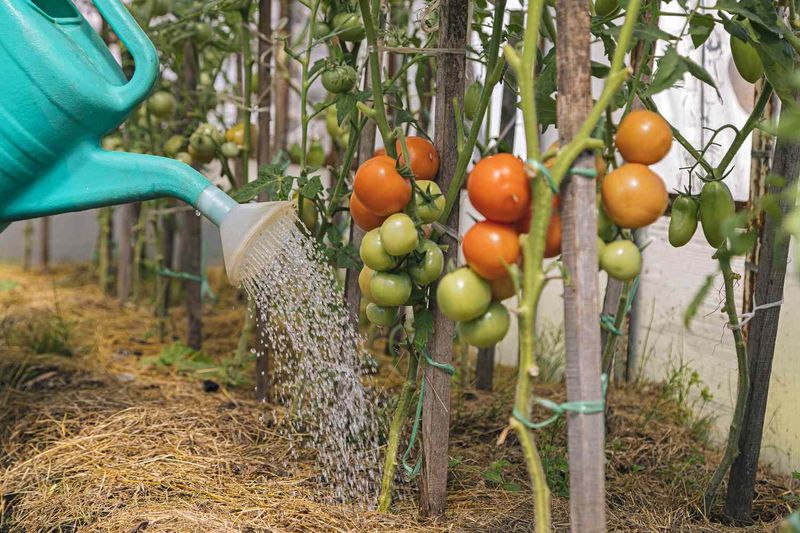
Once a root-zone check confirms that the soil is genuinely dry, the next step is to water thoroughly rather than quickly. Oklahoma State University Extension’s home tomato guide advises watering deeply enough to wet the soil to approximately 12 to 18 inches, which encourages roots to grow downward rather than clustering near the surface where they dry out fastest.
For established in-ground tomatoes, Utah State University Extension and University of Georgia Cooperative Extension both use approximately 1 to 2 inches of water per week as a reasonable starting range. That number is a starting point, not a rule.
Sandy soils, raised beds, periods of extreme heat or wind, and larger plants all push that range higher. Actual rainfall counts toward the total, so check before adding more.
The goal is even moisture between waterings, not a rigid calendar. Wet the root zone thoroughly, then check the soil again before the next application rather than watering on a fixed schedule.
Texas A&M AgriLife Extension’s water-efficiency guidance and UF/IFAS guidance on vegetable gardening in Florida both caution against repeated shallow applications, which promote shallow rooting and leave plants more vulnerable during dry spells. If the soil is already moist or poorly drained, adding water will do more harm than good.
Keep moisture steady without keeping foliage wet
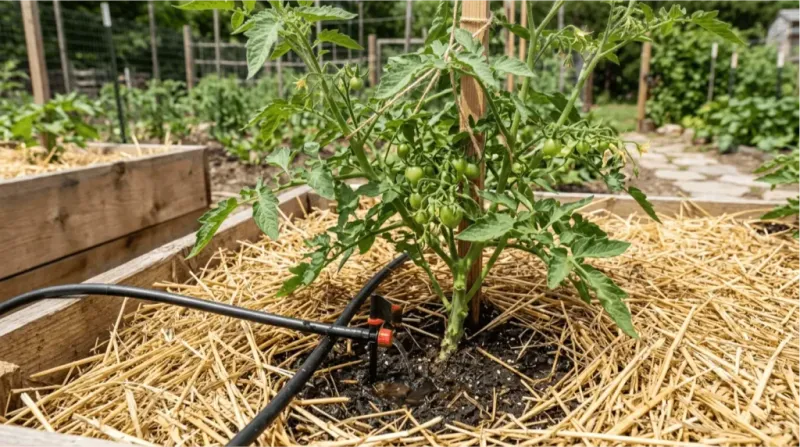
Correcting a dry root zone is only part of the job. Keeping moisture levels steady between waterings reduces the stress swings that make heat-related curl more likely and can also help prevent fruit problems like blossom-end rot and cracking.
Iowa State University Extension’s tomato guide and Colorado State University Extension both recommend watering at the soil surface rather than overhead, directing water to the root zone where it is actually needed.
Morning watering is generally practical because it allows any incidental moisture on leaves to dry before evening, reducing the window for disease. Drip lines or soaker hoses are especially useful in hot climates because they deliver water slowly at ground level without wetting foliage at all.
University of Georgia Cooperative Extension’s tomato troubleshooting guide highlights these delivery methods as a way to support root-zone moisture while reducing prolonged leaf wetness.
Mulch does a lot of quiet work in late summer. A 2- to 3-inch layer of straw, shredded leaves, or wood chips slows evaporation, moderates soil temperature, and buffers the soil against rapid swings between wet and dry.
Penn State Extension’s seedling-to-fruit tomato guide recommends keeping mulch a few inches away from direct contact with the stem to avoid trapping moisture against the base of the plant. None of these practices guarantee that curl or yellowing will resolve, but they support the steadier conditions tomatoes prefer.
Container tomatoes need a separate moisture routine
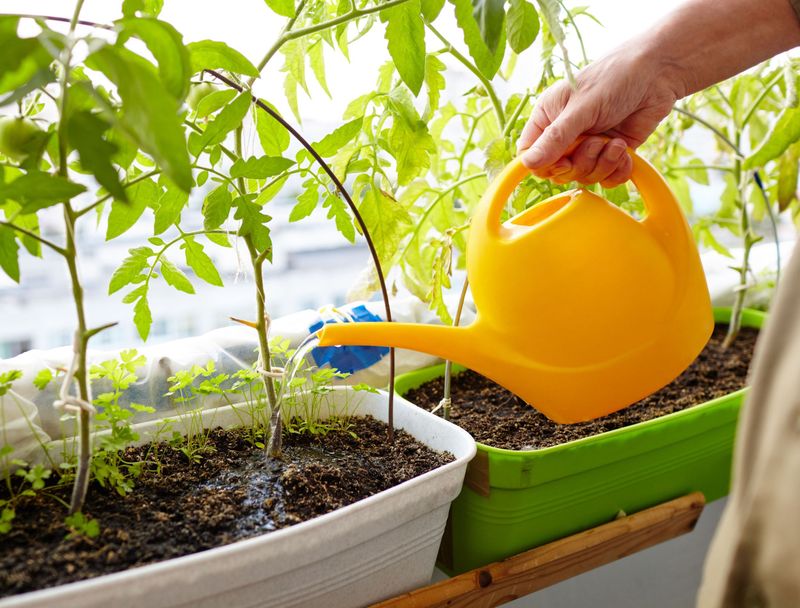
An in-ground watering schedule does not transfer to containers. Pots have a limited volume of potting mix, which heats up faster and dries out much more quickly than garden soil, especially on a concrete patio or wooden deck in full sun.
University of Minnesota Extension’s container plant guidance notes that container plants may need daily watering during hot, dry weather, and sometimes more than once a day when temperatures are extreme.
The only reliable way to know whether a potted tomato needs water is to check the potting mix directly. Push a finger an inch or two into the mix; if it feels dry at that depth, water thoroughly until it drains from the bottom.
If it still feels moist, hold off. Applying water on a fixed daily schedule without checking can leave the root zone saturated, which damages roots, invites fungal problems, and can actually cause the same curling and yellowing symptoms you were trying to prevent.
Container plants also tend to flush nutrients out of the mix faster than garden beds, so yellowing in pots may reflect both moisture stress and nutrient loss. Check moisture first, then consider whether the plant has been fertilized recently according to the product’s directions, and always base any nutrient adjustment on observation rather than assumption.
Use leaf age and markings to investigate yellowing
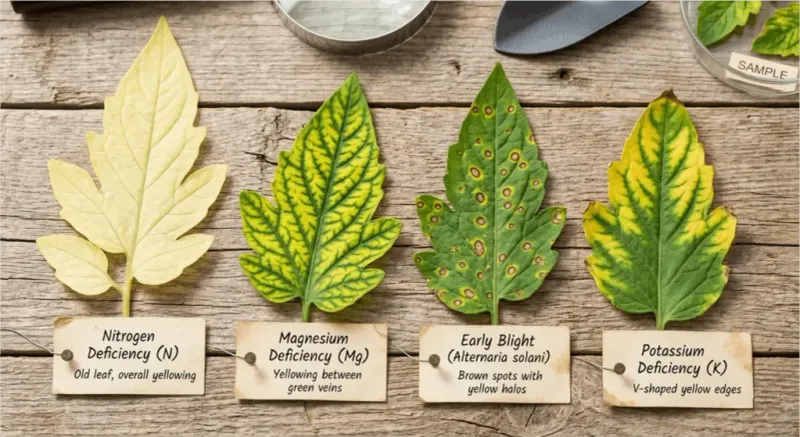
After checking root-zone moisture, the next most useful tool is a careful look at which leaves are yellowing and what they look like. Location and markings together narrow the list of likely causes considerably.
Plain, gradual yellowing that starts on the oldest lower leaves and moves upward can be consistent with nitrogen deficiency, especially later in the season when the plant is carrying heavy fruit loads. University of Minnesota Extension’s fertilizing guide recommends a soil test or nutrient analysis before adding any fertilizer, because guessing and applying nitrogen without confirming the deficiency can create new problems.
Texas A&M AgriLife Extension’s nitrogen deficiency overview describes this pattern as starting in older tissue first, which helps distinguish it from viral or other systemic issues.
Spots change the picture entirely. Small dark or tan lesions surrounded by yellow halos on lower leaves point toward fungal diseases like Septoria leaf spot or early blight rather than a watering or nutrient problem.
Penn State Extension’s tomato disease guide and their scouting and identification resource both recommend removing badly infected foliage, improving airflow around plants, mulching to reduce soil splash onto lower leaves, and avoiding overhead irrigation when disease is present. Watering more carefully may help slow spread, but it will not reverse existing lesions or clear an active infection.
New growth, stunting, and regional clues require escalation
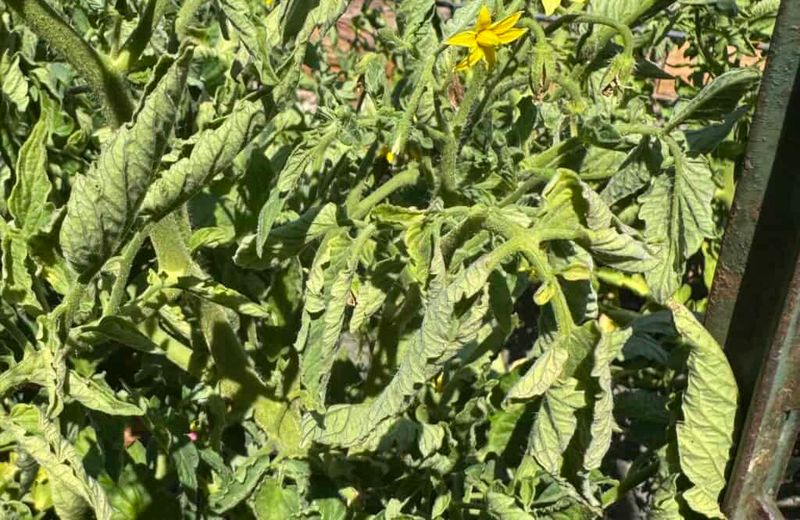
Some symptom combinations should make you stop treating the plant as simply thirsty and start looking for a different explanation. When yellowing or distortion shows up in new leaves rather than old ones, the cause is unlikely to be ordinary heat stress or a dry root zone.
Symptoms worth escalating include upward cupping of new leaves, reduced leaf size, marginal yellowing, mosaic or mottled patterns, purple veins, severe stunting, significant flower drop, poor fruit set, and the presence of whiteflies on the undersides of leaves. These combinations can point to virus, serious disease, or herbicide drift rather than moisture stress.
Twisted, cupped, or abnormally narrow new growth after nearby lawn or agricultural spraying is a strong indicator of herbicide injury.
Florida gardeners face a specific regional risk from tomato yellow leaf curl virus, which is transmitted by silverleaf whiteflies and can cause upward cupping, yellow leaf margins, shortened internodes, stunting, and sharply reduced yield. UF/IFAS Extension’s Florida tomato disease guide notes that visual diagnosis alone is unreliable, and UF/IFAS whitefly management guidance and Florida tomato disease control resources explain that the virus has no curative treatment once a plant is infected.
In Texas and across the southern Plains, Utah State University Extension’s curly top overview and Oklahoma State Extension’s virus and bacteria guide describe curly top as causing yellow, thickened, rolled leaves with purple veins and severe stunting. Plants showing these red-flag symptoms warrant contact with your local extension office or a plant diagnostic lab rather than repeated watering.
Treat moisture stress as a possibility, then reassess the plant
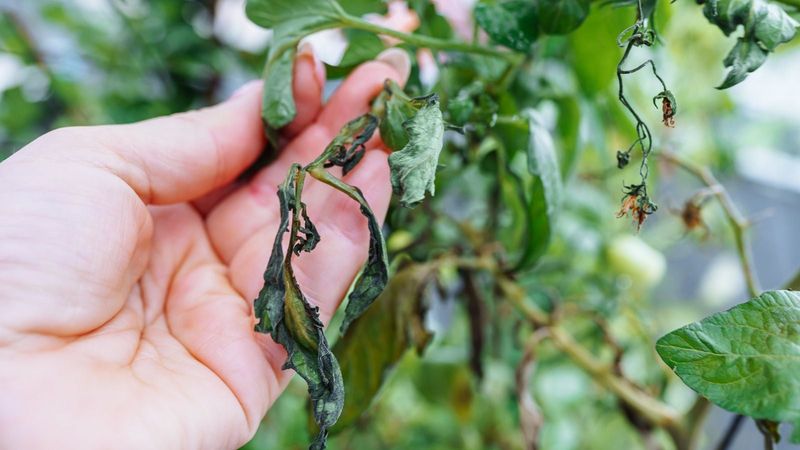
A practical path forward starts at the root zone. Check the soil first, correct genuinely dry or shallow watering if the evidence supports it, and then stabilize moisture delivery with appropriate irrigation and mulch.
After that, shift your attention to new growth rather than the curled older leaves.
University of Minnesota Extension and Utah State University Extension’s vegetable IPM advisory both note that physiologically rolled leaves may stay curled even after conditions improve. Waiting for those leaves to uncurl is not a reliable way to judge whether the plant is stabilizing.
Fresh, normal-looking new growth at the top of the plant is a better sign of recovery than any change in the older leaves.
Persistent yellowing, red-flag symptoms, or patterns that do not fit a simple moisture story are reasons to consult your local cooperative extension service or a plant diagnostic lab. Reliable heat-stress guidance consistently points back to the same principle: check the conditions, then read the plant.
A tomato that keeps pushing healthy new growth through late-summer heat is usually doing better than its lower leaves suggest.