
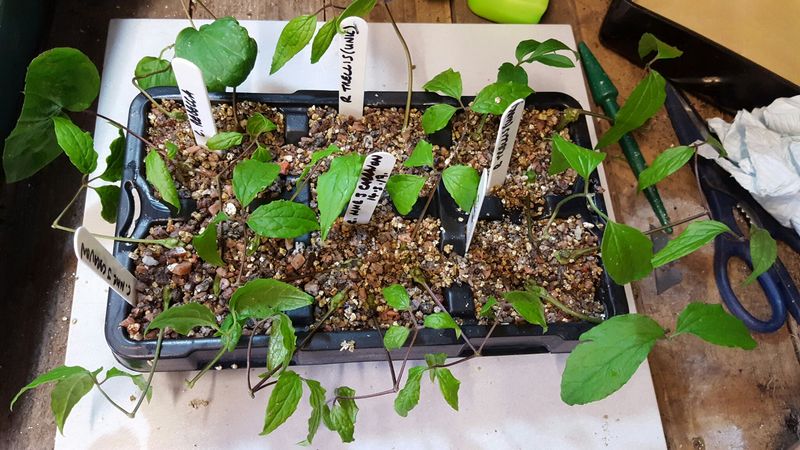
Your clematis is already doing the hard work of growing in your yard, so why not let it help you grow more? With a little patience and the right technique, you may be able to root stem cuttings from your existing vine and produce additional plants that are identical to the one you already love.
The process is not guaranteed, and it does take some supplies and attention, but for Southern gardeners willing to give it a try, it can be a genuinely satisfying way to fill more of the fence or share plants with a neighbor.
Try propagation when the plant reaches the right stage
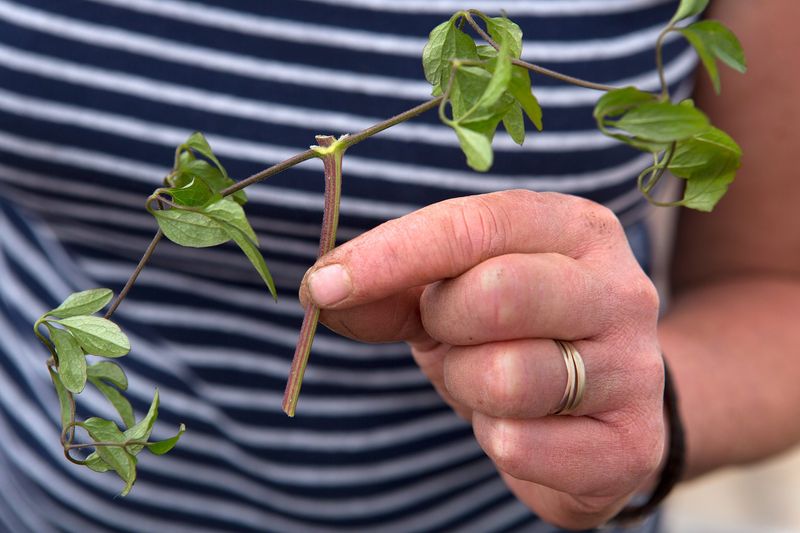
Rooting a cutting from your clematis is worth attempting, but the title’s promise deserves an honest qualifier right away. A successful cutting will produce a genetic clone of the parent, preserving its flower color and cultivar characteristics in a way that seed-grown plants cannot reliably do.
NC State Extension’s propagation handbook confirms that vegetative methods like cuttings reproduce true-to-type plants, which is one of their main advantages over growing from seed.
That said, cuttings may fail, require real supplies and attention, and may not be legally available for unauthorized reproduction depending on your plant’s patent status. The method works best as a trial using several cuttings at once, because rooting ability varies by species and cultivar.
University of Minnesota research on clematis propagation found meaningful differences among cultivars, so what roots easily from one plant may prove stubborn from another.
The most important thing to understand before you start is that growth stage matters more than the calendar month. Rather than targeting a fixed summer date, look for current-season shoots that are green and beginning to firm at the base.
RHS clematis growing guidance classifies this firming material as semi-ripe and supports taking it from summer into mid-autumn, with local climate determining exactly when that window arrives in your garden.
Select healthy, nonflowering current-season growth
Good cuttings start with a healthy parent. Before you reach for the pruners, make sure your clematis has been well watered and shows no signs of pest damage or disease.
University of Georgia Extension’s propagation guide notes that stressed or diseased stock is more likely to produce weak or failed cuttings and can spread problems through the propagation process.
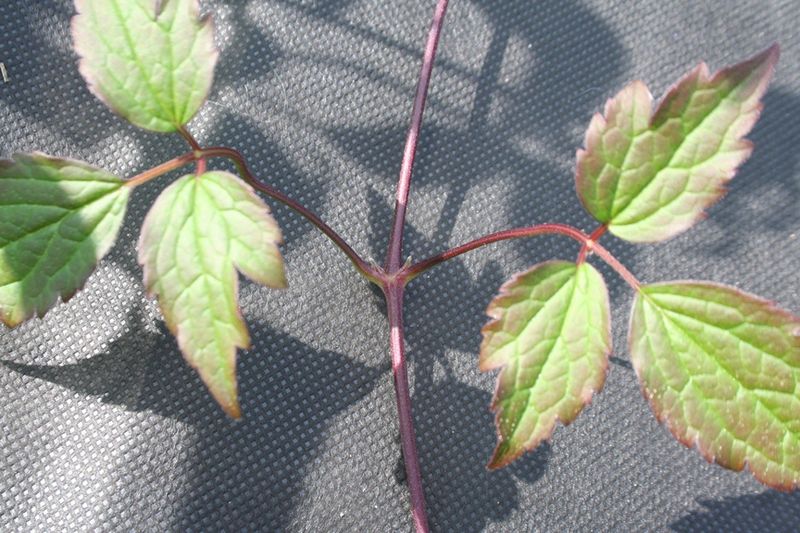
Once you have confirmed the parent is in good shape, look for current-season shoots where the base has started to feel slightly firm while the tip remains softer. Avoid the floppy, bright-green tips at the very end of a shoot, and skip any stems that have turned fully woody and brown.
RHS advice on semi-ripe cuttings describes this in-between stage as the sweet spot for summer propagation, and clematis responds well to it.
Flowering shoots are off the table. Nodes that carry flower buds can sometimes produce roots, but International Clematis Society propagation guidance warns that bud-bearing nodes may fail to generate a useful new shoot even when they do root.
For Southern gardeners, the timing of this growth stage depends on your local conditions rather than a fixed summer month, so check the plant rather than the calendar before you cut.
Cut each piece just below a node
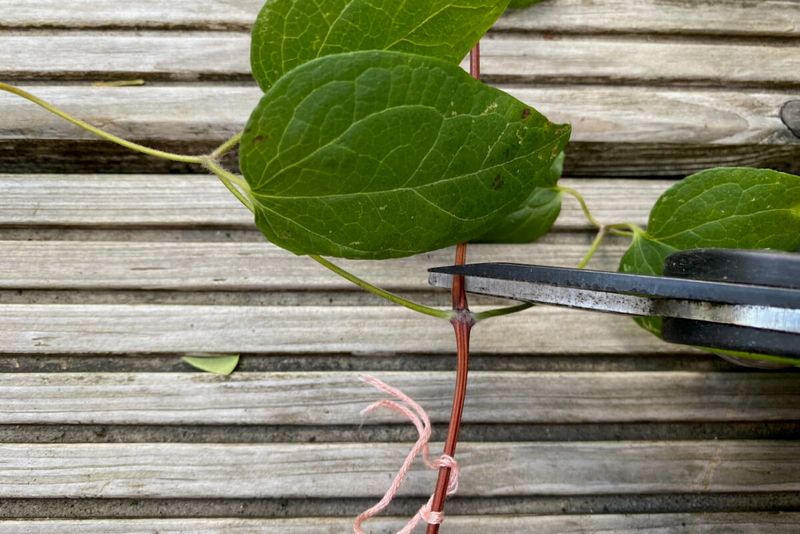
A well-prepared cutting gives roots the best possible start. Aim for a piece roughly 3 to 5 inches long with one or two nodes and at least one leaf or leaf pair above the surface once it is inserted into the medium.
UGA Extension and Clarke County Extension horticulture guidance both recommend sanitizing your pruners or blade before each cut to reduce the chance of transferring disease from plant to plant.
Make the lower cut just below a node, where rooting is most likely to begin. Strip away any leaves from the portion of the stem that will sit below the medium, but leave enough foliage above the surface to keep the cutting alive.
Too much leaf area increases water loss before roots can form, so if the remaining leaves are large, trimming them by half is a reasonable precaution.
Rooting hormone is optional, not required. International Clematis Society guidance mentions IBA-based formulations as a possible aid, and general extension sources treat hormone as something that may speed or improve results in some cases rather than a guarantee.
If you choose to use it, select a product labeled specifically for cuttings and follow the label instructions exactly. More hormone is not automatically better and can actually harm the cutting if applied too heavily.
Root the cutting in an airy, clean medium
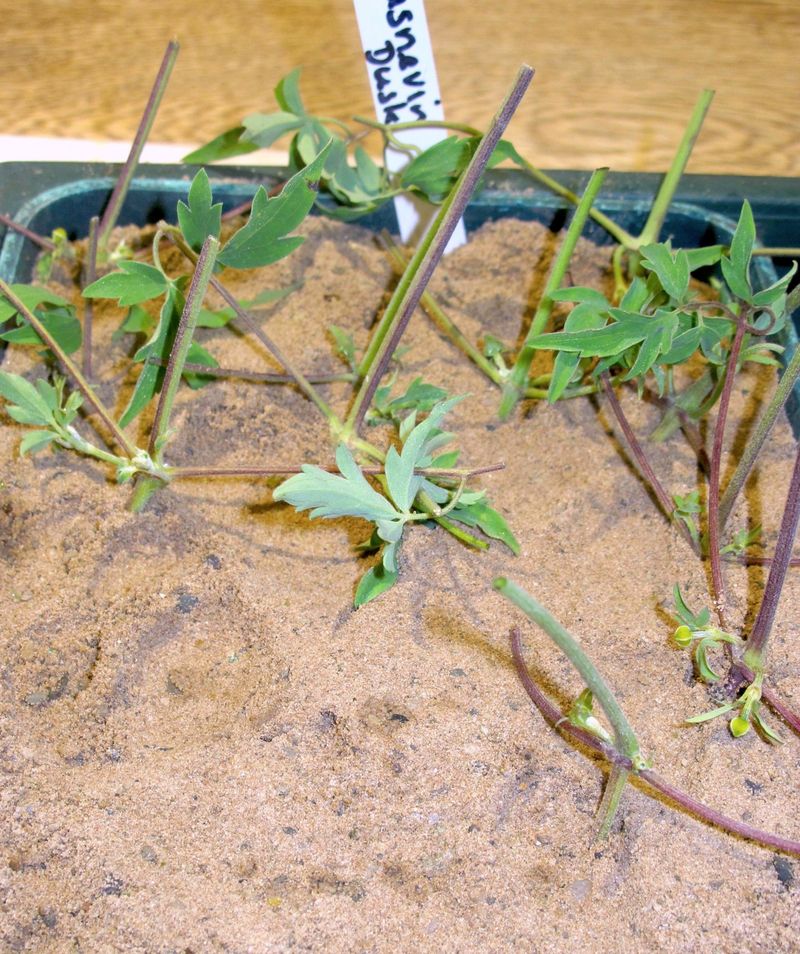
Ordinary garden soil is not the right choice for rooting clematis cuttings. It holds too much moisture, compacts easily, and introduces pathogens that can rot a cutting before roots ever form.
A low-fertility, well-drained but moisture-retentive medium such as perlite, coarse sand, or a blend of the two gives roots the air and drainage they need. NC State Extension’s propagation handbook recommends these types of media for stem cuttings broadly, and clematis research supports the same approach.
Research published in a peer-reviewed horticultural journal and summarized through University of Minnesota scholarship found that medium type affected rooting outcomes across clematis cultivars, with sand and perlite generally performing well. A related study in Scientia Horticulturae reported 71% rooting in pure perlite for the small-flowered varieties tested, but that figure applies to specific cultivars under controlled conditions and should not be read as a guaranteed home-gardener success rate.
Use clean containers and fresh propagation medium rather than reusing old pots without washing them. Moisten the medium thoroughly before inserting the cutting, then let any excess water drain away completely.
Push the cutting in so at least one node sits below the surface while all remaining leaves stay above it, and firm the medium gently around the stem to hold it upright.
Maintain humidity without trapping heat
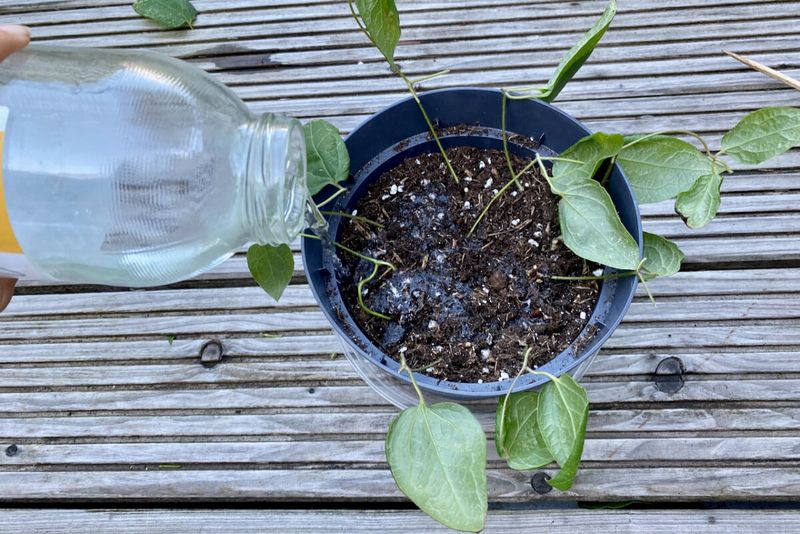
Unrooted cuttings lose water through their leaves and have no roots yet to replace it, so keeping humidity high around the foliage is the main job of aftercare. A clear plastic bag, a cut plastic bottle, or a propagation dome placed over the cutting creates the humid microclimate it needs.
Clemson Extension’s guide on propagation by cuttings recommends this approach while cautioning that the cover must not press directly against the foliage, which can cause rot where plastic touches leaf.
Light matters just as much as humidity. Place the covered cutting in bright indirect light or under filtered shade, and keep it well away from hot direct afternoon sun.
University of Nebraska-Lincoln Extension propagation guidance warns that a sealed plastic enclosure in direct sun can heat rapidly and damage leafy cuttings within a short time. University of Arkansas Cooperative Extension echoes the need for indirect light and even moisture rather than saturated conditions.
These precautions apply wherever summer sun and heat are intense, including covered patios and shaded side porches in hot-climate gardens.
Check the medium every day or two and water lightly if it starts to dry out, but never let it sit waterlogged. If condensation builds up heavily inside the cover, prop it open briefly to vent excess moisture.
Penn State Extension’s propagation resource also flags developing rot and persistent wilting as signals to increase ventilation rather than add more water.
Check roots before potting and hardening
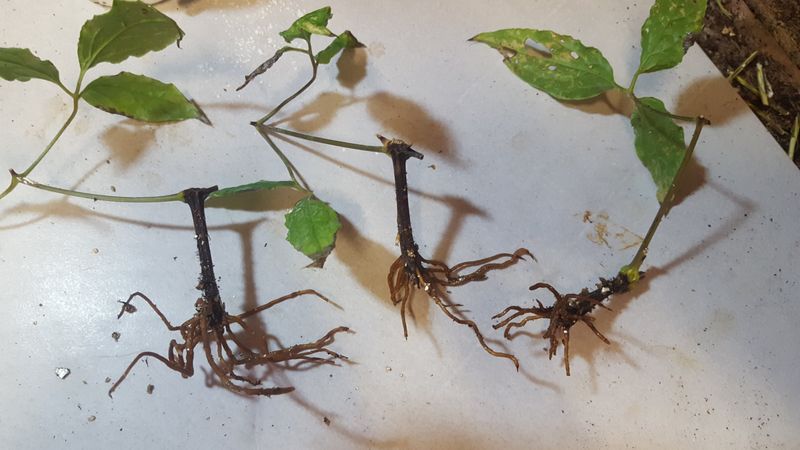
Patience is the hardest part of this step. RHS clematis growing guidance gives roughly six to eight weeks as a general timeline under warm, humid conditions, but cultivar and medium both influence how quickly or slowly roots develop.
Some cuttings may take longer, and a few may not root at all regardless of technique.
A new shoot emerging from the cutting is encouraging but not a reliable sign that roots are ready. International Clematis Society propagation guidance specifically cautions that a shoot can appear before the root system is strong enough to support transplanting.
Their recommendation is to wait for roots of roughly 6 cm or a visibly well-established root system before moving the cutting to a pot of proper growing mix. To check, gently tip the cutting out or tug it very lightly; resistance without pulling free suggests roots are forming.
Once you pot up a rooted cutting, harden it gradually by increasing ventilation and light over several days rather than moving it straight into full outdoor conditions. Protect the new plant through its first hot season by keeping its root zone shaded and evenly moist.
For large-flowered hybrid cultivars, University of Minnesota clematis research and International Clematis Society guidance both support waiting until a second summer before planting outdoors in challenging climates, though you should adapt that timeline to your own region and conditions. Do not expect a flowering-size vine the following season; RHS guidance anticipates flowering within two years under suitable conditions, and establishment speed varies.
Use layering when cuttings or the plant itself call for caution
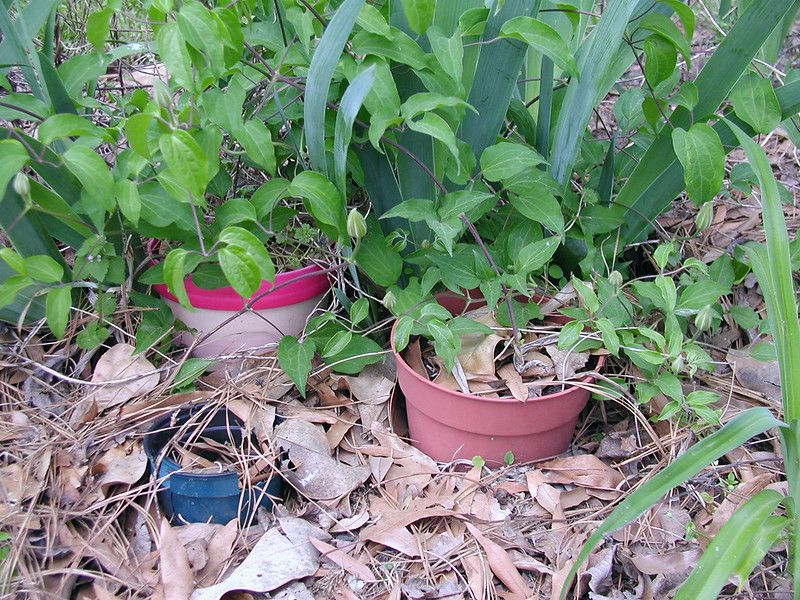
Some clematis cultivars simply refuse to root well from cuttings, and layering offers a more forgiving path when that happens. The technique keeps a flexible, low-growing stem attached to the parent plant while roots form at a buried node, so the stem continues drawing water and nutrients the whole time.
Oklahoma State Extension’s layering guide notes that layering can offer greater success for hard-to-root plants and specifically lists clematis as a candidate.
Before removing any shoots for cuttings or layering, check which pruning group your clematis belongs to. Some types bloom on old wood, some on new wood, and some on both.
NC State Extension’s clematis plant profile and RHS clematis guidance both describe these pruning groups in detail. Taking a few suitable cuttings is very different from aggressively pruning the entire vine, but it is still worth understanding which stems matter most for next season’s flowers before you start cutting.
Florida gardeners face an additional check. Sweet autumn clematis, known botanically as Clematis terniflora, is considered invasive in Florida by UF/IFAS.
The UF/IFAS plant directory entry for Clematis terniflora and UF/IFAS Gardening Solutions on sweet autumn clematis both advise against planting or propagating it there. Confirm your species before multiplying any clematis in Florida.
Plant patents add another layer to check before propagating. USPTO plant patent basics explain that U.S. plant patents can restrict asexual reproduction, including rooting cuttings.
A label marked PPAF means protection is pending, not necessarily granted; USPTO MPEP section 1601 clarifies the distinction. For any commercial propagation, sale, or distribution of a protected plant, obtain permission from the patent holder or consult a professional rather than assuming personal garden use covers all situations.
Finally, ASPCA lists Clematis spp. as toxic to dogs, cats, and horses, with possible salivation, vomiting, and diarrhea. Wearing gloves when handling cuttings or sap is a sensible precaution for anyone with sensitive skin.
Give several cuttings a fair chance
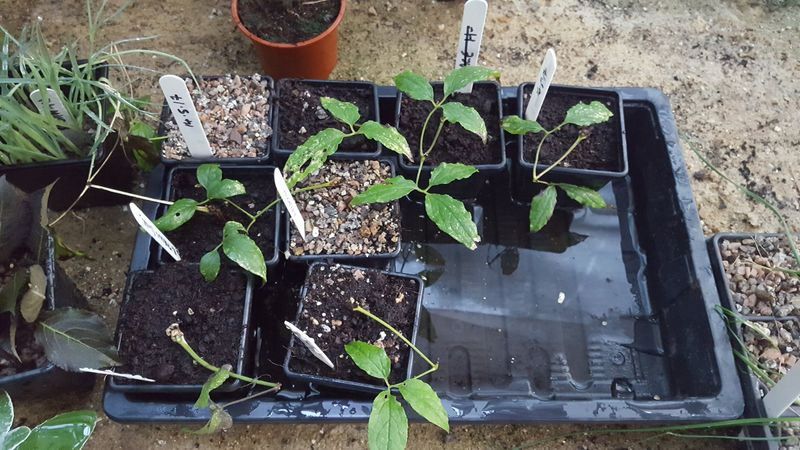
Rather than acting on a fixed calendar date, wait until your clematis produces green, firming current-season growth with no flower buds, then prepare several clean one- or two-node cuttings at once. Taking multiple cuttings matters because results vary by cultivar, tissue maturity, medium, and care, and some will simply not root regardless of what you do right.
RHS guidance on semi-ripe cuttings and NC State Extension’s propagation handbook both support this multi-cutting approach as a practical hedge against variable outcomes.
Use a clean, airy medium, maintain humidity with a clear cover kept off the foliage, and protect the enclosure from direct hot sun. Advance only cuttings that have developed a genuine root system, harden them gradually, and keep new plants sheltered through their first demanding season.
RHS clematis growing guidance anticipates flowering within two years under suitable conditions, but your timeline will depend on the cultivar and your local climate.
Propagating from an established plant can produce additional vines that are true to the parent, but success, timing, and legal permissions all vary. The best outcome is more plants you already know you like, grown from a vine that has already proven itself in your yard.