
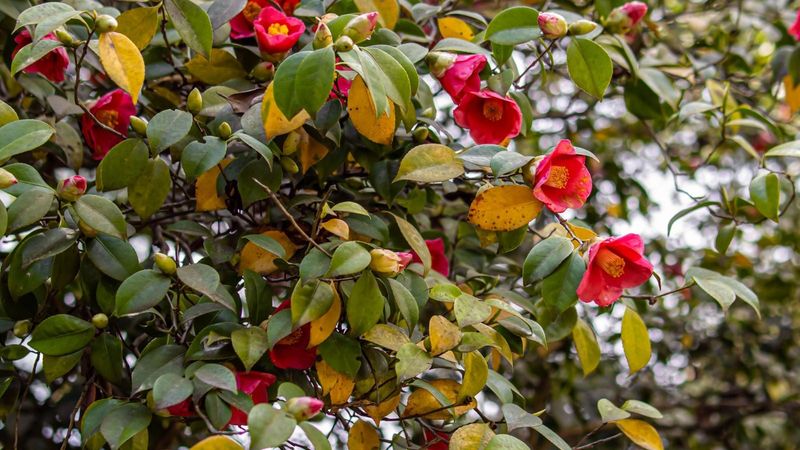
Camellia shrubs are a backyard favorite across North Carolina, prized for their glossy leaves and stunning fall and winter blooms. When those leaves suddenly turn yellow in autumn, many gardeners panic and reach for the watering can or fertilizer bag, which can make things worse.
Rapid yellowing can point to roots that have been sitting in soggy soil too long, but it can also mean something else entirely. Before you treat your plant, take a few minutes to read what your camellia is actually telling you.
Yellowing in Fall Is a Clue, Not a Diagnosis
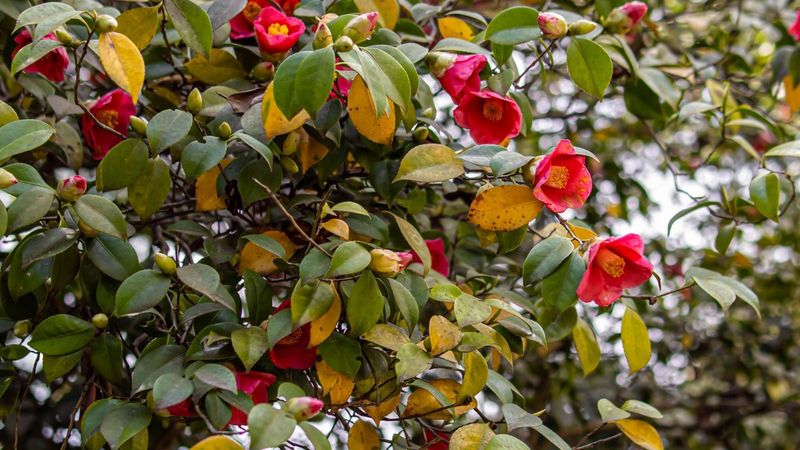
Broad-leaved evergreens like camellias do not hold every leaf forever. Clemson’s leaf-drop guidance notes that periodic shedding of older interior foliage is a normal part of the plant’s cycle, often happening in summer or early fall.
When a handful of older leaves near the center of the shrub turn uniformly yellow and drop while the newer outer growth stays a healthy, deep green, that pattern alone is not cause for alarm.
The more concerning picture looks very different. Widespread yellowing that moves across new growth as well as old, a plant that seems to wilt even after rain, noticeably weak or stunted new shoots, or branches that are dying back from the tips, those are signals that something beyond routine leaf drop may be happening.
Clemson’s camellia disease and pest factsheet connects this broader pattern of decline to root problems, particularly when soil stays saturated.
Yellow leaves in fall are a clue worth following, not a confirmed verdict. The same symptom can result from saturated roots, poor soil pH, scale insects, freeze damage, sun exposure, drought stress, or a nutrient imbalance.
NC State’s camellia profile reinforces that sound care decisions rest on matching the leaf pattern with what you find in the soil, at the root zone, and in the plant’s recent growing conditions.
Start by comparing what you see on the foliage with what is happening below the surface and around the plant. Is the soil wet or dry several inches down?
Has there been unusual rainfall or irrigation? Are the affected leaves scattered uniformly across the interior, or is yellowing spreading outward into new growth?
Answering those questions before reaching for a hose, a fertilizer bag, or a pruning saw is the single most useful thing you can do for your shrub right now.
Why Saturated Soil Can Turn Camellia Leaves Yellow
Camellias need moisture, but they also need air around their roots. When soil stays waterlogged, oxygen cannot reach the root zone, and the fine feeder roots that absorb water and nutrients begin to suffer.
The American Camellia Society’s root rot guidance explains that saturated conditions create exactly the environment where Phytophthora and other root-rot pathogens thrive, spreading through soil water and attacking roots that are already weakened by low oxygen.
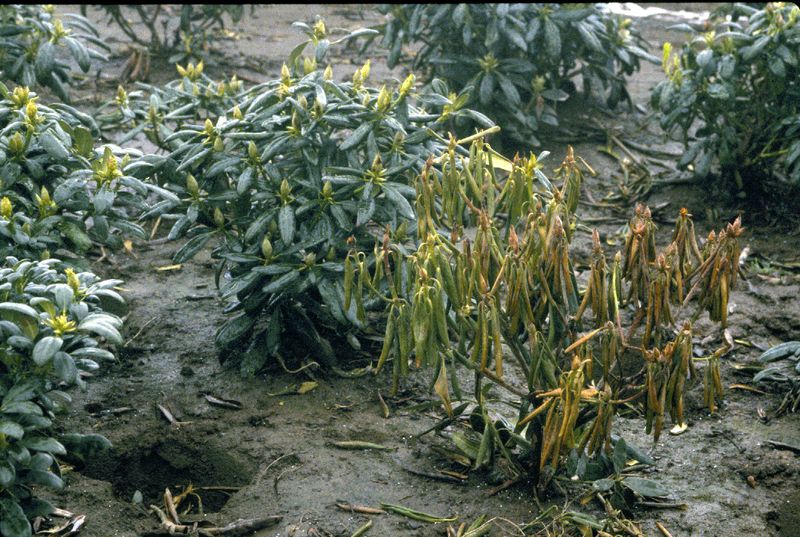
As root damage progresses, the shrub loses its ability to move water and nutrients up into the canopy. The foliage responds by turning yellow, and in warmer spells the plant may wilt even though the soil around it is soaking wet.
That combination, wilting in wet soil, is one of the clearest signs that the roots themselves have been compromised rather than the plant simply needing more water.
Clemson’s camellia factsheet lists the progression that often follows: general loss of vigor, uniform yellowing across the canopy, weak new growth, loss of fine feeder roots, dieback of stems, and in severe cases, death of the entire shrub. UF/IFAS ornamental disease guidance similarly ties Phytophthora root rot to yellow foliage, stunted growth, and feeder-root loss in susceptible species.
None of those symptoms by themselves confirm root rot. Yellowing, wilting, and weak growth can each appear for other reasons.
What makes wet-root stress worth taking seriously is when several of these signs occur together on a plant growing in a site that drains poorly, stays wet after rain, or receives irrigation that never fully dries between cycles. The root zone, not the leaves, holds the clearest evidence, and that is where the next step of the assessment needs to go.
Check the Root Zone Before You Add Water
Before you water, fertilize, or treat your camellia, spend five minutes assessing what is actually happening in the root zone. Push a finger or a wooden dowel several inches below the soil surface near the drip line of the shrub.
If the soil feels wet or cool and clumps together when squeezed, the root zone does not need more water. UGA Extension’s landscape watering guidance recommends checking soil moisture this way rather than watering on a fixed schedule, because calendar-based irrigation ignores what the plant’s root zone actually needs.
Walk around the shrub and look for signs that water collects there. Check whether a downspout empties nearby, whether a drip emitter or sprinkler head is aimed at the base of the plant, and whether the ground around the shrub sits lower than the surrounding bed, creating a bowl that holds rainwater.
After a moderate rain, come back in a few hours and see whether water is still pooling or whether the soil surface remains slick and slow to absorb.
If the shrub is growing in a container, tip it slightly and look at the drainage holes. Blocked holes, a saucer full of standing water, or a pot sitting directly on soil can all prevent drainage and leave roots in a perpetually wet environment.
American Camellia Society container guidance notes that camellia roots need air as well as moisture, and oversized pots or dense potting mixes that stay wet are a common source of root stress in container plants.
Root inspection gives you the clearest evidence of all. A container plant can be tipped out carefully for a look.
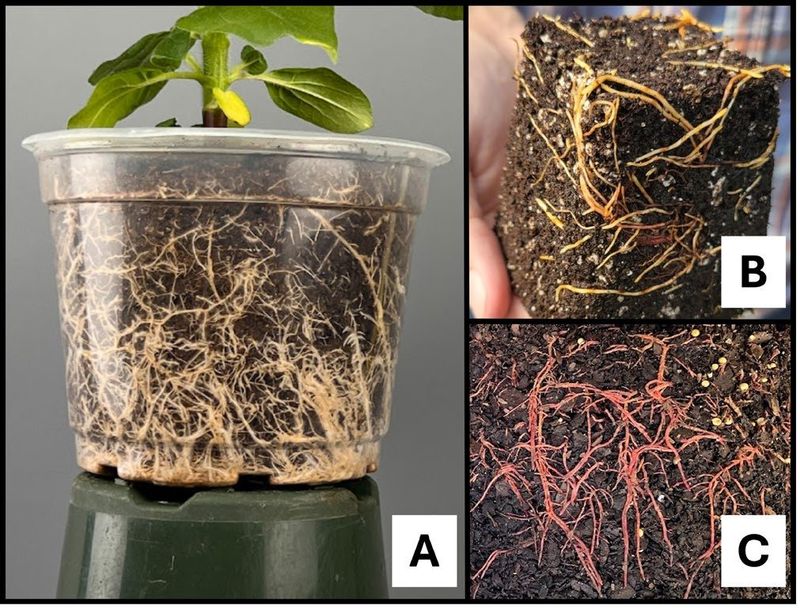
A small in-ground shrub can sometimes be gently lifted from one side to expose a few roots. Clemson’s root and crown rot guidance and the Clemson camellia factsheet both describe healthy feeder roots as generally light-colored and firm.
Roots affected by rot tend to be brown or nearly black, soft, and easy to pull apart, with very few fine root tips remaining. Seeing mostly healthy roots suggests drainage correction and adjusted watering may be enough.
Seeing mostly decayed roots with almost no viable tissue is a more serious finding that changes the rescue calculation.
Stop Calendar Watering While the Soil Stays Wet
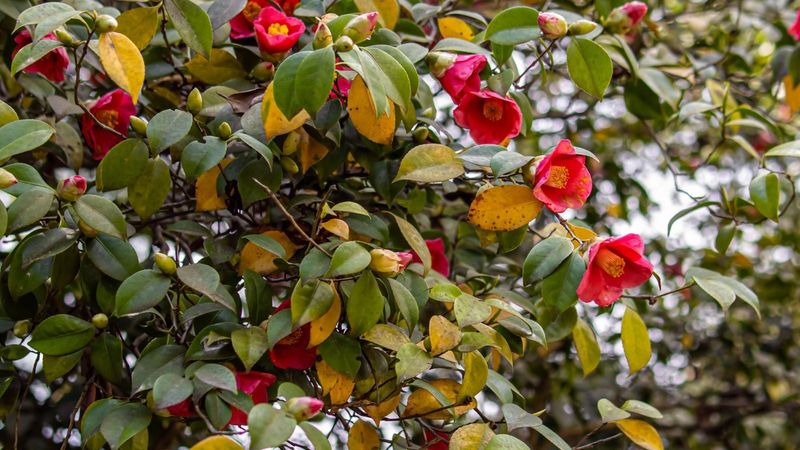
Once you confirm the root zone is already wet, the first and most immediate step is to stop adding water. Continuing to irrigate on a fixed schedule while soil stays saturated does not help the plant recover; it keeps the very conditions that are stressing the roots in place.
Clemson’s root rot guidance is direct on this point: reducing moisture around the root zone is the first management step when saturation is contributing to root stress.
Resume watering only when the soil at root depth actually needs it. When irrigation is necessary, water thoroughly so moisture reaches the full root zone, then let the soil begin to dry before watering again.
Frequent light sprinkling that never fully dries keeps the upper root zone perpetually damp, which is harder on camellias than occasional deep watering with adequate drying time between cycles. Morning is the better time to water when you do irrigate, because it allows foliage to dry during the day and reduces the prolonged leaf wetness that can encourage fungal problems.
A wilting camellia in wet soil presents a specific trap. The natural instinct is to water a wilting plant, but American Camellia Society root rot information and UF/IFAS disease guidance both explain that when roots have been damaged by rot, they can no longer move water into the canopy effectively.
Adding more water to already saturated soil will not relieve the wilting and may accelerate root deterioration. If your camellia is wilting in wet soil, the problem is at the roots, and reducing moisture is a more protective response than increasing it.
Correct Drainage Without Creating a Water-Holding Pocket
After stopping unnecessary watering, the next priority is figuring out why the root zone stays wet in the first place and correcting it at the source. Walk the area during or just after a significant rain.
Look for a downspout that empties near the shrub, a drip line or sprinkler emitter aimed at the base, a low spot in the bed that collects runoff, or a layer of compacted soil that keeps water from moving downward. Redirecting a downspout or adjusting an irrigation emitter can sometimes resolve the problem without any digging.
For sites where water consistently accumulates, Clemson’s camellia factsheet and UF/IFAS guidance both recommend improving drainage, raising the planting area, or relocating the shrub to a better-drained spot. Planting slightly high, with the root flare at or just above the surrounding grade, allows excess water to drain away from the crown rather than pooling around the base.
NC State’s drainage resource reinforces that site-level drainage is more reliable than trying to fix water movement only in the immediate root zone.
One approach to avoid: filling only the planting hole with compost, peat, or coarse sand while leaving the surrounding soil unchanged. NC State’s woody ornamentals handbook and UGA Extension’s landscape newsletter both caution that a localized amended pocket in clay soil can actually disrupt water movement between soil layers, causing the hole to act as a basin that fills and holds water rather than draining freely.
If the surrounding soil is heavy clay, addressing drainage at the bed or site level is more effective than amending only the hole.
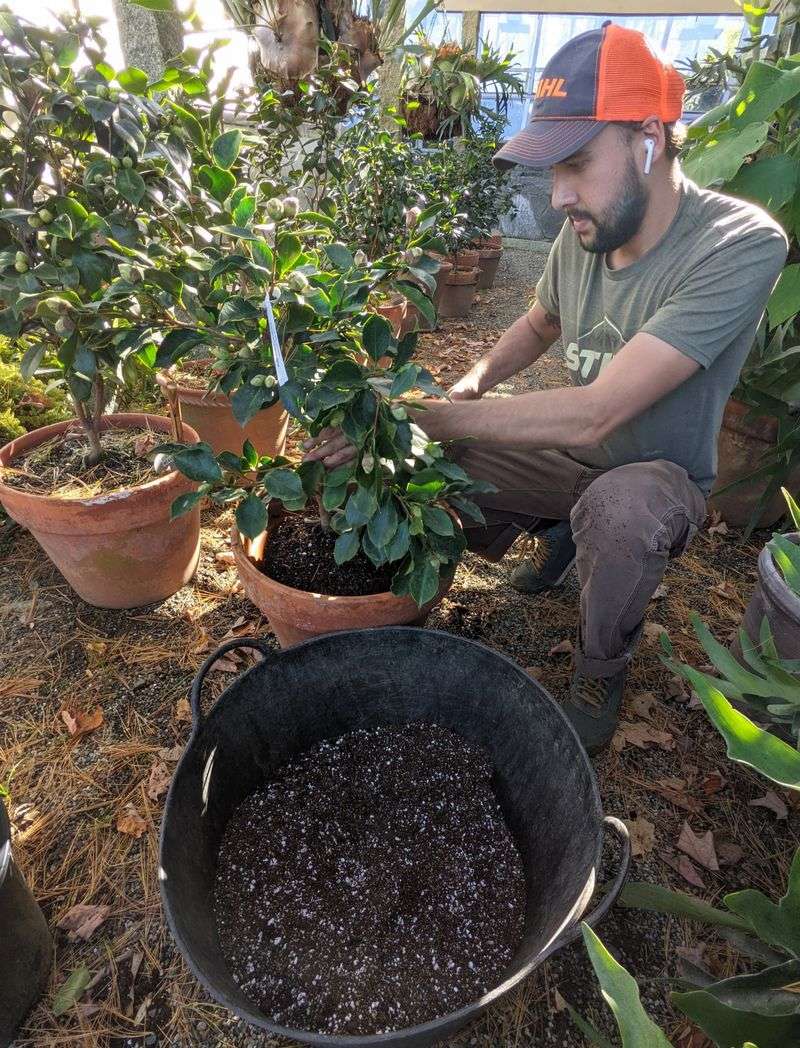
Container plants have their own drainage checklist. Clear the drainage holes of any debris, empty saucers after every rain or irrigation, and avoid placing the pot directly on soil or in a depression that prevents water from escaping.
American Camellia Society container guidance also notes that oversized pots and dense potting mixes that hold moisture long after watering can create the same saturated root environment as poorly drained ground. Matching pot size to the plant and using a well-aerated mix reduces that risk considerably.
Know When Root Damage Is Too Severe to Reverse
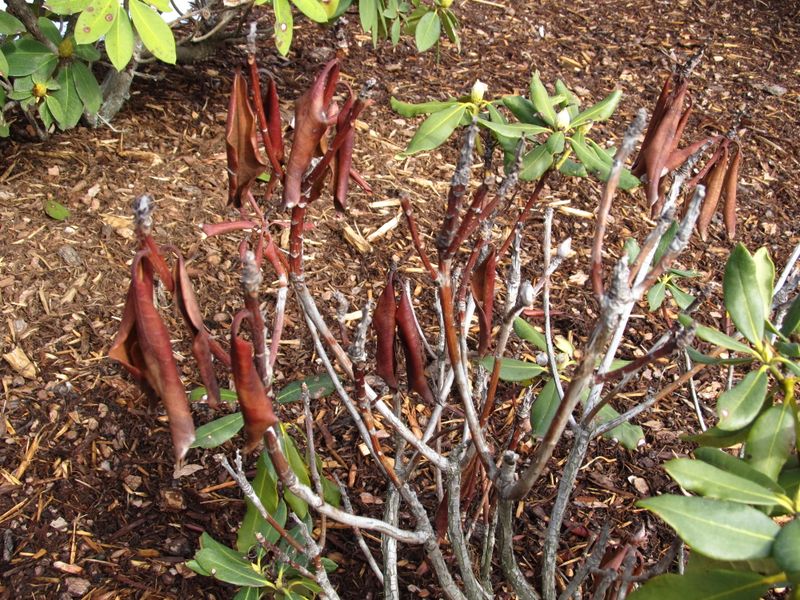
Correcting drainage and adjusting irrigation can protect whatever healthy root tissue remains, but those steps cannot restore tissue that has already decayed. Clemson’s camellia disease factsheet frames prevention as the priority precisely because once root rot is established, reversing it is genuinely difficult.
UF/IFAS plant pathology guidance states plainly that correcting root rot after symptoms appear may be impossible in serious cases, and that removing the plant may be the wisest course when damage is extensive.
Root inspection, as described in the earlier section, helps you make that judgment more accurately than foliage alone. A plant with mostly firm, light-colored feeder roots and only a few damaged ones has a reasonable chance of recovery once drainage improves.
A plant with almost no viable feeder roots remaining, widespread crown discoloration, or stem dieback from multiple branch tips is showing signs that the damage may already be too far along to reverse.
Clemson’s root and crown rot guidance and UF/IFAS camellia disease information mention that fungicide applications may offer some suppression or protection in certain situations, particularly before infection is severe, but neither source presents chemical treatment as a cure for an already damaged root system. Drainage, sanitation, appropriate planting sites, and healthy starting material are consistently emphasized over chemical rescue.
Species selection matters when replanting a problem site. Camellia japonica and C. reticulata are identified as especially susceptible to Phytophthora, while C. sasanqua is more resistant and is sometimes used as rootstock in affected areas.
Choosing more resistant material for a site with a history of wet-root problems reduces future risk, though it is not a guarantee, particularly if the drainage issue itself has not been corrected first.
Check for Scale, Freeze Injury, and Soil Problems
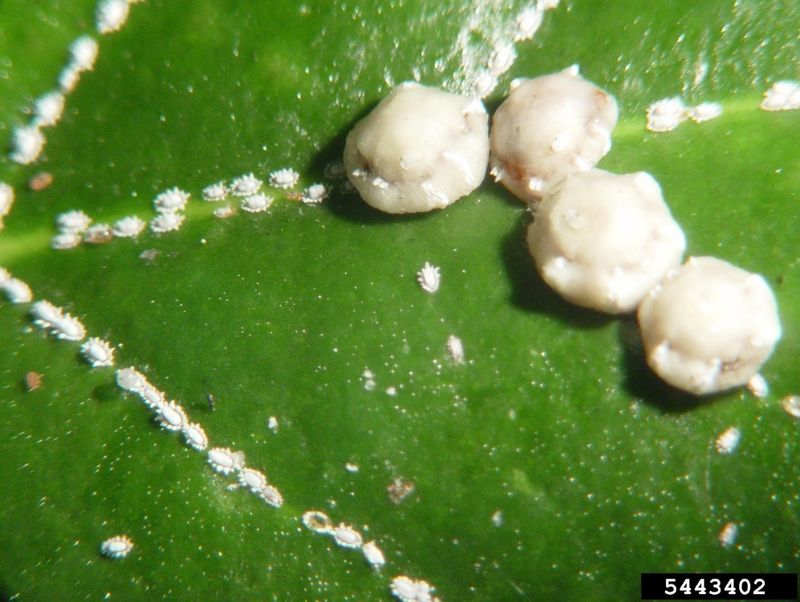
Once you have assessed the root zone and adjusted watering, take a close look at the foliage itself for clues that point toward a different cause. Tea scale is one of the most common camellia pests in the Southeast, and it can produce yellowing or chlorosis on the upper leaf surface that looks superficially like a wet-root problem.
UGA Extension’s tea scale profile describes the insects as tiny, elongated, and found on the underside of leaves, where they feed while causing visible discoloration on the upper surface. Flip a few leaves over and look for white, cottony, or waxy deposits along the midrib and veins.
NC State’s armored scale guidance confirms that this type of scale is a recognized camellia pest in North Carolina and can be managed with horticultural oil or insecticidal soap applied to the undersides of leaves.
Yellowing that appears between the veins, shows as yellow mottling, or is concentrated on exposed outer leaves rather than older interior ones suggests a different direction. Interveinal chlorosis can reflect high soil pH, magnesium shortage, iron deficiency, or even a viral problem.
Clemson’s camellia factsheet and NC State’s camellia profile both list pH and nutrient imbalance as contributors to yellow foliage, but neither recommends treating based on leaf color alone.
Cold injury is another possibility worth considering in fall and early winter. NC State’s winter plant preparation guidance notes that exposed foliage can turn bright yellow within a few days of a freeze event, while inner leaves sheltered by the canopy remain healthy.
That pattern, outer leaves yellowing after a cold snap while inner leaves stay green, is quite different from the general decline associated with root stress.
Soil testing is the right tool for sorting out pH and nutrient questions. NC State soil acidity guidance targets a pH around 5.0 for camellias in North Carolina.
Apply lime, sulfur, iron, magnesium, or any other amendment only after a soil test confirms the need, not based on leaf color alone. NC State’s fertilizing guide for trees and shrubs and Clemson’s camellia care factsheet both advise against pushing quick-release fertilizer during leaf drop and winter dormancy, since fertilizer cannot repair damaged roots and excess salts can cause additional leaf burn.
American Camellia Society salt injury information reinforces that overfertilizing a stressed camellia compounds the damage rather than correcting it.
Use a Winter Rescue Plan That Protects New Growth
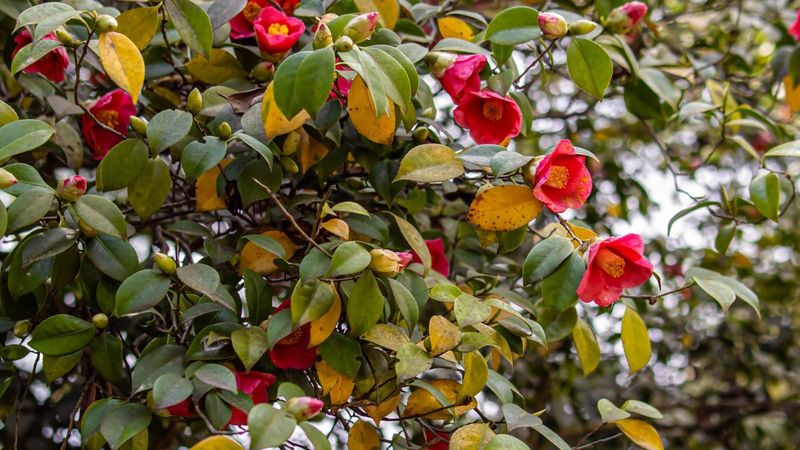
A practical winter rescue for a yellowing camellia follows a clear sequence. Start by comparing the foliage pattern against what you know about the plant: a few uniformly yellow interior leaves on an otherwise healthy shrub are far less urgent than widespread yellowing with wilting or dieback.
Check soil moisture several inches below the surface, identify any drainage problems around the plant, and stop calendar-based irrigation while the root zone stays wet. Clemson’s camellia disease factsheet and UGA Extension’s watering guidance both support moisture assessment as the foundation of that decision.
Inspect roots when you can do so without unnecessary disturbance, correct site drainage at the source, and hold off on fertilizer, Epsom salts, lime, or sulfur until a soil test gives you a reason to apply them. Clemson’s leaf-drop factsheet is a useful reminder that some fall yellowing is simply the plant cycling out older leaves, not a crisis requiring intervention.
Limit any pruning to wood that is clearly dead or diseased; heavy fall pruning can remove next season’s flower buds and add stress to a shrub that is already working to stabilize before winter.
The goal of winter care is not to force already damaged leaves back to green. That will not happen.
The goal is to protect whatever healthy roots remain, allow drainage to improve, and position the shrub to push vigorous new growth when spring arrives. A camellia that gets through winter with its viable root system intact has a genuine path forward; one that enters winter with saturated soil and continued heavy irrigation may not get that chance.
NC State’s camellia profile puts it well: good drainage and appropriate siting are the foundation of long-term camellia health, and no amount of fall intervention replaces getting those basics right.