
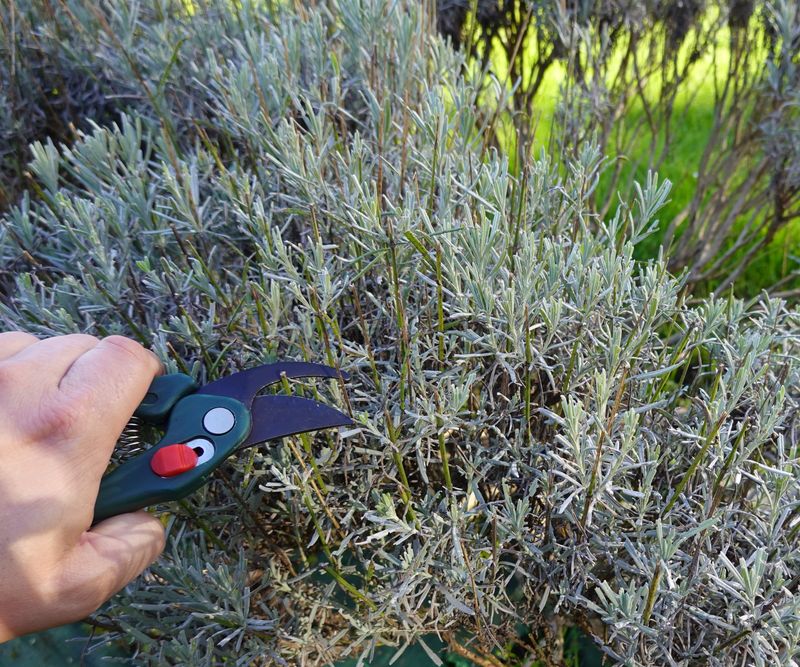
Lavender is one of those plants that looks effortless in photos but can quietly turn into a tangle of bare sticks in a real California yard. If yours has foliage bunched at the tips and an open, splitting center, you are not alone, and you have not necessarily done everything wrong.
The good news is that catching the problem early, and understanding what lavender actually needs, gives you a real path forward before the plant gets too far gone.
A woody base is normal; a retreating canopy needs attention
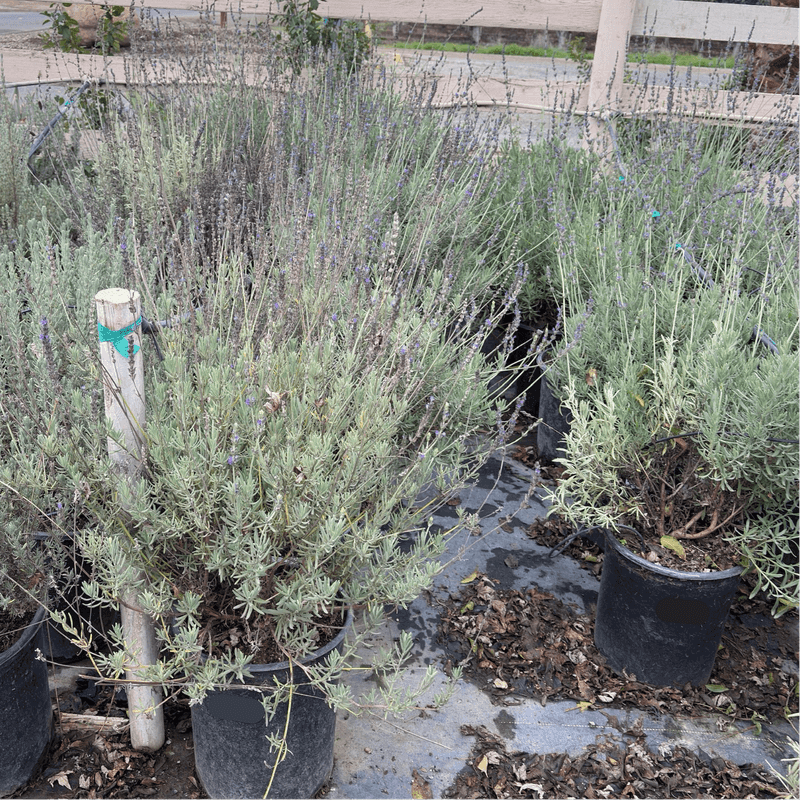
Lavender grows as a woody subshrub, so some older, brown wood at the base of the plant is completely normal and not a sign that anything has gone wrong. The problem worth paying attention to is different: when the leafy, flowering growth retreats toward the outer tips of the branches and the center of the plant opens up into a bare, splitting framework, the plant is becoming leggy in a way that is hard to reverse later.
UC Master Gardener guidance from Sonoma County notes that lavender is a woody subshrub and that regular pruning helps prevent it from becoming woody and open.
A post-bloom trim can help maintain leafy growth above that woody base, but it cannot guarantee a full, rounded plant by the following summer in every situation. The plant’s condition going into any pruning matters enormously.
A lavender with plenty of healthy green foliage has something to work with; one that is already mostly bare wood has much less room for a successful reshape.
Several factors contribute to a sparse, open canopy, and missed pruning is only one of them. Age, cultivar selection, available sunlight, soil drainage, irrigation habits, and fertilizer use all play a role.
UC Master Gardeners of San Luis Obispo County point out that six-year-old lavender plants can become woody and fall apart even when gardeners have made reasonable efforts, and that multiple care factors are involved. Recognizing that the woody base is natural, while a retreating leafy canopy is the actual concern, is the right starting point for everything that follows.
Why lavender becomes open and difficult to reshape
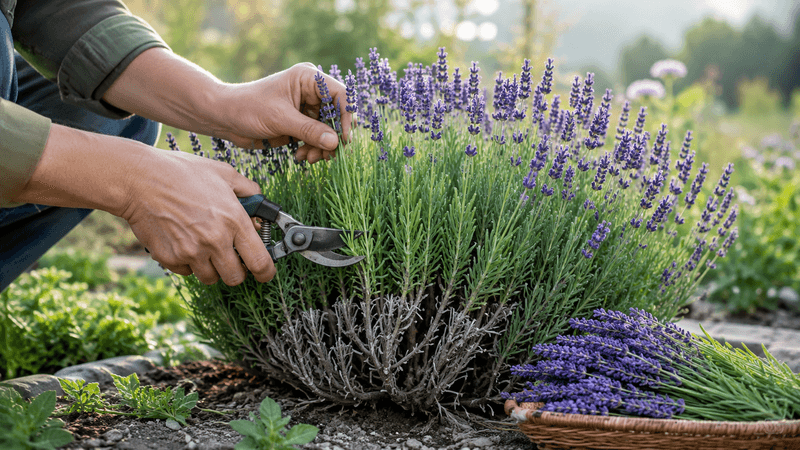
Lavender’s architecture creates a real pruning limit that most gardeners only discover after they have already crossed it. New growth develops most reliably from the green, leafy portions of the stem.
The older, bare wood lower on the plant tends to stay bare after cutting, unlike many shrubs that push new shoots from dormant buds in old wood. UC Master Gardener Program of Sonoma County confirms that lavender does not reliably regenerate from old woody stems, which is why cutting into that zone often leaves a plant worse off rather than better.
The common mistake is waiting. A plant that gets trimmed annually while it still carries plenty of green growth stays compact because each cut encourages new leafy shoots from the portions just above the wood.
A plant that goes several seasons without any shaping gradually pushes all its new growth further out along the branches, leaving the interior bare. By the time the problem is visible, the green zone has moved far enough from the base that any cut severe enough to reduce the plant’s size would land in bare wood.
Royal Horticultural Society guidance specifically warns that hard pruning into old wood can kill the plant or leave it unable to recover. Regular maintenance, started when the plant is young and continued each year after flowering, is what keeps the green zone close to the base.
Once the bare-wood zone dominates, cautious shaping can preserve what remains, but it cannot restore the plant to its earlier compact form.
Use a post-bloom trim as one key maintenance step
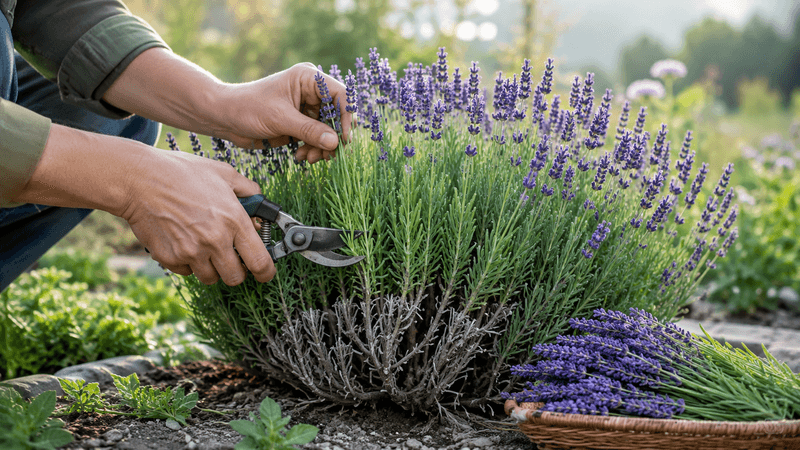
After your lavender finishes its main flowering cycle, removing the spent flower stalks and lightly shaping the green leafy growth is one of the most useful maintenance habits you can build. UC Master Gardeners of Santa Clara County recommend pruning after flowering specifically to help keep lavender from becoming woody.
This kind of routine trim encourages the plant to put energy into compact new growth rather than letting long, bare stems extend further from the center.
The goal of a post-bloom trim is modest and realistic. You are removing the finished flower stems, tidying the shape, and cutting back some of the green growth to encourage bushier regrowth.
You are not attempting a dramatic rescue or trying to reduce the plant by half in one session. When the plant has healthy green foliage, this approach can reduce legginess and help the canopy stay rounded and full over time.
What this trim cannot do is promise a specific result by next summer. Results depend on how much viable green growth remains, what cultivar you are growing, how well the site drains, how much sun the plant receives, and whether irrigation and fertility are well matched to the plant’s needs.
RHS growing guidance describes an annual late-summer trim after flowering as the recommended approach, removing spent stems and roughly an inch of leafy growth to maintain a tidy habit. The post-bloom trim is one key maintenance step among several, and its value compounds when it is done consistently each year rather than skipped until the plant looks bad.
Cut above green growth and stop before the bare wood
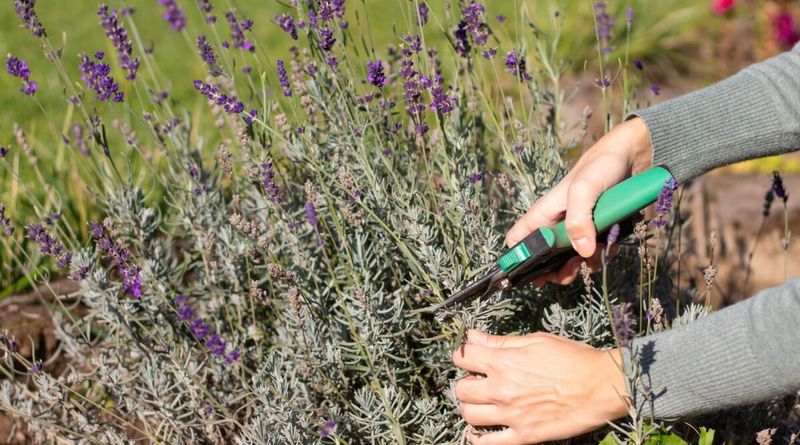
Before picking up the shears, take a moment to look at the plant from the side. You should be able to see a zone of green, leafy growth sitting above a section of older brown wood.
Your job is to work within that green zone, not below it. Start by clipping off the spent flower stalks at their base, just above where the leafy foliage begins.
UC Master Gardener printable guidance is clear on this point: do not prune into the woody stem. Leaving a cushion of green foliage above the wood gives the plant material to regenerate from.
After the spent stems are gone, step back and look at the overall shape. If the plant is lopsided or has long, straggly branches extending past the main mound, you can trim those back as well, again making each cut above a visible green leaf node or bud.
UC Master Gardeners of El Dorado County suggest that a conservative reduction of green growth is a reasonable target, but the consistent rule across guidance is to preserve green foliage and avoid bare wood rather than applying an exact percentage to every plant.
Stop the moment the next cut would expose bare brown wood with no green growth above it. That is your boundary.
El Dorado County Master Gardener pruning guidance reinforces that species, age, condition, and local growing environment all vary enough that a rigid fraction does not fit every plant. A compact, shorter lavender with green growth close to the base can tolerate more shaping than an older plant whose green zone has retreated far up the branches.
Let the plant’s actual structure guide each cut rather than a predetermined number.
Let the lavender type and local climate set the timing
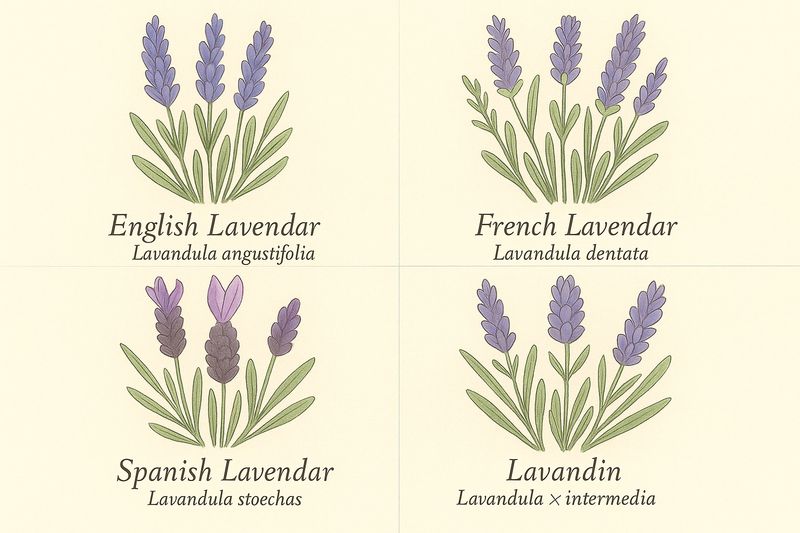
California grows several distinct types of lavender, and they do not all behave the same way or finish flowering at the same time. English lavender (Lavandula angustifolia) tends to bloom in late spring to early summer and is generally the most cold-tolerant type.
Lavandin hybrids (L. x intermedia) often flower a bit later and grow larger than English types. Spanish lavender (L. stoechas) blooms earlier and can rebloom after a light trim.
French lavender (L. dentata) tends to flower over a longer period and is less cold-hardy. UC ANR’s guide to lavender for Central Valley gardens outlines these differences in species characteristics and their varying responses to California conditions.
Location within California matters just as much as the plant type. A coastal garden in the Bay Area may see English lavender finish flowering weeks later than the same cultivar growing in a hot inland valley.
Mountain gardens at elevation can have a compressed season with early frosts that limit how late a trim can safely happen. UC ANR’s publication on lavenders for California gardens covers how climate zone affects both plant selection and care timing.
The practical rule is to prune after your plant’s local bloom cycle while green growth is still visible and the plant has time to settle before any significant weather change. RHS growing guidance cautions against late-autumn pruning in wet or cold regions because exposed cuts can be more vulnerable to winter damage.
For most California gardeners, a trim shortly after the main flush of flowers fades is the most reliable window, but that window falls at different points on the calendar depending on what you are growing and where you live.
Fix the site conditions that pruning cannot solve
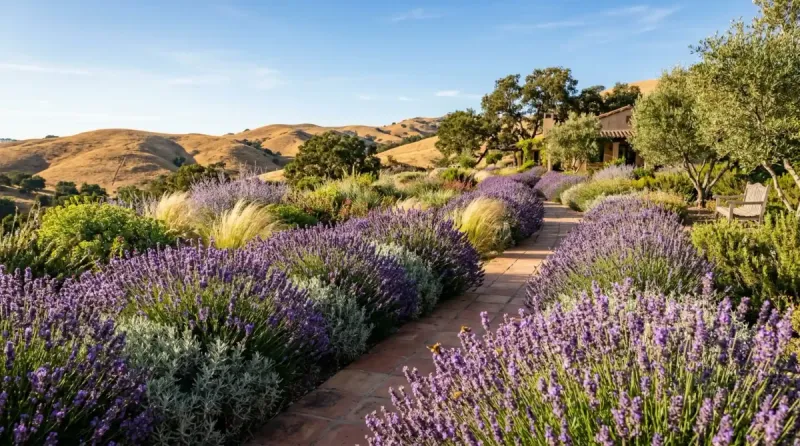
Pruning can tidy the canopy, but it cannot compensate for a site that works against the plant every day. Lavender performs best in full sun, meaning six or more hours of direct sunlight daily.
Plants in partial shade tend to stretch toward the light, producing longer and weaker stems that contribute to an open, leggy form. Sharply draining soil is equally important.
UC IPM’s cultural tips for growing lavender describe lavender as a plant that requires well-drained soil, and note that heavy or persistently wet soil increases the risk of root and crown rot. Where drainage is slow, mounding the planting area or setting the plant slightly high in the bed can help water move away from the crown.
The phrase “drought tolerant” sometimes leads gardeners to the wrong conclusion. Newly planted lavender needs regular irrigation to establish a healthy root system, and even established plants may benefit from occasional deep watering during extended heat or when flowering.
UC Master Gardener Program of Sonoma County is clear that overwatering, especially summer irrigation in heavy soil, can contribute to decline and an open, woody habit. The goal is conservative, well-timed watering rather than either extreme.
How you deliver water also matters. UC ANR’s lavender publication recommends drip or targeted irrigation with emitters placed away from the main stem rather than directly against the crown, and notes that frequent overhead watering can damage plants and promote disease.
On fertilizer, mature lavender generally needs little or none at all. Excess nitrogen encourages soft, floppy growth, reduces flowering, and can leave the plant structurally weaker.
If you have been feeding your lavender regularly with a general-purpose fertilizer, scaling back or stopping entirely is often the better choice.
Know when cautious shaping should become replacement
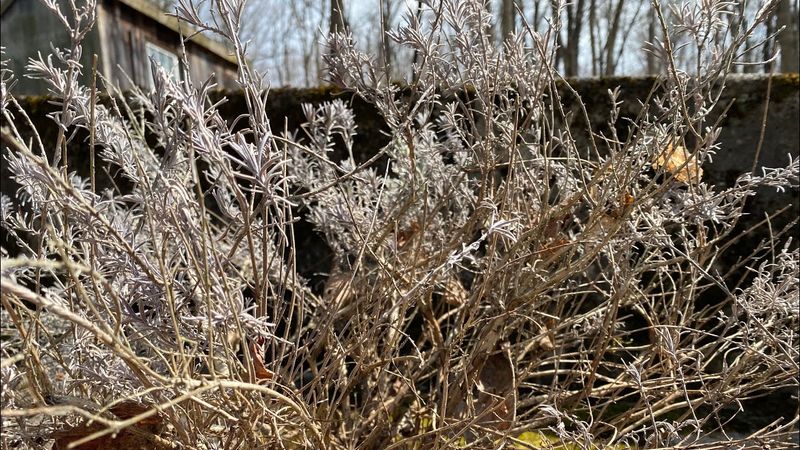
Not every lavender can be rescued with careful pruning, and recognizing that limit early saves time and frustration. If your plant still has healthy green tips and leafy sections distributed across the branches, you have material to work with.
Cautious shaping above those green portions can preserve the plant’s form, and healthy stem tips can also be taken as cuttings to propagate new plants with better genetics for your site. RHS growing guidance recommends propagating from green tip cuttings as a practical way to renew lavender when the parent plant is aging.
A plant that is mostly bare wood with only a few leaves clinging to the very tips is a different situation. Hard pruning into that bare framework rarely produces a full recovery, and the plant may decline further or die after a severe cut.
UC Master Gardeners of San Luis Obispo County acknowledge that lavender plants can reach a point where replacement is more realistic than renovation, and frame that as a normal horticultural reality rather than a failure on the gardener’s part. Choosing a new plant, possibly a cultivar better suited to your specific drainage and climate, is a legitimate and often smarter path forward.
California homeowners in fire-prone areas have an additional reason to evaluate declining lavender honestly. Dead, dry, and woody plant material can contribute to fire risk near structures.
CAL FIRE’s defensible space guidance advises removing dead and dry vegetation as part of maintaining the required clearance zones around homes. A lavender that is mostly dead wood sitting close to a fence or structure deserves a realistic assessment under those defensible-space requirements, not just a hopeful hard prune.
Maintain the green canopy, but let the plant’s condition guide you
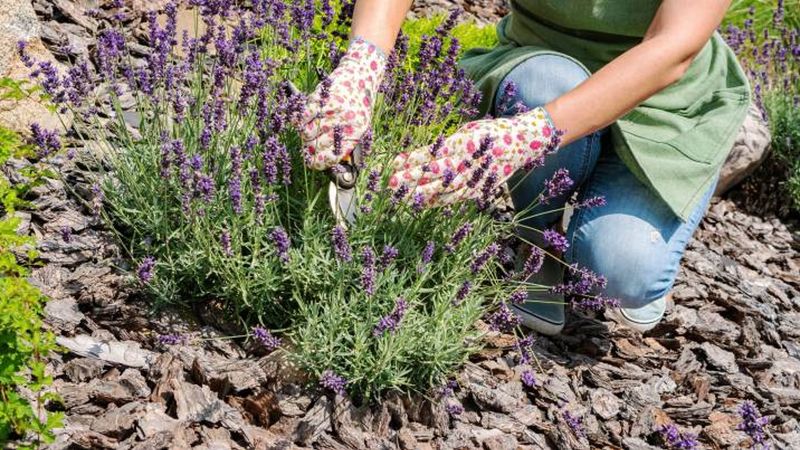
The action sequence is straightforward. Watch your specific plant and note when the main flush of flowers fades.
Remove the spent flower stems, then step back and assess the shape. Trim any green growth that extends past the plant’s natural mound, always cutting above a visible leaf node or bud and stopping before bare wood appears.
Then turn your attention to the site: confirm the plant is getting full sun, check that water drains freely after irrigation, and adjust watering habits if the soil stays wet between sessions. UC Master Gardener Program of Sonoma County and UC IPM cultural guidance both support this combination of timely pruning and corrected site conditions as the foundation of keeping lavender in good form.
The goal throughout is a compact leafy canopy sitting above a naturally woody base, not a plant stripped down to old wood in hopes of a fresh start. Post-bloom pruning is prevention and maintenance.
It works best when it is done consistently each year while green growth is still plentiful, not as a one-time rescue after years of neglect. Whether your lavender looks full and rounded next summer depends on how much healthy green growth it carries now, how well the site fits its needs, and whether you can keep up the habit going forward.
A plant that is honestly assessed and honestly cared for will always tell you more than any single calendar rule.